How to Use Slick Slider in WordPress

Are you looking for an easy way to add slider functionality to your WordPress site?
If so, Slick Slider may be just what you need. In this article, we’ll show you how to use Slick Slider in WordPress. We’ll also provide some tips on creating effective sliders.
Follow all the steps, and it’ll be a piece of cake.

The topics which I’ll tackle in this blog are:
- What is a slider, and why do people use it
- Pros and cons of using a slider.
- How to use the slick slider in WordPress
Let’s start by understanding what a slide slicker is and why people use it?
Table of Contents
What Is a Slick Slider and Why People Use It

Sliders (aka carousels) are a great way of providing all sorts of information to the viewer. From products and services to team members, it can display all. You may have seen image sliders on different websites but didn’t know what they were.
If properly used, the overall appeal of your website can improve by 30% because you provide a visual means of your accomplishments or services. It’s because when it comes to a normal human being, we prioritize visual aids more than textual ones.
Normally thinking about a slider and a carousel, normally we consider them the same things. The truth is that they are different from one other while also providing similar functionality.

Both the slider and the carousel provide similar functionalities, but the main difference between them comes when it comes to displaying multiple images simultaneously. Carousels can display more than one image, while the carousel can display multiple images simultaneously.
Suppose your aim is to display one large image at a time. It helps the viewer to focus on only one image because sometimes you only want to tell one particular thing at a time.
When it comes to the position of the image slider, the majority of the people prefer that it should be on the top of the page. Furthermore, it’s the perfect position for any company to give their introduction.
If we talk about figures, the majority of the visitors click on the first image slider that they see, while others can be ignored normally. About 90% of the people click on them to get further information about them (because some of them may have links).

Pros and Cons of Using a Slider
Knowing the pros and cons of a slider can help you make the decision to use it on your website.
Pros
- Can easily convey a large amount of information in smaller formats.
- Visual aids are better than textual ones.
- No need for coding to impose text on the image of the slider.
Cons
- Some slider plugins can cause issues for websites opened on mobile devices.
- Multiple images may go unseen by the visitor.
- Some WordPress plugins can take time to learn properly.
- Sliders can be bad for the SEO of your website.
- Can become a cause of banner blindness.
How to Use Slick Slider in WordPress?
Using a plugin is the best way of creating a slider in WordPress. It provides ease of creating one without any hassle. Learning how to create a slider can be complicated, but once you understand how to create one, You can do it with one hand behind your back😂.
Installation
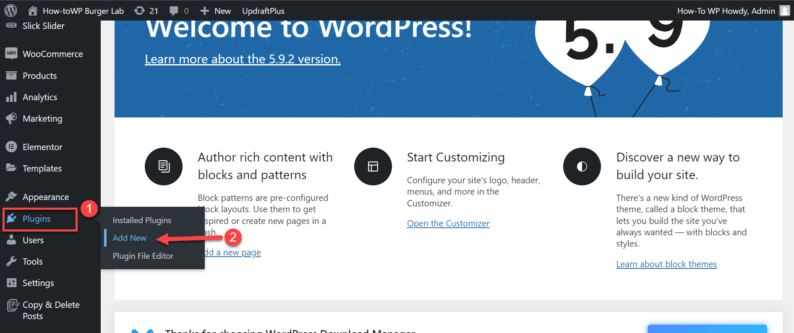
Start by hovering over the “Plugins” option and clicking on the “Add New” option.
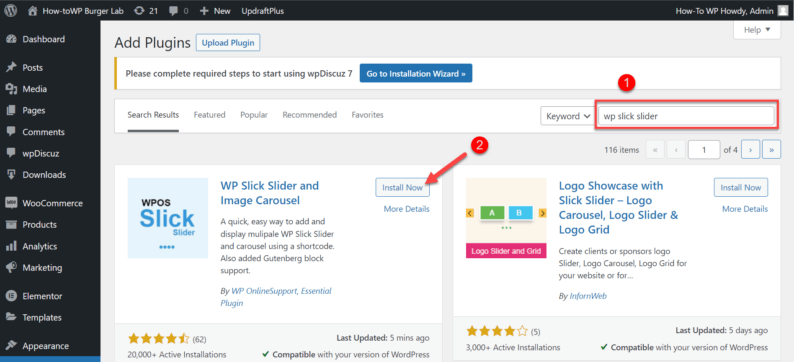
Now search and install the “WP Slick Slider” plugin.
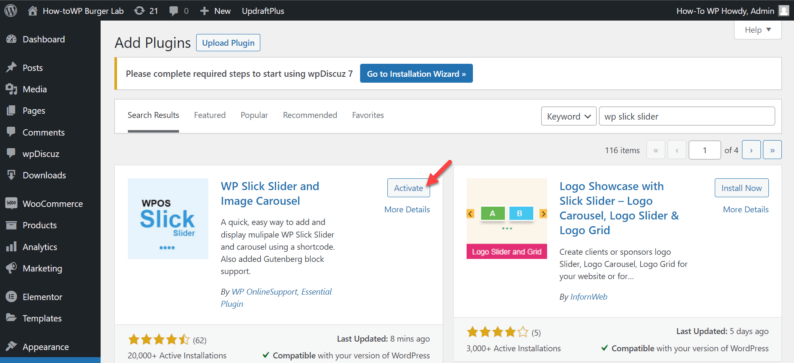
After installing the “WP Slick Slider” plugin, click the “Activate” button.
Installing the plugin isn’t something difficult at all because it’s the standard procedure for all of the plugins you install.
Creating Sliders
However, creating a slider is something unique and similar at the same time.
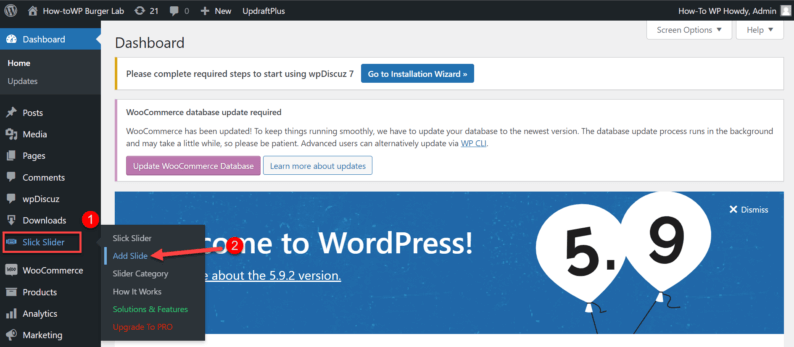
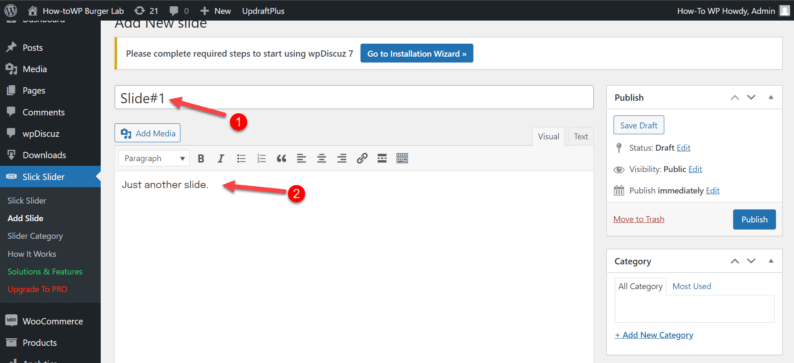
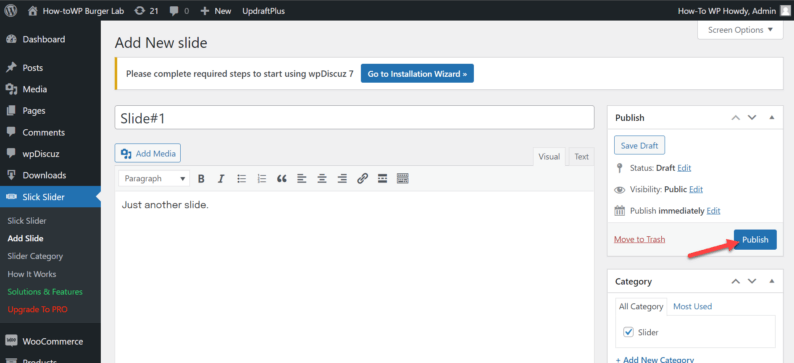
Go to the “Slick Slider” option from the navigation bar and click on the “Add Slide” option.
You’ll enter the title and some text for the slider image you want to add here.
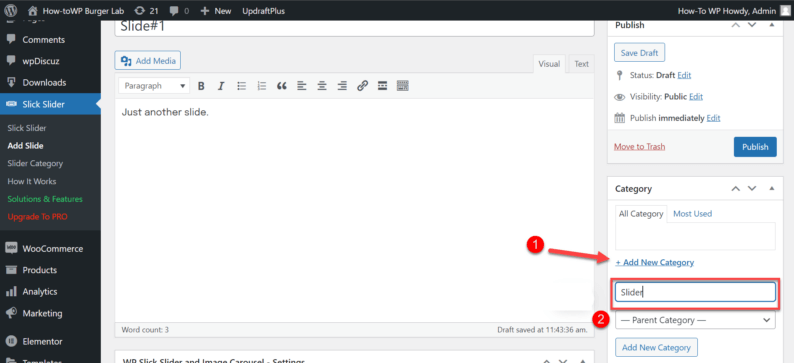
After entering the text, you’ll need to create a category for the slider. Click on the “Add New Category” option and enter a category name.
After typing in the name for the category, just press the enter key, and it’ll add a new category.
Note: You only have to create the category once because you can just select it from the categories section after creating one.
The next step is optional, but if you want to do it, then to each their own. You can paste a URL to attach it to the slider image.
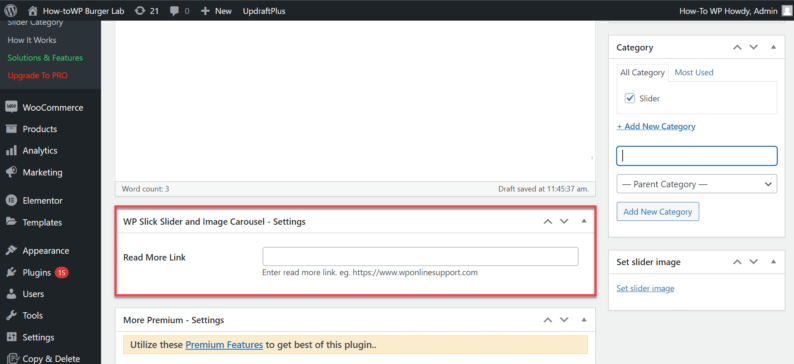
Now click on the “Set slider image” option on the right-hand side.
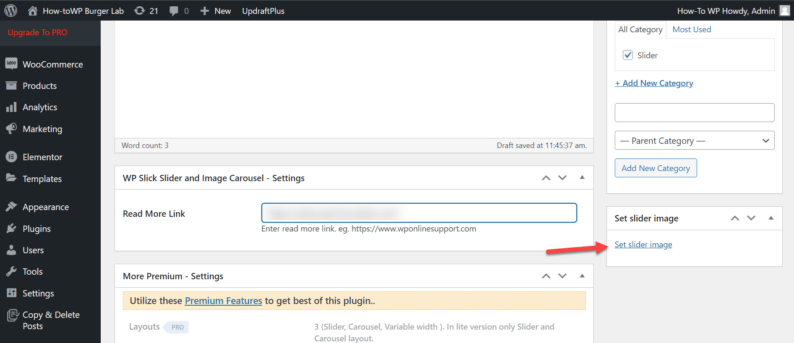
A box will appear with all the media available for your website. If you want to add a new media file, then you can do so by dragging and dropping on this section.
After adding the media file, select and click on the “Set slider image” button.

After doing all of the things, click on the “Publish” button to create the slider.
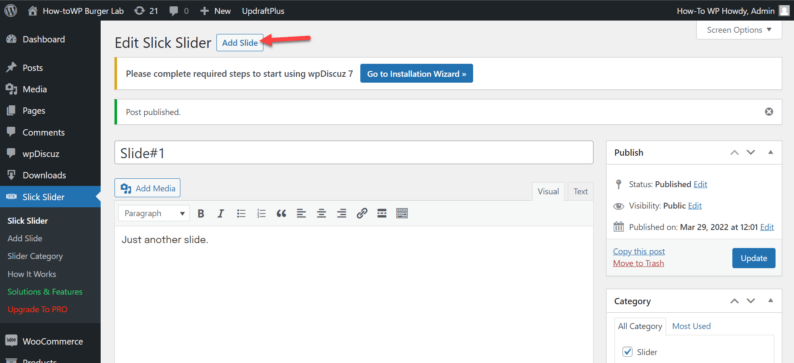
Now one of the images for your slick slider is set. Now all that remains is to repeat all of the process (excluding the category-creating process) and set as many images as possible. To do so, click on the “Add Slide” button, which appears on the top.
You might be thinking to yourself that this entire process looks strangely similar to when you create a post or a page, and to that, I say you’re completely right😂. The entire procedure is similar to what you’re used to, so there shouldn’t be any issues.
Now, you might be wondering, now that you have created a slider, how do I display it? Well, the process is relatively easy.
Displaying Slider (With Dashboard)
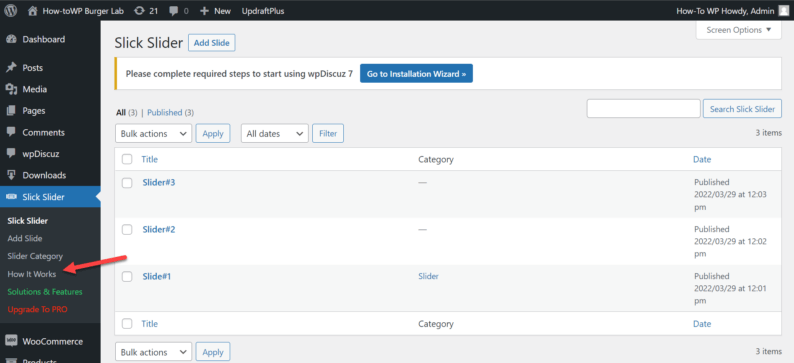
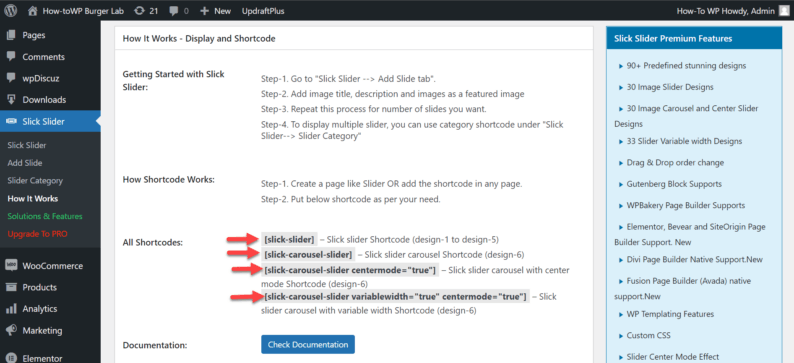
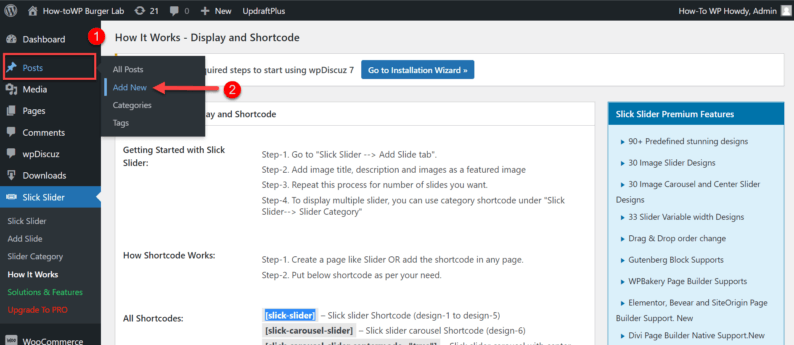
Start by clicking on the “How it Works” option under the “Slick Slider” option.
Here, you’ll see multiple shortcodes; copy the one you want to use.
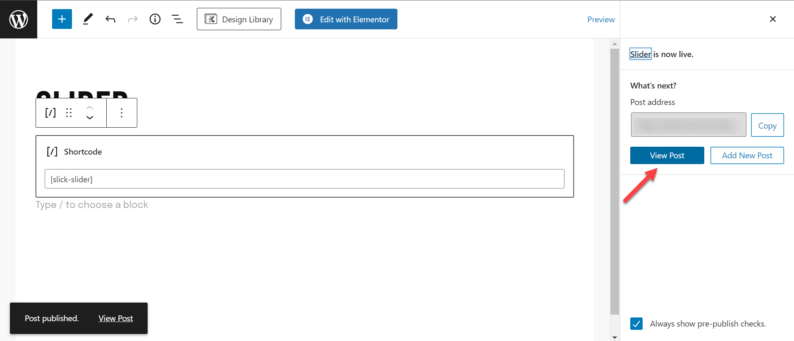
After copying the shortcode, go to the “Posts” option and click on the “Add New” option.
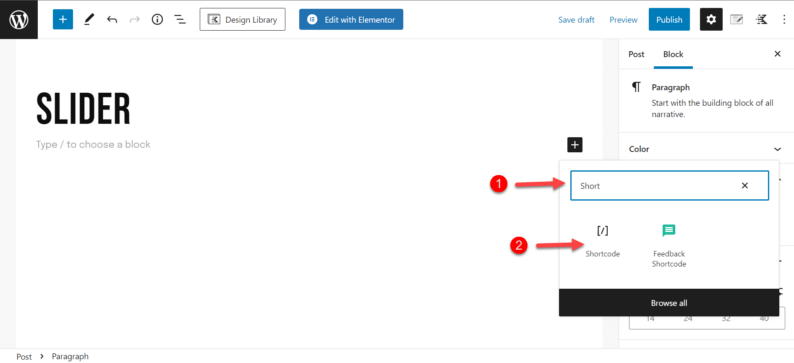
You’ll click on the “+” icon on the posts page.
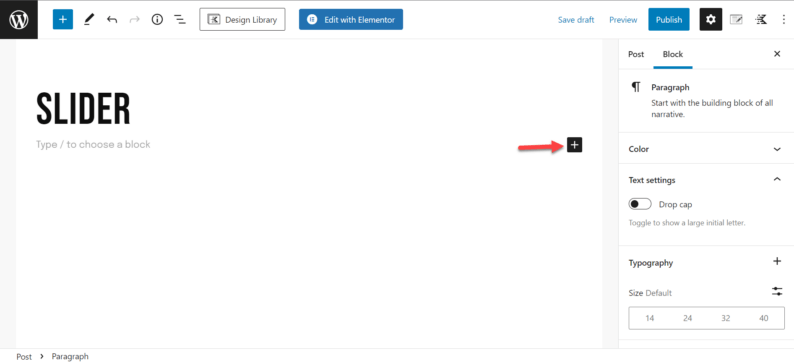
Now, type “shortcode” in the search bar and click on the shortcode icon.
A box will be added where you’ll paste the previously copied shortcode. After pasting the shortcode, click the “Publish” button to create a post with a slider.
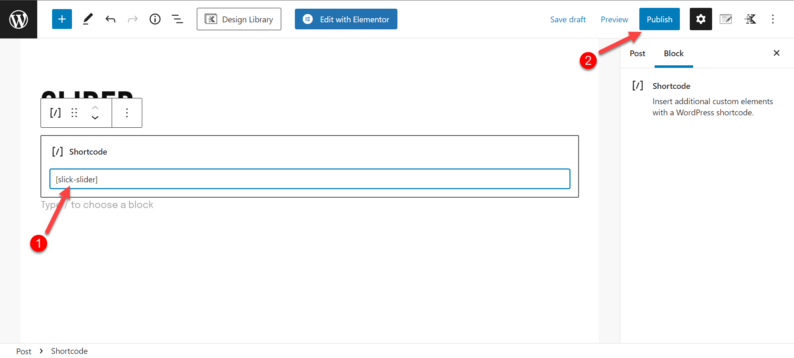
To view the post, click on the “View Post” button.
After clicking on the button, you’ll be redirected to the post where the slider has been created.

Note: The process is exactly for creating a page and editing a previously created page or post.
Displaying Slider (With Elementor)
Click “Elementor” on the toolbar to add the slick slider to your desired page.
Note: Before starting, ensure that the page you want to edit supports the elementor plugin because otherwise, it won’t appear on the toolbar.

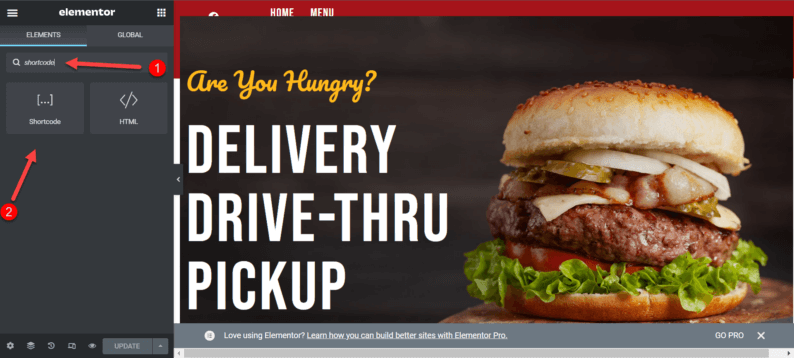
On the left-hand side, type “Shortcode” in the search bar, where a shortcode icon will appear. Drag that icon onto the page.
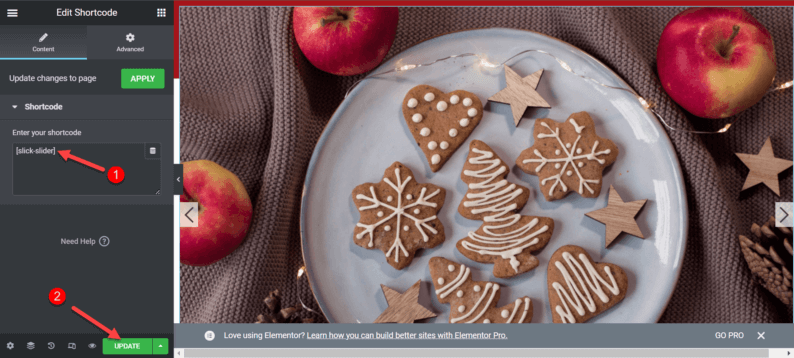
Once the shortcode icon section is in place, paste the shortcode for the slick slider in the box on the left-hand side. As soon as you paste the shortcode, the slider will appear on the website’s right side of the screen.
Note: To get the shortcode, go to the “How it works” section of the plugin.
After pasting the code, click the “Update” button.
To check the slider on the website directly, click on the three bars icon on the top left corner of the screen.
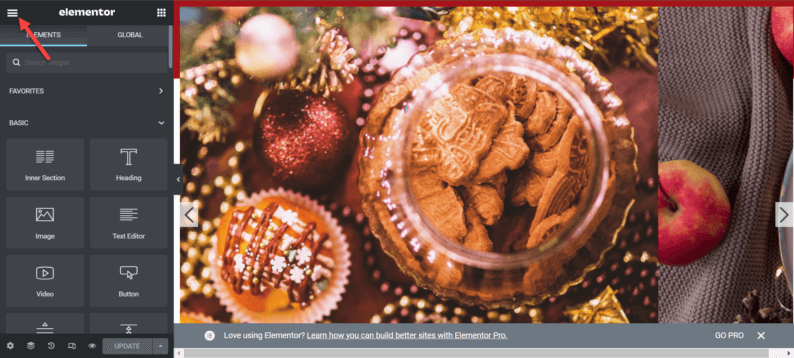
Now, click on the “View Page” option.
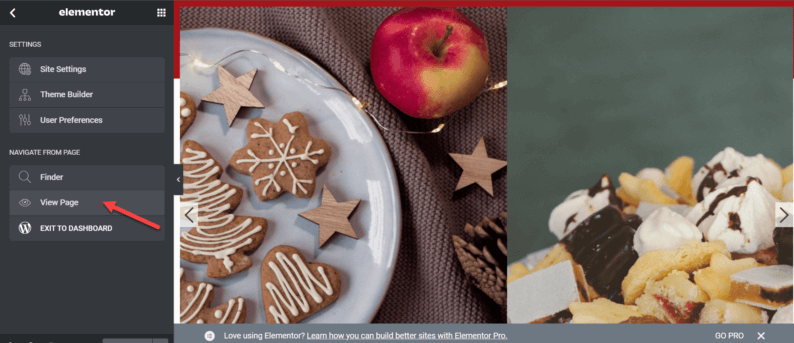
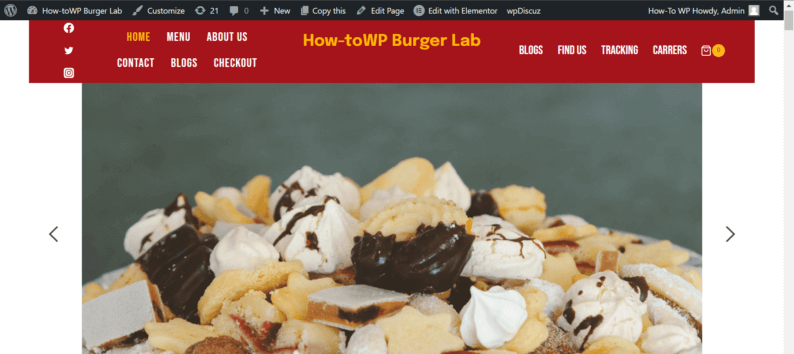
The slider is now visible on the website.
Closing Thoughts
As I said before, once you know what to do and how to do it, you’ll be able to do it with one hand tied behind your back😂. There are other plugins as well that you can use for your website, but they all vary in difficulty.
These plugins are:
- Logo Showcase with Slick Slider
- Responsive Slick Slider WordPress
- Slick Slider
- WP Logo Showcase Responsive Slider and Carousel
- Meta slider and carousel with lightbox
If you know any other ways to use slick slider in WordPress, let us know below.


Thanks Muhammad, very helpful starter page
I’m glad it’s helpful. 🙂