How to Customize WordPress Admin Dashboard [A Visual Guide]
Are you tired of staring at the same old WordPress admin dashboard every time you log in? What if I told you that you could customize your WordPress dashboard to make it more visually appealing and user-friendly?
By making a few simple tweaks, you can transform the default dashboard into a sleek, personalized control center that suits your unique needs and preferences. From rearranging widgets to adding custom branding elements, there are plenty of ways to make the dashboard your own.
In this article, you’ll learn:
- Different methods to customize the WordPress admin dashboard
- Explanation of the WordPress admin dashboard
- Importance of WordPress dashboard customization
Whether you’re a blogger, developer, or website owner, customizing your WordPress dashboard can greatly improve your productivity and overall user experience. So, let’s dive in and explore how to create a dashboard that truly works for you!
Table of Contents
Top 5 Methods to Customize Your WordPress Admin Dashboard
Ok! Now, let’s move to the main topic for today’s discussion. There are various methods you can employ to make changes. This control center allows you to add new posts or pages, publish or update existing content, and modify widgets.

Each of these actions serves a distinct purpose, so get ready to explore and personalize your dashboard to suit your needs.
Method 1: Hiding WordPress Admin Elements
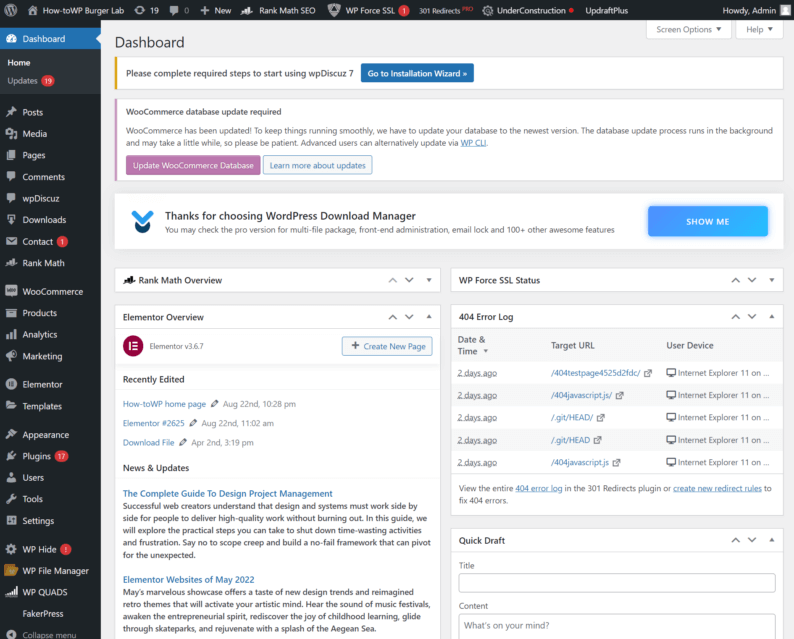
To hide the admin elements, go to the “Dashboard” section and click on the “Home” option.
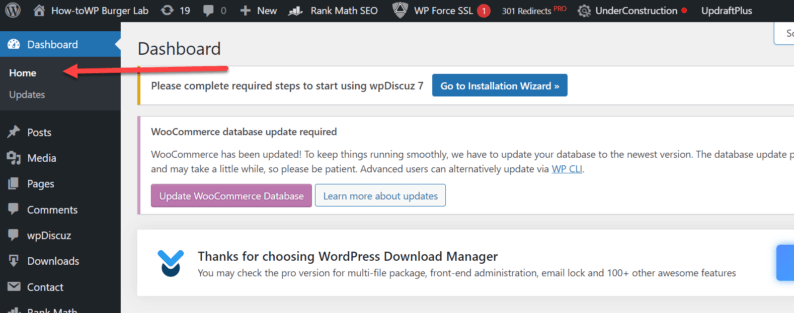
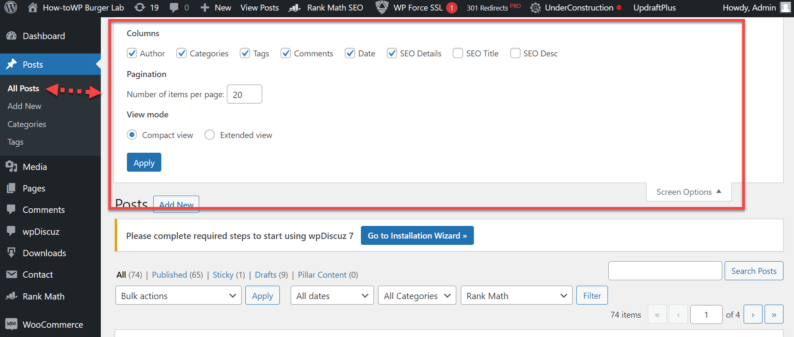
On this page, click “Screen Options,” and a drop-down menu will appear. You can deselect any of the admin elements you don’t want to display on the home page of the dashboard.
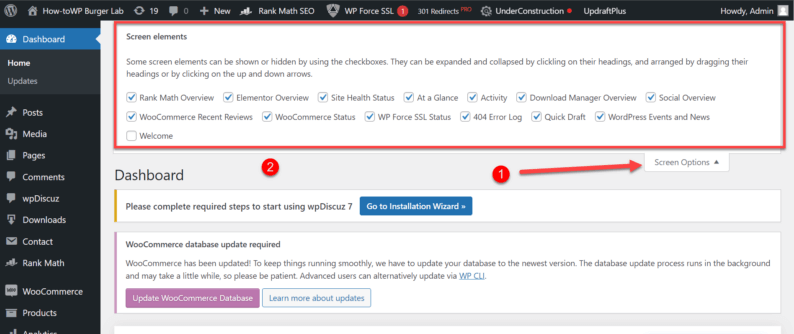
Note: The admin elements will differ depending upon which section of the admin panel you are currently in.
Other than hiding the admin elements, you can also rearrange different sections of the dashboard. You can drag and drop any of the important things you want to see as the first thing.
The main reason behind doing this rearranging is that when you open the admin panel, so you don’t have to locate important blocks such as “At a Glance” and “Site Health Status.”
Method 2: Optimizing the Block Editor
After editing the dashboard panel of the website, you need to optimize how you use the editor because the Gutenburg editor has a lot of unnecessary features that can get in the way while editing posts and pages.
Start by going to the “Posts” or “Pages” section and clicking the “Add New” option.
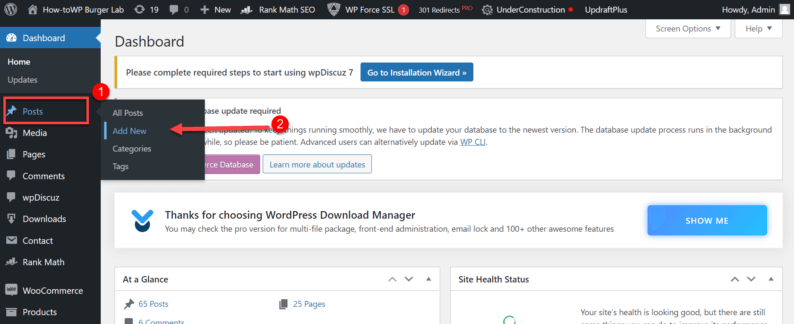
After that, click the 3 dots icon in the top right-hand corner of the screen.
A menu will appear from which you’ll select the “Preferences” option.
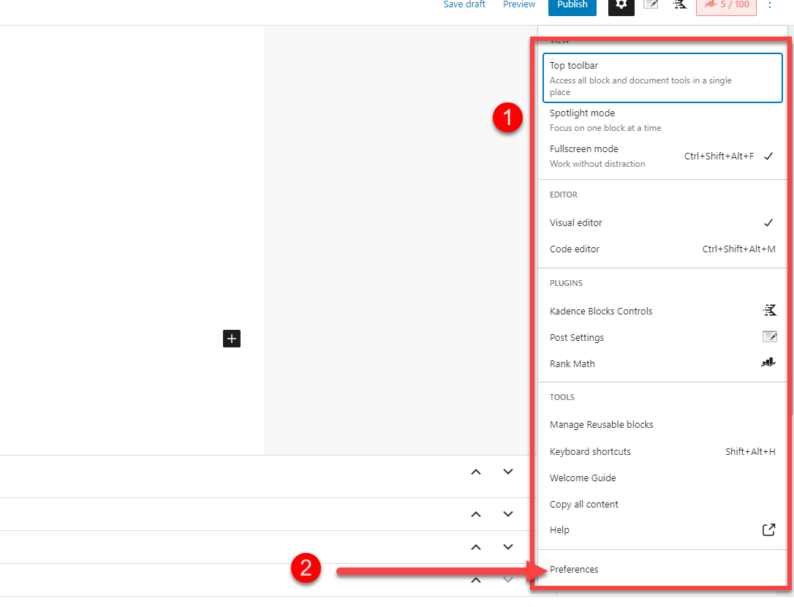
Once you do that, a pop-up box will appear, which has a variety of options for you to change the layout of the editor however you like.
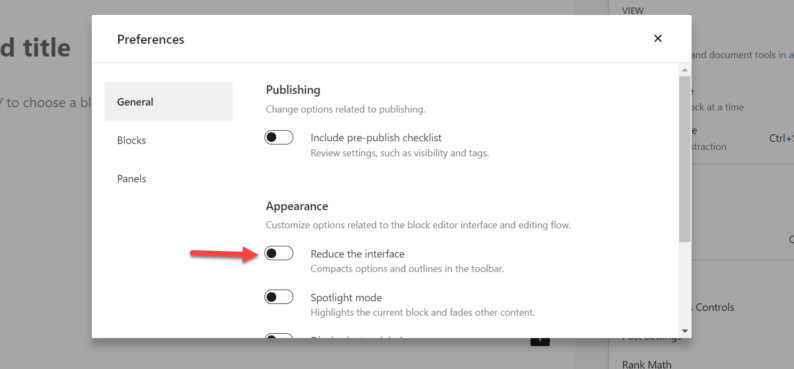
In the “General” section, you can toggle the switch of “Reduce the interface” to on, which will help the interface look more compact and manageable.
Note: There are other options here as well, which you can experiment with to see what suits you best.
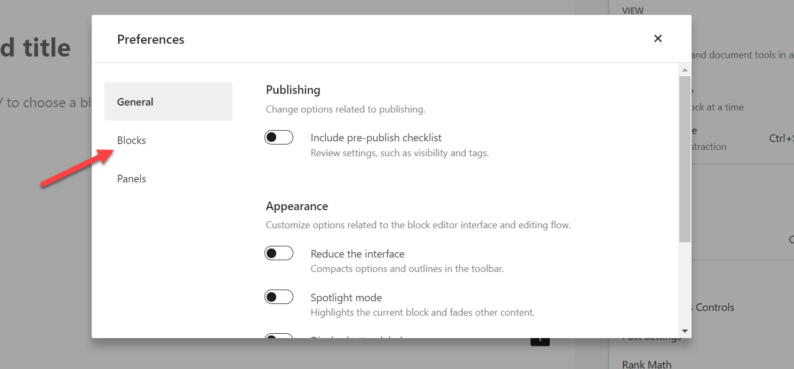
After that, go to the “Blocks” section.
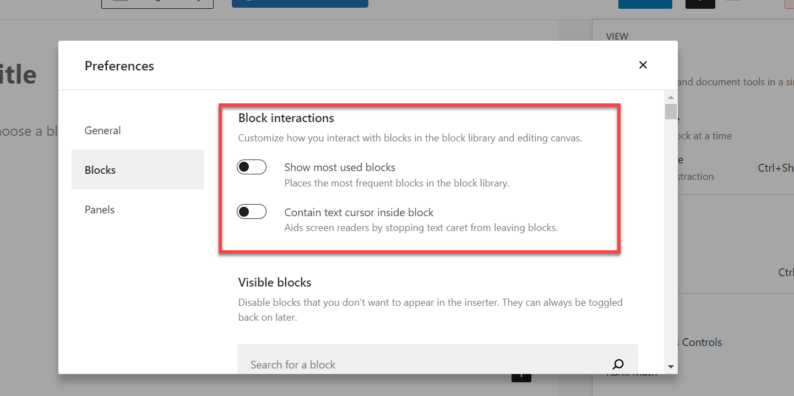
Here you’ll see another section, “Block interactions,” which houses 2 toggle switches. You toggle either or both of them to see if you like the results.
Note: You can also check or uncheck any of the options you want to add to a block, such as images, HTML & shortcode, etc.
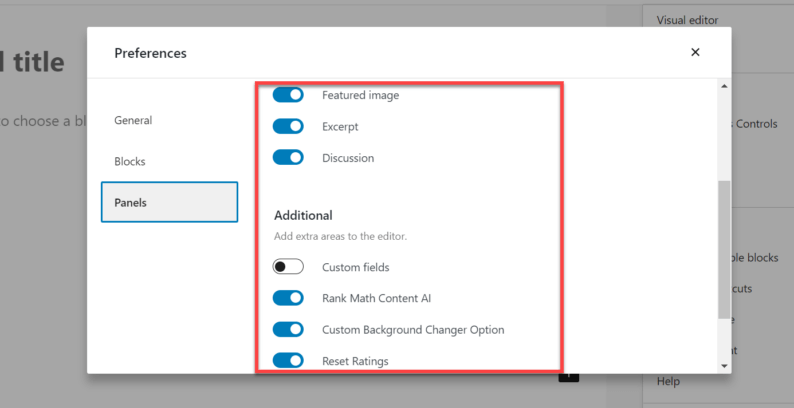
Next, go to the “Panels” section.
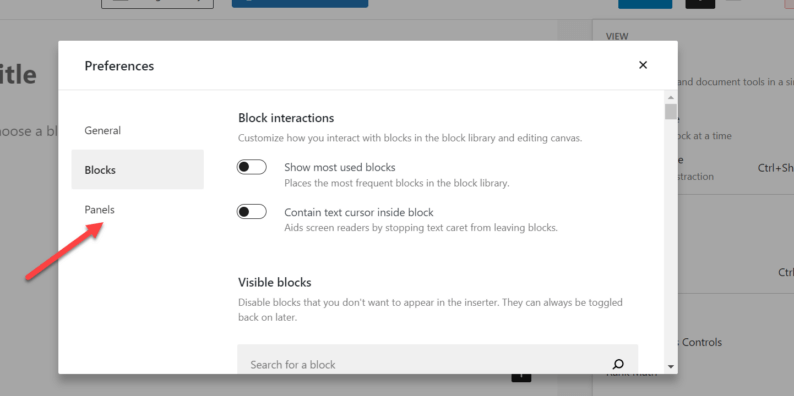
From this section, you can either add or remove any of the features that you may or may not think are necessary respectively.
After making all the changes, click the small “x” icon on the top right-hand corner of the pop-up box. You’ll see that all the settings have been saved.
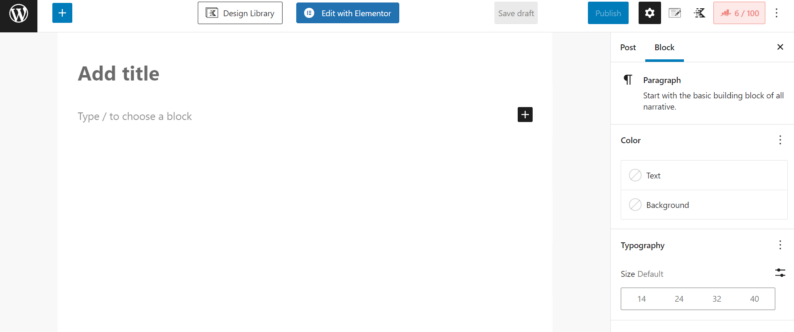
If, for some reason, you only want to focus on the text and don’t want to see the sidebar on the right-hand side of the screen, then simply click the icon which is currently displaying it, and it will go back.
Since we all know that the main navigation bar in the WordPress dashboard is very vital to go from one section of the dashboard to another, continuously adding new plugins and activating different features can make it difficult to find the right option when needed.
That’s why it’s of great importance that you continuously remove any unnecessary plugins and manage the navigation sidebar.
To properly manage the sidebar, I’ll recommend that you use the “Admin Menu Editor” plugin.
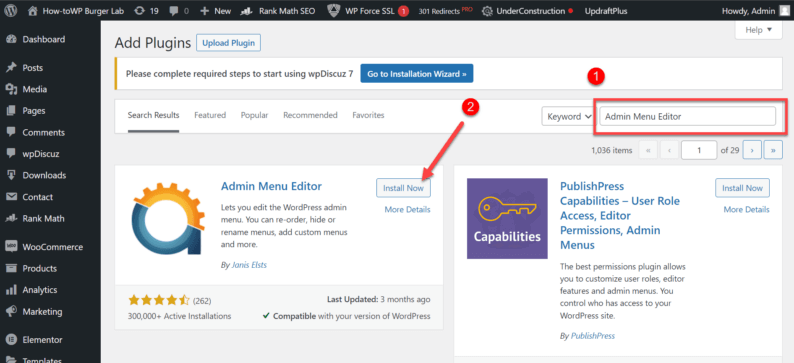
Start by going to the “Plugins” section and clicking the “Add New” option.

From here, search and install the “Admin Menu Editor” plugin.
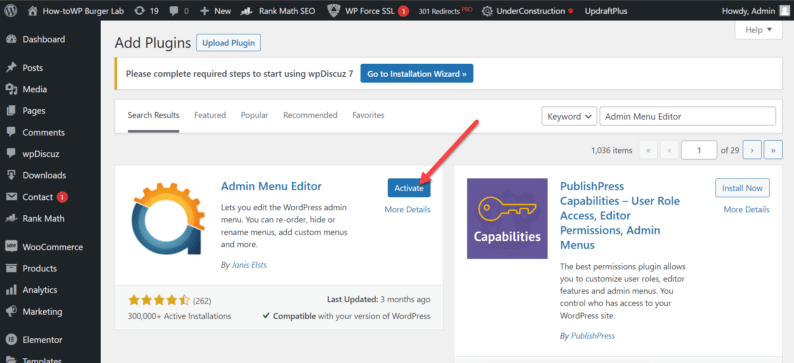
After installing the plugin, make sure to stay on the same page and click the “Activate” button.
To use the plugin, go to the “Settings” section and click the “Menu Editor” option.
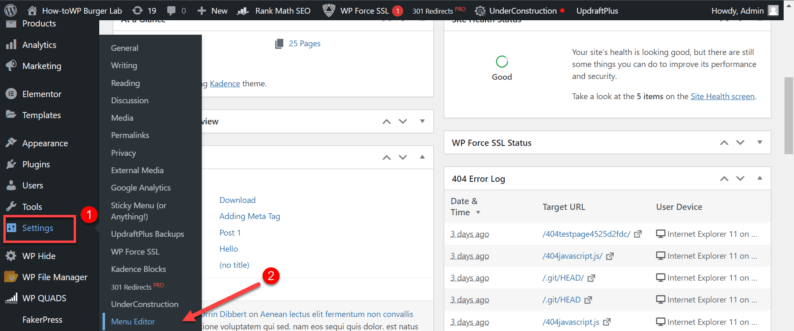
It will open the plugin that helps you manage the main navigation sidebar. To hide any of the options, click the delete icon from the toolbar.
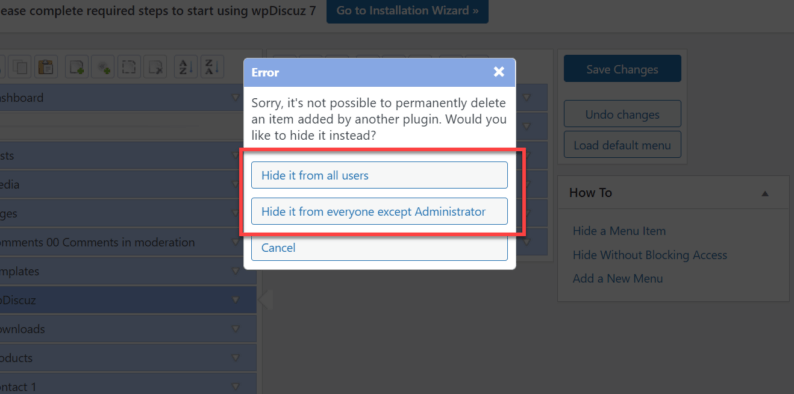
A pop-up will appear in some cases, which will tell you that it’s impossible to delete menu items. So to hide them, you have to choose any of the two options.
Note: For me, the “Hide it from all users” option worked.
Other than hiding a menu item, you can also edit its credentials by clicking on the option. By clicking on it, multiple options will appear on the screen that you can change. These options are menu title, targeted page, URL, etc.
Change any of the fields according to your needs or requirements.
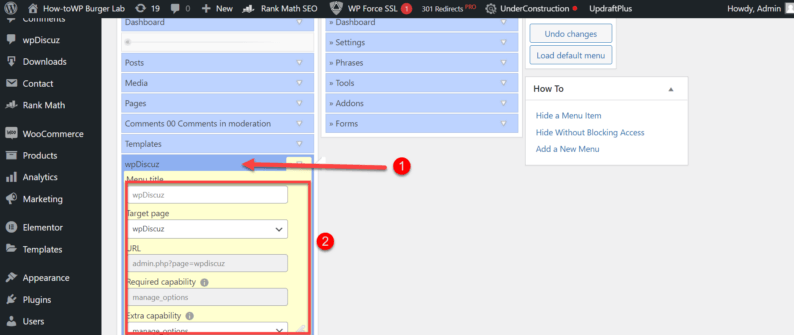
After making all the changes click the “Save Changes” button.

To see all the changes that take place, refresh the page.
Method 4: Editing the Tool Bar
Just like the main navigation sidebar, the tools bar is just as important. By using the toolbar, you can access all of the necessary settings from the WordPress dashboard. To declutter the toolbar, I’ll recommend the “Adminimize” plugin.
Go to the “Plugins” and click the “Add New” section.
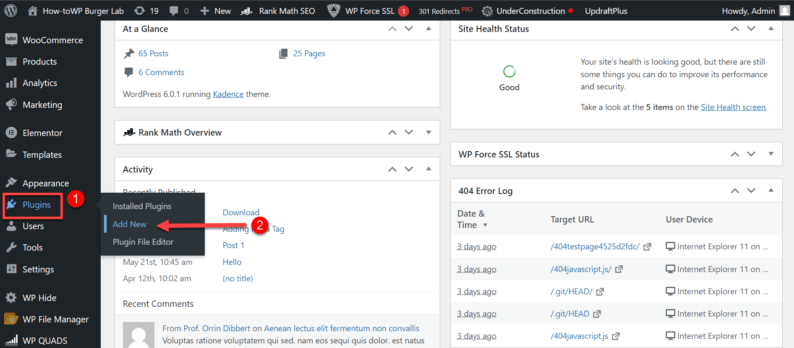
Search and install the “Adminimize” plugin.
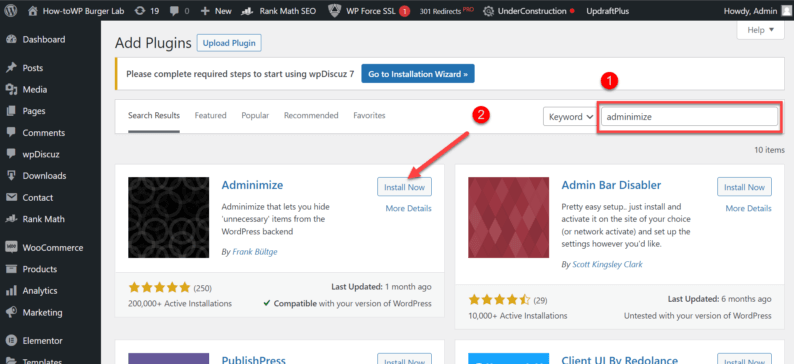
Stay on the page and click the “Activate” button.
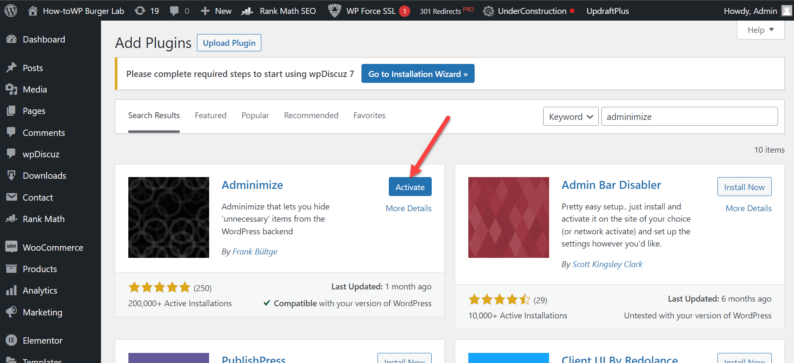
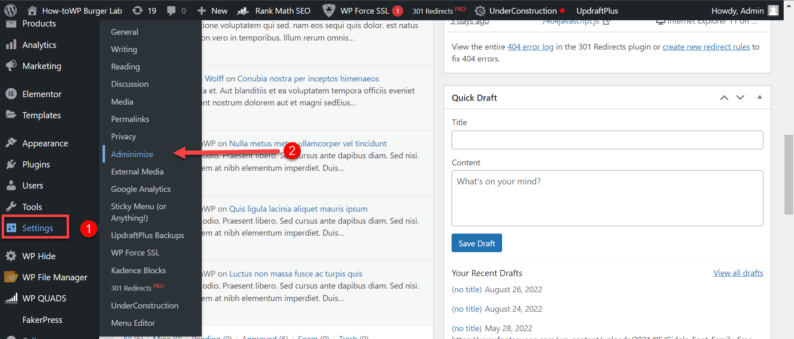
To use the plugin, go to the “Settings” and click the “Adminimze” option.
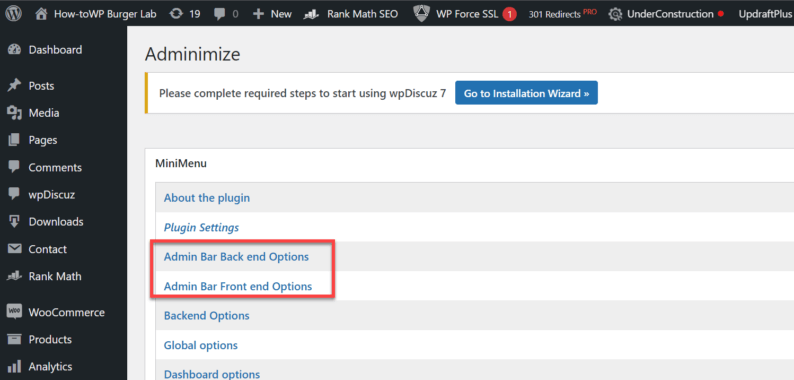
From here, check the “Admin Bar Back end Options” and the “Admin Bar Front end Options” to edit the toolbar.
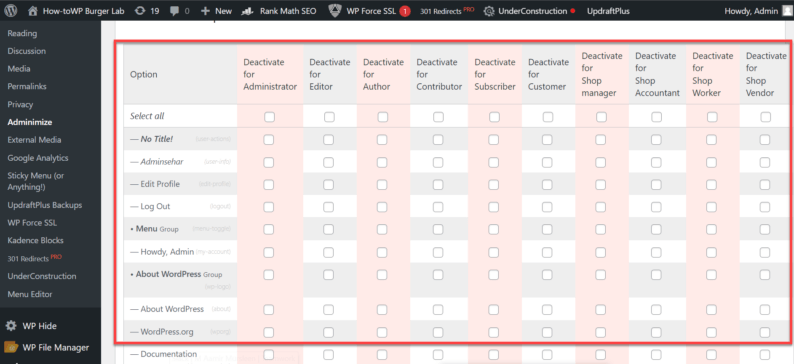
These will provide you with a multitude of check boxes that you can check and uncheck to hide the different features.
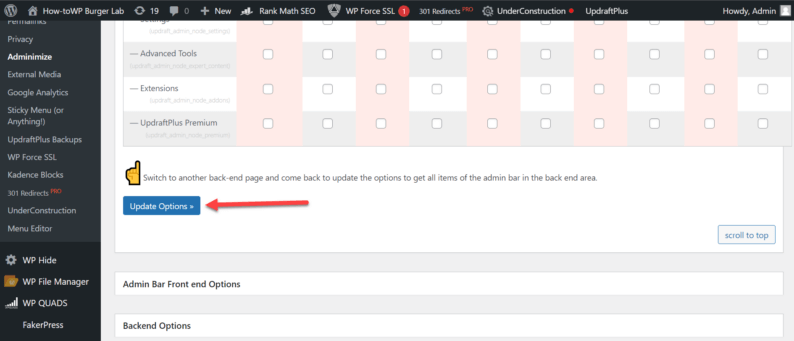
After making all the necessary changes click the “Update Options” button.
Method 5: Changing the Admin Dashboard Color Scheme
Unlike the previous methods, this method is used for simply making changes to the color scheme of the dashboard because you can easily become bored by the black, blue, and grey color scheme.
To change the color schemes, go to the “Users” section and click the “Profile” option.
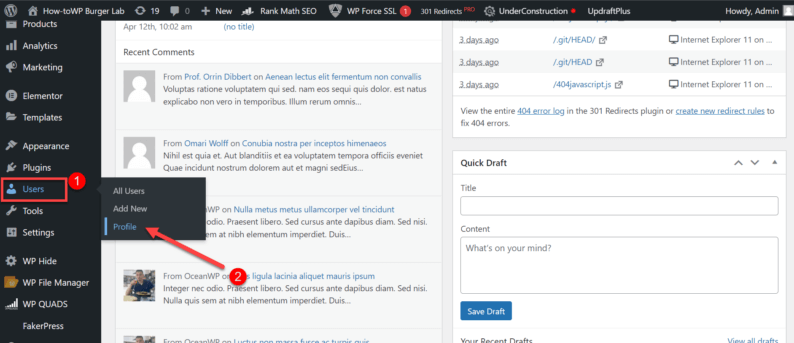
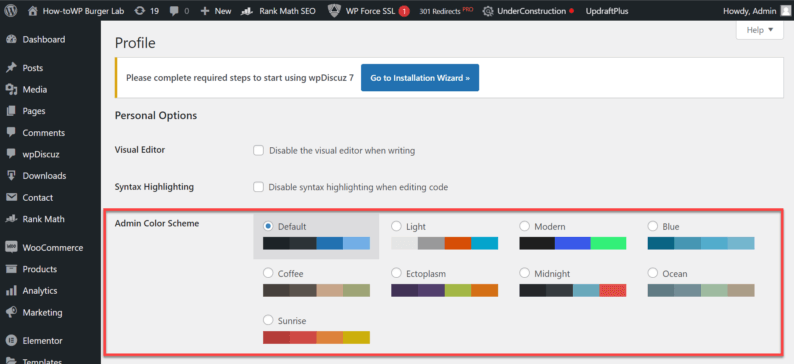
By default, it’ll be set in a black, blue, and grey scheme. Simply click on another type of color scheme you want for the dashboard.
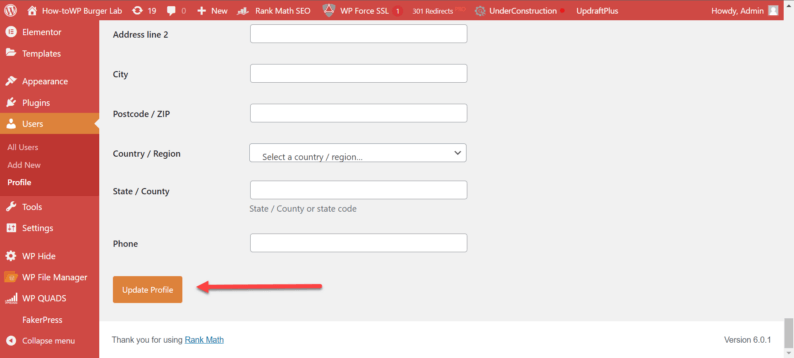
After selecting a color scheme, scroll down and click the “Update Profile” button.
Explanation of the WordPress Admin Dashboard
Your WordPress site’s admin dashboard is where everything happens. From here, you can manage all aspects of your site, including posts, pages, comments, plugins, and themes. The dashboard is also where you’ll go to update your WordPress installation or install new features.

The admin dashboard is divided into sections, each with its own set of options. The main sections are:
- Dashboard: This is the default section that you see when you first log in to your WordPress site. It contains an overview of your recent activity, as well as links to other useful areas of the dashboard.
- Posts: This section is where you’ll go to manage your site’s content. Here you can create new posts, edit existing posts, and delete posts. You can also manage categories and tags, which help organize your content.
- Pages: This section is similar to the Posts section, but it’s used for managing static pages on your site. These are the pages that don’t often change, such as your About page or Contact page.
- Comments: This section is where you can moderate comments left by visitors on your site. Here you can approve or delete comments, as well as mark comments as spam.
- Appearance: This section is where you manage the look and feel of your site. Here you can install and activate themes, as well as customize the appearance of your site.
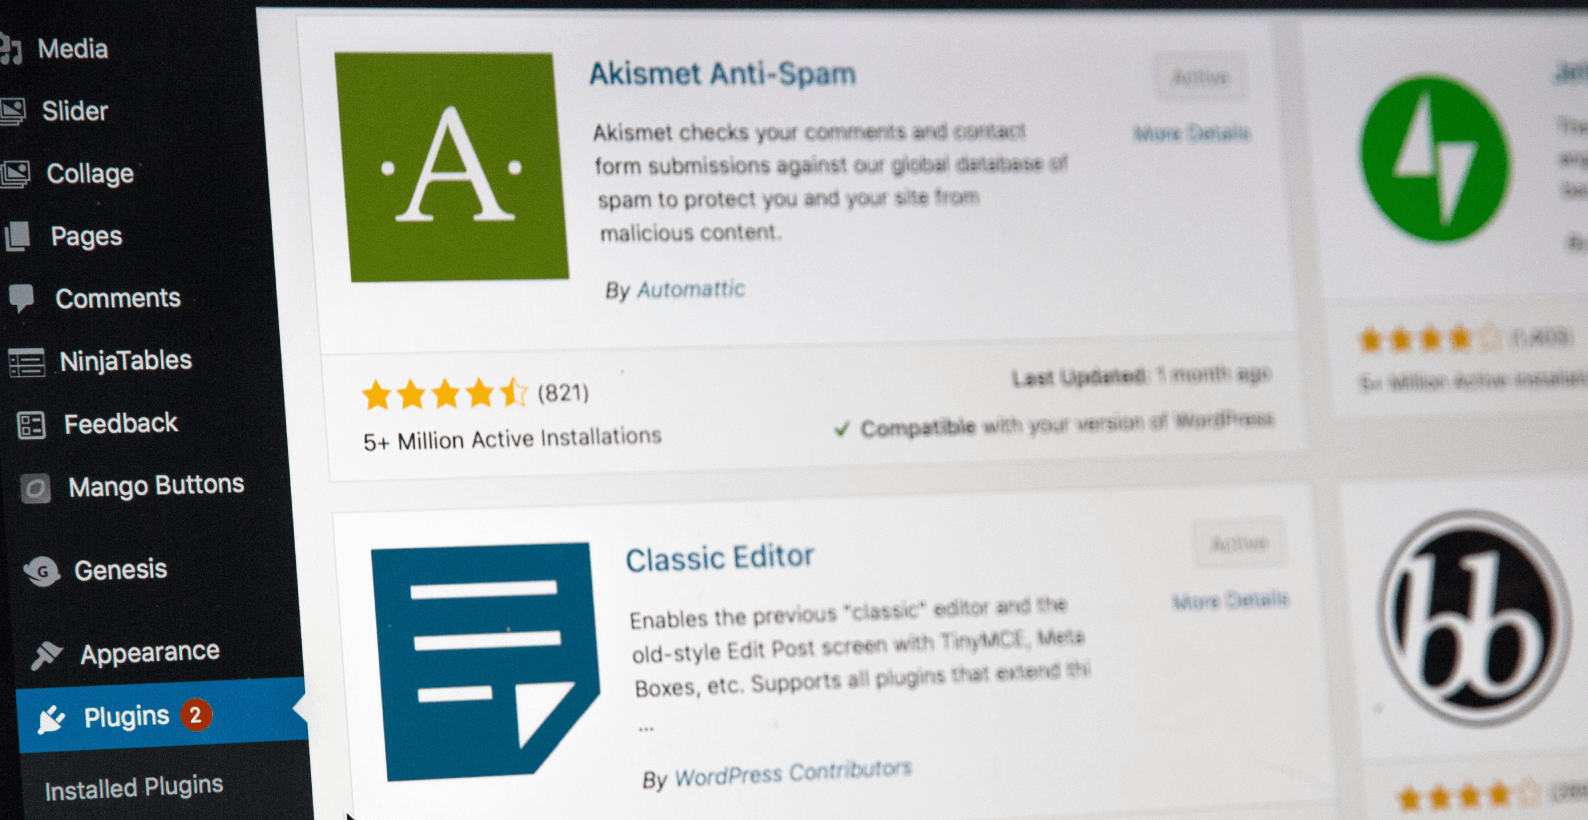
- Plugins: This section is where you can add, remove, and manage plugins on your site. Plugins are small pieces of software that add functionality to your WordPress site.
- Users: This section is where you manage the users of your site. Here you can add new users, edit existing users, and delete users. You can also assign roles to users, which determines what they can and cannot do on your site.
- Tools: This section contains a variety of tools that you can use to manage your WordPress site. These tools include an import/export tool, a link manager, and a backup tool.
- Settings: This section contains all of the settings for your WordPress site. Here you can configure the general settings, writing settings, reading settings, discussion settings, media settings, privacy settings, and permalink settings.
As you can see, the WordPress admin dashboard is a powerful tool that you can use to manage your WordPress site. It’s important to familiarize yourself with the dashboard so that you can take full advantage of all it has to offer.
As you add more plugins, more options will become visible in the “Main Navigation” section on the left-hand side.
Benefits of Customizing WordPress Admin Dashboard
If you’re still not convinced that you need to customize WordPress admin dashboard, then here are some of its benefits:
1. You Can Improve the User Experience
One of the main benefits of customizing the WordPress admin dashboard is that you can improve the user experience for yourself and for other users who visit your site.
For example, let’s say you frequently use certain plugins that add extra menu items to the dashboard. By customizing the dashboard, you can move those plugin menus to a more convenient location.
This can save you a lot of time and frustration because you won’t have to hunt for those menus every time you want to use them.
2. You Can Make the Dashboard More Intuitive
Another benefit of customizing the WordPress admin dashboard is that you can make it more intuitive. This is especially useful if you often have to help other people use your site.
For example, let’s say you have a lot of content on your site, and you want to make it easy for people to find what they’re looking for. You can do this by adding custom menus and widgets to the dashboard that help people navigate your site more easily.
3. You Can Reduce Clutter
One of the most common complaints about the WordPress admin dashboard is that it’s often very cluttered. This can be a problem if you’re trying to find a specific setting or if you’re just trying to get an overview of what’s going on with your site.
By customizing the dashboard, you can remove any unnecessary items that are taking up space and making it more difficult to find what you’re looking for.
4.You Can Enhance Security
Another benefit of customizing the WordPress admin dashboard is that you can enhance security. This is especially important if you have sensitive information on your site.
For example, let’s say you have an eCommerce site, and you want to make sure that only authorized users can access certain areas of the dashboard. By customizing the dashboard, you can add an extra layer of security that will help keep your site safe.
5. You Can Improve Performance
Finally, one of the most important benefits of customizing the WordPress admin dashboard is that you can improve performance. This is especially important if you have a lot of traffic to your site.
For example, let’s say you have a lot of plugins installed on your site. By customizing the dashboard, you can disable any unnecessary plugins that are slowing down your site.
Why Customize It
You might be asking yourself, “What is the purpose of customizing the dashboard if I can do my work as it is?” Well, it is true that you can do all your work without having to customize the WordPress admin dashboard because your main objective is the website.
However, it won’t be efficient for you in the long run. If you’re planning on managing your website for the foreseeable future, then you’ll need to customize the WordPress admin dashboard. The reason behind it is that over time more plugins and different features can clutter the dashboard section, and it will hinder you.
Many WordPress beginners face this problem because they don’t plan ahead and organize the dashboard. Let me explain this with an example; imagine that you work in an unorganized and cluttered environment. It will hinder your work performance as opposed to a clean and organized environment.
Conclusion
This was a long one, but hopefully, you found the above-mentioned methods beneficial to customizing the WordPress admin dashboard. Be careful only to change the features that are cluttering your site and making your work difficult.
Other than that, If you’re looking for a good hosting provider, then I’ll recommend Nexcess because it works amazingly, no matter if you own an eCommerce store or a simple blog.
Don’t forget to mention your experience with the methods in the comments section below.