How to Add Meta Tags in WordPress [A Visual Guide]

Improving your site’s SEO is crucial if you want to rank high in search engine results. One way to do this is through a meta tag. Today, I’ll explain meta tags and how to add them in WordPress.
You’ll learn about:
- How to add meta tags in WordPress
- What are meta tags
- Benefits of using a meta tag
Let’s start with how to add them.
Table of Contents
Before we dive into the specifics of adding meta tags in WordPress, it’s essential to have a basic understanding of what meta tags are and why they are important.
Meta tags are HTML tags that provide information about a web page. Search engines use them to help index and classify web pages, while web browsers can also use meta tags to provide information to users.

Note: We will cover the details of meta tags later in this article, but for now, let’s focus on the process of adding them to your WordPress site.
Meta tags can be added using a plugin, but you’ll need to know what plugin to use. There are several SEO plugins that you can use for this process, but I recommend the RankMath plugin.
Let’s start with the installation process.
Step 1. Activating the RankMath SEO Plugin
If you want the Pro version of this plugin, then click this link. Otherwise, you use the free version of the plugin as well.
- Launch your web browser and open Google for optimal speed and precision in search results.

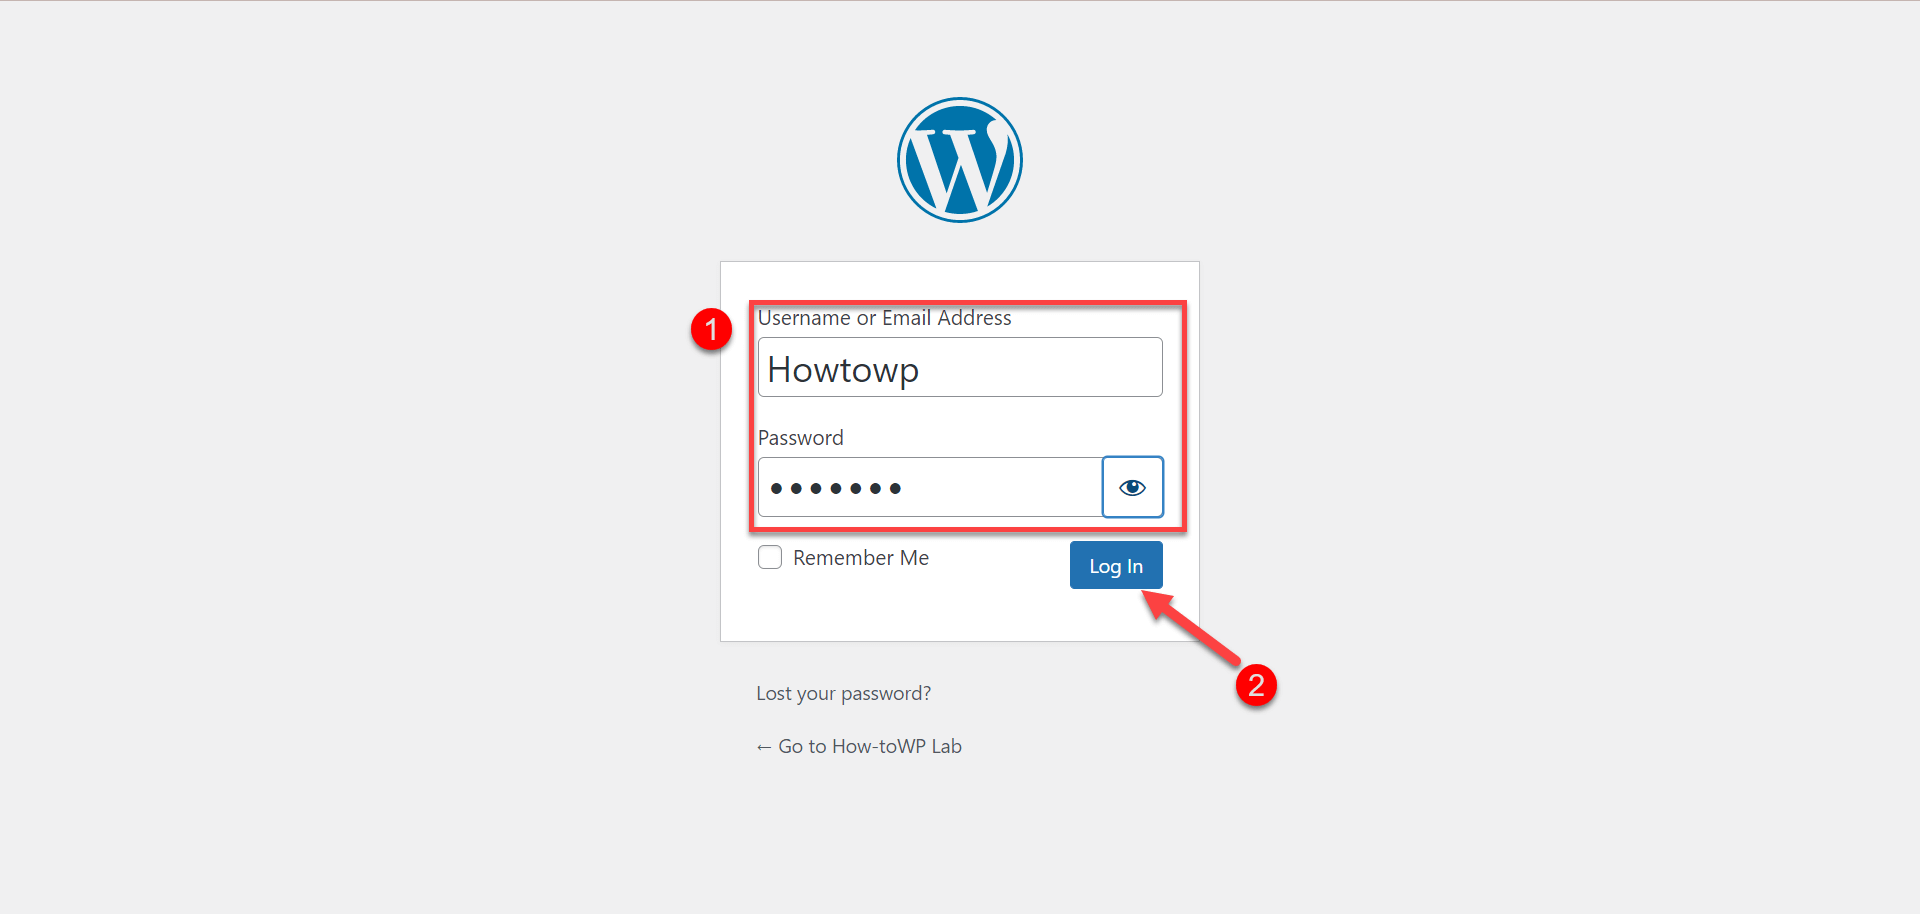
- Go to your WordPress website, enter your login details on the login page, and click “Log In” after ensuring accuracy.
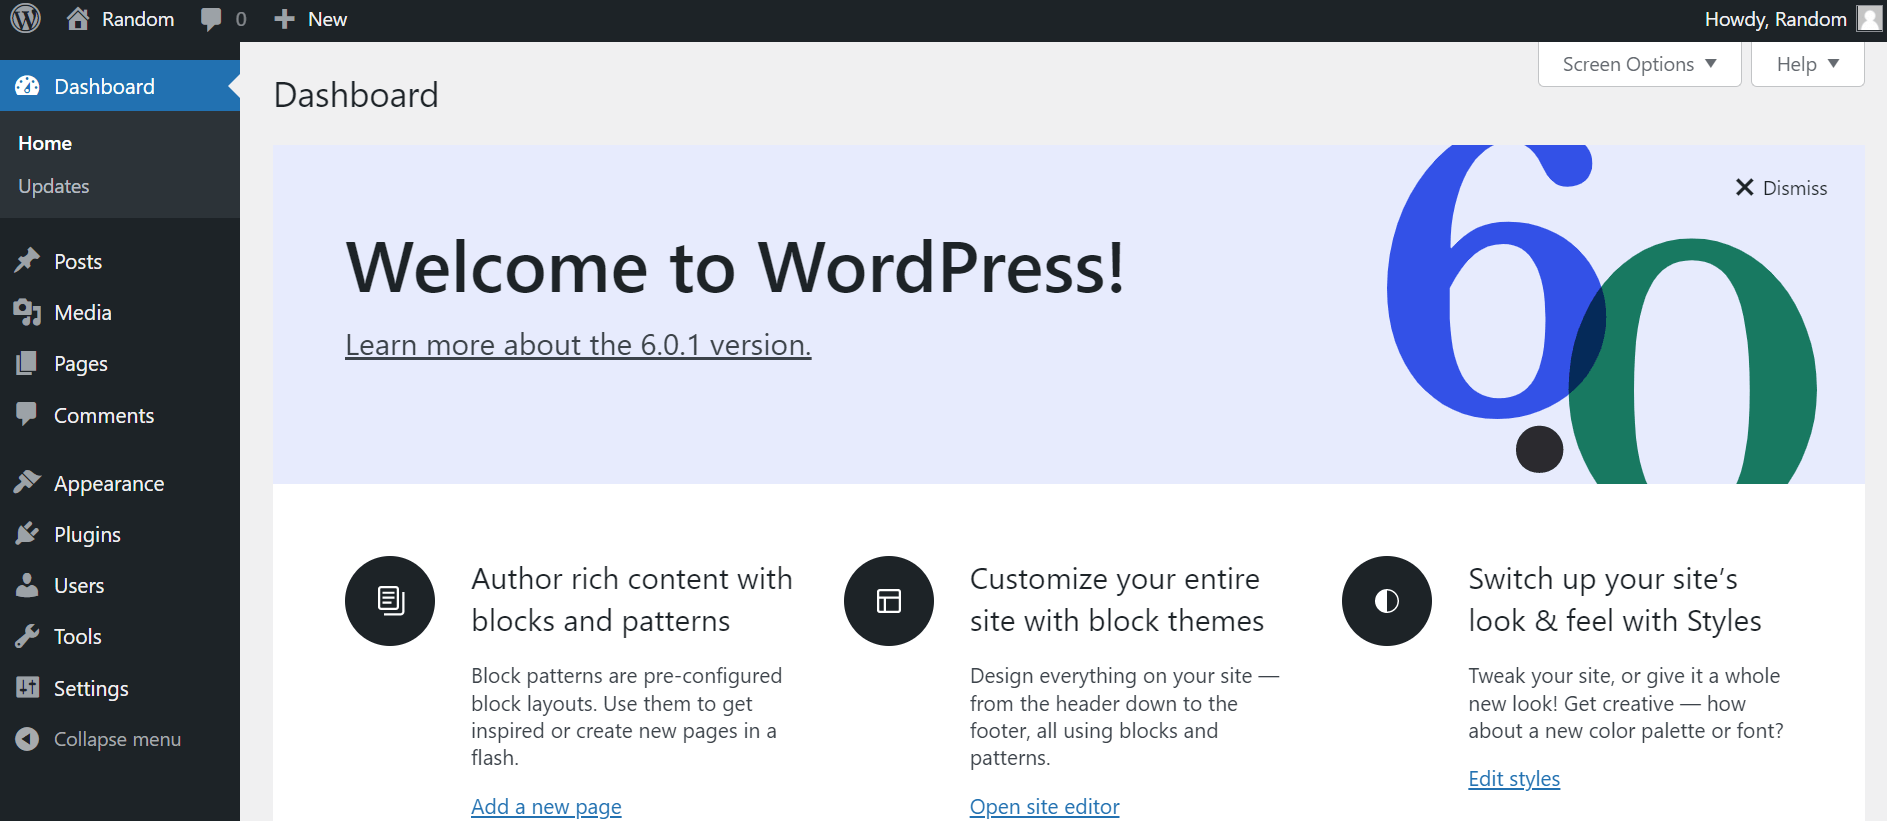
- Upon successful login, access the WordPress dashboard, your centralized platform for managing site content, themes, plugins, and settings.
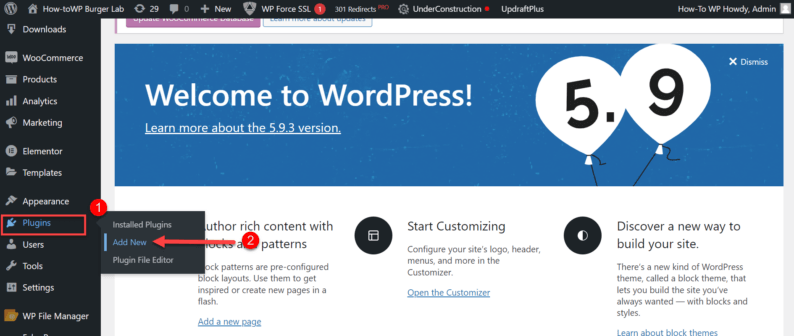
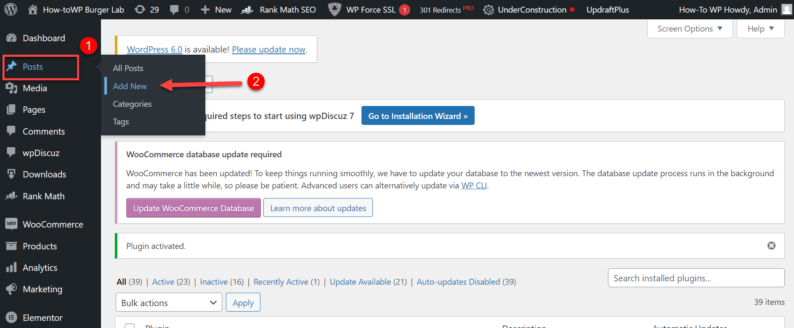
- Go to the “Plugins” option and click the “Add New” option.
- Search for the “RankMath” plugin in the WordPress dashboard’s “Plugins” section.
- After the installation is complete, click on the “Activate” button to activate the RankMath plugin.
Now, I’m assuming you have diligently followed the aforementioned steps and successfully activated the RankMath plugin; you are now ready to proceed to the next phase of enhancing your WordPress website’s SEO capabilities.
Step 2. Setting Up RankMath Plugin
After installing the RankMath plugin, if you are using it for the first time, you will need to complete a setup process to configure the plugin for your website. This setup typically involves the following steps:
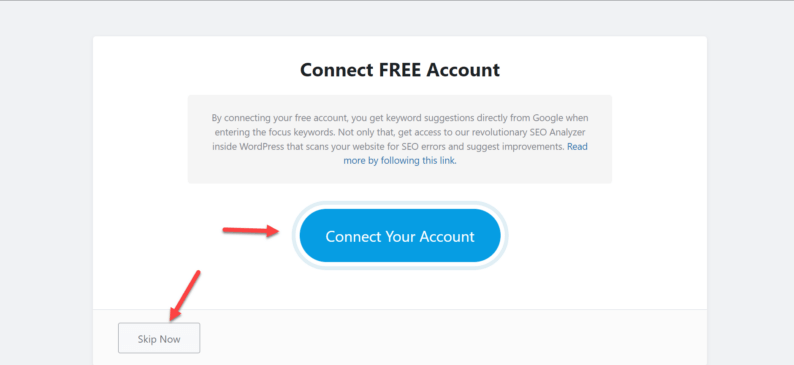
- For starters, it’ll ask you to connect an account for RankMath. You can do it by clicking on the “Connect Your Account” button or just clicking the “Skip Now” button.
- After that, select a mode in which you want to use the plugin and click the “Start Wizard” button.

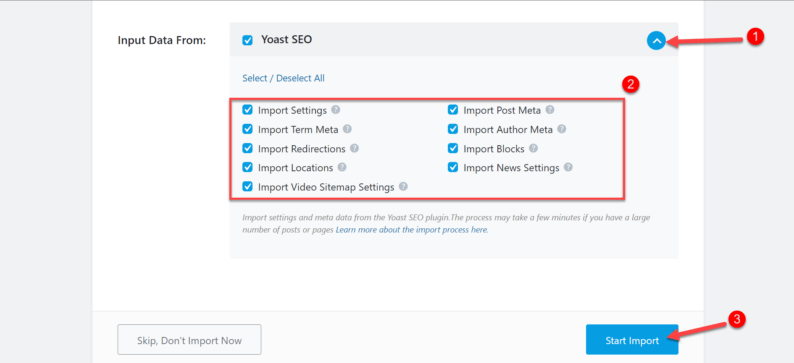
- The next page will ask you to import all the necessary SEO files. Click the “Yoast SEO” drop-down option and select all of the files to import. After selecting the files, click the “Start Import” button.
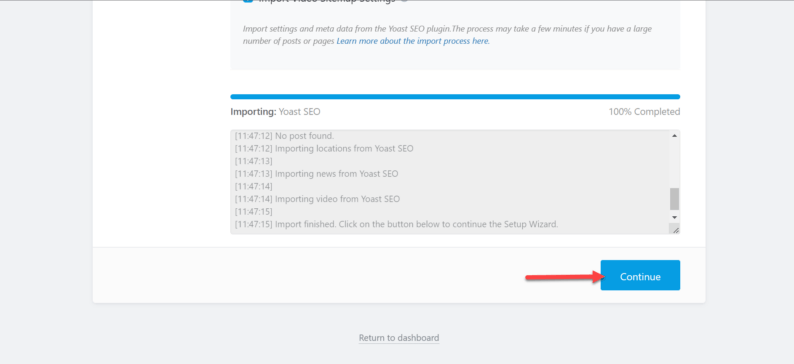
- After the importing process has concluded, click the “Continue” button to proceed.
- Next, enter all the necessary details of your website, which the plugin is asking you, and click the “Save and Continue” button.

- If you haven’t connected your RankMath account with the plugin, it’ll ask you again to connect it, but you can just skip it by clicking on the “Skip Step” button.

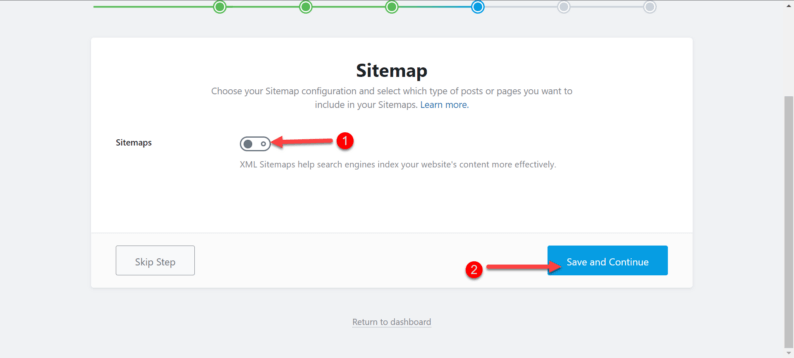
- Next, toggle the “Sitemap” switch to on and click the “Save and Continue” button.
- After that, it’ll ask you to do a few SEO tweaks. You can change the options if you like or simply leave them as it is and click the “Save and Continue” button.

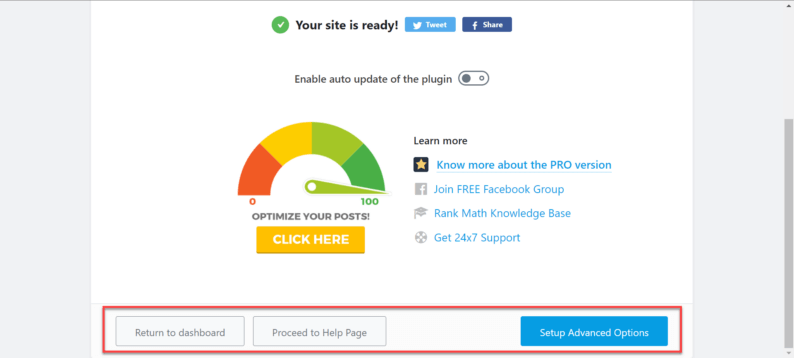
- The RankMath plugin is now ready to be used on your site. You can go to set up advanced options or simply go back to the dashboard.
Now that you’ve set up the RankMath plugin on your WordPress site, you’re almost ready to boost your website’s search engine optimization (SEO) by adding meta tags. Meta tags provide crucial information to search engines about your website’s content.
Just a couple more steps and your site will be better equipped to improve its visibility on the web. Let’s proceed with these final steps to make your site more search engine-friendly while enhancing its overall online presence.
- To add meta tags, you first need to create a new post or a page. Go to the “Posts” option and click the “All Posts” option.
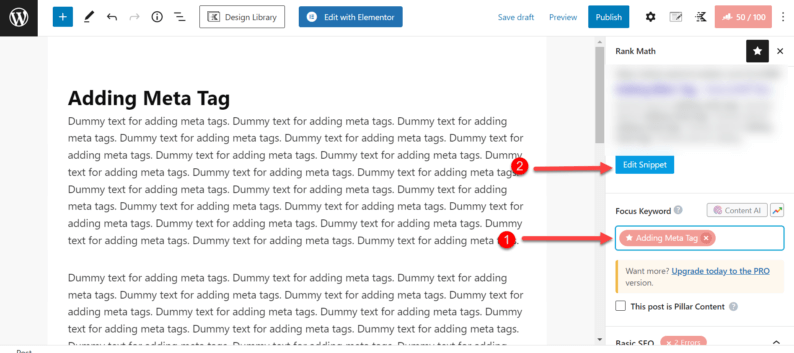
- Here, you’ll enter the content for the topic you’re writing for. After that, click on the red box on the corner of the screen.
Note: The box will show some sort of number out of 100.

- Now comes the main part. Type in the keyword for your article in the “Focus Keyword” section. You’ll immediately see a change in numbers. After that, click on the “Edit Snippet” button on top of the keyword section.
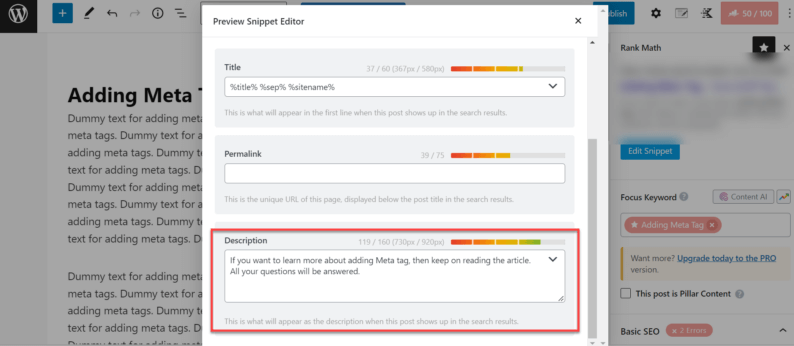
- A small box will appear on the screen. In the “Description” section, you’ll add a small paragraph of about 2 to 3 lines. Keep an eye on the color bar with the “Description” section because it’ll show you if the length of the description is enough.
Note: Don’t forget to add the keyword in the description because this description is normally called “Meta Description,” which will be displayed on the search engine.
- After that, click the small cross icon on the top of the box.
Here is how you add meta tags to WordPress posts, and the procedure is the same for pages.
Step 4. Publishing the Post or the Page
Once you’ve added the meta tag, ensure that the changes you made are correct. Here is how you can do it.
- At the page’s top, find the “Preview” option, which can be accessed by clicking on “Preview in a new tab.”
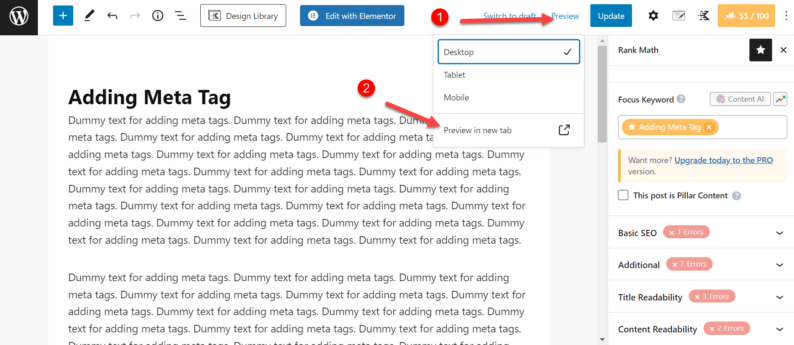
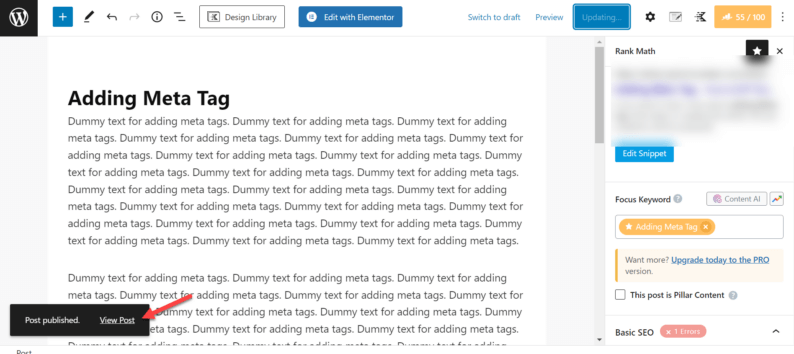
- After making sure the changes are correct, click the “Publish” button on top of the screen.

- To view the post or the page, click on the “View” option that appears on the screen.
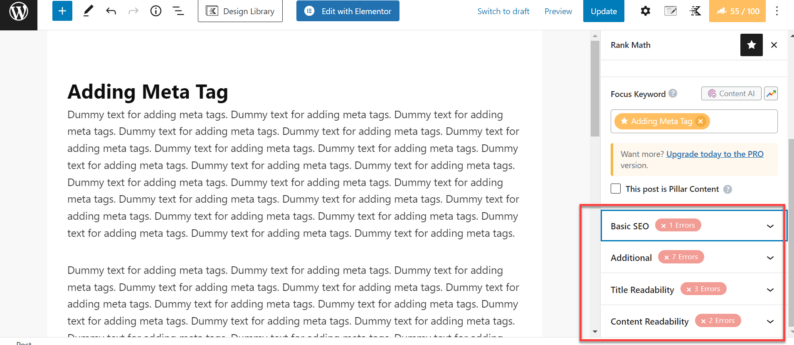
- To improve the on-page SEO of the post or page, check the other recommendations provided to you.
To view if the information you gave is now added in the form of meta tags, open the post or page you just created.
- Right-click on it with your mouse and click on the “View page source” option.

- Here, you’ll see that the tags are added to the page, and they contain the information that you’ve provided.

Meta tags are HTML tags that provide information about a web page. Search engines use them to help index and classify web pages. Web browsers can also use meta tags to provide information to users.

There are multiple types of meta tags, each with its own function. Some common meta tags include:
Title Tags
The title tag is an HTML element that specifies the title of a web page. It is displayed in the browser’s title bar or tab and is also used by search engines as the clickable headline for a search result. The title tag should accurately describe the content of the page and include relevant keywords.
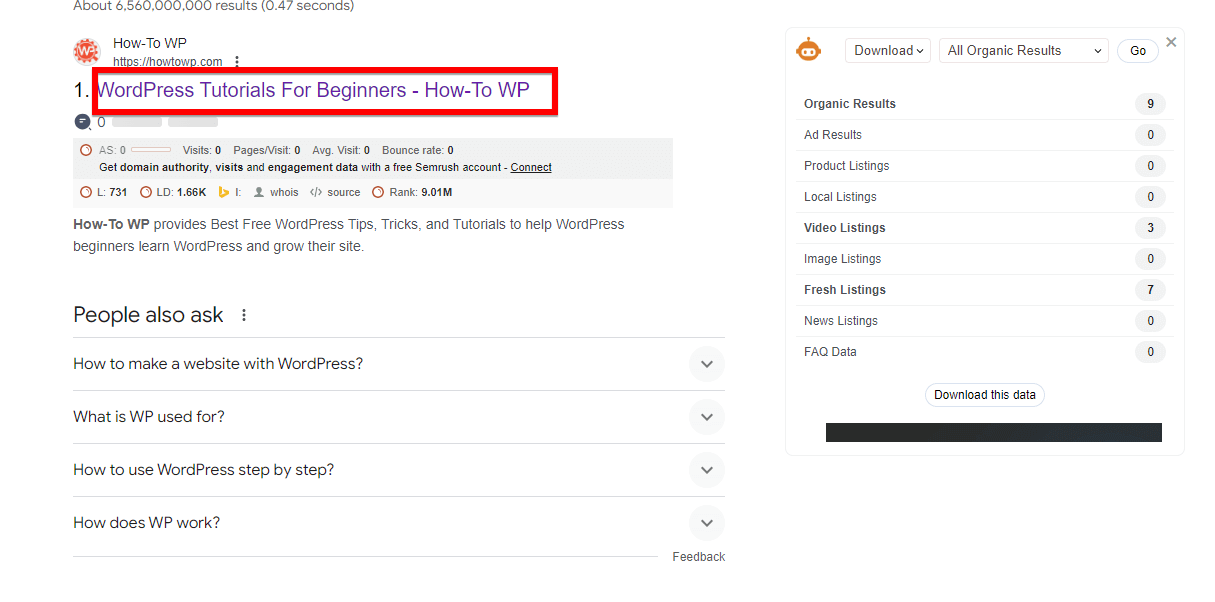
A well-crafted title tag can entice users to click on your link, increasing your website’s click-through rate (CTR). A higher CTR can indirectly influence your search engine rankings, as search engines may interpret it as a sign of relevance and quality.
Description Tags
The meta description tag provides a brief summary of a web page’s content. Search engines often display the meta description in search results, making it an important factor in attracting clicks from users.
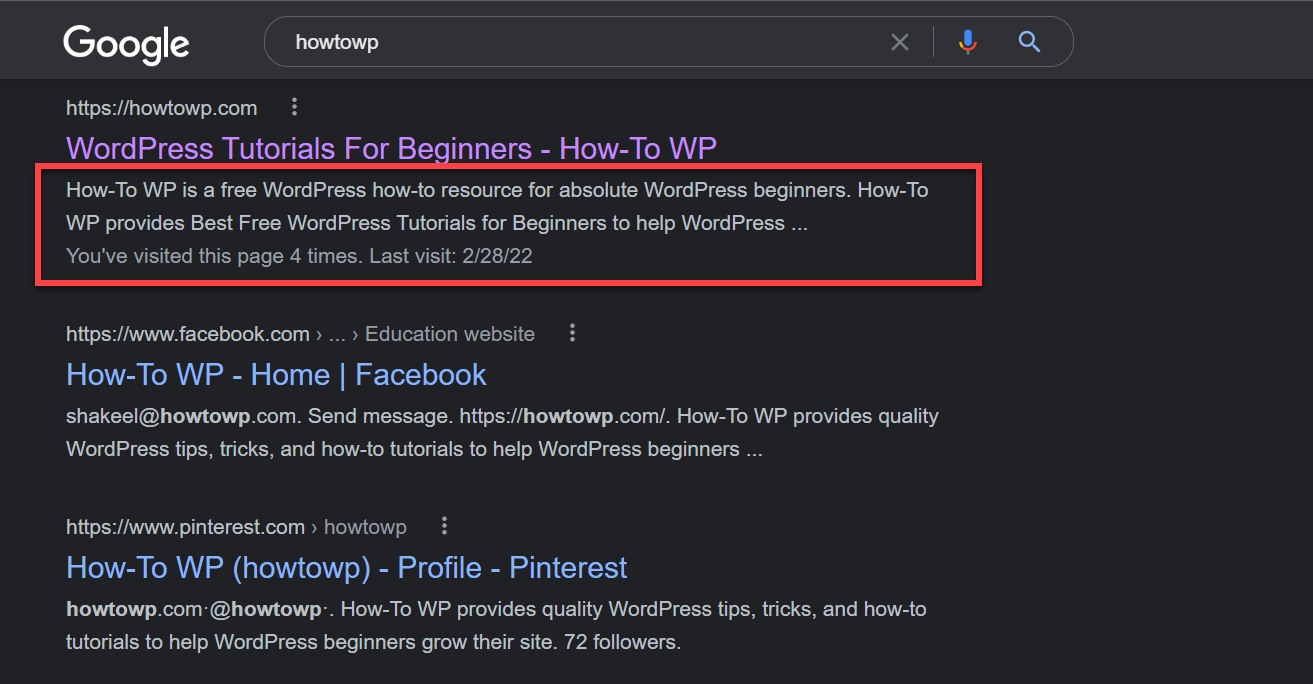
Title tags and meta description tags are particularly important because they are often the first elements a user sees when your website appears in search engine results pages (SERPs). A well-written meta description should be concise, engaging, and include relevant keywords.
Keyword Tags
The meta keywords tag was previously used to specify keywords relevant to a web page’s content. However, due to abuse by spammers and the diminished importance search engines place on this tag, it is no longer a crucial factor in SEO. Nonetheless, some website owners still choose to include it.
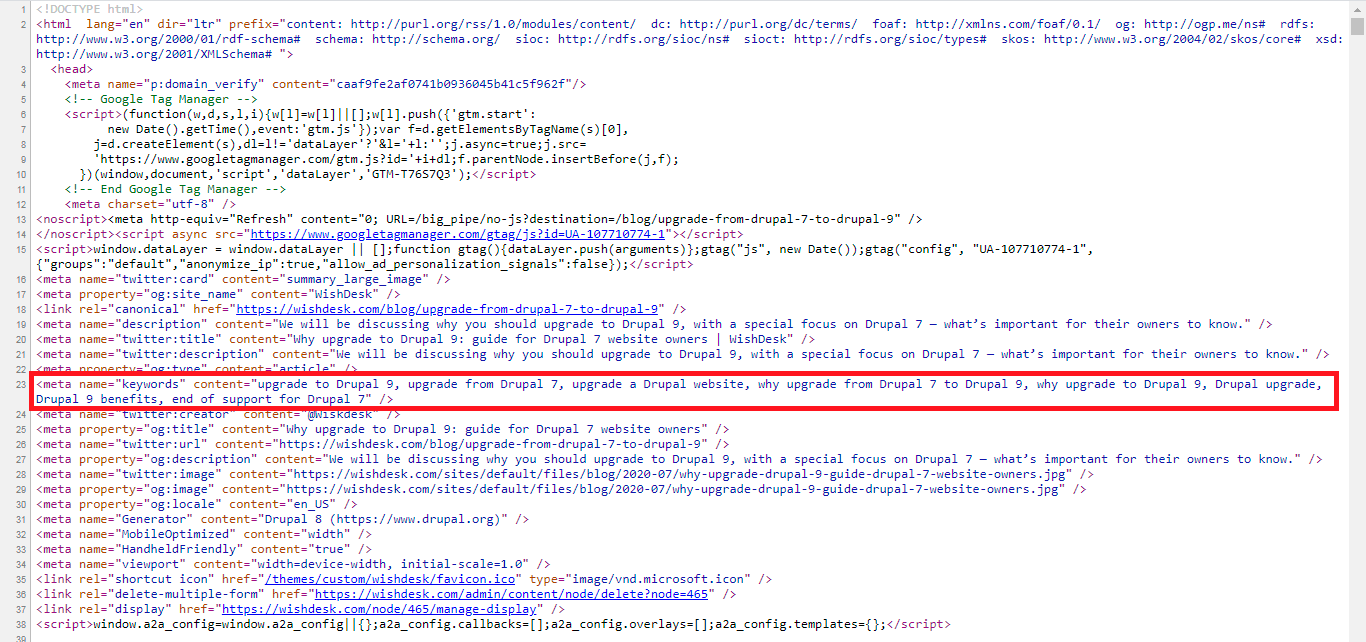
While keyword tags have lost their significance in terms of SEO impact, they can still serve as a helpful way to organize and summarize the main topics covered on a web page.
Author Tags
The meta author tag is used to specify the author of a web page or article. This tag can be helpful for attributing content to specific individuals and establishing authority within a particular niche.
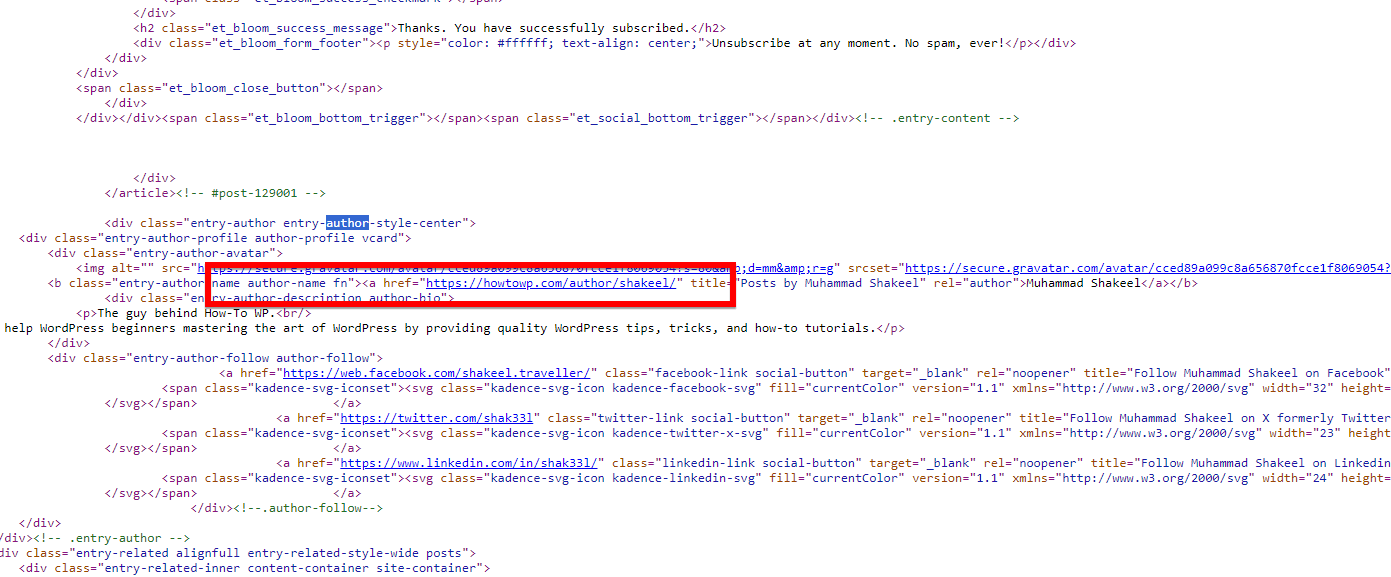
Lastly, author tags can help establish credibility and authority within your niche by attributing content to specific individuals or experts in your field.
Among the most important meta tags for SEO are title tags and description tags. Both the title and meta description tag are very important in ranking the article on Google. When writing the meta descriptions for the article make sure to use the meta keywords within the allocated character space.
Keyword tags and author tags can also be useful but are not as important as title tags and description tags.
Additionally, the robots.txt file and sitemap.xml file are not technically meta tags; however, they’re used to provide information about a website to search engines.
In order to optimize a website for search engines, it is important to use a meta tag correctly. Meta tags are typically located in the head section of a web page. They are usually placed between the opening and closing head tags.
This means using relevant keywords in the title and description tags and making sure the robots.txt file and sitemap.xml file are properly configured.
Using meta tags correctly can help a website rank higher in search engine results pages (SERPs), which will result in more traffic to the site.
Here are some of the generic meta tag codes:
  <meta charset="UTF-8">
  <meta name="description" content="Free Web tutorials">
  <meta name="keywords" content="HTML, CSS, JavaScript">
  <meta name="author" content="John Doe">
Benefits of Using a Meta Tag
There are different meta tags for different purposes, and each of them has multiple benefits. Here are some of the commonly known benefits of using meat tags.
- Improves your website’s SEO.
- It makes sure that your web pages are properly indexed and classified by search engines.
- Provides information to users about a web page.
- Improves the usability of a website.
- Creates more effective marketing campaigns.
- Increases the click-through rate (CTR) of your website.
- Reduces the bounce rate of your website.
- Improves the conversion rate of your website.
- Increases brand awareness for your website.
- Helps you track and analyze the performance of your website.
There are several other benefits, each specific to the type of tag being used.
Summary
Using the method above, you can easily add meta tags to WordPress. You don’t skip any steps and check the source code to see if every tag is implemented correctly.
Many people don’t prefer the plugin method, and they add meta tags by changing the coding of the theme. This method isn’t recommended because you can end up changing crucial parts of the theme, and when you change the theme, it automatically removes the manually added tags.
That’s why I prefer the plugin method because it’s not only easy but also convenient if you like to add some other information on how to meta tags in WordPress, mention them below.
FAQ’s
If you’re looking to add meta tags in WordPress without using plugins, you can opt for a manual method by directly editing your theme’s header.php file. By incorporating meta tags into this file, you can add them to your site without relying on external plugins. This method provides more control and customization options while ensuring efficient meta tag implementation.
How do I add a meta tag to my page?
Adding a meta tag to a specific page in WordPress involves accessing the page’s editor in your WordPress dashboard. Within the editor, switch to the “Text” rather than “Visual” mode to directly insert the meta tag code. By placing the meta tag within the <head> section of your page, you can customize the metadata for that specific page. Remember to save the changes after adding the meta tag.
To add custom meta tags to your WordPress site, you can utilize the functions.php file for your theme. By incorporating PHP code snippets within this file, you can create custom meta tags tailored to your specific requirements. Custom meta tags allow you to define additional metadata properties that are not covered by standard WordPress functionalities, offering a personalized touch to your site’s SEO and user experience.


