How to Put Images Side by Side in WordPress [Visual Guide]

WordPress can sometimes pose challenges, especially when you’re trying to align images horizontally. This is a common task that many users face, and mastering how to put pictures side by side in WordPress is a valuable skill to have.
As highlighted in a report by Tech.co, visual content plays a pivotal role in effective content marketing strategies. The report underscores the superior performance of web content enriched with visuals, such as images or videos, which can garner up to 94% more views.
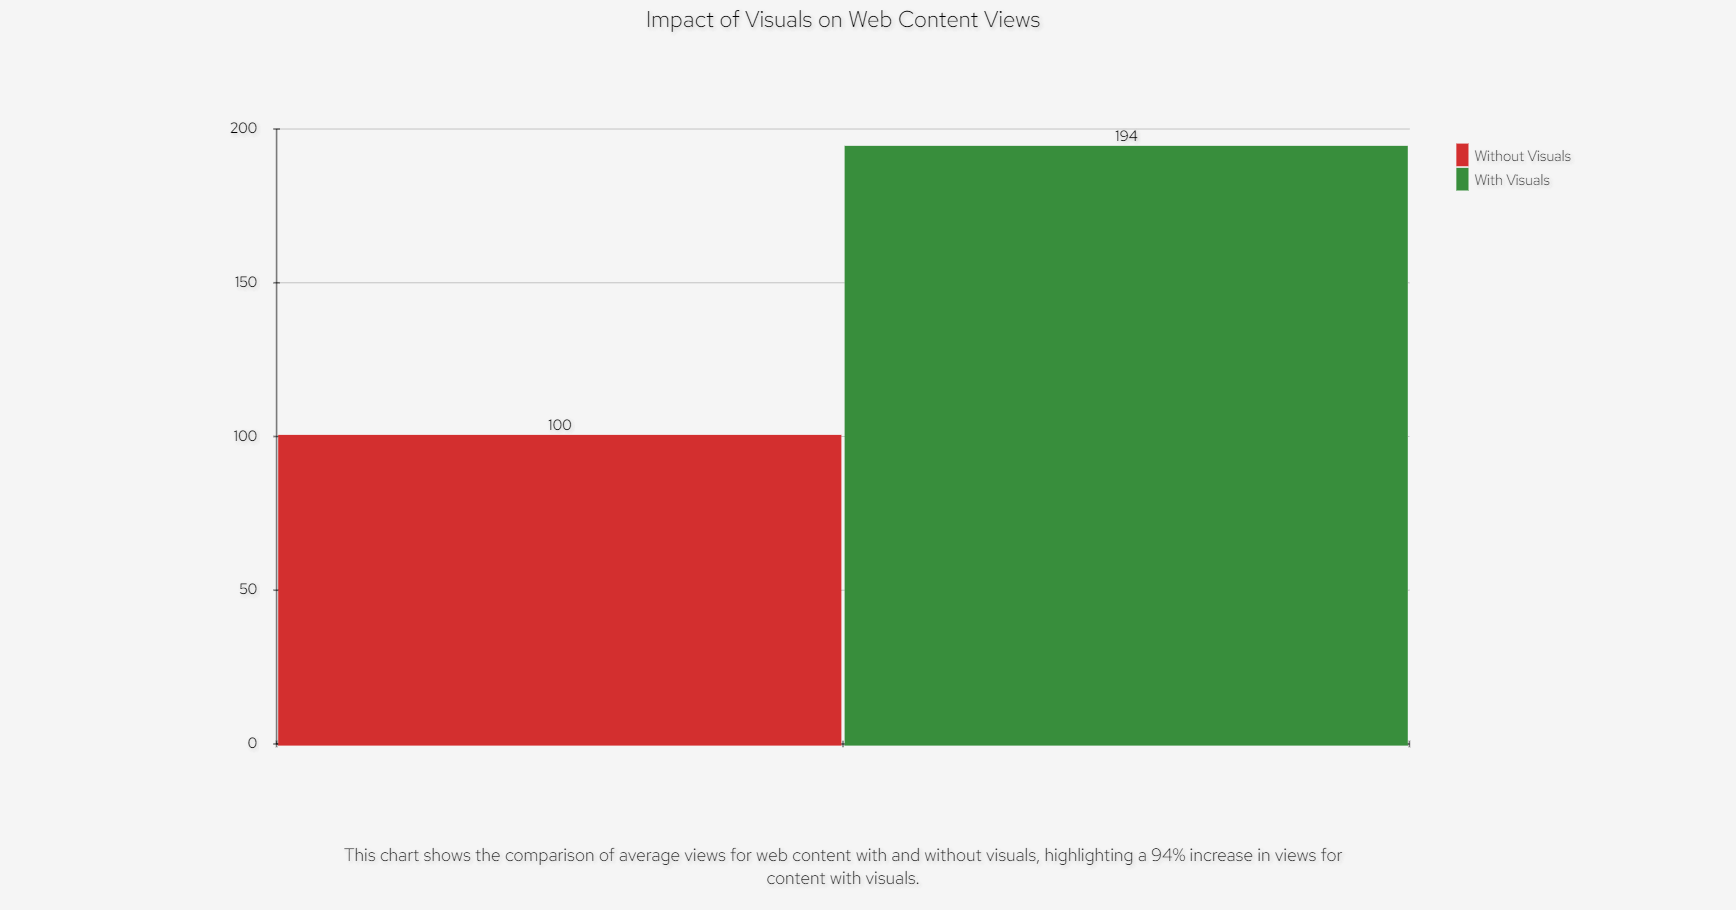
This illustrates the importance of not just including images in your posts but also arranging them nicely.
In this article, you will learn:
- Different ways to put images side by side in WordPress
- Why it’s good to put images side by side
- Answers to common questions about image placement in WordPress
Are you ready to unlock the full potential of your WordPress posts? Let’s dive into the world of image arrangement in WordPress together. I’m going to show you how this simple skill can take your content to the next level.
Stay tuned as we’re about to unravel the secrets that will make your posts stand out.
Table of Contents
4 Ways to Put Two Images Side by Side in WordPress
There are various methods for arranging images side by side in WordPress, each leveraging different tools and functionalities. I will outline 4 straightforward and popular methods for achieving this layout.
For each method, I’ll also provide a detailed analysis of its advantages and disadvantages, giving you the insight to decide which approach best suits your needs.
Let’s begin with the first method.
Way 1: Creating Side-by-Side Images with Column Blocks
If you’re new to WordPress or like things to be simple, using Column Blocks is a great way to put pictures side by side. This method uses something already in WordPress called the Gutenberg block editor. It’s effortless, and you don’t need to add anything extra to your website.
Just follow these steps, and you’ll have your pictures side by side in no time.
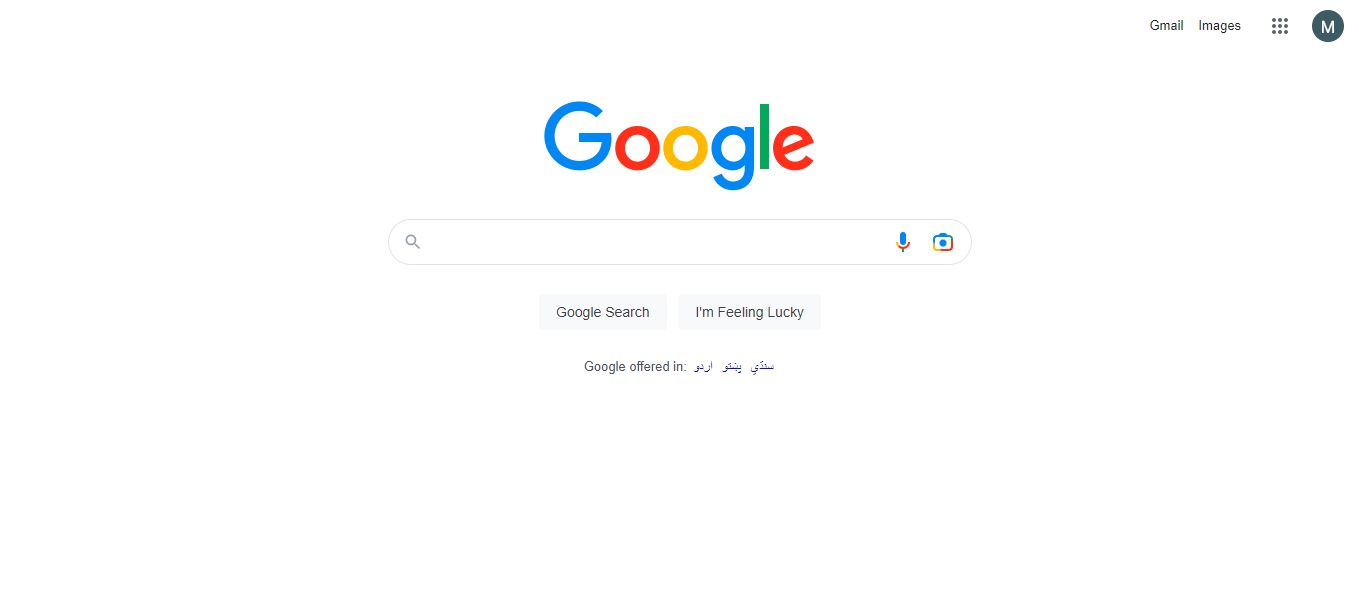
Step 1: To start, launch your preferred web browser. For this particular task, it’s suggested that you utilize “Google” as your search engine, known for its speed and accuracy of search results.
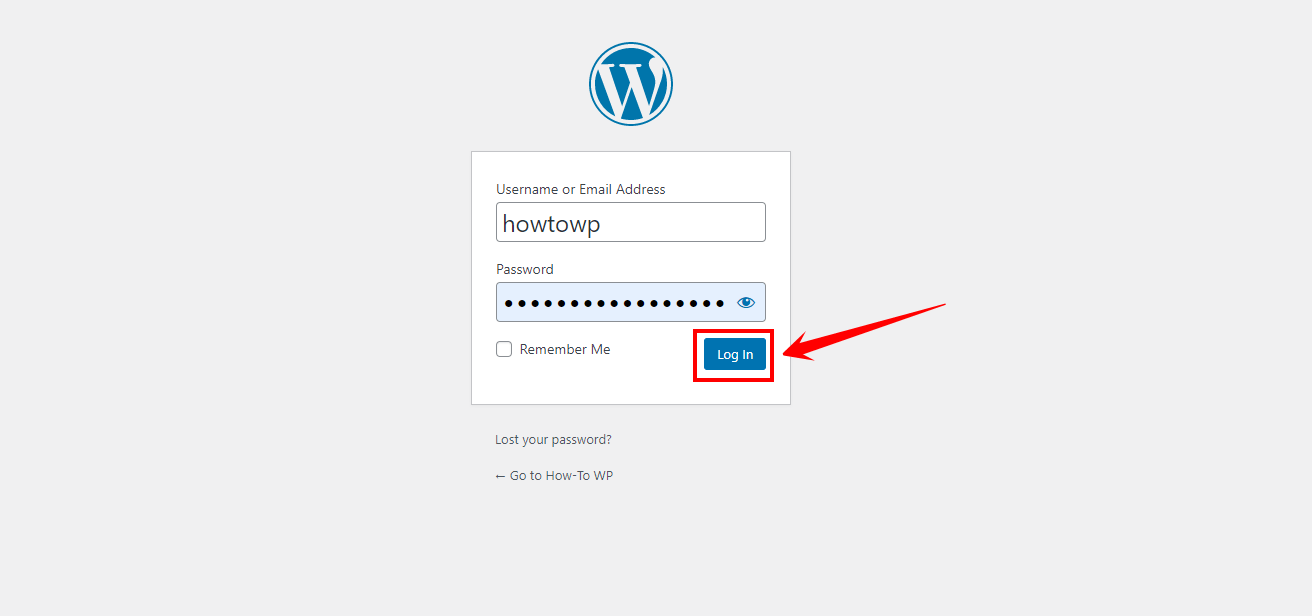
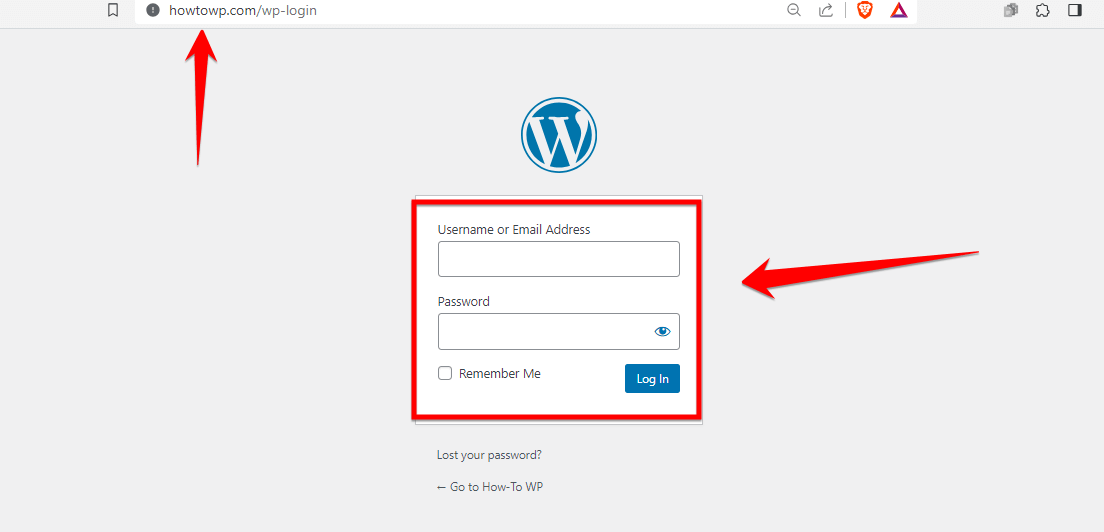
Step 2: Next, navigate to your WordPress website. Upon landing on the WordPress login page, provide your login credentials in the respective fields and click the “Log In” button. Remember to double-check your details for any input errors.
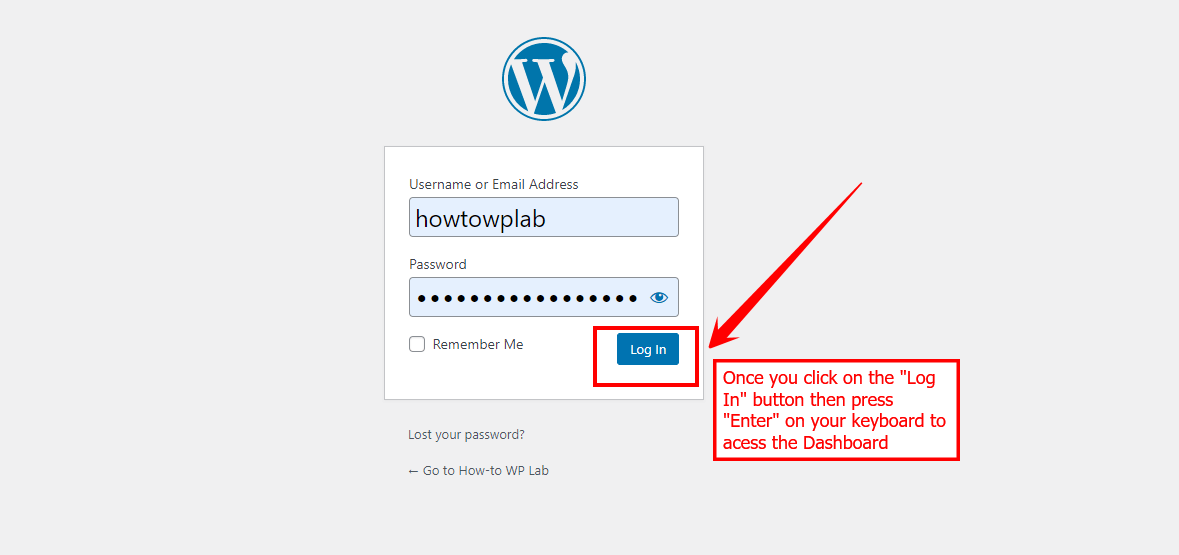
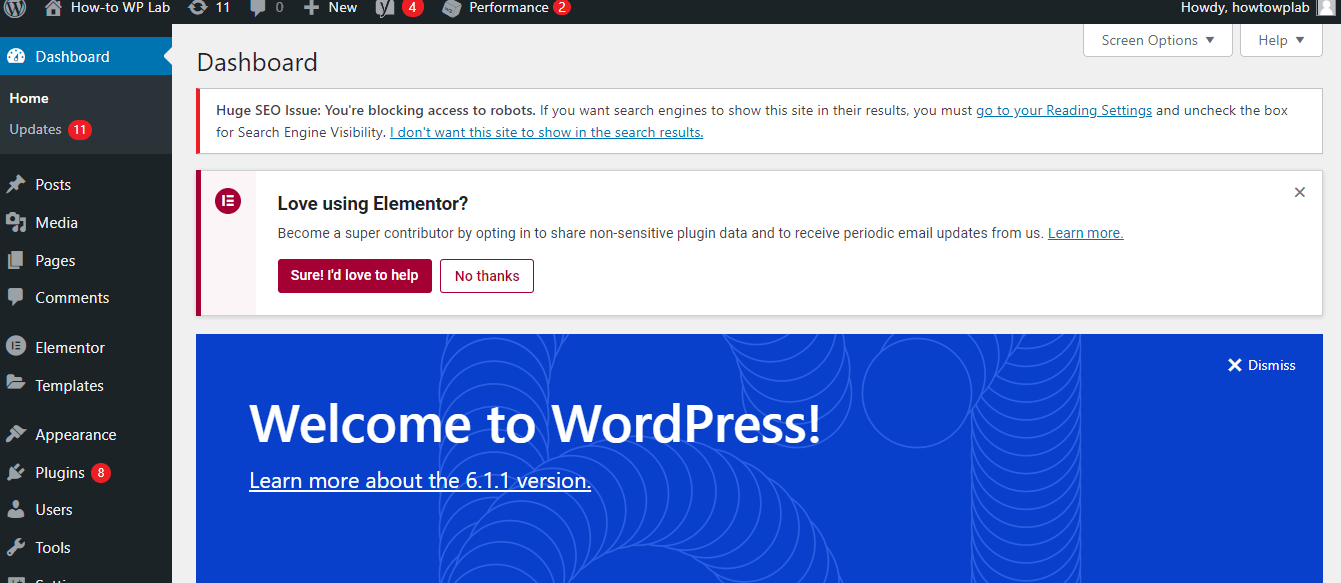
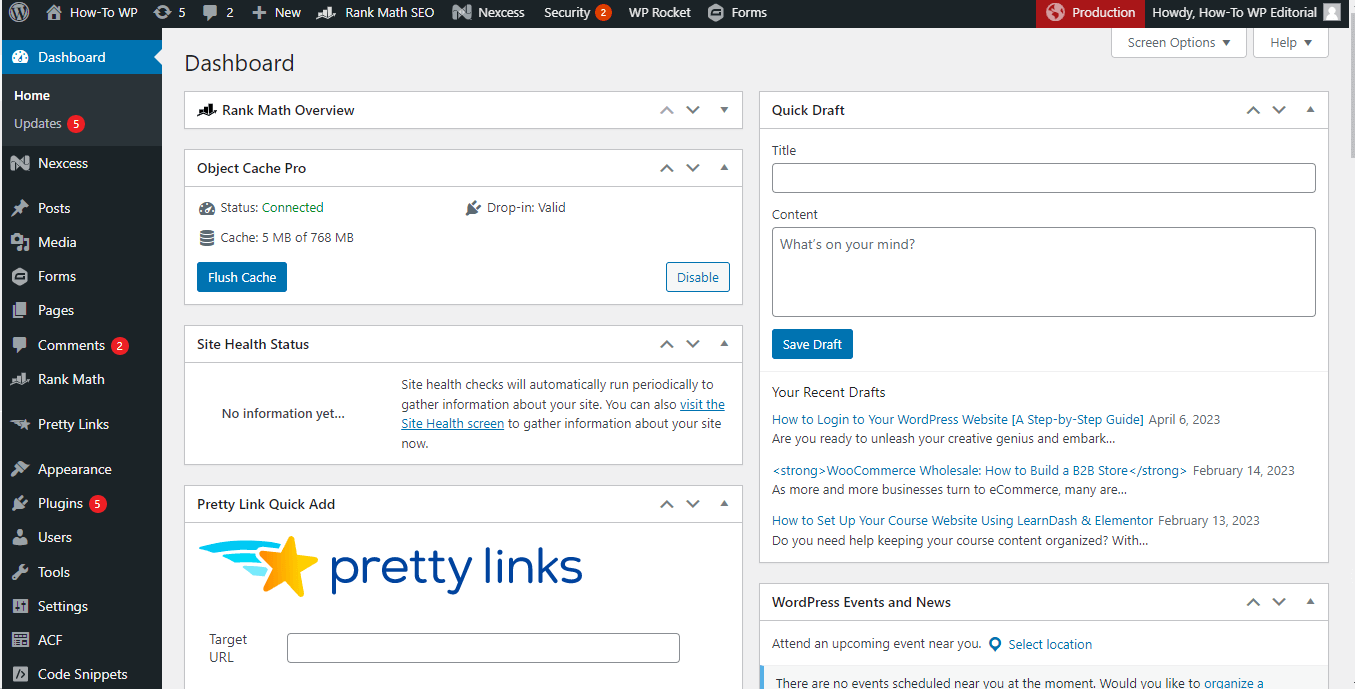
Step 3: Successfully logging in will lead you to the “WordPress dashboard”, the hub for managing all aspects of your site, including posts, pages, themes, plugins, and settings.
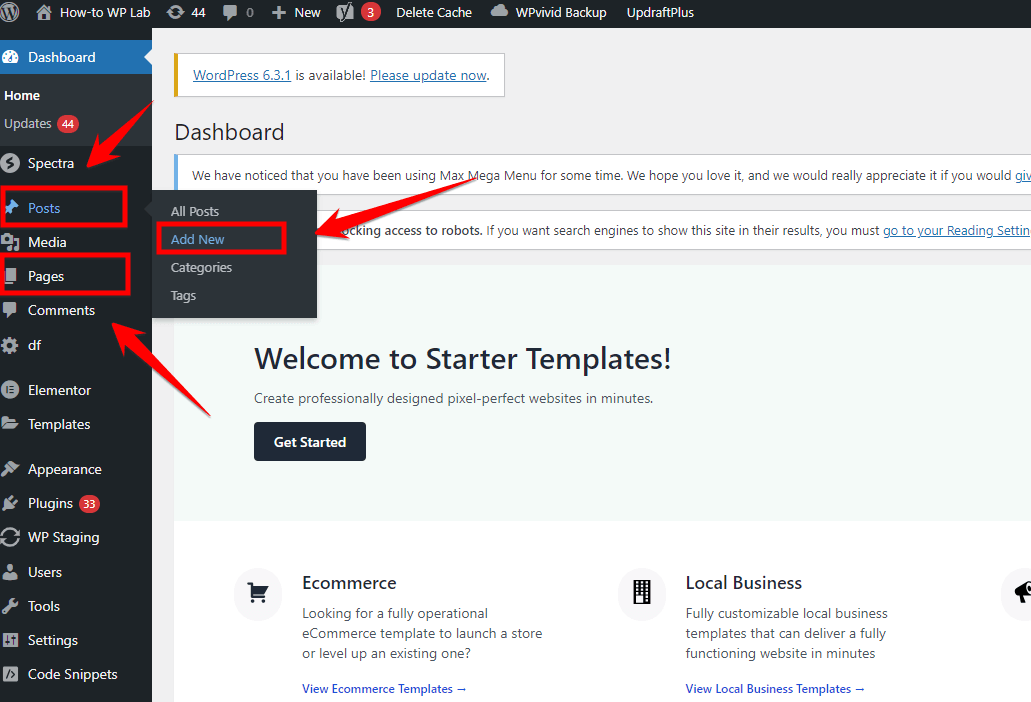
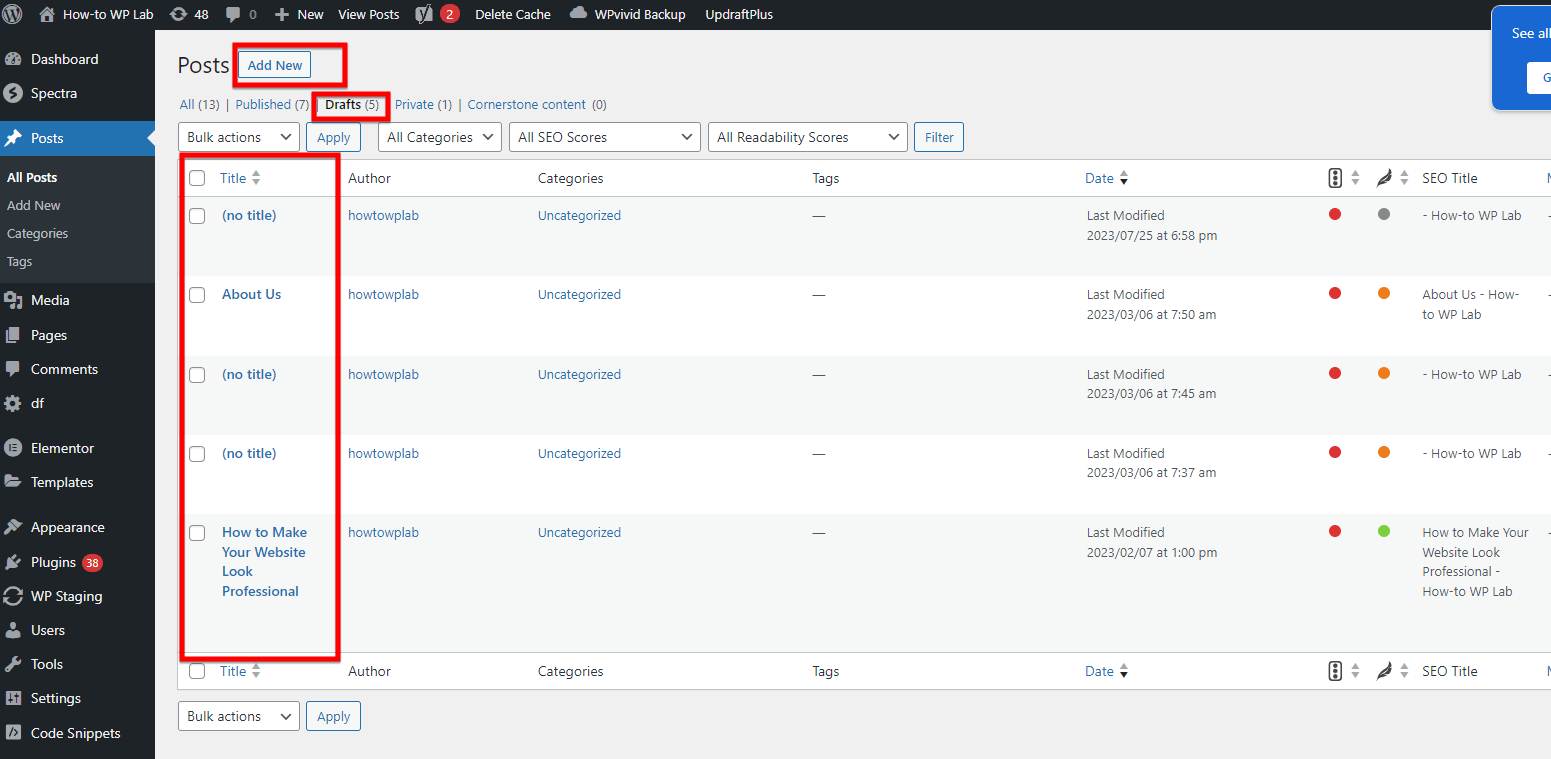
Step 4: It’s time to start creating. Scan the options on the left sidebar of your dashboard and identify options to create a new “Page” or “Post”. Click on your desired choice based on the type of content you’re about to craft.
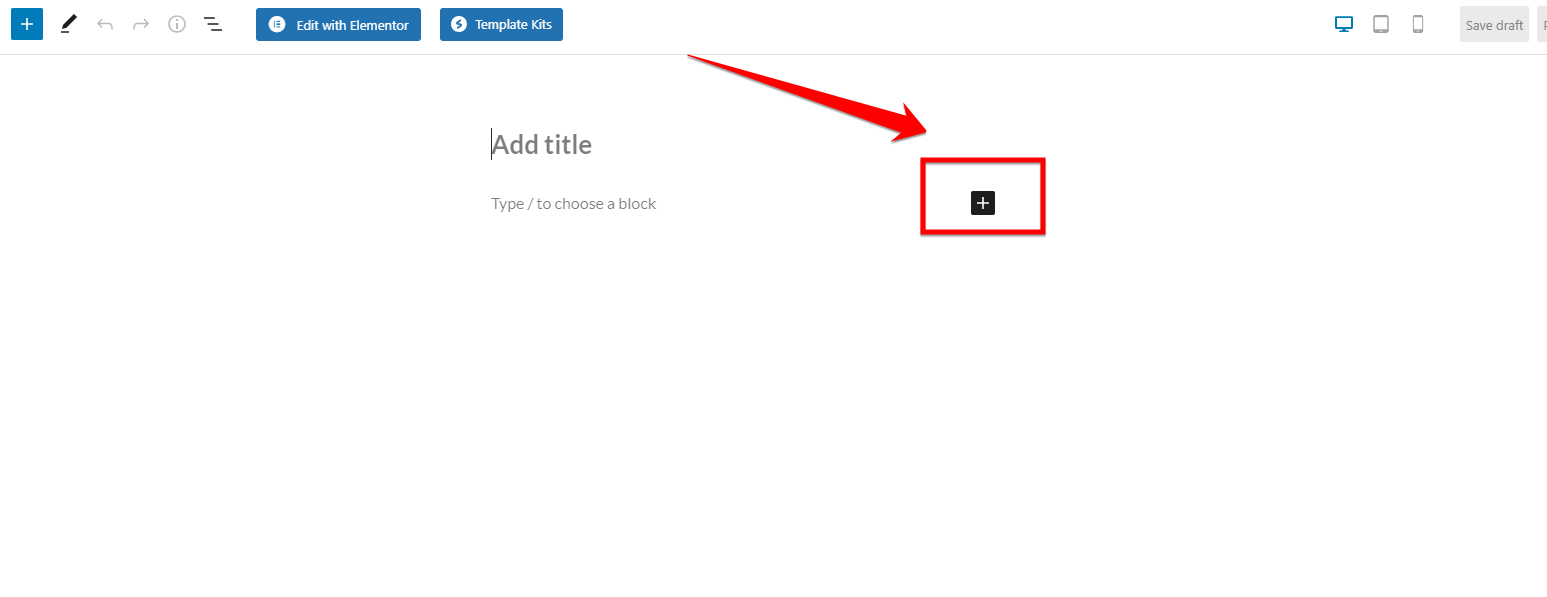
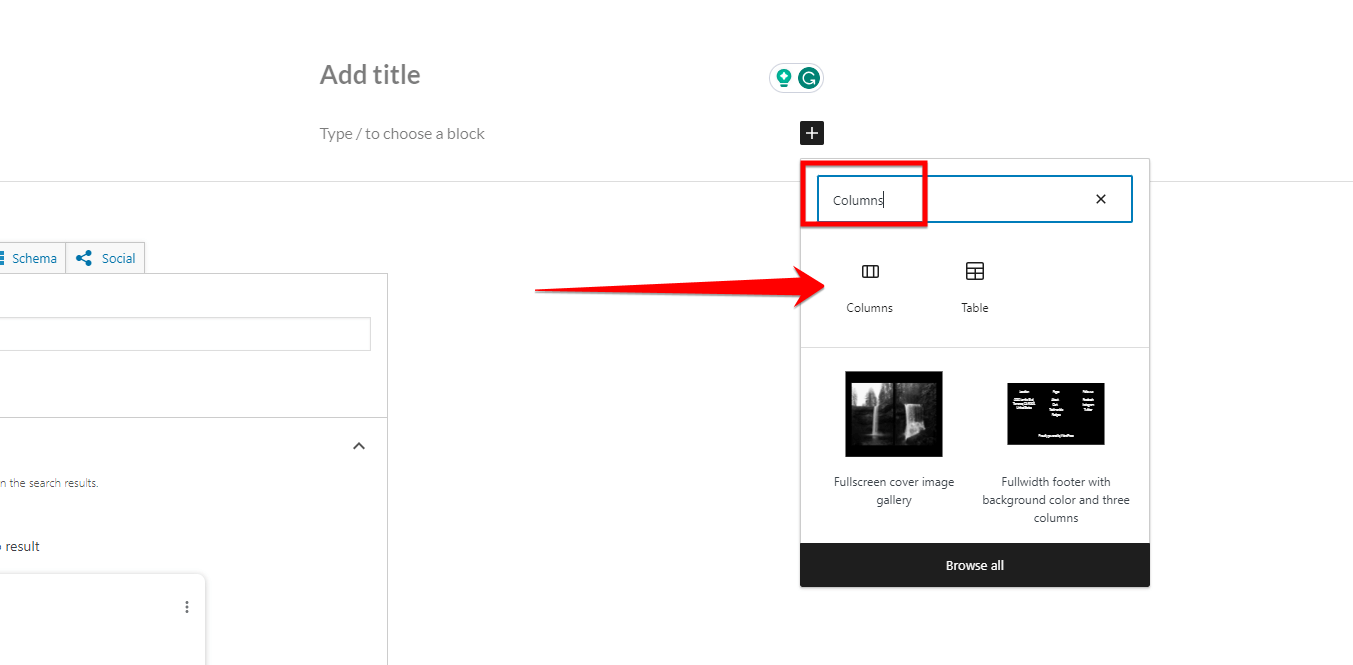
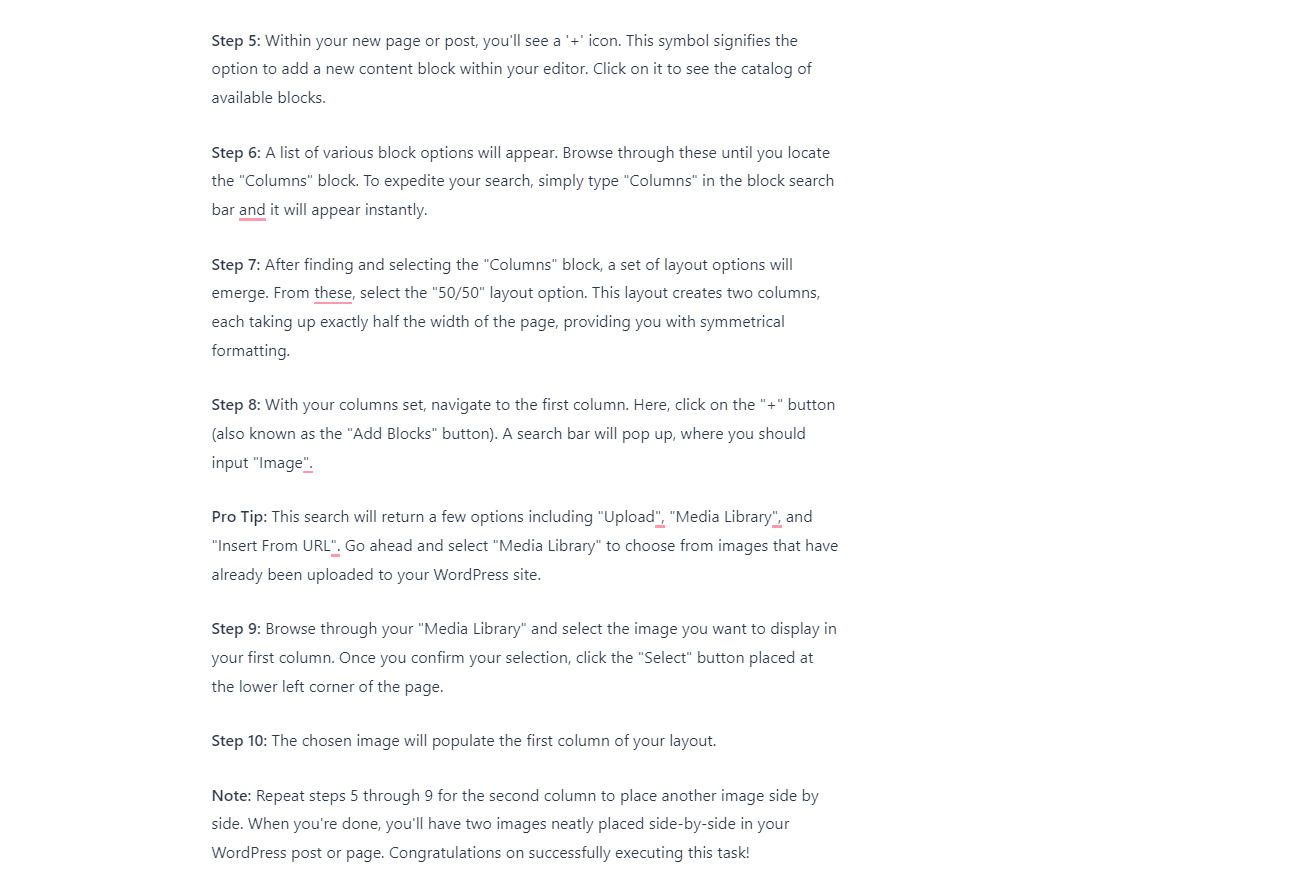
Step 5: Within your new page or post, you’ll see a ‘+’ icon. This symbol signifies the option to add a new content block within your editor. Click on it to see the catalog of available blocks.
Step 6: A list of various block options will appear. Browse through these until you locate the “Columns” block. To expedite your search, simply type “Columns” in the block search bar and it will appear instantly.
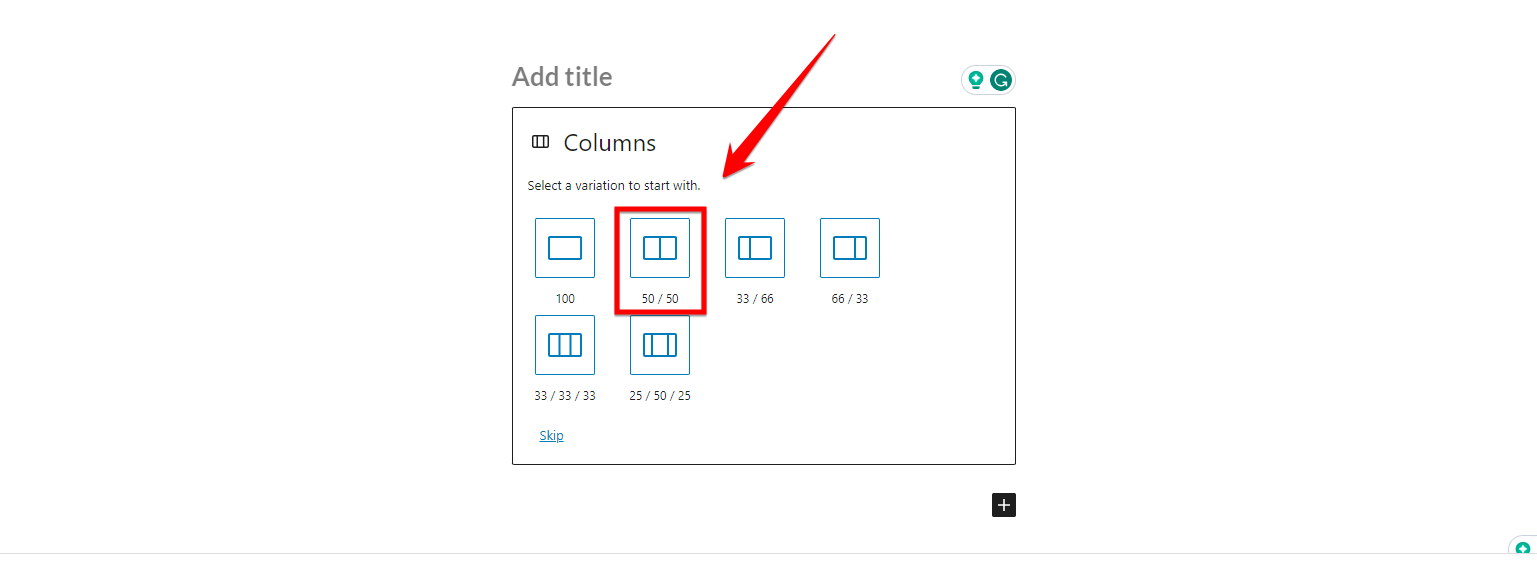
Step 7: After finding and selecting the “Columns” block, a set of layout options will emerge. From these, select the “50/50” layout option. This layout creates two columns, each taking up exactly half the width of the page, providing you with symmetrical formatting.
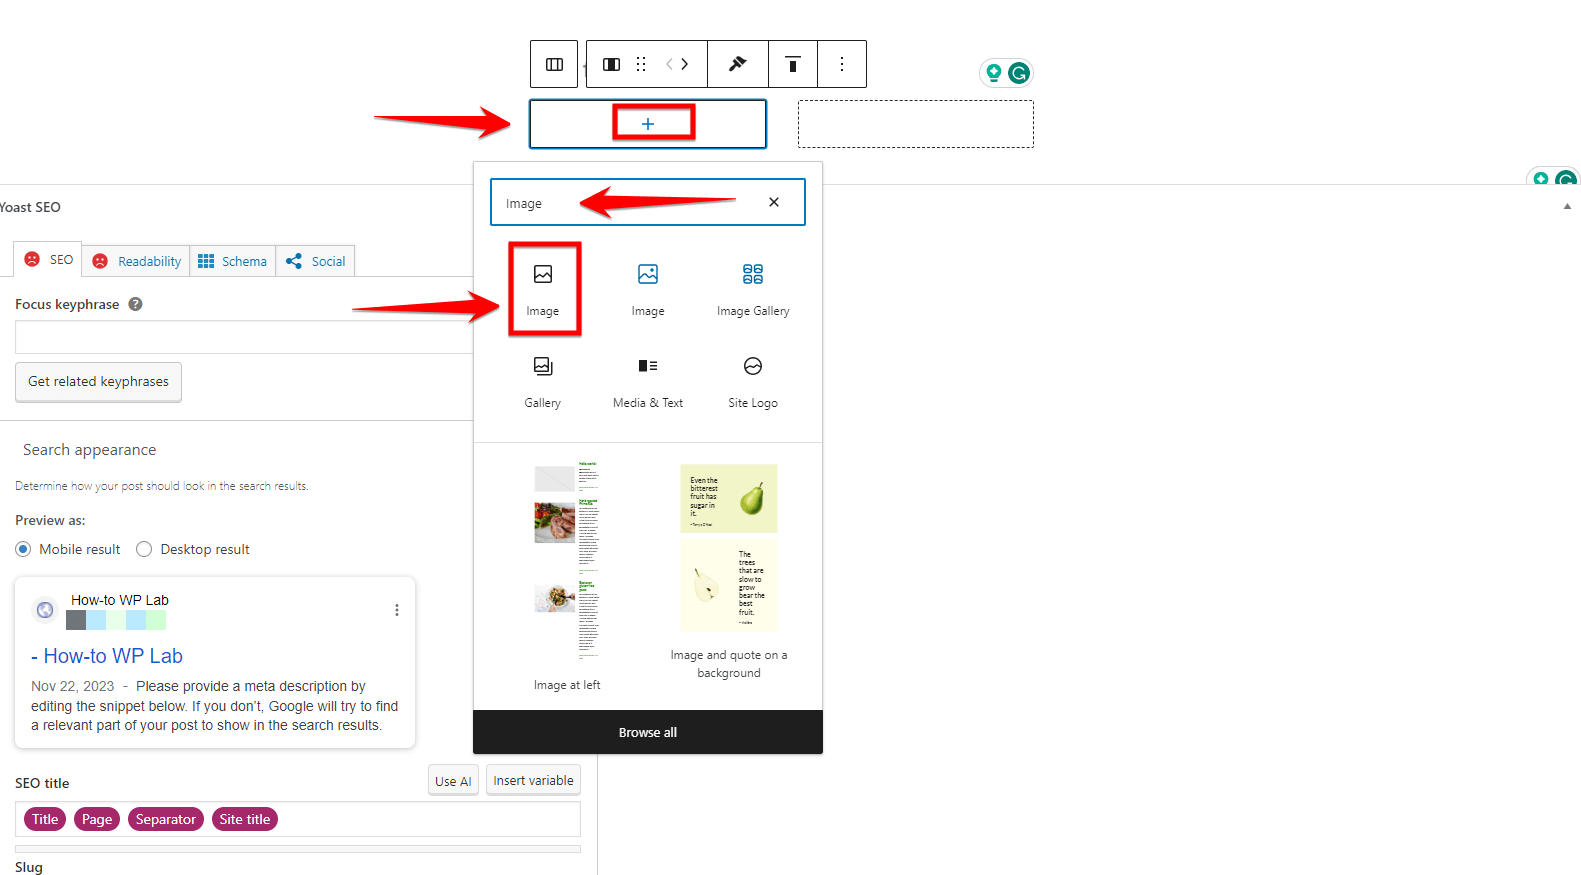
Step 8: With your columns set, navigate to the first column. Here, click on the “+” button (also known as the “Add Blocks” button). A search bar will pop up, where you should input “Image”.
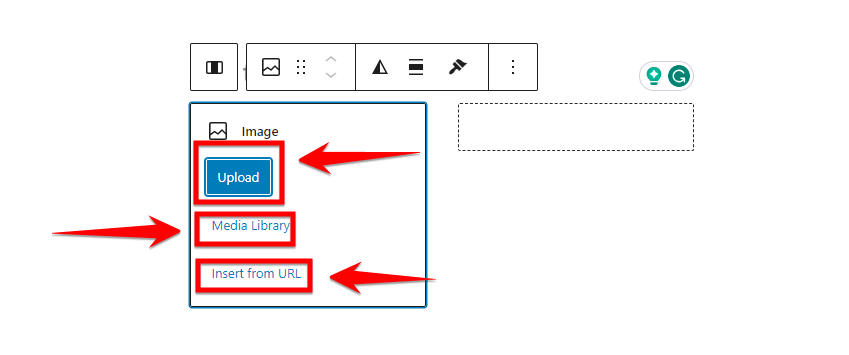
Pro Tip: This search will return a few options including “Upload”, “Media Library”, and “Insert From URL”. Go ahead and select “Media Library” to choose from images that have already been uploaded to your WordPress site.
Step 9: Browse through your “Media Library” and select the image you want to display in your first column. Once you confirm your selection, click the “Select” button placed at the lower left corner of the page.
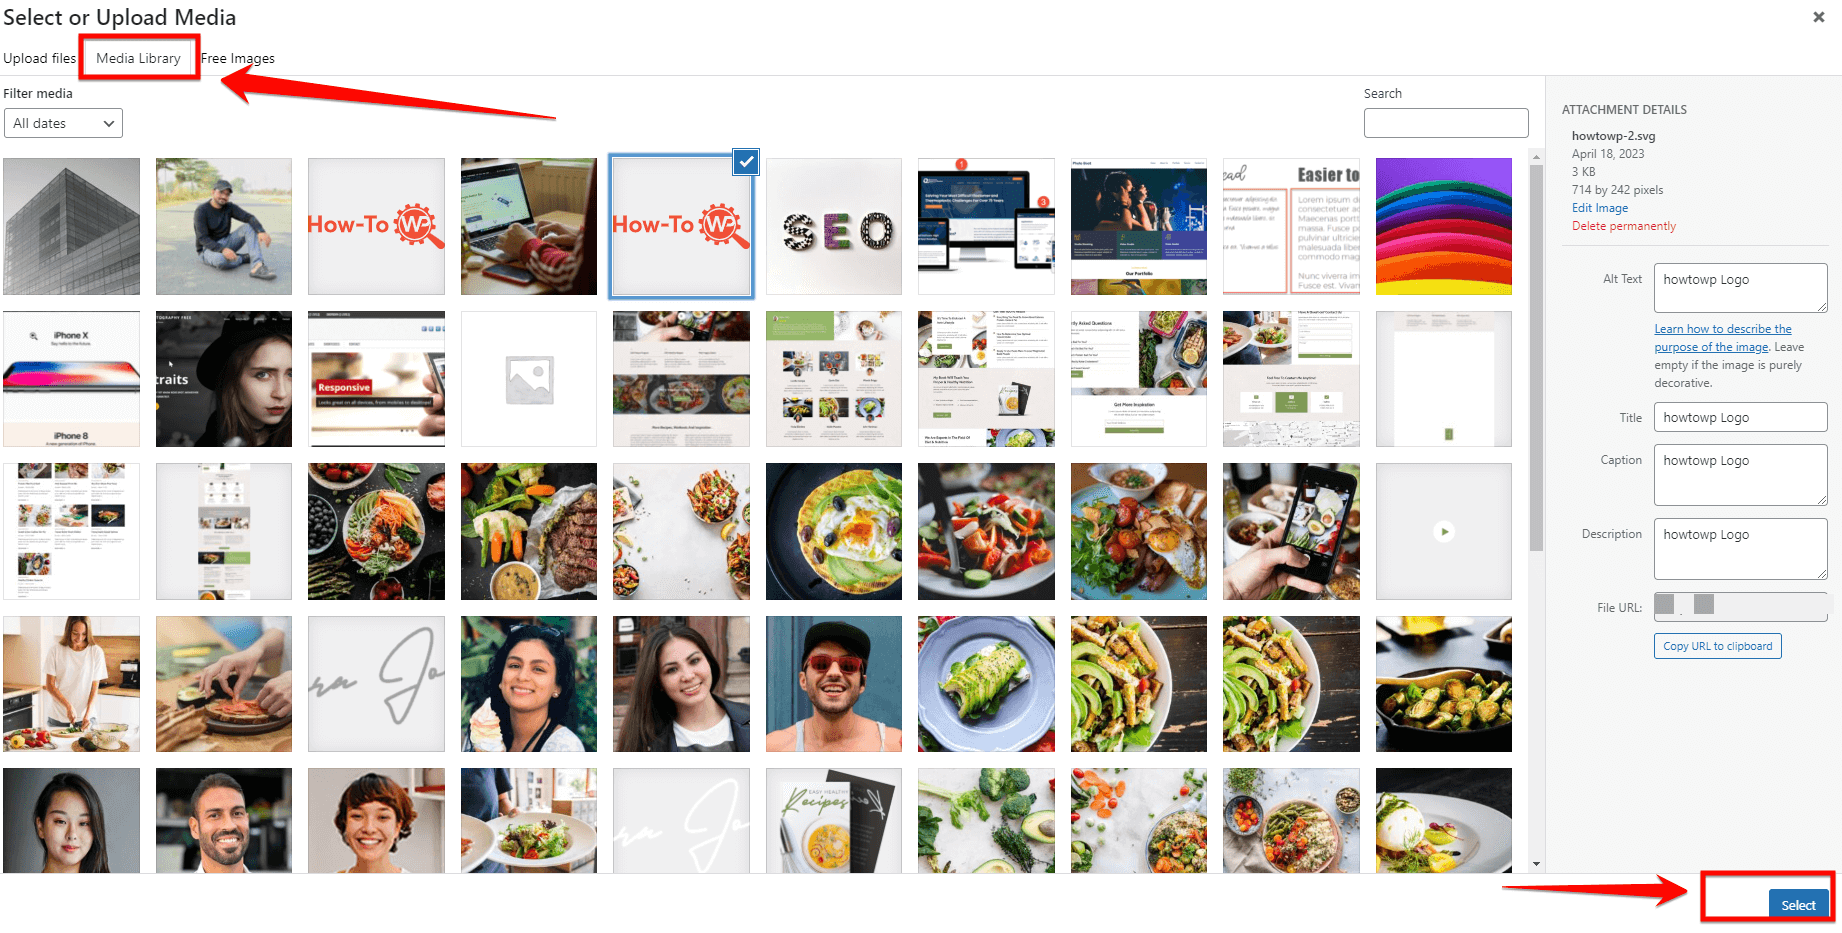
Step 10: The chosen image will populate the first column of your layout.
Note: Repeat steps 5 through 9 for the second column to place another image side by side. When you’re done, you’ll have two images neatly placed side-by-side in your WordPress post or page.
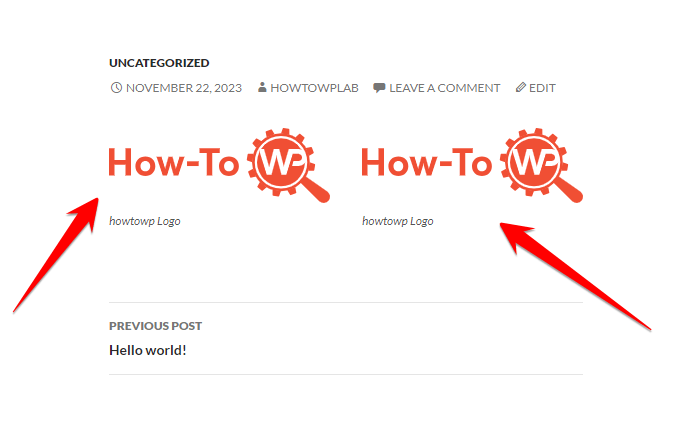
Congratulations on successfully executing this task!
Pros:
- User-Friendly: Ideal for WordPress beginners, with an easy-to-use interface.
- No Need for Extra Plugins: Works with WordPress’s built-in features, reducing the need for additional software and keeping your site faster.
- Various Layout Options: Offers a range of column layouts, giving you the flexibility to design as per your preference.
- Automatically Adjusts for Mobile Devices: Ensures that your images look good on all screen sizes, from desktops to smartphones.
- Customizable Column and Image Sizes: Allows you to adjust the width of the columns and the size of the images, giving you control over the appearance.
Cons:
- Limited Design Options: The styling capabilities are more basic compared to advanced plugins, which might be limiting if you’re looking for sophisticated designs.
- Possible Need for Coding: For specific styles or advanced customization, you may need to use some CSS code, which requires a bit of technical knowledge.
Way 2: Using the Row Block for Side-by-Side Images
Row blocks in WordPress are another easy method for arranging images side by side. This method is especially handy if you’re looking for a bit more control over the layout compared to column blocks. It’s still simple to use and doesn’t require any extra plugins.
Note: Row blocks are great for creating neat, aligned rows of images, perfect for showcasing a series or creating a clean, organized look.
Simply follow a few straightforward steps, and you’ll be able to seamlessly combine your photos.
Notice
As we move ahead, please note that I’ll only describe unique steps. For steps identical to Method 1, please refer back to them. I’ll remind you about these shared steps later on, right before presenting the pros and cons.
Now, let’s start with the steps.
Step 1: Open your internet browser and visit your website’s dashboard login URL. Enter your login credentials, which typically comprise your username and password. After filling in these details, click on the “Log in” button.
Step 2: Once you’ve logged in successfully, you’ll be automatically redirected to your dashboard. This is your command center, where you’ll be able to modify and control the features of your website.
Step 3: Within the dashboard, go to the specific WordPress section where all your posts or articles are showcased. This could be under the “posts” or “pages” section, depending on your individual setup.
Step 4: Here, you have two paths: create a new post/page or edit an existing one. If you wish to edit an existing article, locate it from the list and click on its “Edit” link. On the other hand, if your aim is to create a new article or page, click on the “Add New” button to commence.
Step 5: Once you’re in the editing mode, look for a “+” symbol, usually located towards the top of the page or in the top corner of the text block you’re working in. This “+” icon is the block inserter; it allows you to add different types of content blocks (like paragraphs, images, and more) to your post or page.
Step 6: Click on this “+” icon, and a search bar will appear. In this search bar, type “Row layout”. As you start typing, a list of related layout types will appear underneath.

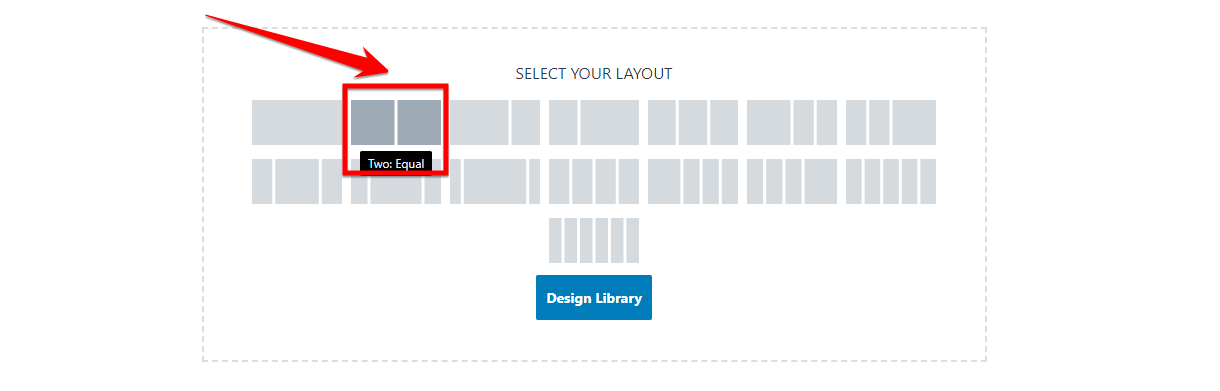
Step 7: Look through the displayed list for an icon representing the “Row layout”. Once you find it, click on this icon, and you’ll notice multiple layout options. In these options, select the “Two: Equal” layout; this will divide your page into two equal sections or columns.
Note: You’ve now successfully reached the end of your first method of modifying in WordPress. It is now time for you to progress through steps 5 to 10, following along carefully and executing each step properly.
Note: Great job, now you’re ready to follow steps 5 through 10 in the initial method 1.
Pros
- Simple Layout Option – Row blocks offer a straightforward approach to line up images horizontally.
- Flexible Additions – Each cell within a row can hold different types of blocks, not just images.
- Clutter-Free Reality – It breaks up the monotony of vertical image placements, resulting in an enjoyable reading experience.
- Responsive Design – Row blocks ensure your side-by-side images adapt well for different screen sizes.
- No Additional Plugins Needed – It’s included in the Gutenberg block editor, eliminating the need for third-party plugins.
Cons
- Limited Stylization – While reliable for creating rows, it lacks in-depth customization options, unlike a few specialized plugins.
- Alignment Challenges – While the design adjusts for different screen sizes, it may occasionally require tweaking to get the alignment just right.
Way 3: Creating Side-by-Side Images with Gutenberg’s Gallery Block
Here, we are at the third method on our list. This time, I’m going to introduce you to the Gutenberg Block Editor’s Gallery Block. If you, like many other WordPress users, frequently need to manage multiple images within your content, this method is for you.
Your posts will be greatly enhanced by using the Gallery Block to intentionally arrange side-by-side images. This built-in, easy-to-use approach is an excellent option for bloggers, marketers, and businesses that consistently work with visual storytelling in their posts.
Now, are you ready to give your content a better aesthetic touch? So, without further ado, let’s jump right in!
Follow these steps to put your images side by side using the Gallery Block:
Step 1: Open your web browser, enter your WordPress site’s URL, login with your username and password.
Step 2: Once you are successfully logged in, proceed to your personalized WordPress “Dashboard”.
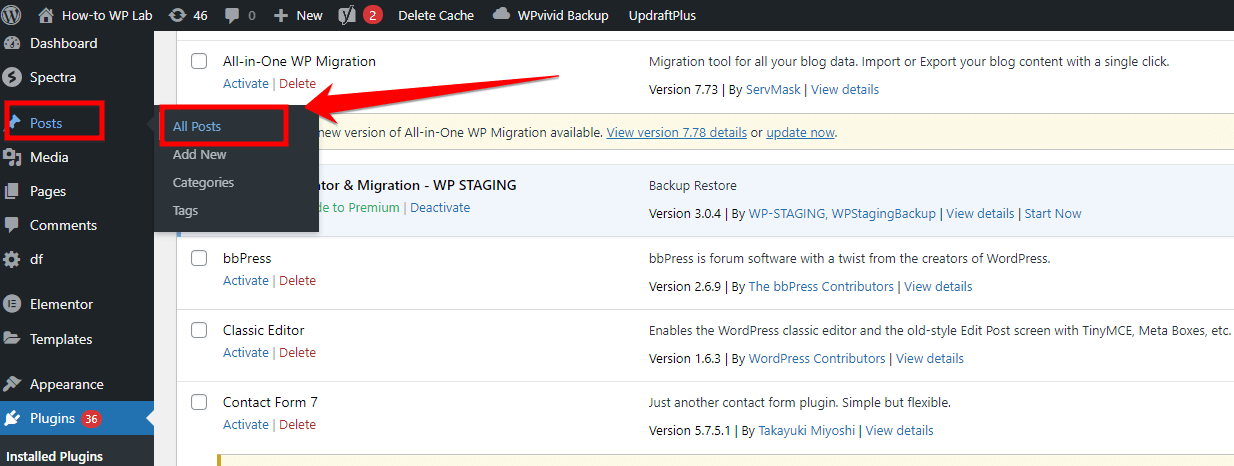
Step 3: In the dashboard, locate the “Posts” option in the left-hand sidebar. Click on it and select “Add New” to generate a new post. Alternatively, if you want to modify an existing post, click on “All Posts,” seek out the desired post to be edited, and click on “Edit.”
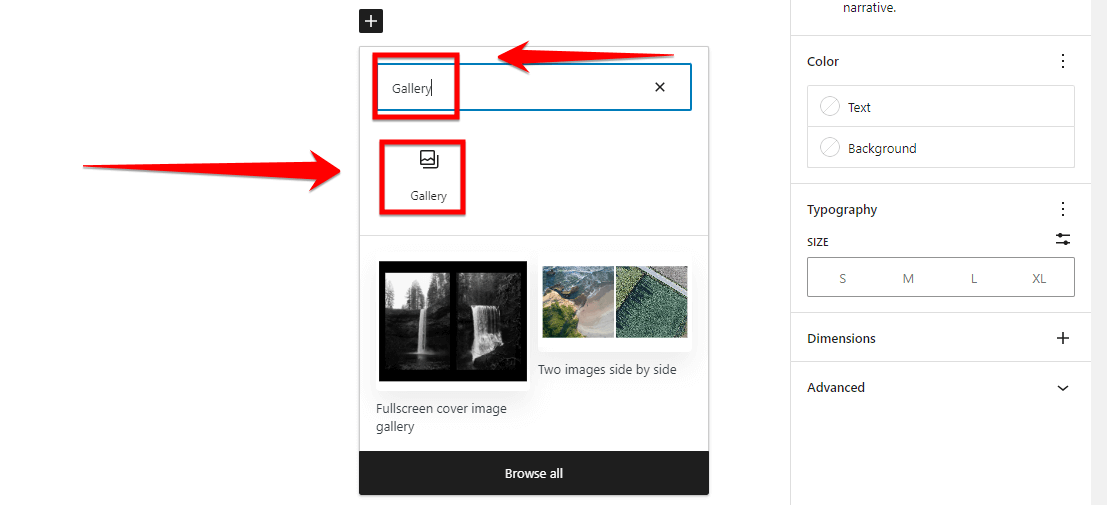
Step 4: To incorporate a new block, click on the “+” symbol.
Step 5: Moving forward, from the dropdown list, steer toward the “Gallery” block.
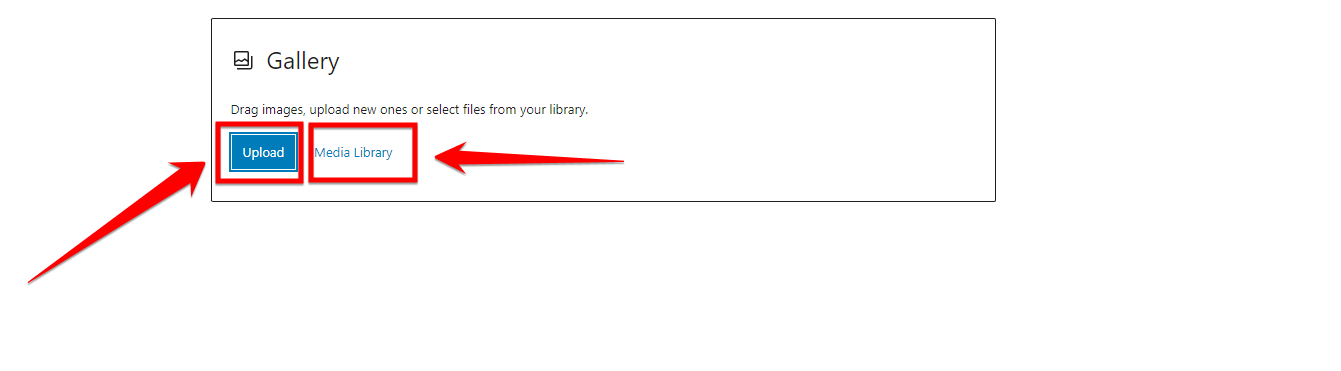
Step 6: To add images, click the “Upload” button and select files from your computer. Alternatively, you can select the ” Media Library ” button to use images that are already in your media library.
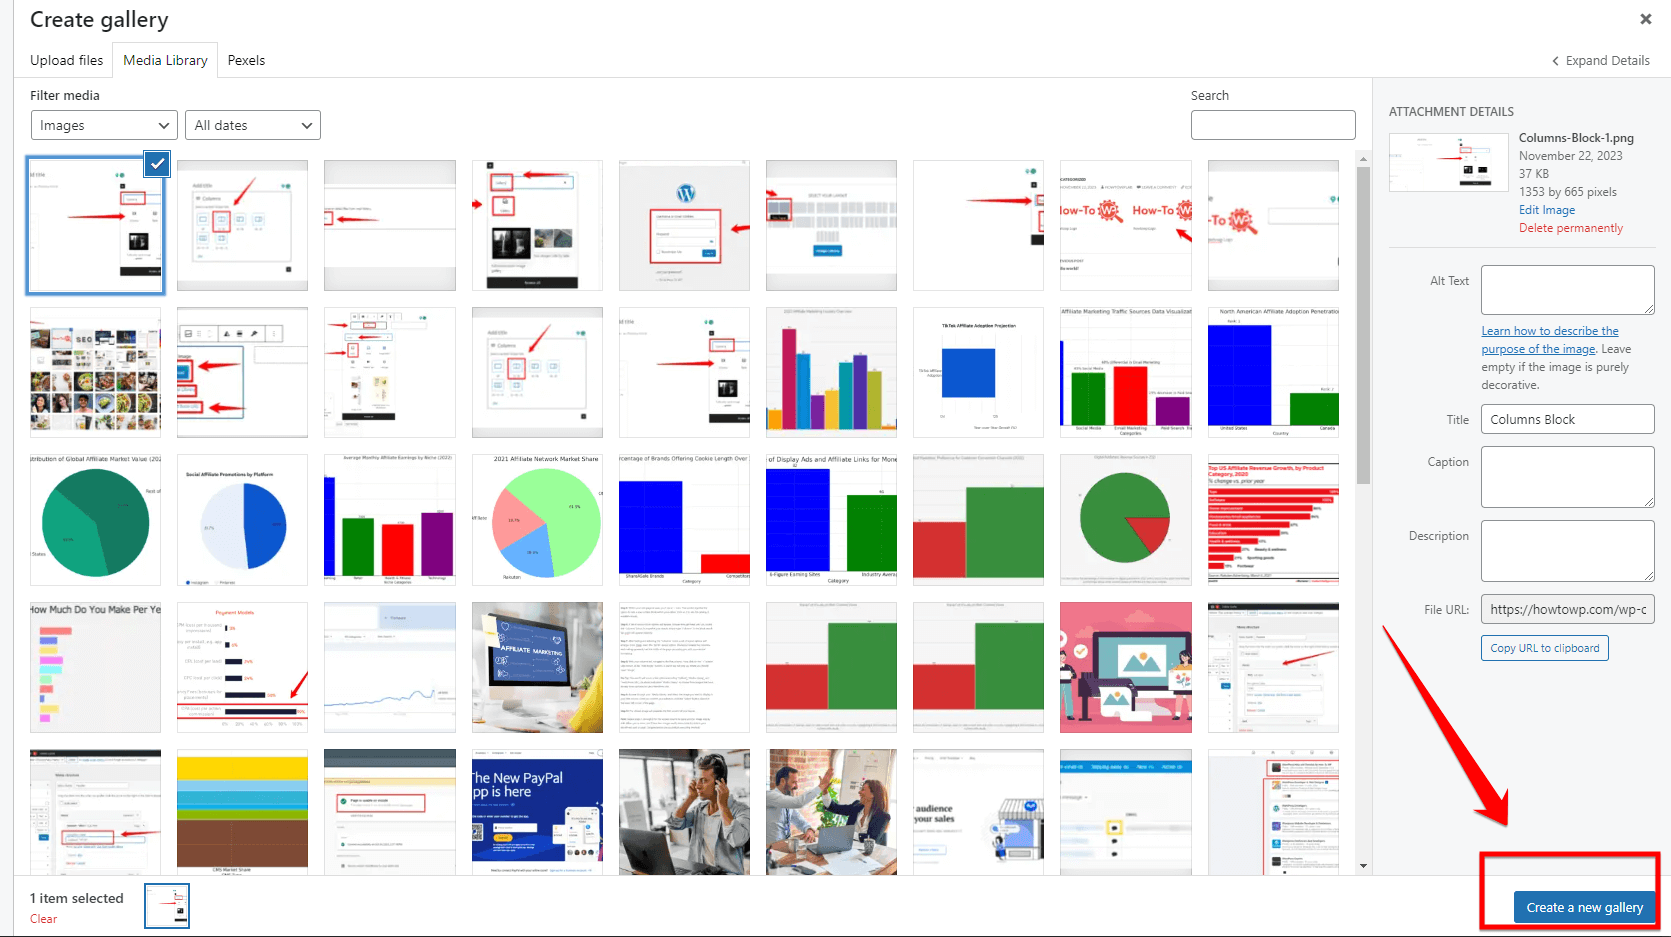
Step 7: Select your desired images by clicking on them (hold CTRL or CMD for multiple selections), then click “Open” to upload. Chosen images will be marked with a check.
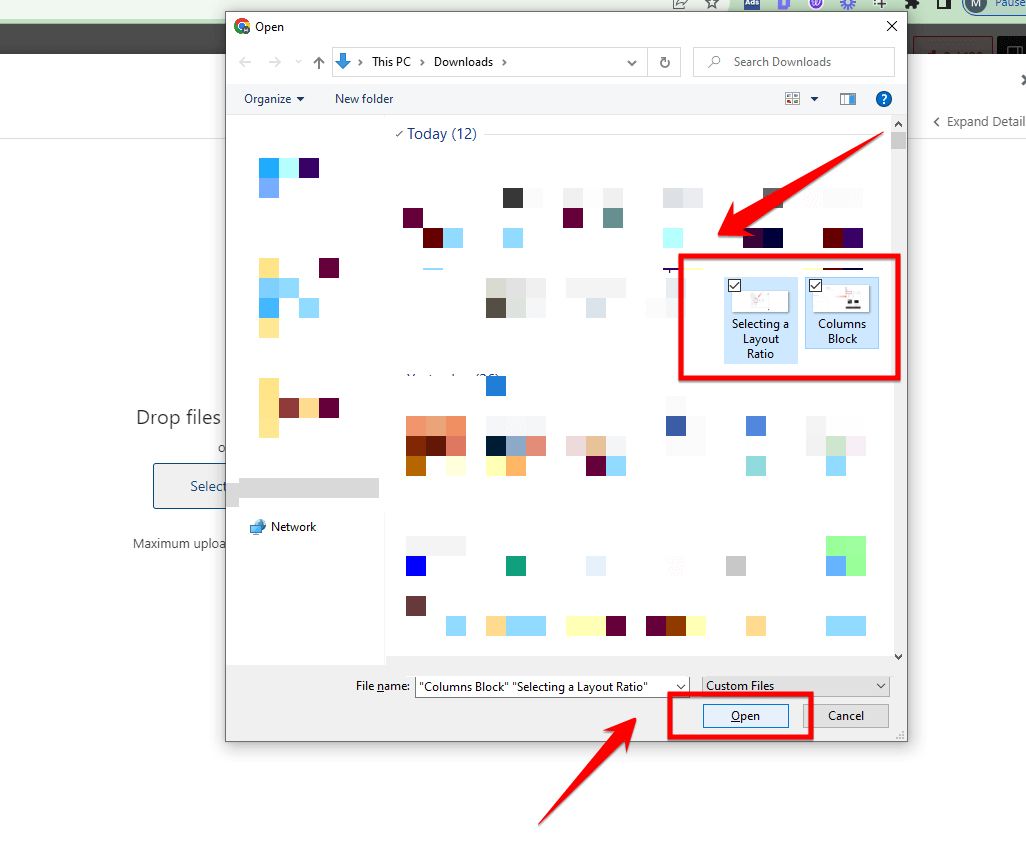
Step 8: After selecting your preference in images, hit the “Create a new gallery” button located at the bottom right.
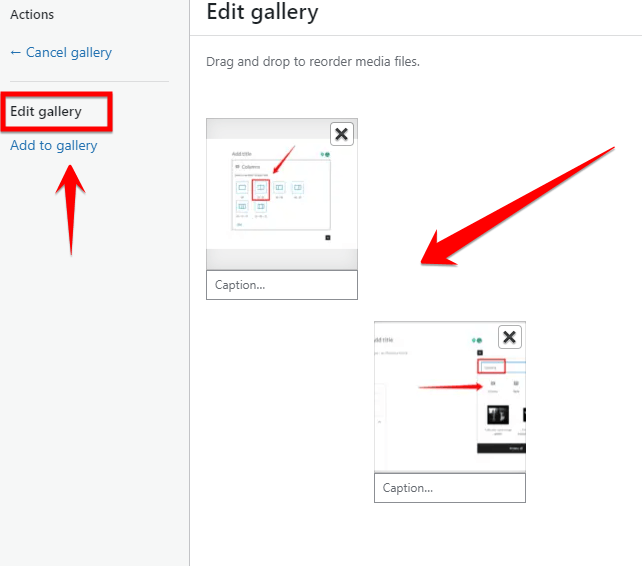
Step 9: Upon reaching the Edit Gallery page, rearrange your images in your desired sequence by dragging. Optionally, you can also write captions below each image for better user understanding.
Step 10: Once you have arranged and written captions for the images (if required), insert your gallery by clicking on the “Insert gallery” button.
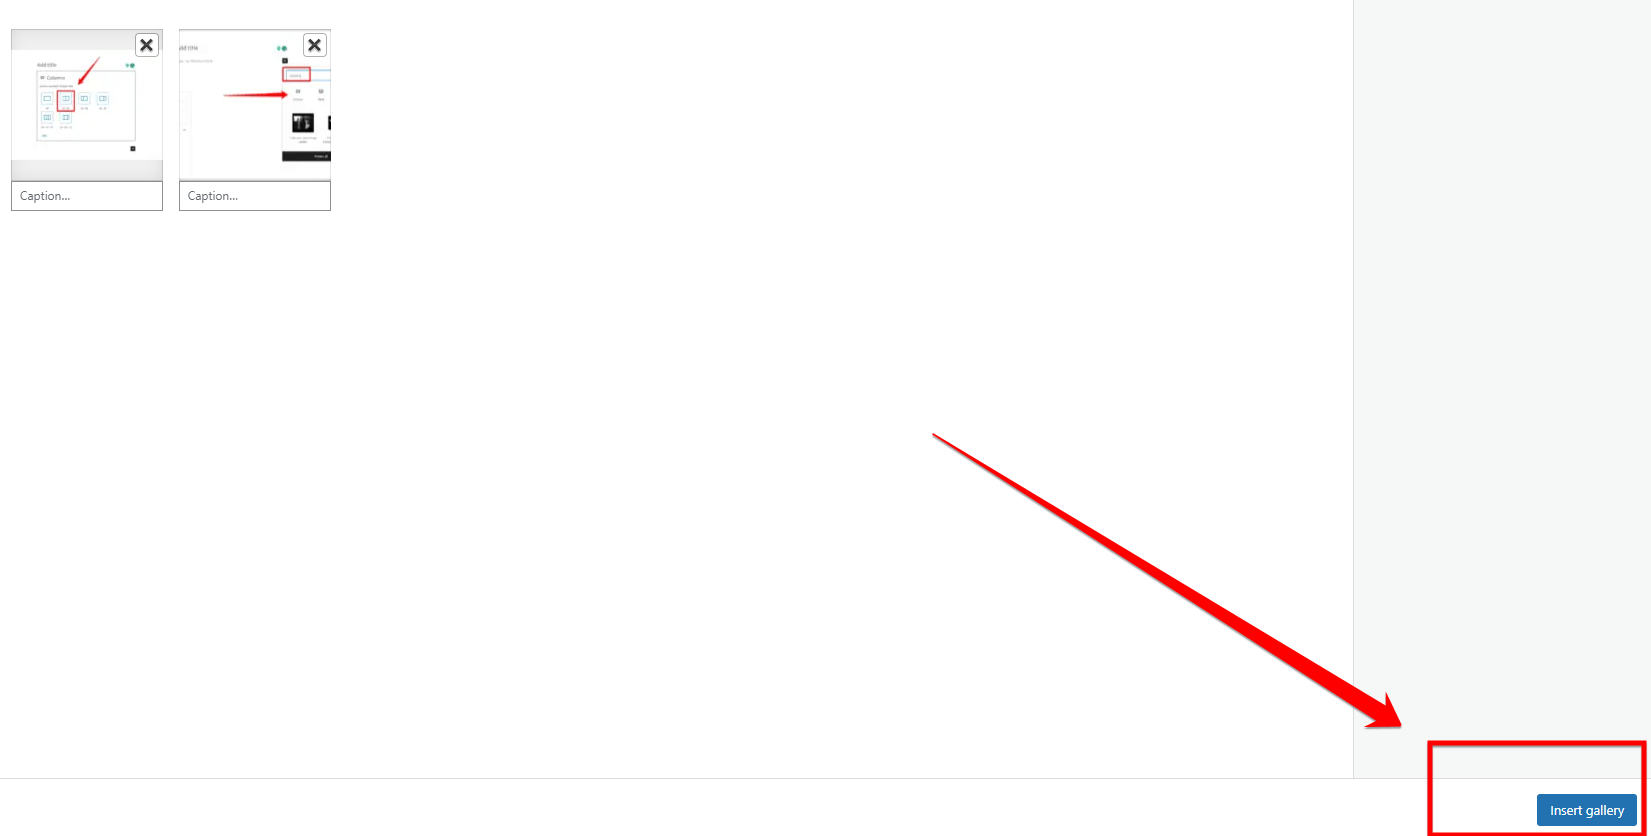
Note: The Gutenberg editor in WordPress has a smart feature to adjust the size and layout of the images automatically to ensure they fit perfectly within the gallery block.
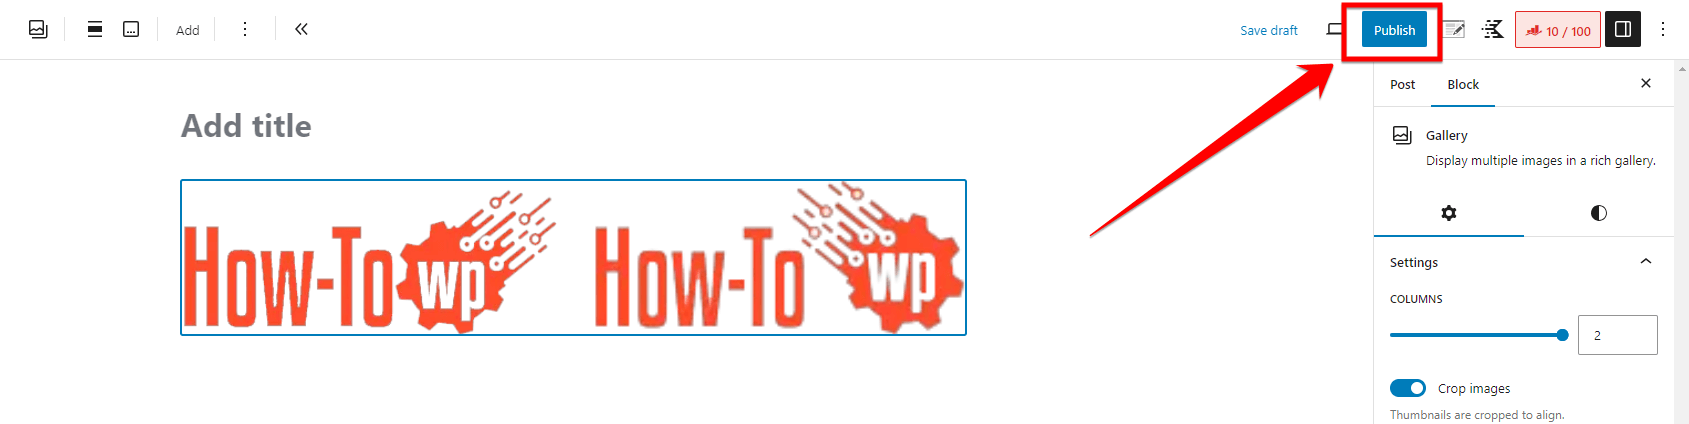
Step 11: If you intend to display multiple images side-by-side, click on the gallery block and select “columns.” Here, you input the desired number, which could be 2 (for two images) or any other number for multiple images.
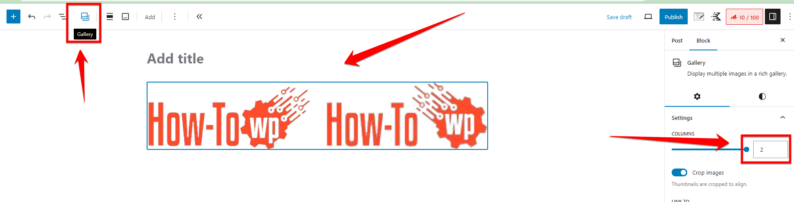
Step 12: Lastly, to retain the changes made, click on “Update” or “Publish,” depending on the status of the post (whether it’s new or already been published).
A Pro Tip: Do a quick preview of your post before making it public to verify and ensure that your images are arranged according to your preference. This helps carry precise information visually and aesthetically.
Pros
- Efficient Image Management – Easily handle multiple images within a single interface.
- Flexibility – Opt for two or more side-by-side pictures based on your layout requirements.
- Automatic Adjustment – Skip the hassle of manually resizing; it’s done automatically.
- Caption Option – Add extra insights with optional captions under each image.
- Built-in Functionality – No plugin installation is necessary; it’s a built-in Gutenberg feature.
Cons
- Limited Stylizing Features – Gallery Block is reliable but lacks the advanced stylizing options offered by some plugins.
- Possible Layout Issues – The automatic layout adjustments might sometimes align with your layout vision.
Way 4: Creating Side-by-Side Images Using Table Blocks
As we proceed further through this tutorial, up next is our fourth method, which employs Table Blocks to create striking side-by-side images. The Table Block, although primarily intended for tabular data, lends itself ingeniously to the task of formatting images. This method could be a game-changer, especially if you desire to experiment beyond the standard image block or if you wish to couple your images with a textual explanation.
So, if you belong to a group of bloggers, product reviewers, or digital marketers who regularly incorporate images with text, this technique might just hit the bulls-eye for you. Sounds intriguing, doesn’t it?
But don’t just take my word for it; let’s explore this together. Let’s move on and dive into the step-by-step procedure for creating side-by-side images using Table Blocks:
Step 1: Go to your website’s login URL and enter your login credentials to access your WordPress dashboard.
Step 2: From your WordPress dashboard, navigate to the page or post where you want to place side-by-side images.
Step 3: Click on the “+” button (Add Block) in the top left corner or within the post/page body to add a new block.
Step 4: Search for “Table” in the block search box and click on it.

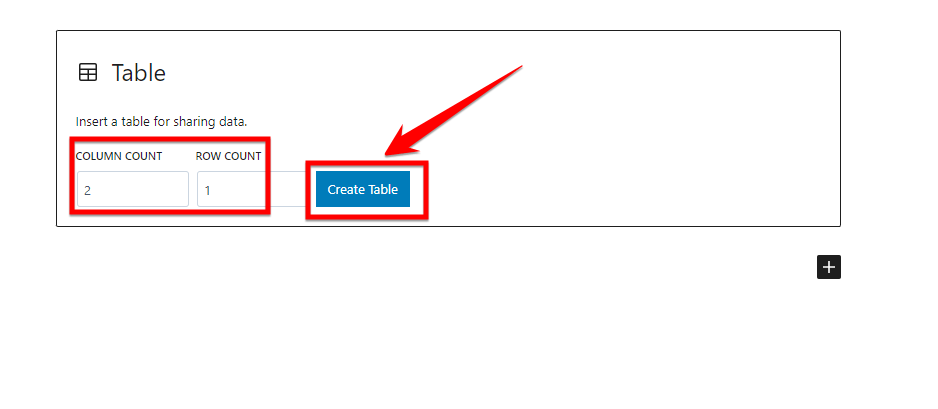
Step 5: Set the table to have 2 columns and 1 row and click “Create Table”.
Step 6: Following the table creation, locate the “⬇️” (down arrow) indicating “More”. From the available options, choose “Inline Image”.
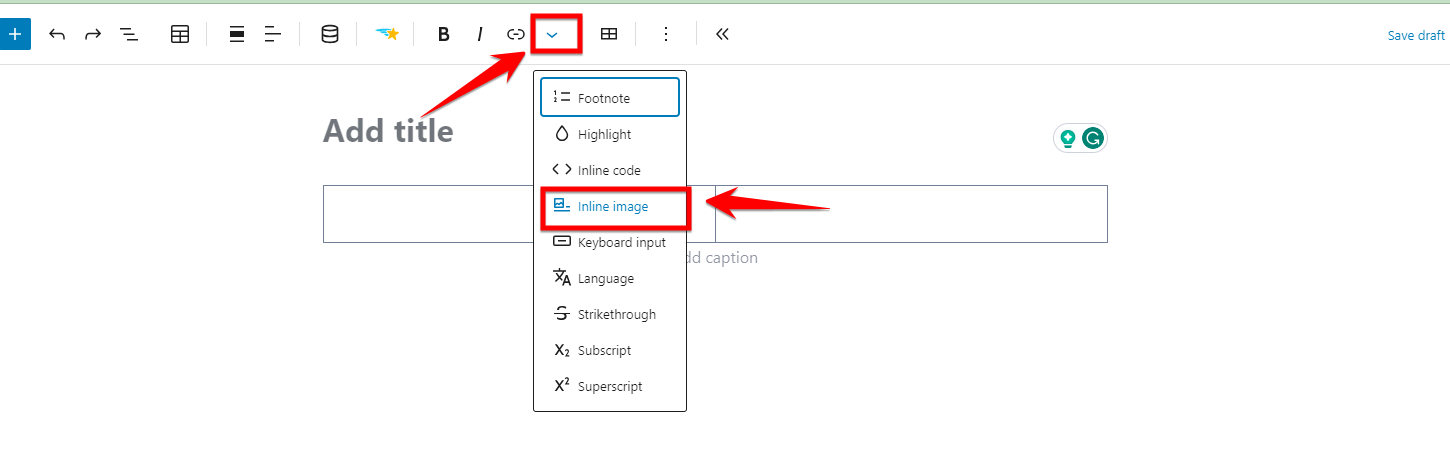
Step 7: Once you’ve clicked on “Inline Image”, you will be seamlessly transitioned to the Gallery. This is where you’re able to either upload new imagery or select pre-existing ones. Upon deciding on the images, make sure to hit the “Select” button. For this demonstration, I’ll be choosing images from my personal media library.

Step 8: After selecting the image, the next step is to adjust its display. Modify the “width” of the image according to your needs. For the image that I have uploaded, I’ll set the “width” to “300”. Sizing them this way guarantees the images are displayed adequately when arranged side by side.

Note: If you want to display images side by side in WordPress employing this technique, simply replicate steps 6 through 8 for the following cell in the table.
Step 11: After you’ve finished placing and editing your images, click the “Update” button if it’s an already published post/page or “Publish” if it’s a new post/page.
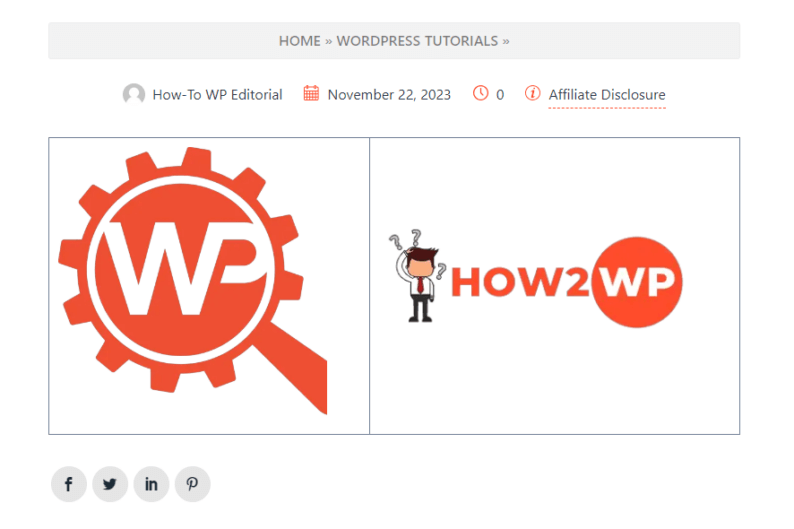
Step 12: Confirm your decision in the pop-up dialog box. Your images will now be displayed side by side on the selected page or post.
Pros
- Easy Implementation: Using table blocks to create side-by-side images is simple and does not require any HTML coding or CSS styling knowledge.
- Inbuilt WordPress Feature: The table block is a native feature in WordPress. It does not need additional plugins, contributing to the website’s speed and performance.
- Flexible Editing: The Block Editor allows resizing, alignment, and addition of captions or alt text to images within table blocks, providing significant control over the presentation.
- Responsive Layout: Images placed in table blocks are automatically responsive, which leads to a decent output on different device screen sizes.
- Improves User Experience: Placing images side-by-side can enhance the visual appeal of your content, contributing to the overall user experience.
Cons:
- Limited Styling Options: While table blocks are handy, they come with limited styling options compared to using a dedicated page builder or CSS.
- Difficult for Large Tables: Although suitable for placing a couple of images side-by-side, table blocks can become cumbersome when dealing with a large number of columns and rows. It might not be the best tool for larger and more complex layouts.
Why Would You Want to Add Two Images Side by Side in WordPress
Having images in your WordPress posts not only makes them more engaging but also effectively conveys your intended message. But why would you want to add two images side by side? There are compelling reasons, especially when you want your content to stand out and improve user experience.
Let’s explore this further with a deeper dive into three specific reasons that might encourage you to use this approach in your posts:
Reason 1: Enhanced Visual Engagement
Humans are inherently drawn to visuals. Images can be processed quickly by the brain, and they make complex information more digestible. By placing two images side by side, you can create a more dynamic and engaging visual layout that can hold the viewer’s attention more effectively.
In the vast landscape of digital content, capturing and maintaining viewers’ interest is paramount for reducing your site’s bounce rate and potentially boosting its SEO performance.
Thus, side-by-side images, creating a break from monotonous text, can help retain viewer interest, increase on-page dwell time, and enhance overall user engagement with your content.
Reason 2: Efficient Comparison
In numerous scenarios, the value of your content greatly depends on how effortlessly you can convey comparisons or contrasts. This is especially true for product reviews, DIY projects, tutorials, or any content that deals with ‘before-and-after’ scenarios.
In such instances, placing images side by side vastly simplifies the comparison process and provides a clear, visual depiction of the contrasting elements. This not only adds substantial value to your post but also enhances your content’s credibility by facilitating a better comprehension of the matters you’re discussing.
Therefore, side-by-side image placements can be very effective for content that requires a comparative perspective.
Reason 3: Optimized Space Utilization
Lastly, let’s discuss the spatial aspect of your WordPress site. A web page cluttered with vertically-lined images can be overwhelming to viewers and may lead to excessive scrolling. By putting images side by side, you are optimizing the use of your available space, resulting in a more balanced, less daunting, and reader-friendly layout.
Such effective spatial organization offers your readers a smoother navigational experience, transforming a potential scroll-fest into a relaxed scroll-through. Thus, with side-by-side images, you can implement efficient space utilization, which positively reflects on user experience and the overall aesthetic appeal of your content.
With such potential benefits, placing images side by side in your WordPress posts can greatly contribute to the enhanced reader experience, broader comprehension of your content, and improved SEO characteristics.
Summary
And there we have it! Together, we’ve walked through the ins and outs of 4 versatile methods to put pictures side by side in WordPress. From convenient native functionalities like column blocks, row blocks, and the Gutenberg Gallery Block to the adaptable Table Block and the robust Envira Gallery plugin, you now have a wide array of tools at your disposal.
With these techniques, I hope you’ll add that extra visual spark to your posts, enhancing engagement and boosting reader experience. Remember, the key lies in exploring and finding which method vibes best with your specific needs.
Throughout this journey, I truly appreciate your time and dedication. After reading this article, I believe you are now ready to craft captivating side-by-side image layouts that will enhance the engagement of your WordPress content.
FAQs
How do I align multiple images in WordPress?
Aligning multiple images in WordPress is often a task of balancing aesthetics and functionality. WordPress offers various options within its editor. You can use the gallery feature, which automatically arranges your images in a neat grid.
Alternatively, for a more customized approach, you can insert images individually and use the alignment tools (left, center, right) to position each image. The block editor also allows for spacing adjustments, ensuring that your images are aligned according to your design preferences.
How do I put two blocks side by side in WordPress?
To place two blocks side by side in WordPress, you can use the Columns block. This block allows you to divide your content into multiple columns, enabling you to place different blocks side by side.
After adding a Columns block, you can insert individual blocks into each column, like text, images, or any other type of content. Adjust the width of each column to customize the layout further, ensuring a balanced and visually appealing arrangement.
How do I add multiple pictures to a page in WordPress?
WordPress users frequently need to add multiple pictures to a page, which can be efficiently managed through the platform’s various tools.
As outlined in my article, adding multiple images to a WordPress page is achievable through various methods. The most straightforward technique involves utilizing the Gallery block, which facilitates multiple images’ simultaneous upload and grid arrangement.
An alternative method is to employ multiple Image blocks, allowing for the insertion of individual pictures into each block. This latter approach affords greater flexibility in terms of specific placement and alignment for each image.
How do I move an image position in WordPress?
To move an image within a WordPress page or post, you have a few options. If you are using an Image block, you can drag and drop the block to a new position. Additionally, alignment options such as left, center, right, wide, and full-width are available in the block toolbar, offering quick adjustments to the image’s position.
For more precise placement, you might also consider using Spacer blocks or Columns to achieve the desired layout.
Why won’t my images align in WordPress?
There are several reasons why images might not align as expected in WordPress. Common issues include theme constraints, conflicting CSS styles, or improper use of alignment options. Ensure that your theme supports the alignment you are trying to achieve and that there are no custom CSS styles overriding your settings.
Additionally, using the correct alignment tools in the block editor is crucial. If problems persist, inspecting the page with browser developer tools can help identify and resolve any underlying CSS issues.