How to Create Sticky Components for WordPress Without Any Coding

Many people don’t know that you can create sticky components for WordPress without any coding. The easiest way to do this is to use a WP sticky plugin. I’ll show you how you can create sticky components in a few simple steps.
In this blog, you’ll learn:
- What are sticky components
- How to create sticky components for WordPress
- Key features of WP Sticky plugin
Let’s start with some information on sticky components.
Table of Contents
What Are Sticky Components

Sticky components are elements positioned to remain at the top of the website, like a fixed navigation bar. For example, if there’s a menu on the top of your website that you want to stick when you’re scrolling. Such components of a site are called sticky components.
Sticky components are significant to increasing customer trust in your website. Scrolling up and down through your website will give customers a sense of interaction if you have sticky elements.
Sticky elements also allow users to easily find what they need on your website, which is the third most important factor influencing the purchase.
Additionally, according to some research, sticky components prevent visitors from feeling lost on your website. These elements help people to explore the website in a comfortable way.
How to Create Sticky Components for WordPress
WP Sticky is the best plugin for this purpose. Let’s start with the installation process of the plugin.
For this blog, we’re going to use a free plugin.
1. Installation
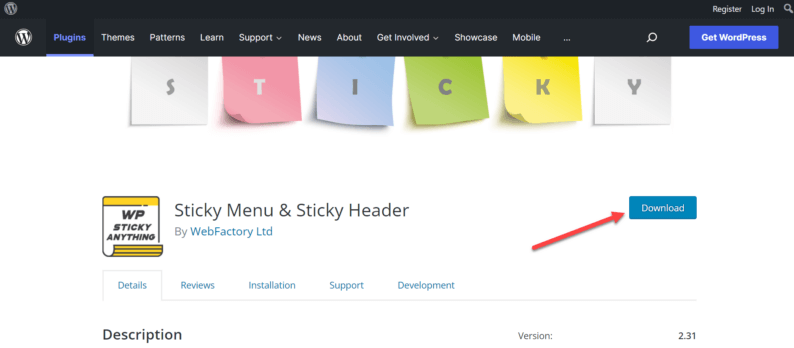
Go to WordPress.org and download the “Sticky Menu & Sticky Header“ plugin.
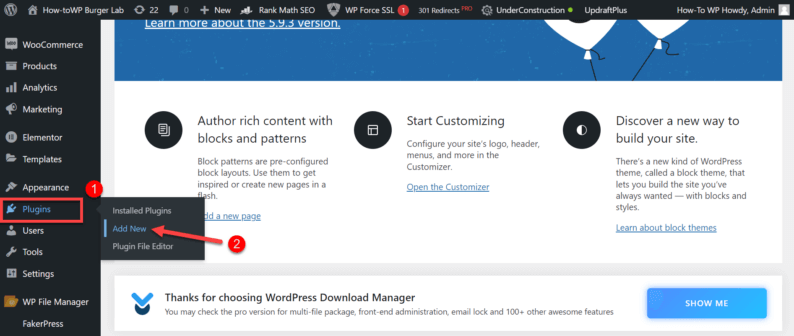
Go to your website’s dashboard, hover over the “Plugin” option, and click on the “Add New” option.
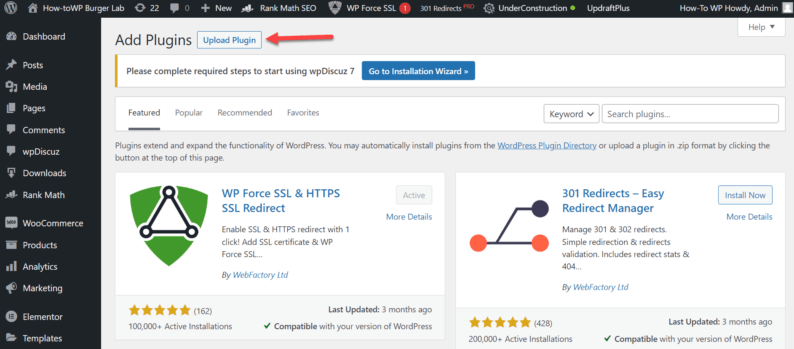
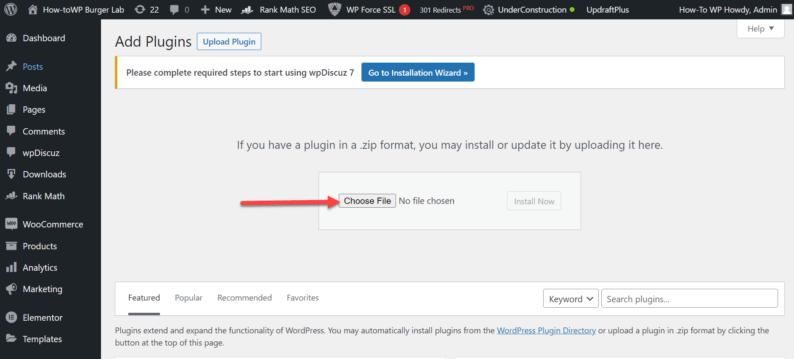
Click on the “Upload Plugin” button.
Next, click on the “Choose File” button.
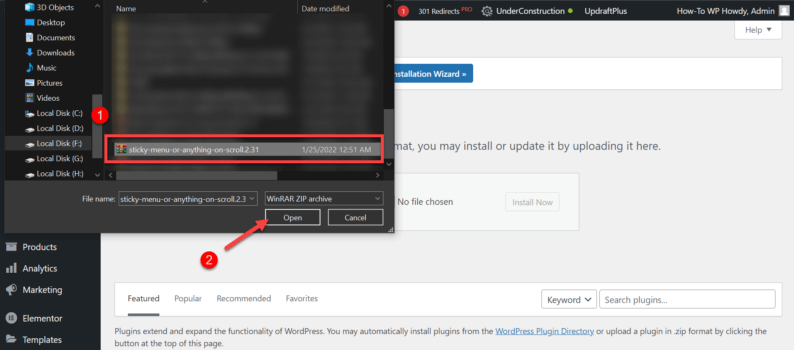
Select the plugin’s zip file and click the “Open” button.
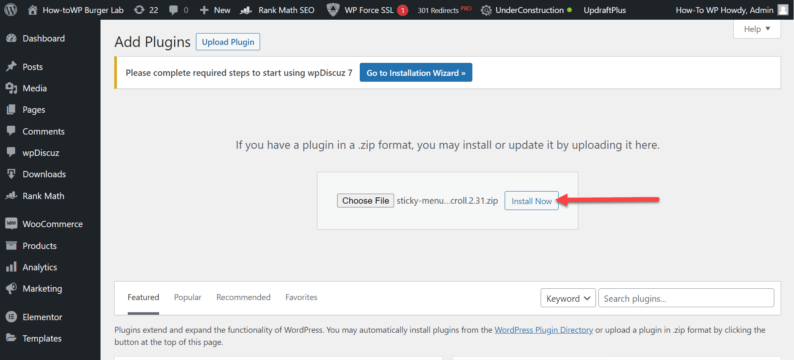
Click on the “Install Now” button.
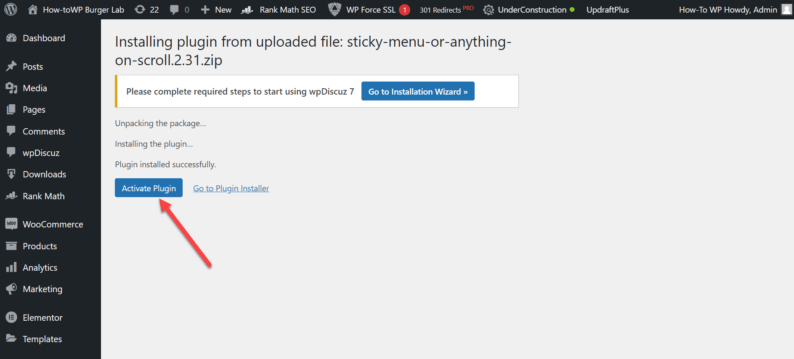
After the installation, you’ll need to activate the “Sticky Menu” plugin.
2. Create a Sticky Component
First, you’ll need to go to your website.
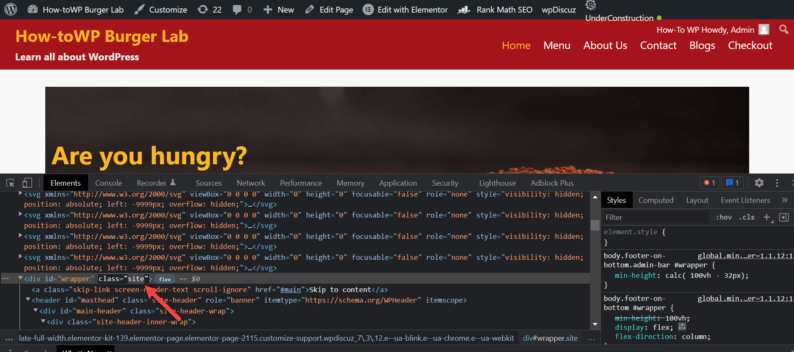
Click “F12” to open the inspect element menu and click on the cursor icon on the top left corner of the panel.
After that, hover over the header bar.
Copy the class of the header.
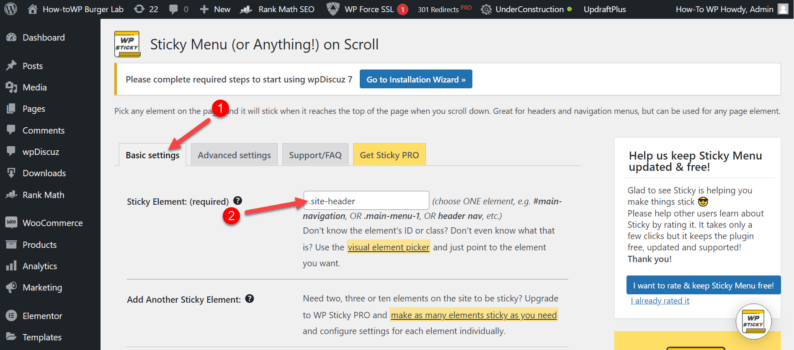
Go to the “Settings” option and click on the “Sticky Menu (or Anything)” option.

Go to the “Basic settings” section and paste the class name.
Note: There are some class names given with the plugin which you can use, but this one worked for this theme.
Next, go to the “Advanced settings” section and increase the “Z-index” value to 100.
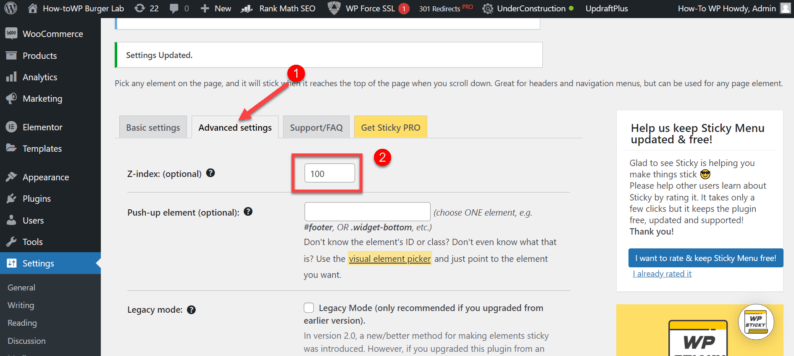
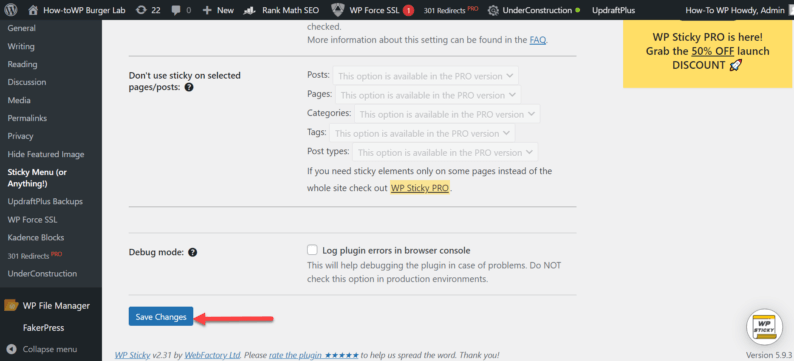
Scroll down and click on the “Save Changes” button.
The header has now become sticky and stays on the screen when you scroll.
Key Features of WP Sticky Plugin
Installing a plugin is the easiest and fastest way to get sticky elements on your site. The best plugin for this is the WP Sticky. With it, you can create sticky elements in a minute or less and pick any element visually without the need to add any code.
Here are some of the key features of WP Sticky:
- Any element can be sticky. Even though sticky elements are mostly connected to menus and navigation bars, CTAs, widgets, or headers can also be sticky.
- You can set up the positioning of the sticky element at the top of the website and adjust the space between the component and the page.
- You can enable the minimum and the maximum screen size where you want your sticky to show.
- You can also set up your sticky element to show up only on specific pages.
- Admin Bar tool checks if the user has an Admin Toolbar at the top of the site. If it has, the sticky element will not cover it (or be covered with it).
- Debug Mode checks why you are having problems with your sticky element.
Additionally, there are some new features like Z-Index, Legacy Mode, push-up elements, and Dynamic mode that users can also set up with this plugin. The plugin is compatible with all themes, page builders, and plugins. In addition, it has an easy-to-use interface.
Conclusion
Sticky components are the perfect option to make your website visitors feel at home. They help you increase their trust in your website and brand and make them comfortable on your page.
With the WP Sticky plugin, you can create sticky components in just a few easy steps.
In addition, you can customize your sticky by selecting the position, screen size, pages to display it on, etc. Additionally, the plugin is easy to use for everyone.
Tell us down in the comments section if the WP Sticky plugin worked for you.