How to Fix the Uploaded File Exceeds the Upload_Max_Filesize Error

Sometimes when it comes to uploading a file on a WordPress website, you’ll see an error message that says “upload file exceeds the upload_max_file” error. It’s a very common error, and it can be very frustrating. In today’s article, I’ll show you a few methods by which you can counter this issue.
Today you’ll learn:
- How to fix the uploaded file exceeds the upload_max_filesize
- Why does the “uploaded file exceeds the upload_max_file” error occurs
Let’s start with what it is and why does it occur?
Table of Contents
How to Fix the Uploaded File Exceeds the Upload_Max_Filesize
Although some methods will be simpler than others, there are several ways in which you can easily increase the upload maximum file size limit. It’s best to do your own experiment and see which one works for you the best.
Let’s start with the simplest and the most straightforward of all the methods.
Method 1: Contact Your Hosting Provider
I know, I know but listen to me. Many people out there hesitate to contact their hosting provider, but it’s one of the simplest ways to fix the upload file that exceeds the upload_max_filesize error. We recommend using Nexcess hosting because they have the best service out of other hosting providers.
Normally when you contact the customer support of such companies, you will check the issue, and if it’s possible to solve the issue, then they will do so. The same is true for the max file size limit. Inform them of the problem by contacting them.
Keep in mind that not all the customer support teams are helpful or good, for that matter. Bluehost and Hostgator, two of the world’s most renowned companies, have some of the worst customer service teams.
According to Trustpilot, there are a total of 2513 for Hostgator and out of which 34% of them are bad. Yeah! You should get a better understanding of how the hosting is doing simply by the number of bad reviews.
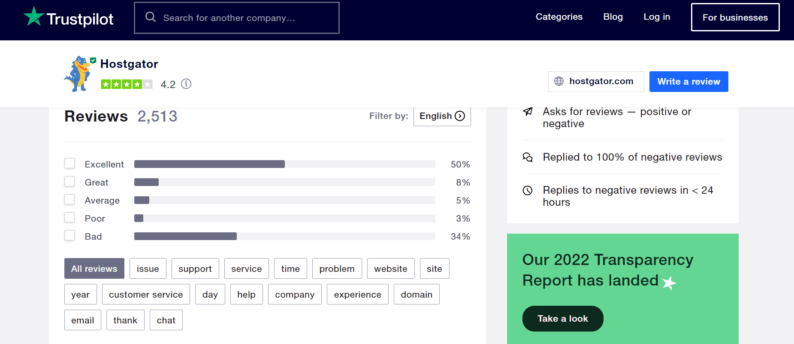
Most of them are bad because of how bad the support is. Here is one of the comments that show how bad the customer support service is.
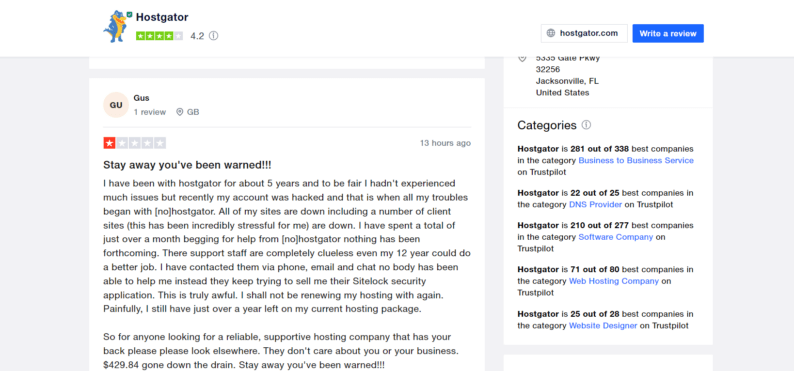
The same is true for the Bluehost. The number of people leaving bad reviews due to bad customer support is astonishing. Almost it has the same number of bad reviews as Hostgator, which is 32%.
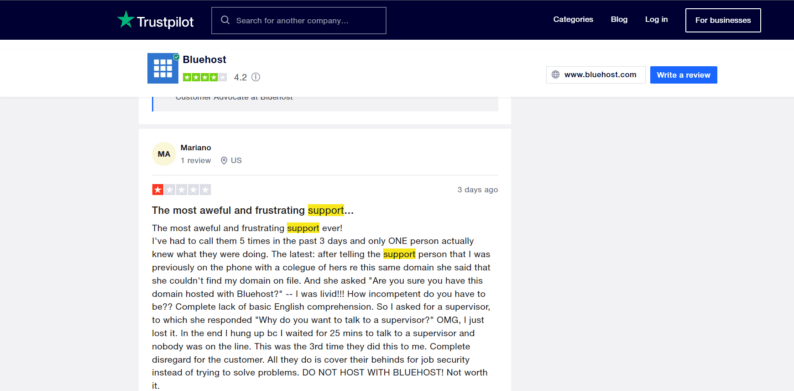
So the fact of the matter is that whenever you start a website, make sure to choose a company with the best customer support; otherwise, it’ll only become a hindrance in the long run.
Method 2: Use MultiPHP INI Editor in cPanel
If, for some reason, customer support can’t help you with increasing the maximum file upload size. There is another way for you to counter this issue. You’ll need to do it manually by utilizing the cPanel.
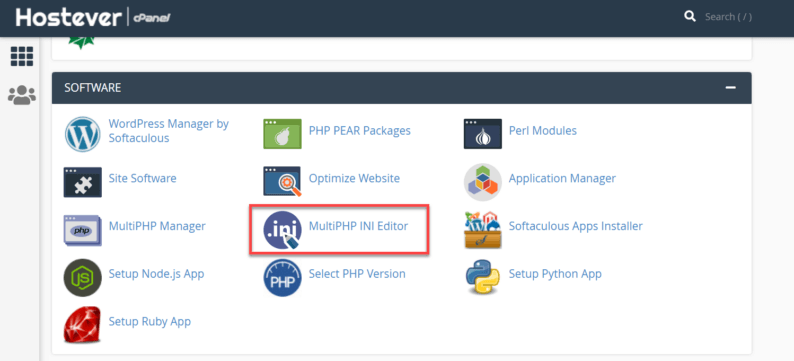
Go to your cPanel and scroll down. Find the “MultiPHP INI Editor” and click on it.
Note: The option you’re looking for will be available in the “Software” section.
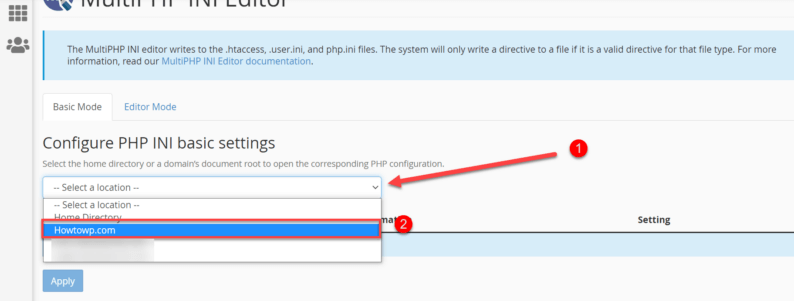
After that, you’ll see a drop-down menu on which you’ll click. Here you’ll choose the directory of the website in which you’ll change the post and upload size.
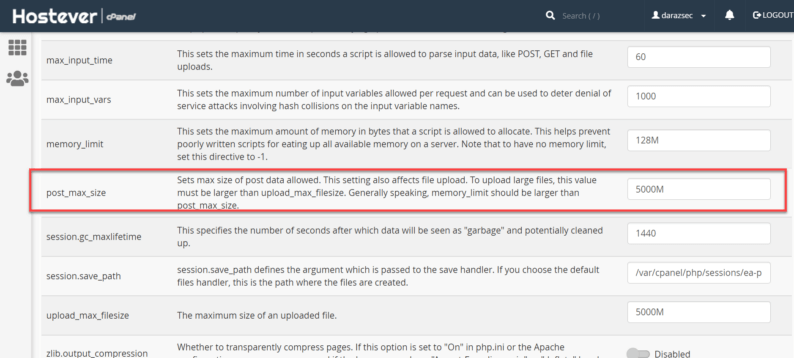
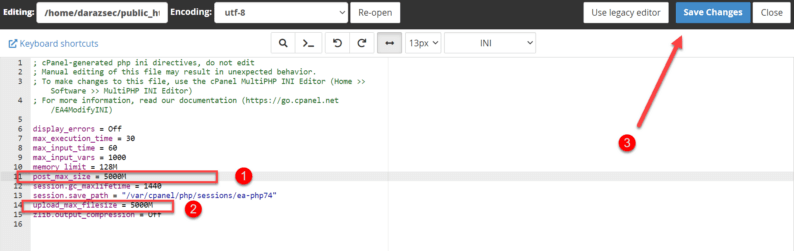
Now search for the “post_max_size” because you’ll need to increase its value.

To increase the size, you’ll need to enter the value MBs. Meaning if you want to increase the total capacity by 1 GB, then you’ll have to add additional 1024 MBs.
After that, you’ll need to search for the “upload_max_size” to increase its value.
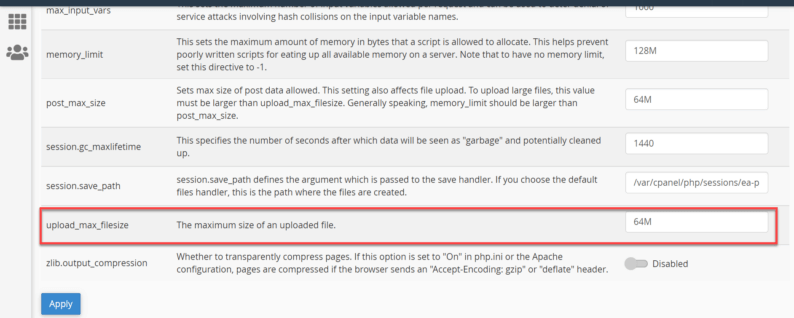
Similar to the post size, you’ll need to add additional MBs to increase its value. After increasing the values of both the post and upload size, click the “Apply” button.
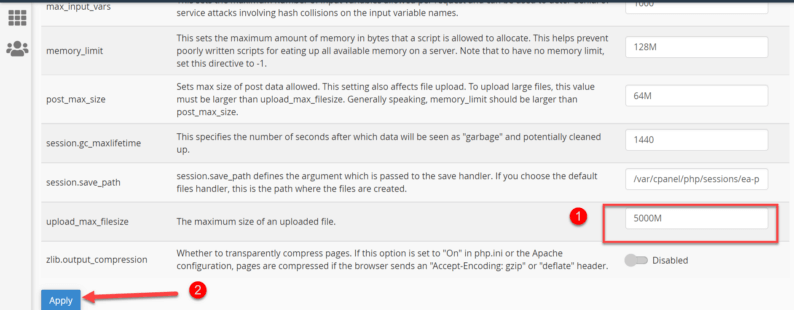
By doing this, you can easily fix the “uploaded file exceeds the upload_max_filesize” error. You can verify it by uploading any file on your WordPress website by uploading a major file.
Method 3: Increase the Max Upload File Size by Using .htaccess
There is another method by which you can increase the max upload file size for your WordPress website, and it involves tinkering with the .htaccess file. It’s not advised to use this method. It requires you to make the changes to the code file of .htaccess.
When changing the coding, you’ll need to be very careful because even the smallest error while editing can cause the file to not work. However, If you still need to proceed, this is how you can fix the uploaded file that exceeds the upload_max_filesize error.
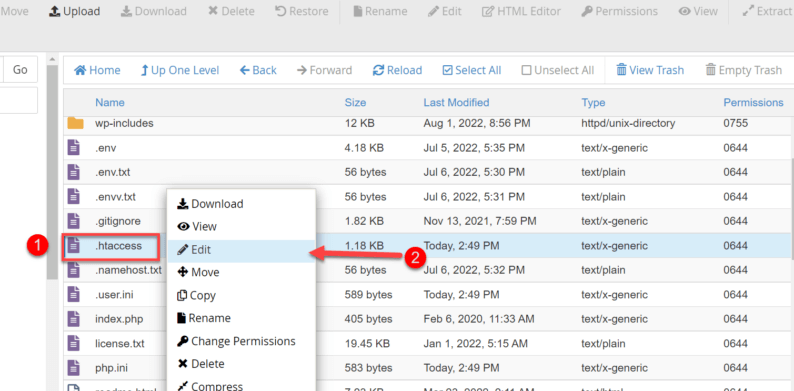
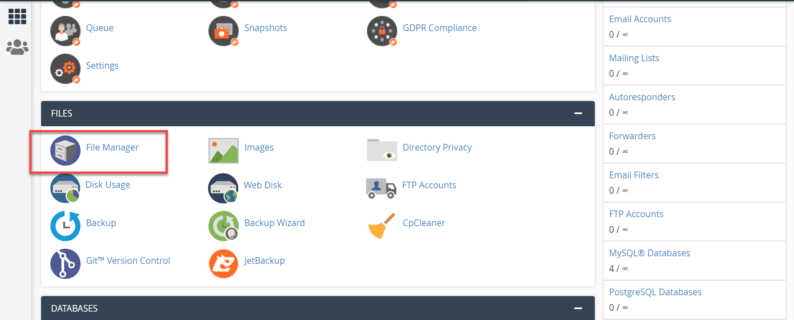
For starters, you’ll need to open cPanel and click on the “File Managers” option.

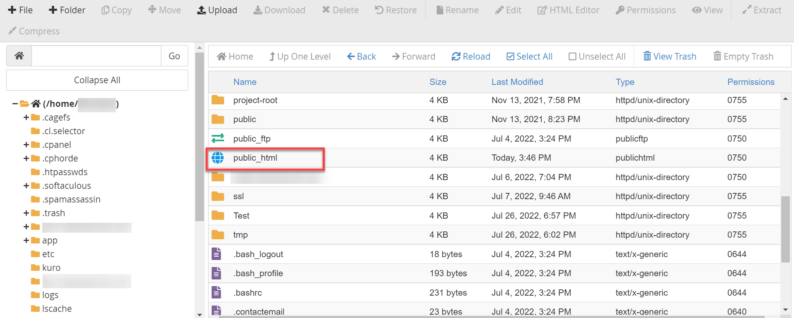
After that, click on the “public_html” file.

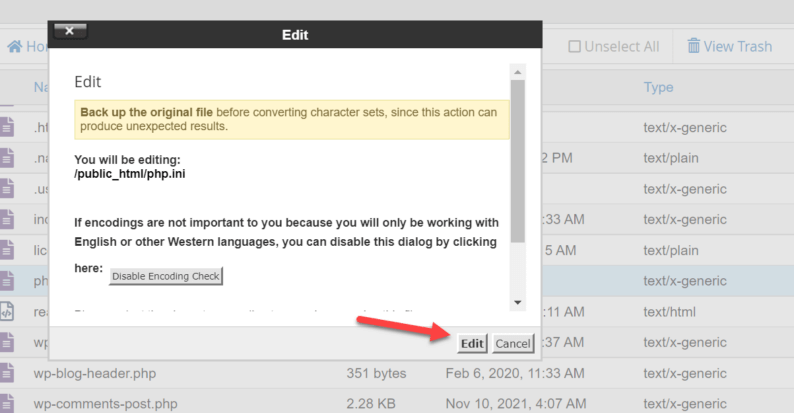
Now locate the “.htaccess” file, right-click on the file, and choose the “Edit” option.
Note: This file has a “.” at the starting of the name, meaning that the file will be hidden. So if you can’t find the file, simply just change the settings to make all the hidden objects visible.
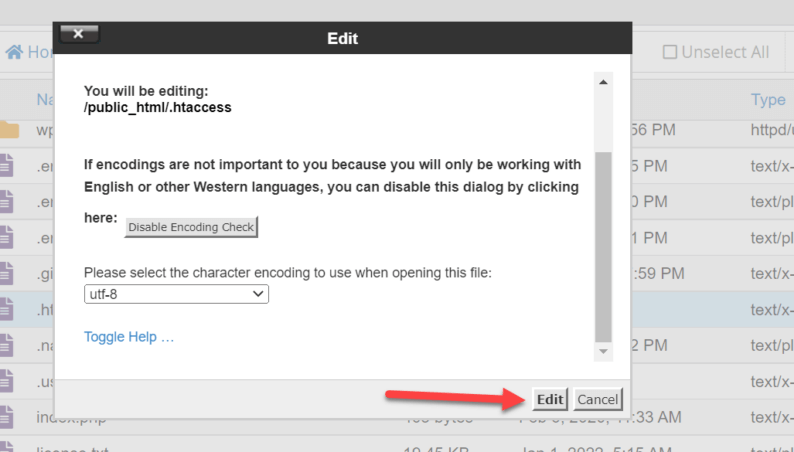
It’ll notify you to backup the original file so that if you want to reverse the changes, you can do so. Just click on the “Edit” button.
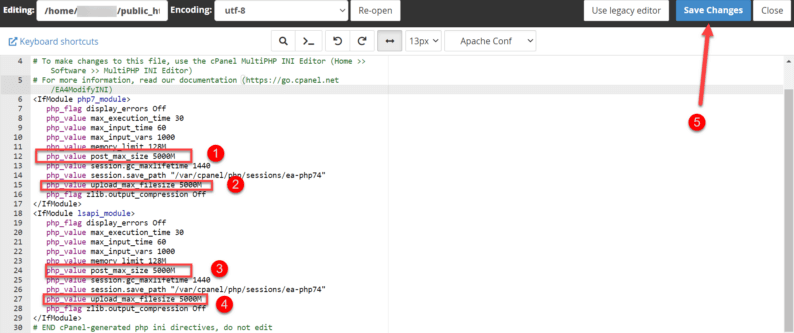
After that, you’ll see the option to change the post and upload size at least 2 times. Change all of them, and in the end, click the “Save Changes” button.
If you want to upload the .htaccess file, then you’ll first need to download it. The default .htaccess runs as:
# BEGIN WordPress

RewriteEngine On

RewriteRule .* – [E=HTTP_AUTHORIZATION:%{HTTP:Authorization}]

RewriteBase /

RewriteRule ^index.php$ – [L]

RewriteCond %{REQUEST_FILENAME} !-f

RewriteCond %{REQUEST_FILENAME} !-d

RewriteRule . /index.php [L]
# END WordPress
Once making all the necessary changes, simply upload the .htaccess file in the root directory in cPanel.
Method 4: Changing the wp-config.php File
You can fix the same thing by editing the wp-config.php file. However, you need to remember that a single error can make the file useless. To avoid this from happening, avoid any unnecessary changes and make a backup of the file.
The first few steps are exactly the same in which you first open “File Manger” from the cPanel and open the “public_html” file.
After that, locate the “wp-config.php” file and right-click on it. From the drop-down menu, select the “Edit” option.
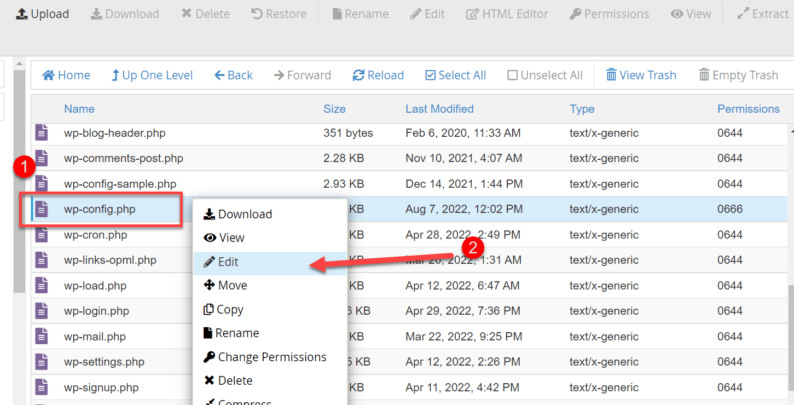
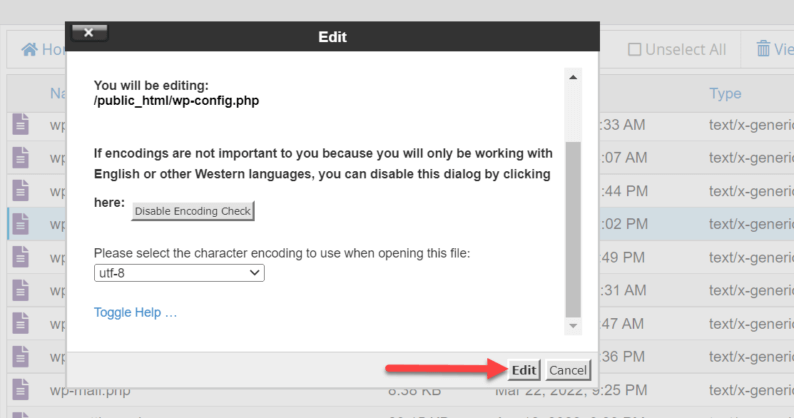
Once you do that, you’ll see a pop-up box telling you to create a backup of the file. Click on the “Edit” button to continue.
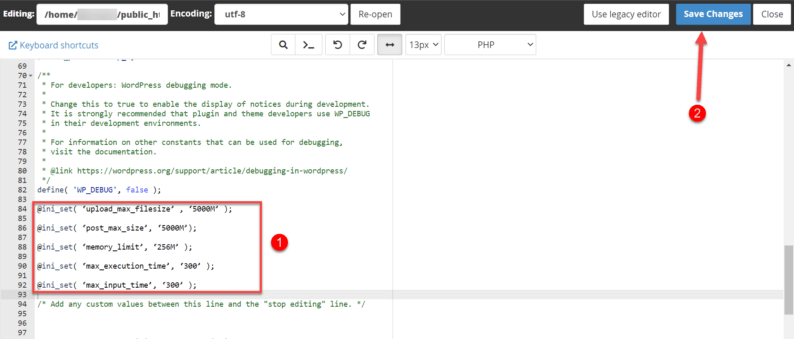
Once the file opens, paste the code the following code right below the “define(‘WP_DEBUG’, false)” to ensure that no errors occur:
@ini_set( ‘upload_max_filesize’ , ‘5000M’ );

@ini_set( ‘post_max_size’, ‘5000M’);

@ini_set( ‘memory_limit’, ‘256M’ );

@ini_set( ‘max_execution_time’, ‘300’ );

@ini_set( ‘max_input_time’, ‘300’ );
After pasting the code, click the “Save Changes” button.
Note: Ensure you don’t make any mistakes because otherwise, it can become an issue for you.
Method 5: Editing the php.ini File
Another method of fixing the uploading size issue is that you can play around with the php.ini file, and it goes without saying that this method is only for those who have some knowledge of coding.
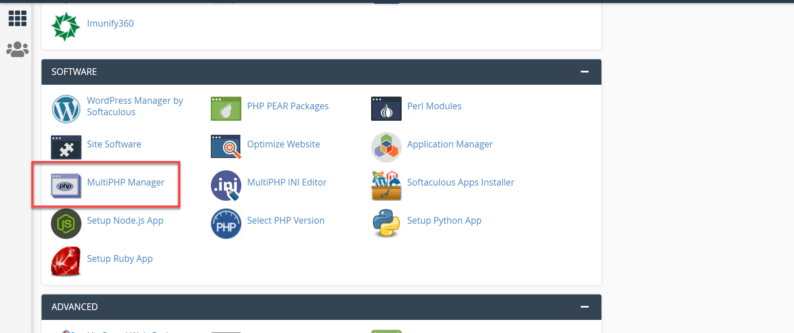
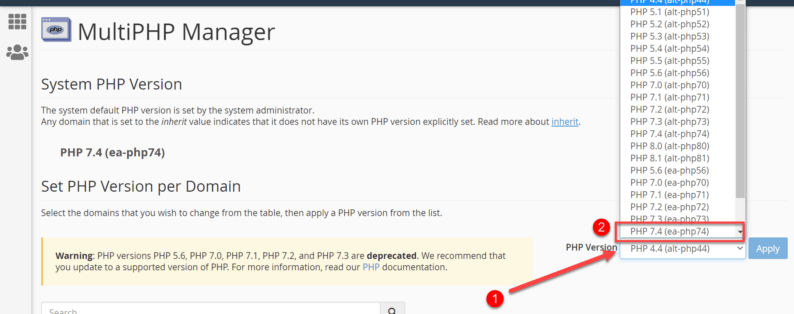
First, go to the “MutiPHP Manager” in the cPanel. You can find it in the “Software” section.
After that, select the website and look at its PHP version.
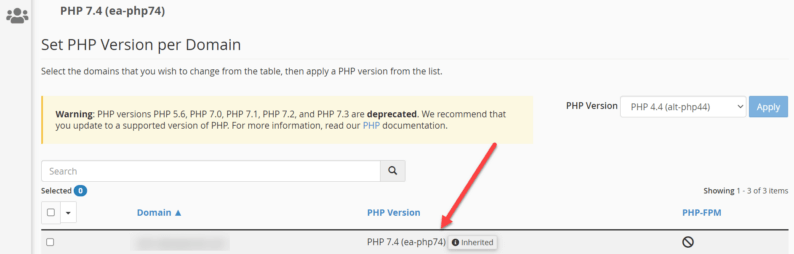
Next, click on the drop-down menu, select the PHP version you want, and click the “Apply” button.
Please return to the cPanel and select “File Manager.”
After that, open the “public_html” file.
Find the “php.ini” file, right-click on it, and select the “Edit” option from the drop-down menu.

Click the “Edit” button on the pop-up.
Change the post & upload size and click the “Save Change” button on the top right-hand corner of the screen.
Why Does the “Uploaded File Exceeds the Upload_Max_File” Error Occurs
The “uploaded file exceeds the upload_max_filesize directive in php.ini” error typically appears when you are trying to upload a file that is too large for PHP to process. This can happen if your server’s PHP settings are not configured correctly or if you are attempting to upload a particularly large file.
If you are getting this error, it is likely that your server’s PHP settings need to be adjusted. The upload_max_filesize value in your php.ini file can be increased by contacting your web hosting provider or server administrator. Alternatively, you can try uploading your file in smaller chunks if possible.
However, you might be asking yourself that “I bought the best hosting plan with unlimited hosting and storage. I shouldn’t be facing this issue” The truth is that many companies use the word “unlimited” to misdirect you.
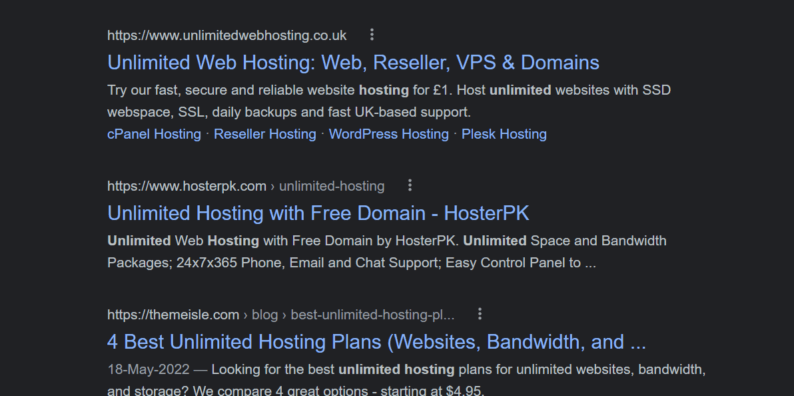
The amount of data you can use is limited. Some hosting providers have fair-usage policies, which intend to preserve the resources for all customers and ensure that those who use too much won’t abuse their accounts by consuming everything in sight.
Their server is so efficient that they can easily handle 90% of the websites with no threat to their valuable resources.
There are limitations placed on what you are allowed to do in terms of file size and how often your site will be accessed again following a previous load. These restrictions ensure a significant amount of storage is saved each time your site is loaded.
There are a lot of guides available on the internet that don’t work to fix your issue with uploading photos since they only try increasing upload_max_filesize, but post size is also critical in solving this problem.
For example, Namecheap doesn’t allow you to upload more than 300,000 files or inodes on their shared hosting plan, and the maximum size limit is just 50MB.
Conclusion
By using these 5 methods, you can easily make changes to the core files of the WordPress website and can fix the “uploaded file exceeds the upload_max_size” error.
Throughout these methods, you might be asking yourself that “Why do I have to change the post size as well as the upload size?” To put it simply, you may be able to upload the file to your size once changing only the upload size, but you won’t be able to post that file. So it’s important that you match both sizes.
If these methods worked for you, don’t forget to mention them in the comment sections below and also share this article with your circle.