How to Integrate Your WordPress Site with Telegram
There are more than 700 million Telegram active users per month. This should tell you how many people use Telegram, not to mention that it’s the best way to bring traffic to your site. That’s why you should learn how to integrate your WordPress site with Telegram.
If your own a Telegram channel or a group, then this is the article for you. Many people aren’t aware that you can integrate your WordPress site with Telegram. That’s why today I’m going to show you how to do so and much more.
You’ll learn about:
- What Is Telegram & why integrate it with WordPress
- How to send WordPress posts to Telegram
- How to integrate your WordPress site with Telegram
Why don’t we start with what Telegram is? Because some people might not be aware of what it is.
Table of Contents
What Is Telegram & Why Integrate It with WordPress
An instant messaging service based on the cloud, Telegram is a cross-platform app. A Telegram client is available for both mobile (android, iOS, windows phone, Ubuntu touch) and desktop systems (Windows, macOS, Linux). Users can send messages and exchange photos, videos, stickers, audio, and files of any type.
The client sides of Telegram are open-source software, but the source code of recent versions is not always immediately available, whereas its server sides are closed-source and proprietary. The service also provides optional end-to-end encrypted messaging.
How to Integrate Your WordPress Site with Telegram
Before we begin, I just want to mention that the method we’re going to use for integrating your WordPress site with Telegram is going to be a long one. So buckle up, and let’s get integrating.😁
To integrate your WordPress site with Telegram, you’ll need to use the “WP Telegram” plugin. It’ll help with the process of linking both the site and the Telegram channel. Before you integrate your site with Telegram, you first need to install the plugin.
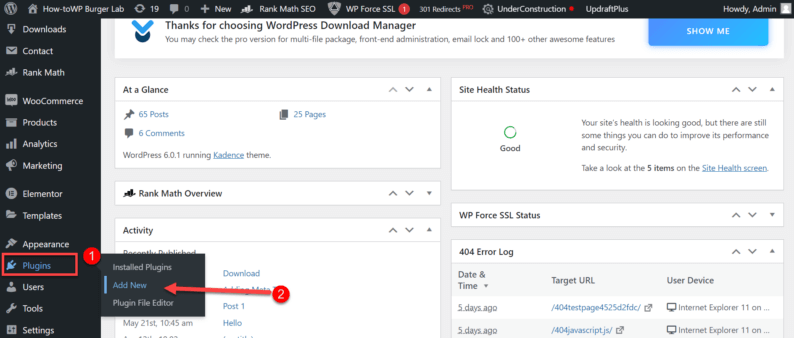
Step 1: Installing the WP Telegram Plugin
Start by clicking the “Add New” option in the “Plugins” section.
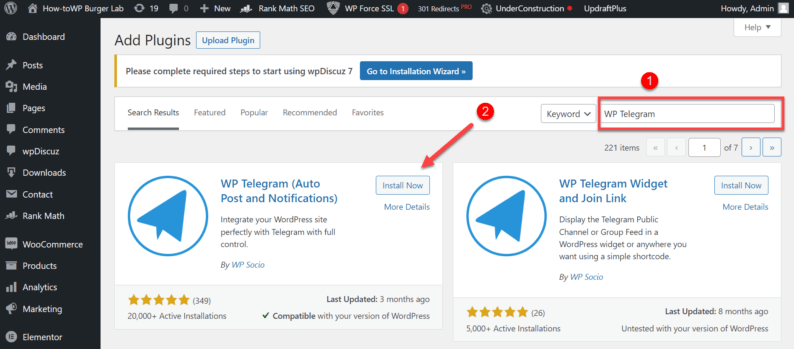
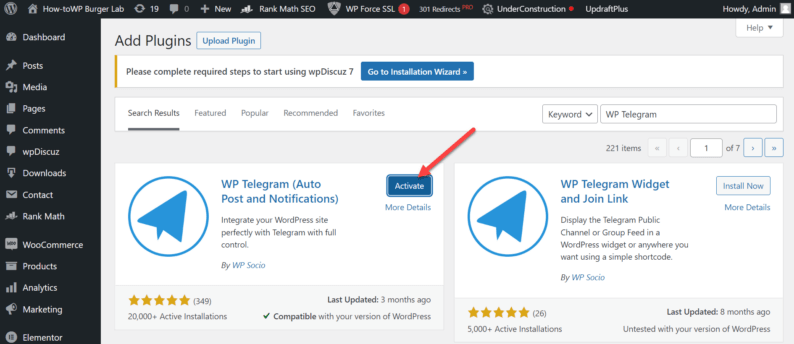
Now search and install the “WP Telegram (Auto Post & Notification)” plugin.
Note: You can also download the plugin from the WordPress.org website but to install it, you’ll need to upload it in the “Plugins” section.
After the installation has concluded, stay on the page and click the “Activate” button.
After going through this process, the plugin should be installed and ready for use.
Step 2: Setting Up a Bot
Now that the WP Telegram plugin is installed, you’ll need to create a bot that will notify the Telegram channel regarding any and all WordPress site updates.
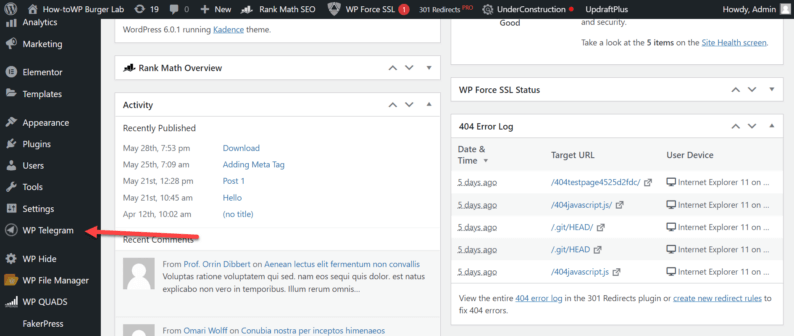
Start by going to the “WP Telegram” section.
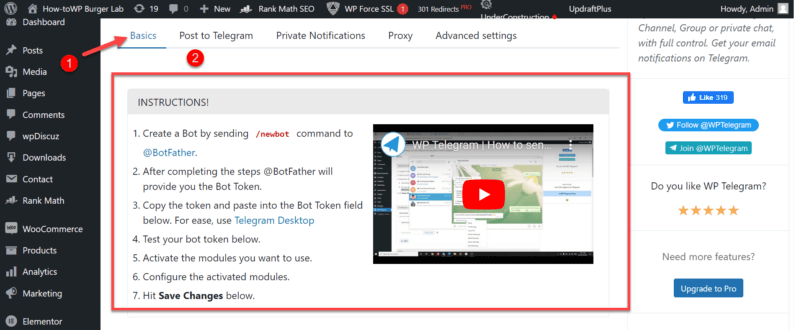
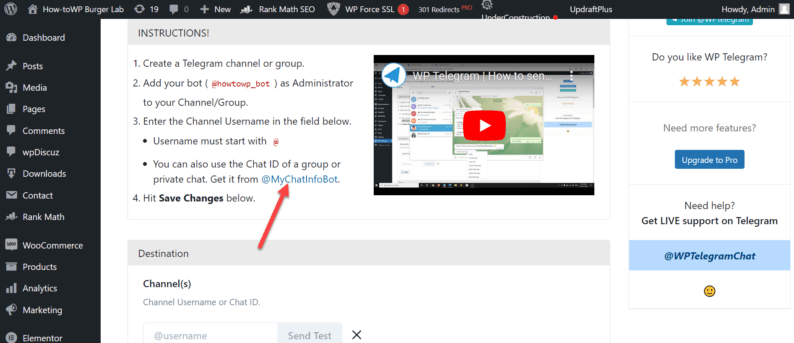
From the “Basics” section, you can get all the instructions regarding setting up the chatbot for Telegram but don’t worry. I’ll guide you through the entire procedure.
Note: To integrate your WordPress site with Telegram, you’ll first need to create an account on Telegram (obviously).
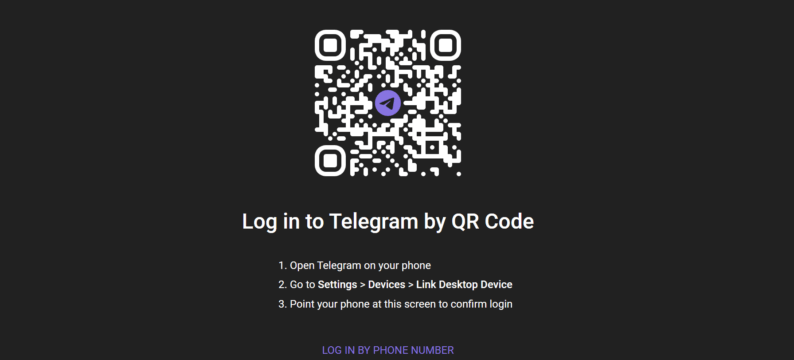
Go to the “Telegram Web” and scan the QR code that’ll help you log in to your account.
Note: You can also use your phone number to log in.
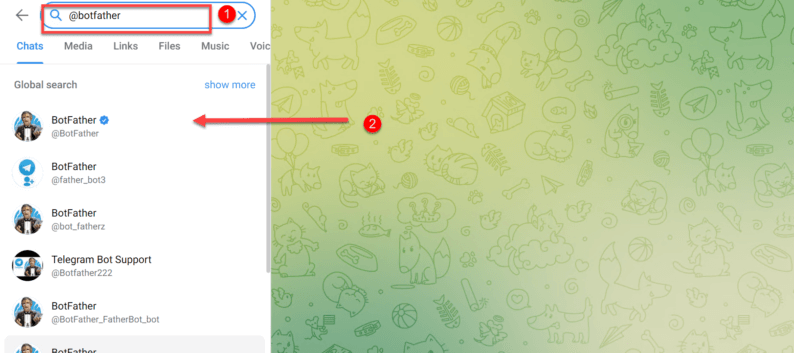
Once you’ve logged in, search for the “@botfather” username and click the one that has a small blue tick next to it.
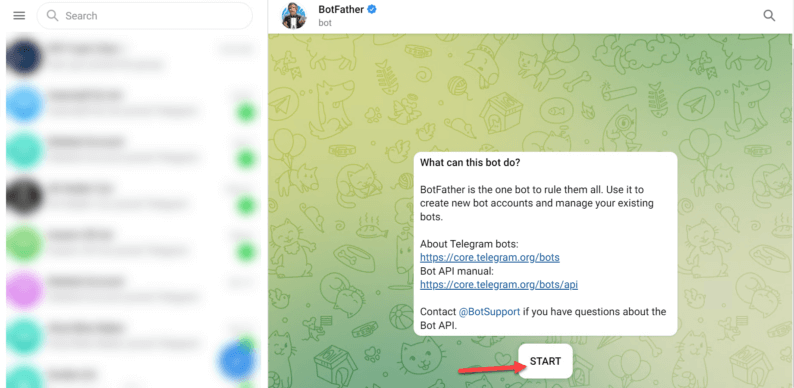
Now click the “Start” button.
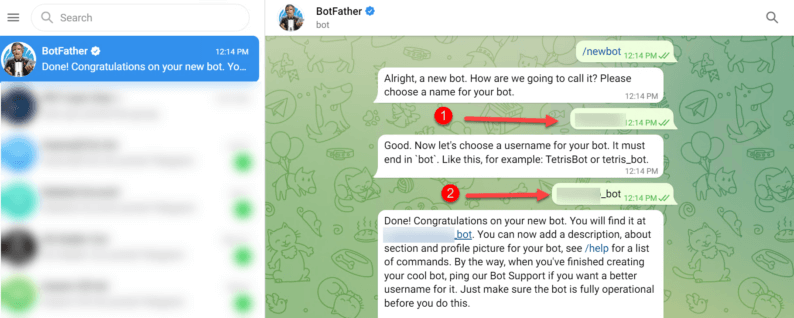
To create a chatbot, you first need to name it and then give a username for it.
Note: The name can be anything; however, you’ll need to make sure that it’s unique because otherwise, it won’t accept it.
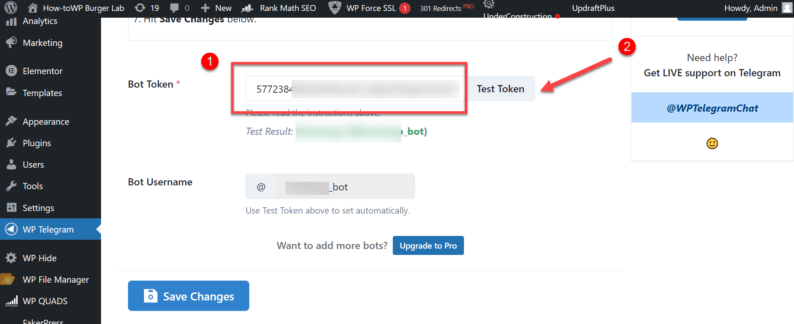
Once you successfully name the bot, you’ll get a message that’ll provide you with a “Bot Token,” which be used to integrate your WordPress site with Telegram.
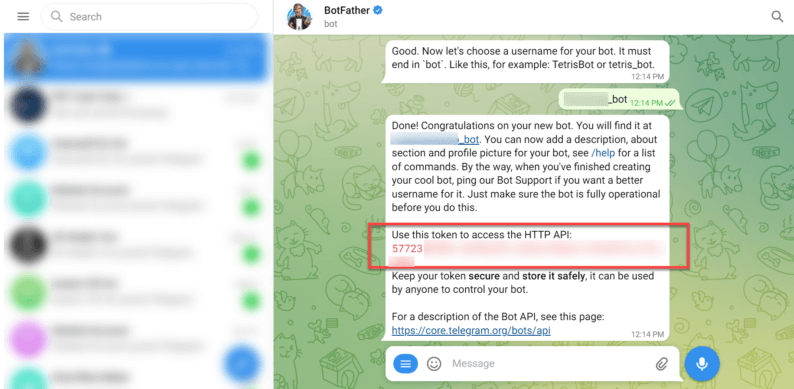
Copy the token and go back to the “Basics” section within “WP Telegram.” Paste the code in the box for “Bot Token” and click the “Test Token” button.
If the test is successful, it’ll show both the name and username of the bot.
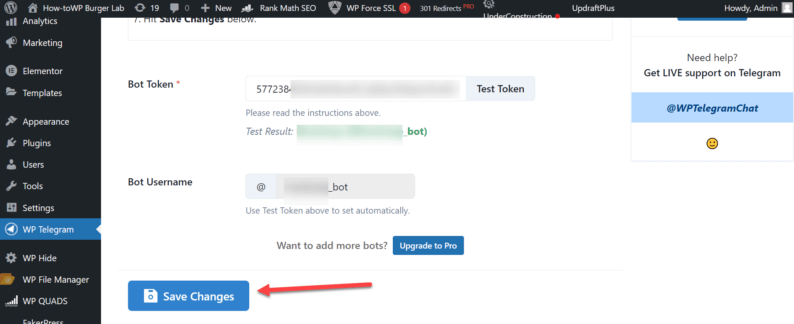
After linking the bot with your WordPress website, click the “Save Changes” button.
Step 3: Creating a New Channel
After linking the Telegram bot with the WordPress website, you’ll need a channel in which the bot will be sending messages.
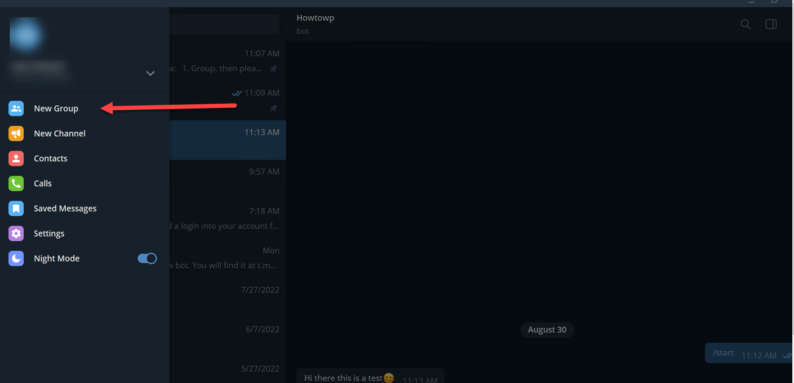
To create it, click on the “New Channel” option.
Note: If you’re using Telegram Web, then it’ll appear by clicking on the pencil icon; other if you’re using the desktop application, then click the three lines in the top left-hand corner of the screen.
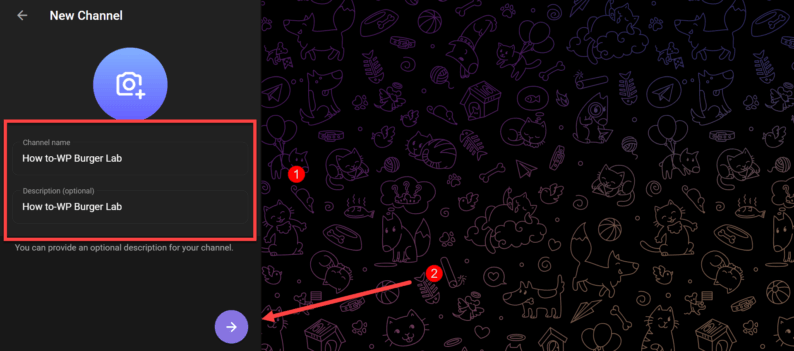
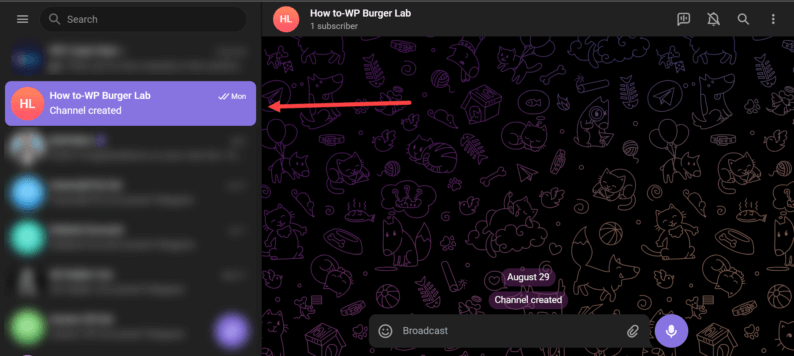
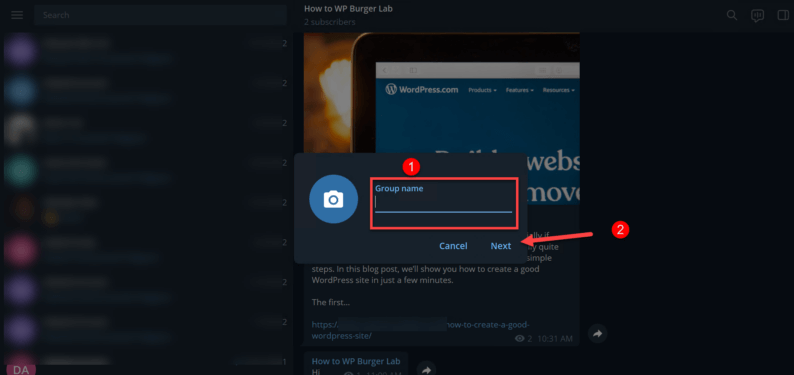
Now give the channel a name and provide a description of the channel, which will tell the member of the channel what it is used for.
Note: You can also add an image for it.
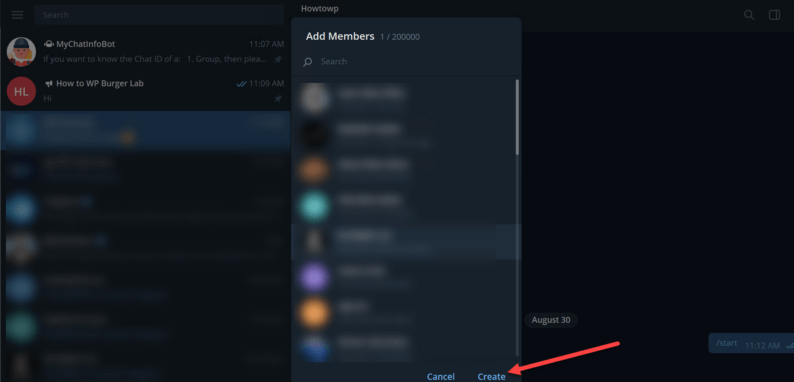
Select the member you want to add to the channel.
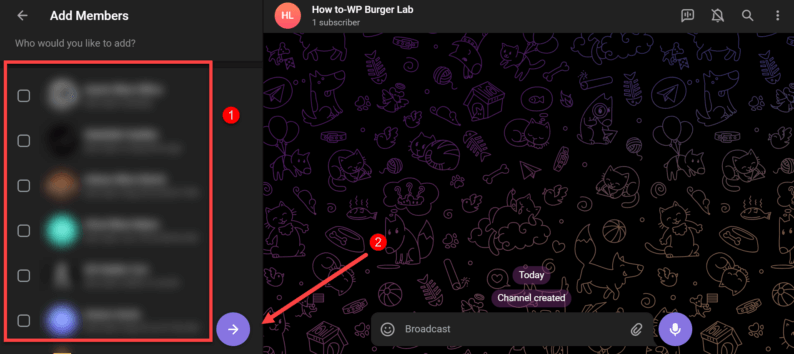
After adding the group members, the channel will be created.
Step 4: Adding the Bot as an Administrator
Now comes the interesting part, you’ll have to add the bot as an admin in this channel because otherwise, it won’t be able to send updates of the WordPress site to Telegram.
Note: I highly suggest that you use the desktop application of Telegram because the Telegram web doesn’t allow the user to manage any of the important settings of your account. I was stuck on it for quite some time until I figured it out.😅

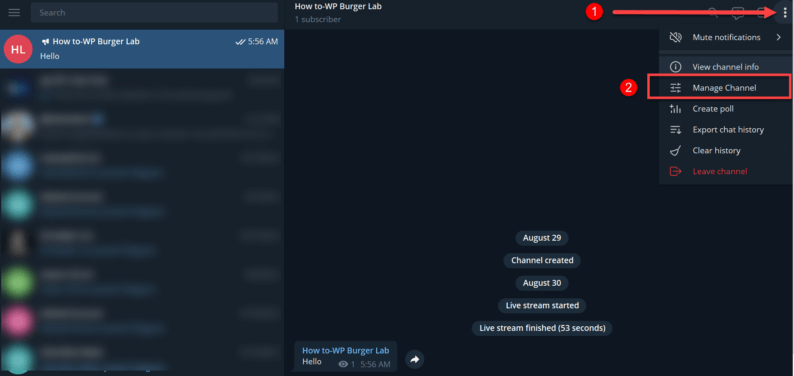
Go to the channel and click the “3 dots” icon. A menu will appear, which will contain the “Manage Channel” option. Click on it to add the bot as an admin.
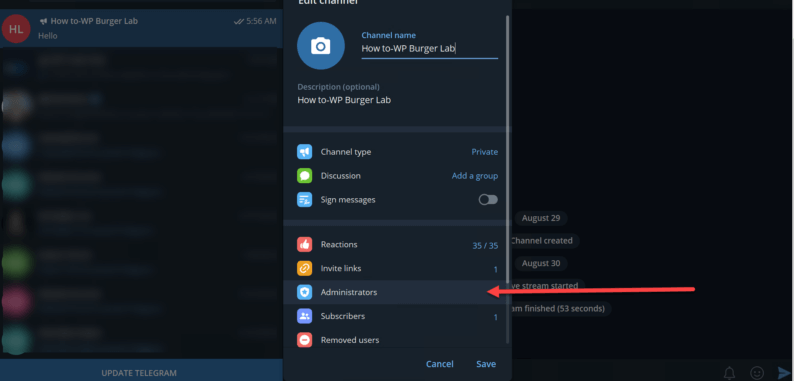
Go to the “Administrators” settings.
Click on the “Add Administrator” option.
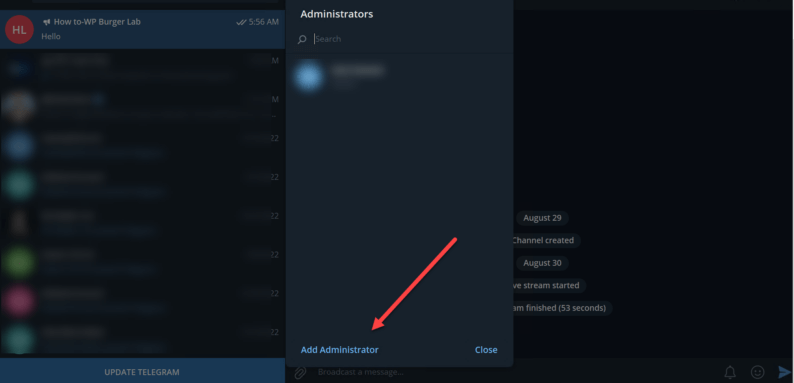
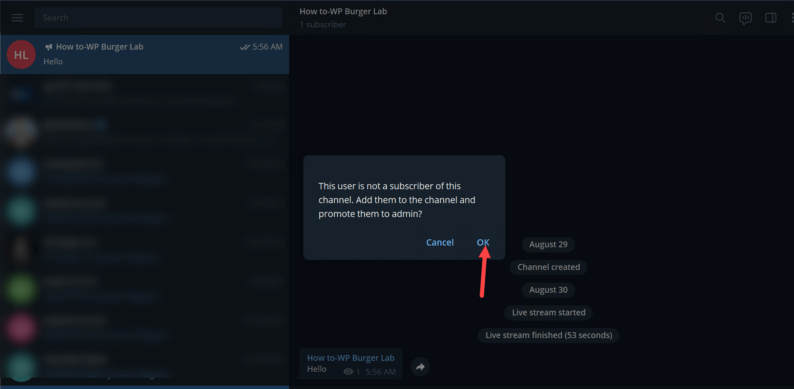
Search the bot by its username and add it.
Note: If you haven’t added the bot before in the channel. A pop-up message will be displayed on the screen, which tells you to add the bot before making it the admin. Just click “Ok” and continue.
Make sure that the “Post messages” switch is toggled on; after that, click the “Save” option.
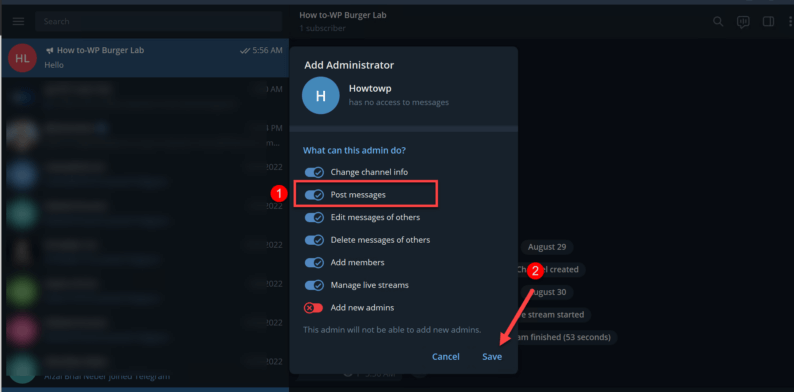
You’ll see that the bot is now the administrator of the channel and can now message in it. Click the “Close” option to continue.

Step 5: Making the Channel Public
Great! The channel and the bot are ready. However, to establish a connection between the channel and the website, you’ll need to make it public.
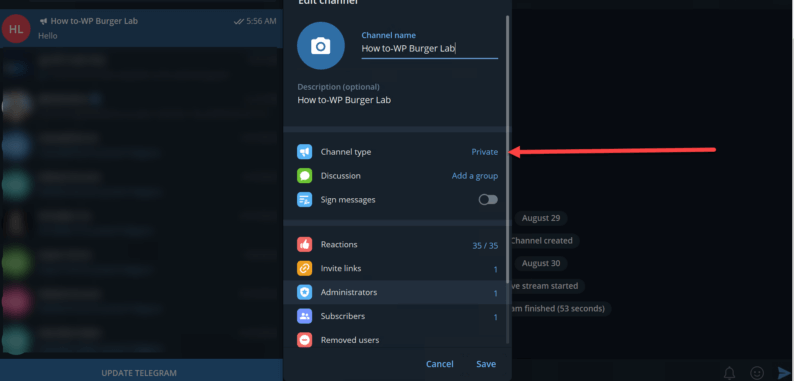
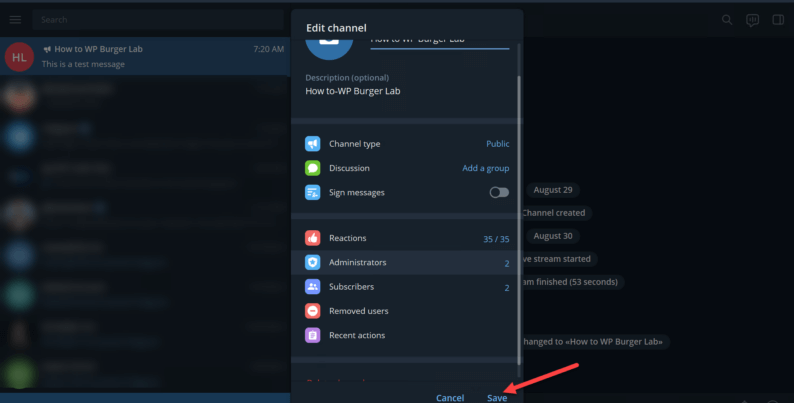
Go to the “3 dots” icon of your channel and click the “Manage Channel” option.

Now go to the “Channel Type” section.
Click the “Public Channel” option.
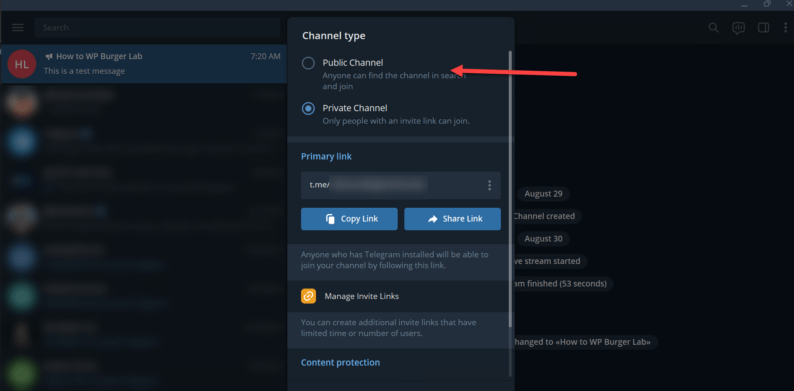
Give a name for the link and click the “Save” option.
Note: The name that you enter in the link will be the username for the channel. Keep that in mind while moving forward.
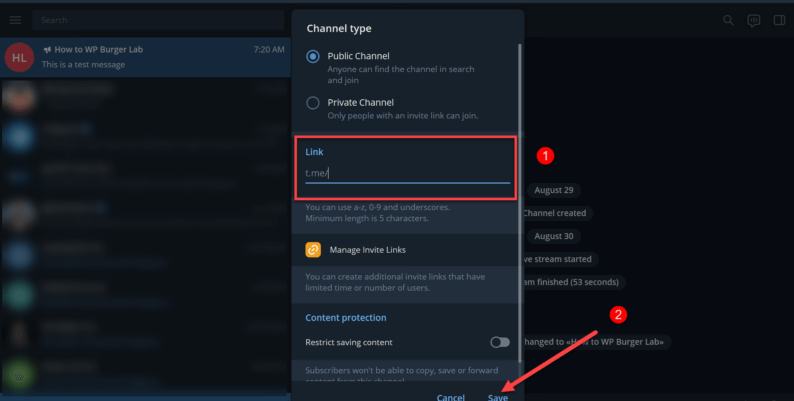
Make sure to click the “Save Changes” option again because previously, it saved the link but now clicking this option will save the settings.
Step 6: Linking the Channel With the WordPress Site
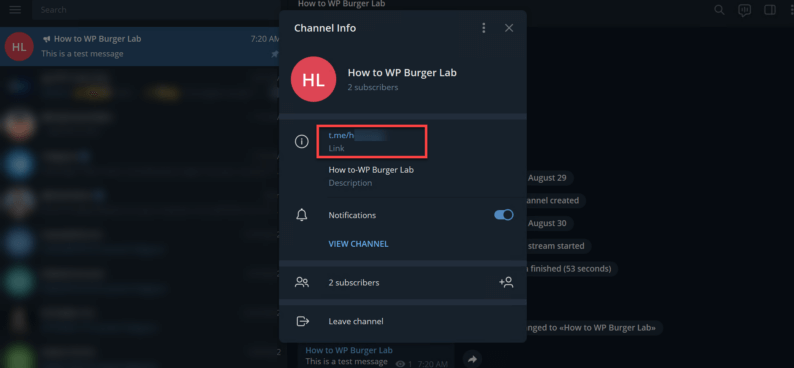
Now let’s link the channel (that you previously made public) with the WordPress site. Click on the top bar of the channel and click copy the link of the channel.
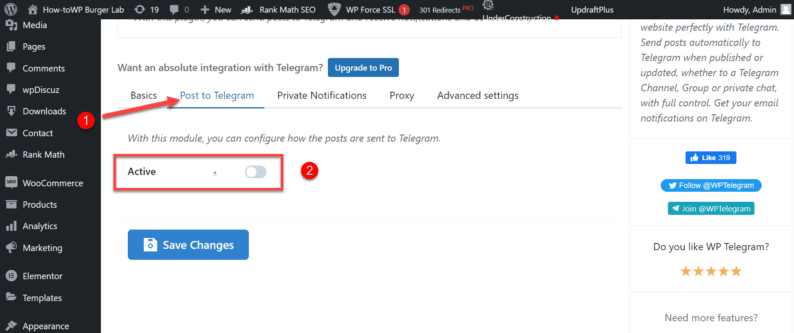
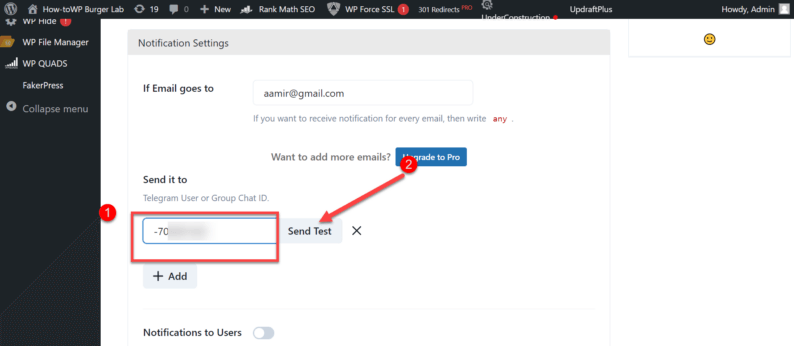
Now go back to the website and go to the “Post to Telegram” section. Here toggle the “Active” switch to on.
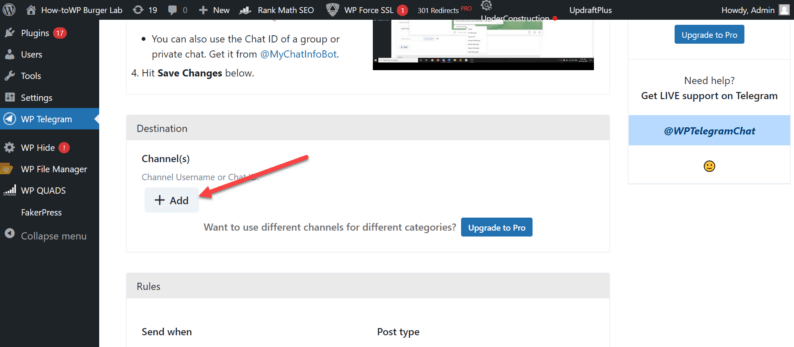
In the “Destination” section, click the “Add” button.
Now paste the previously copied link in the box that appears. After pasting it remove all of the text mentioned before the name that you typed for the link.
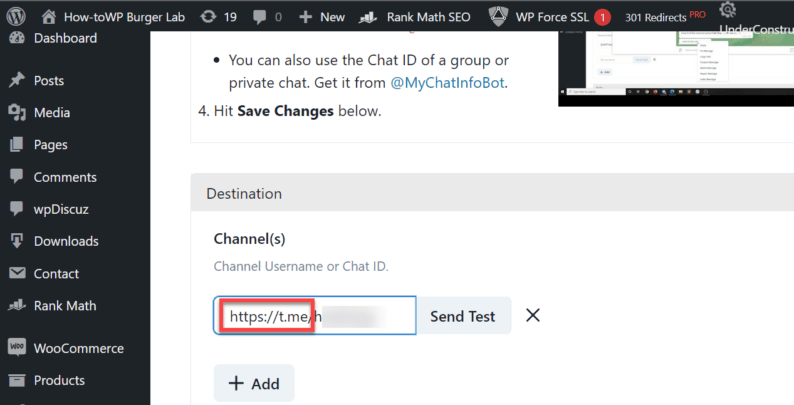
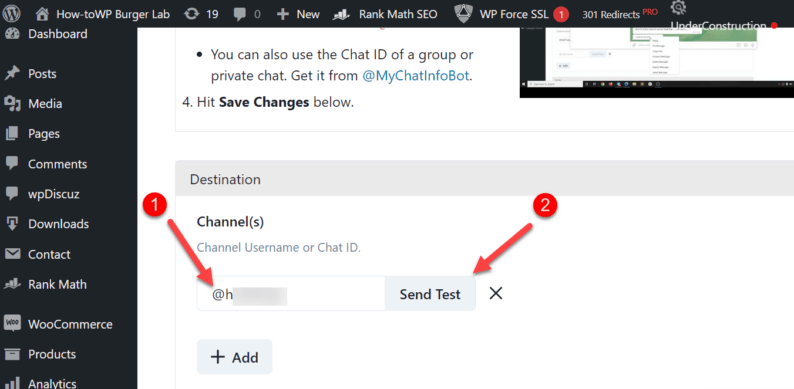
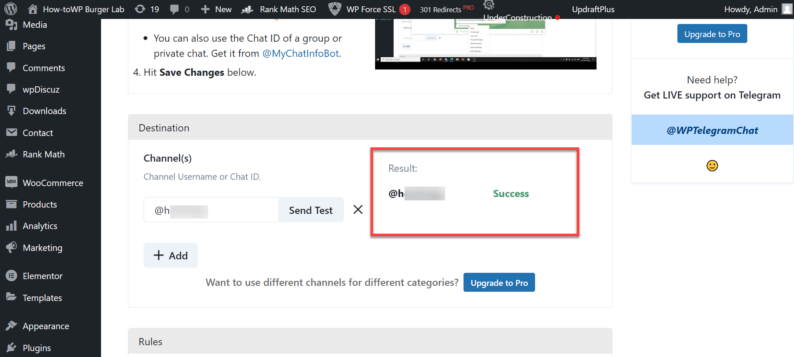
Add a “@” symbol before the name, and this will be the username for the group. After that, click the “Send Test” button.
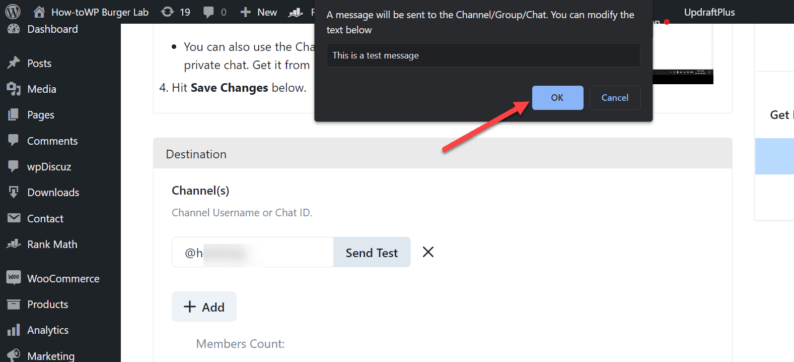
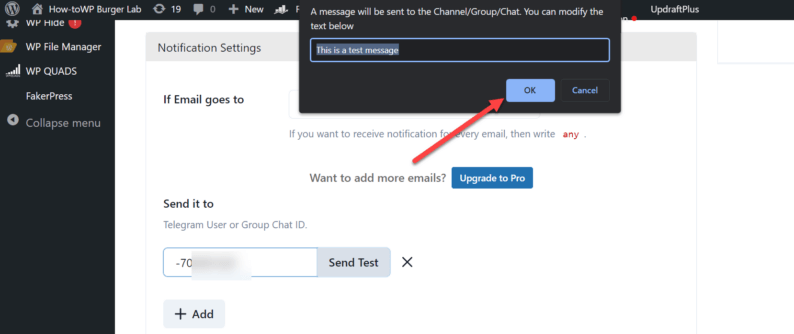
A box will appear with a text that’ll be sent to the channel. Edit it if you want to, and after that, click the “Ok” button.
A “Success” text will appear next to the username of the channel (if everything is done correctly).
Note: You can also verify this by checking the message in the channel.
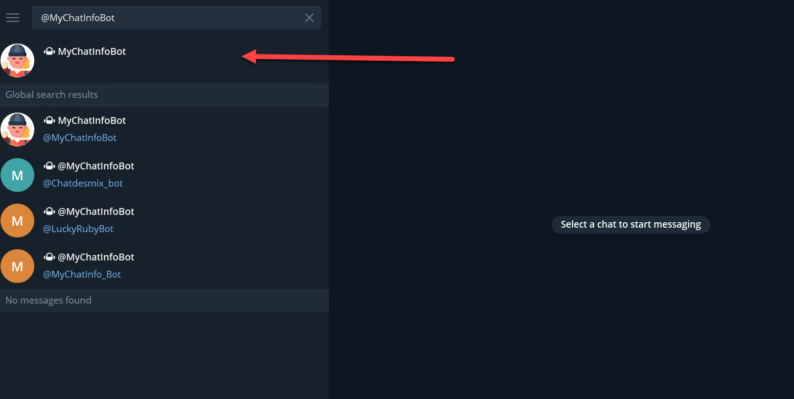
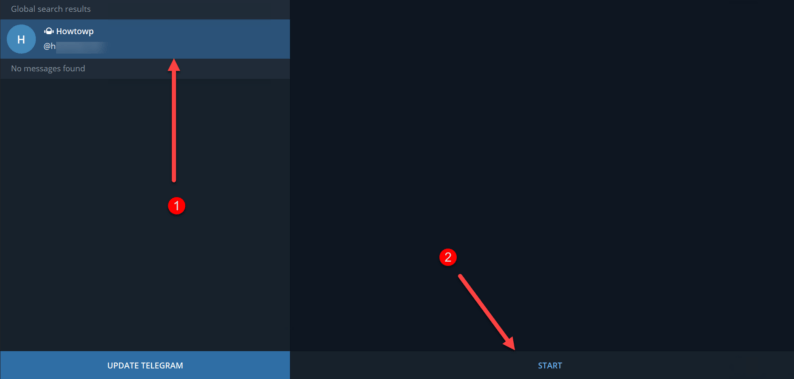
If you don’t want to make the group public, then there is a way to integrate your WordPress site with Telegram. Copy the “@MyChatInfoBot” text mentioned with the instructions.
Go to Telegram and paste it into the search bar. Click the first option that appears on the screen.
Now, click the “Start” button.
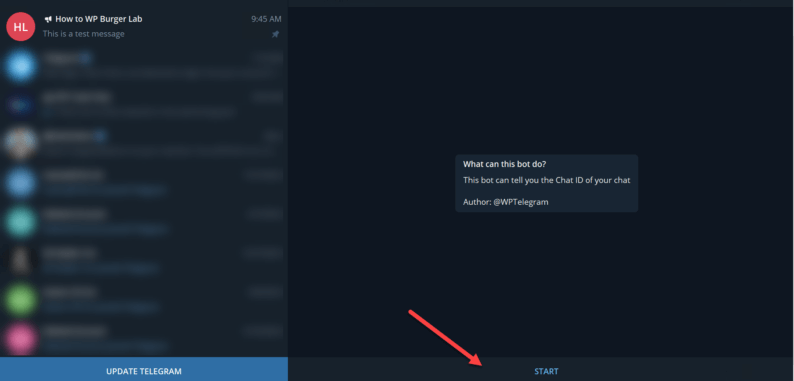
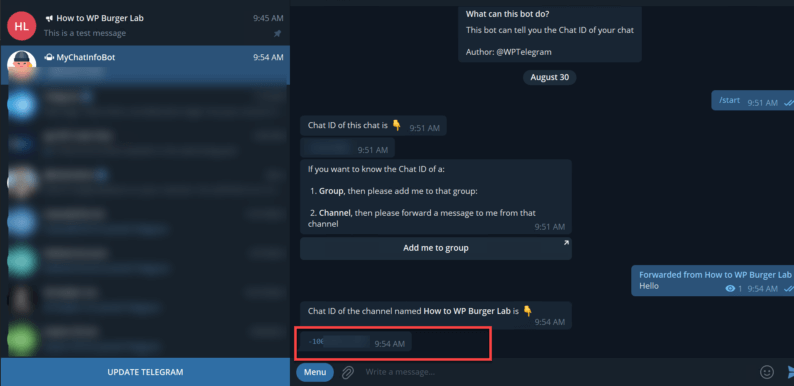
After that, go back to the channel in Telegram and forward any random message to the “@MyChatInfoBot” user.
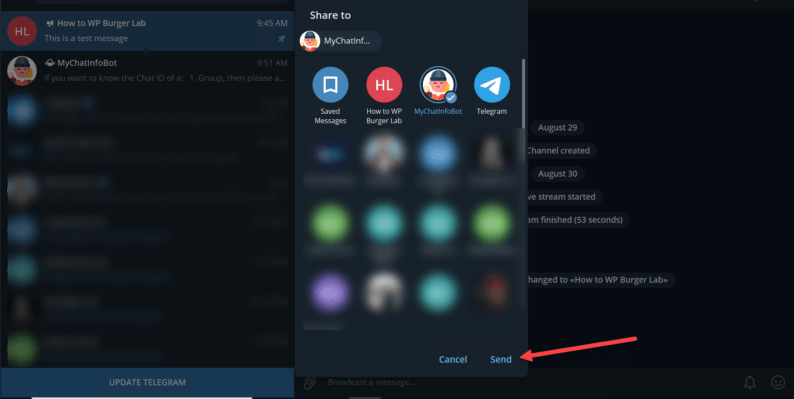
As soon as you forward the message, you’ll be given the ID of the channel.
Go back to your WordPress site and paste the channel ID. After that, click the “Send Test” button.
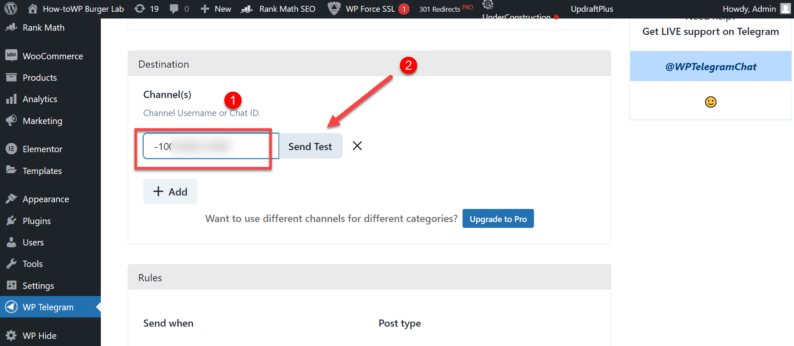
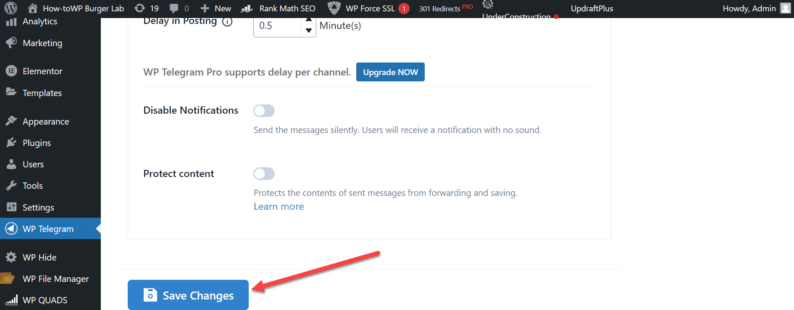
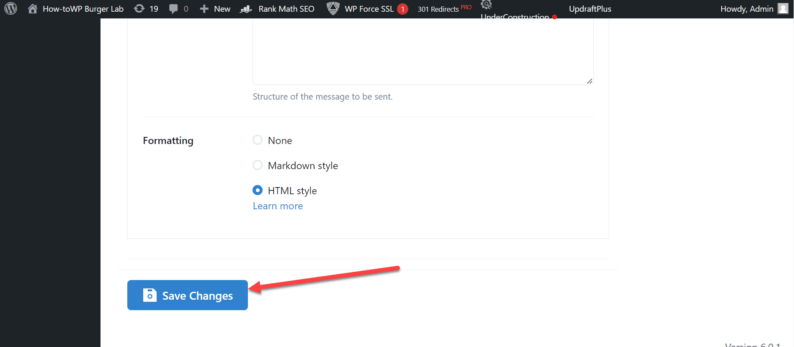
Next, scroll down a bit and set the rules for sending posts.

Once all the changes have been made, click the “Save Changes” button.
Step 7: Sending the Posts
Finally, you’ve successfully integrated your WordPress Site with Telegram.😅 Why don’t you check it out by creating a new post on your site?
Go and write a new post for your site. After writing it, make sure to publish it.
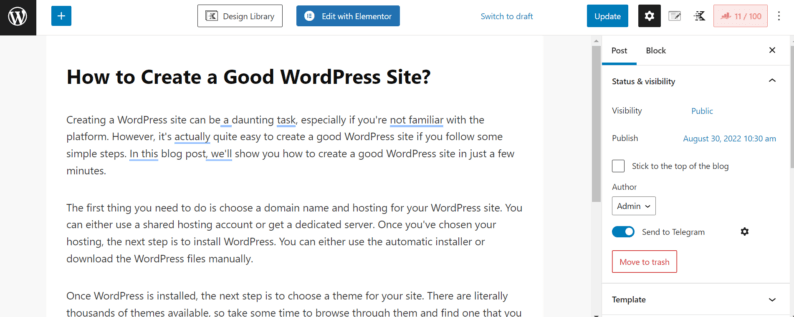
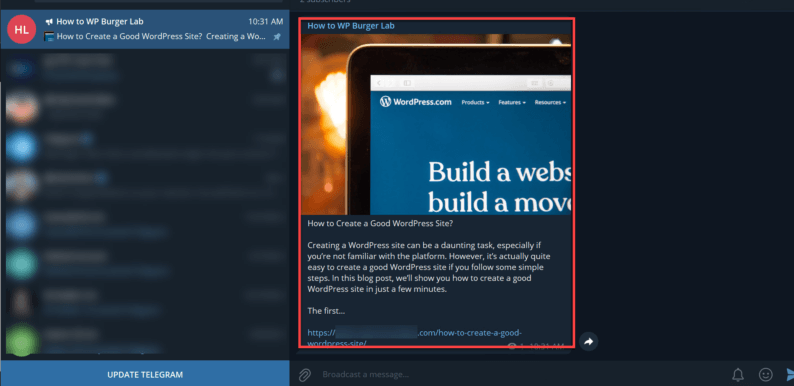
As soon as you publish the post, a message will be sent to your channel.
Step 8: Enabling Private Notification
Ok! Now that you’ve successfully integrated your WordPress site with Telegram, you need to make sure that you receive a private notification whenever something is published via the bot.
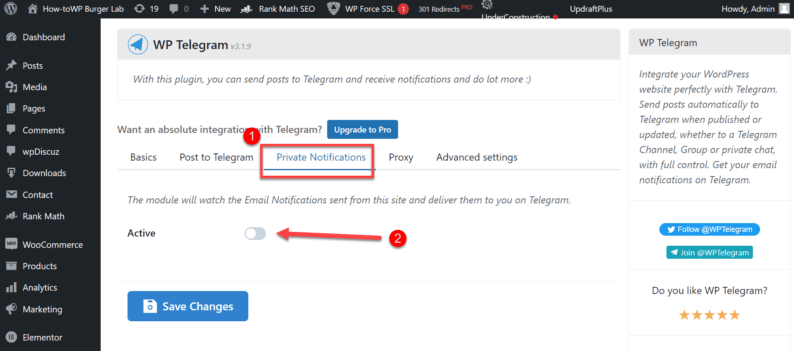
To enable this feature, you’ll first need to go to the “Private Notifications” section and toggle the switch to on.
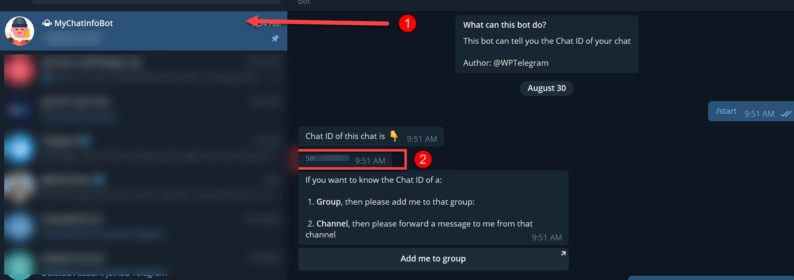
Now go back to your Telegram account and open the “MyChatInfoBot” chat. Here you’ll see that you’ve already been given the “Chat ID” for later use. Make sure to copy it.
Before you go back to the WordPress site, search for your chatbot by its username and click the “Start” button.
Note: It’s necessary to do so because otherwise, the connection will not work.
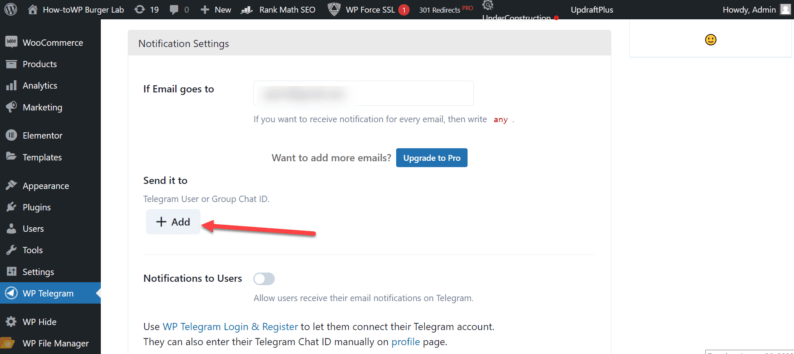
Now, go back to your site and click the “Add” button under the “Notification Settings” section.
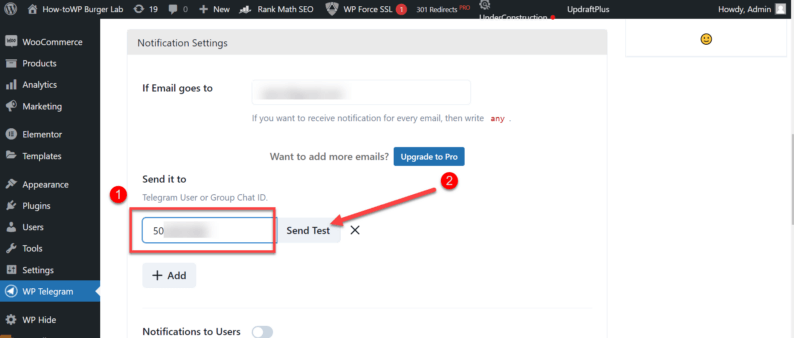
Paste the chat ID in the box and click the “Send Test” button.
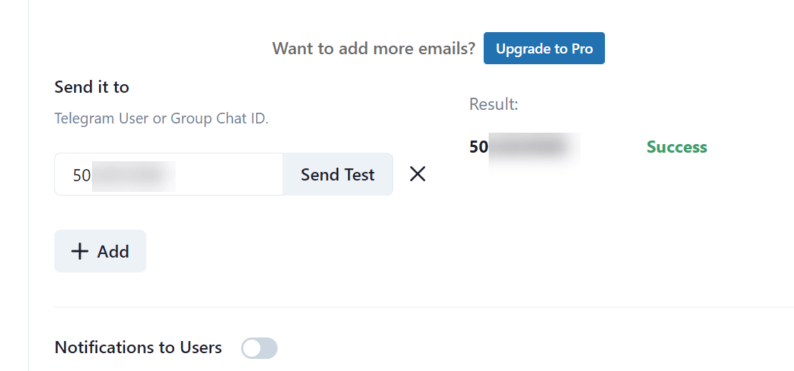
If the connection has been established, a “Success” text will be shown with the chat ID.
How to Connect WordPress Site with Telegram Group
Now that Telegram is integrated with your site, and you might need to send messages to a group as well. Overall the procedure is similar with a few exceptions.
Go to the Telegram application and create a new group.
First, you’ll need to enter a name for the group.
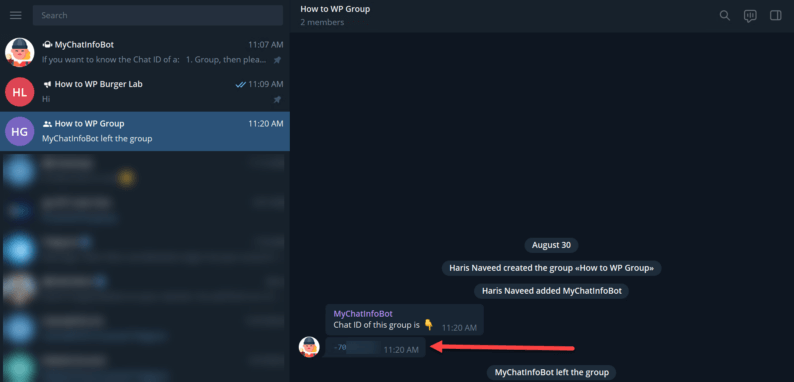
Next, you’ll need to add group members. Make sure that you add the “@MyChatInfoBot” user as well because it’ll give you the group ID.
Note: As soon as the group is created, the “@MyChatInfoBot” will give you the group ID and leave the group.
Copy the group ID to your clipboard.
Go back to your WordPress site and paste the code. After that, click the “Save Changes” button.
Click the “Ok” button to send the message.
You’ll see that a message has been sent to your group. Don’t forget to click the “Save Changes” button.
Why Integrate Your WordPress Site with Telegram
There are several reasons why you should integrate Telegram with WordPress. For one, it allows you to receive instant notifications whenever a new post or page is published on your site. This way, you can keep your audience updated on your latest content in real-time.
Another reason to consider integrating Telegram with WordPress is that it makes sharing your content with others easier. With the click of a button, your readers can share your articles and blog posts with their contacts on Telegram. This helps to spread the word about your website and increase its visibility.
Finally, Telegram is a secure platform that offers end-to-end encryption for all messages. This means that your conversations and communications are protected from being intercepted or hacked. This is especially important if you are sharing sensitive information on your website.
Some other reasons why you should integrate your WordPress site with Telegram include:
- It’s a fast and secure messaging app with a focus on privacy.
- It’s available on all major platforms, including iOS, Android, Windows, and Mac.
- Telegram offers a variety of features that are perfect for online collaboration, such as group chats, file sharing, and voice and video calls.
- Free to use and does not display ads.
- It has push notifications, so you can receive messages even when you’re not using the app.
- It’s cloud-based, so your chats are always backed up and available from any device.
- Telegram is open source, which means it can be audited for security vulnerabilities.
- It’s constantly being updated with new features and improvements.
Conclusion
The above-mentioned method is quite extensive and long, so don’t get scared by the length of the procedure. Just follow each of the steps as it is, and there shouldn’t be any issues when you integrate your WordPress your WordPress site with Telegram.
If you want to add a chatbot to your WordPress site, then I’ll recommend that you check my article on “How to Add ManyChat to WordPress” article.
If you found this article to be helpful, then please leave a comment below, and don’t forget to share this article with your friends.


Is there a way to insert a message from Telegram chat into a WordPress post?
Another possible method for inserting a message from Telegram chat into a WordPress post is to use the Telegram API to create a custom integration. This method would involve creating a bot using the Telegram API and then using that bot to send messages from Telegram to your WordPress site. Here are the high-level steps for this method:
Step 1: Register a new bot using the Telegram Bot Father
Step 2: Get the API key for the bot
Step 3: Use a programming language like PHP or Python to create a script that listens for incoming messages from Telegram and then sends them to your WordPress site.
Step 4: Use the WordPress REST API to insert the message into a post.
Step 5: Schedule the script to run at regular intervals to check for new messages.
Please note that this method is more advanced than the others you have discussed and will require some knowledge of programming and APIs.
Nice i really enjoyed reading your blogs. Keep on posting. Thanks
Thanks! 🙂