How to Make a Menu Item Non-Clickable in WordPress

With WordPress, there are tons of customizations you can make. It can be anything from making menu items non-clickable to changing the entire layout of the website. Almost all of the websites that use WordPress needs to be customized.
Creating menu items is simple but making them non-clickable is something that many people don’t know how to do so. However, that is something that can be resolved with a few simple steps. All you need to do is to follow each of them carefully, and everything should be alright.
So follow me, and you’ll get a proper guide on how to make a menu item non-clickable in WordPress.😊
In this guide, you’ll learn:
- How to make a menu item non-clickable?
- What are clickable & non-clickable menu items?
- Why are non-clickable menu items useful?
Let’s start by knowing what menu items are.
Table of Contents
Creating a menu item non-clickable isn’t a complicated task, but it isn’t straightforward either.
There are two main ways to make a menu item non-clickable:
- By entering # in the URL
- Without removing the URL
We’ll start with the method in which we remove the URL because it doesn’t require you to change any aspect of your website.
Method 1: By Entering # in the URL
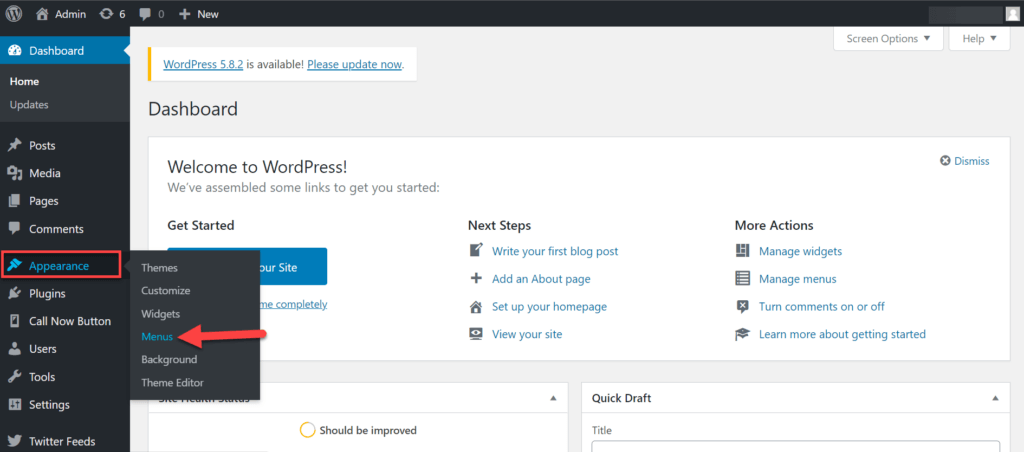
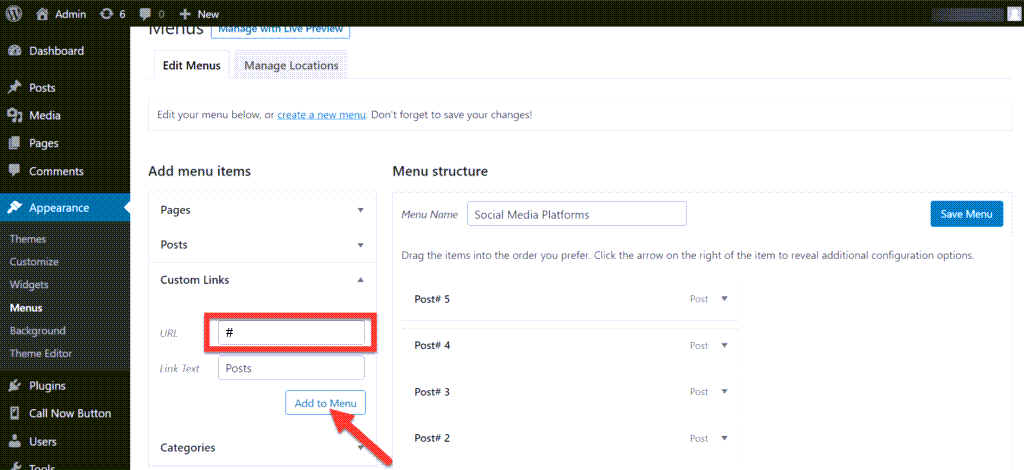
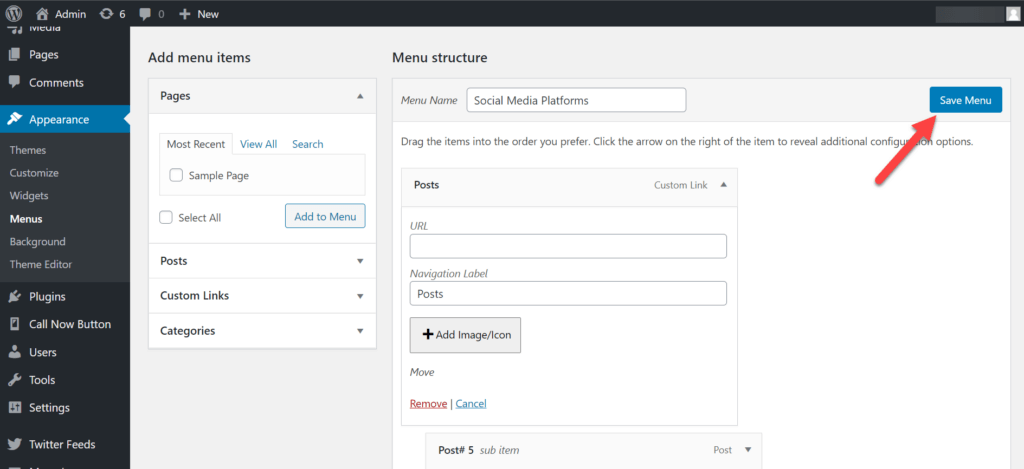
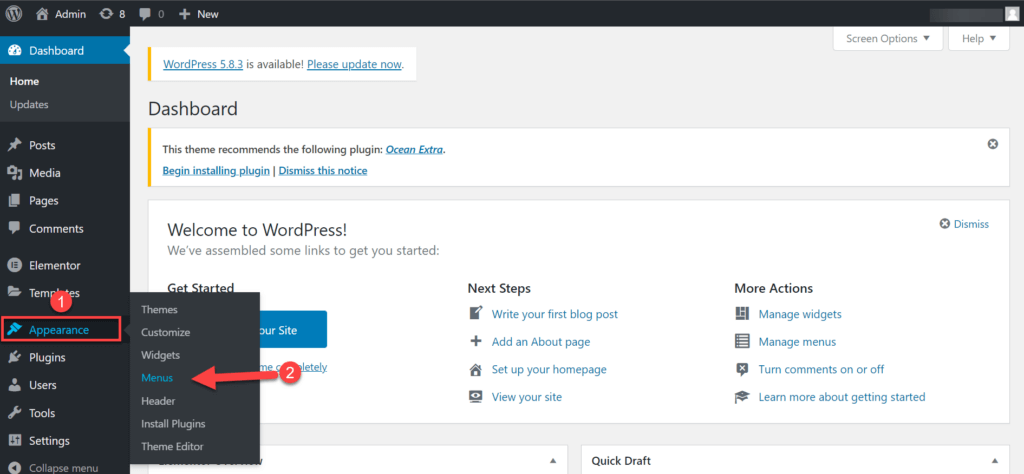
First, you will have to create a custom menu item. Start by going to “Appearance” and then clicking on the “Menus” option.
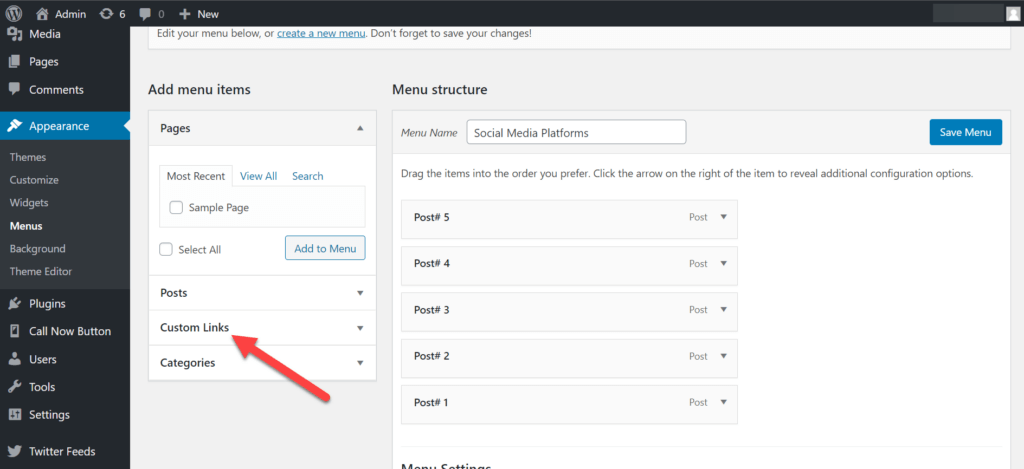
In this section, click on the Menus, and you will see an option labelled as “Custom Links,” using which you can add a new dummy menu item.
A drop-down menu will appear so you can enter the details for the dummy menu item. Usually, if you try to add a menu item without the URL field, WordPress won’t let you add it.
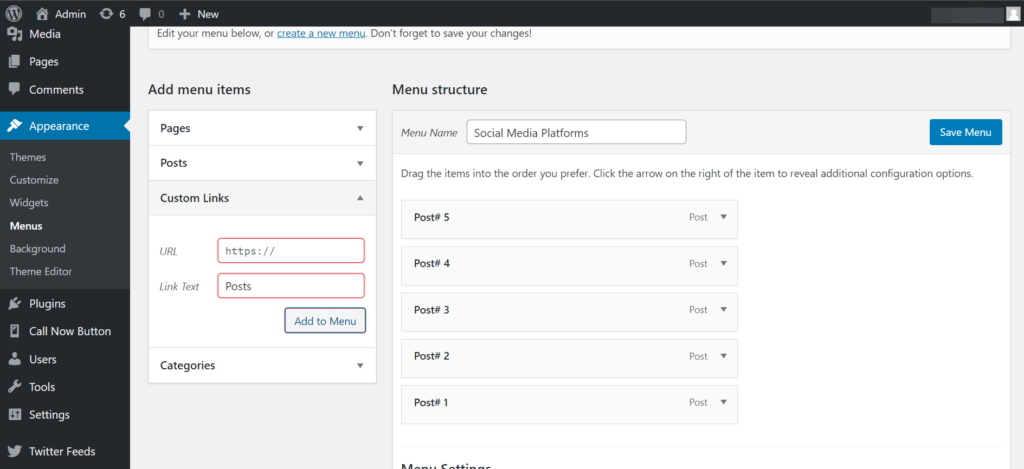
Just add # in the URL section and click on the “Add to Menu” button to avoid the error.
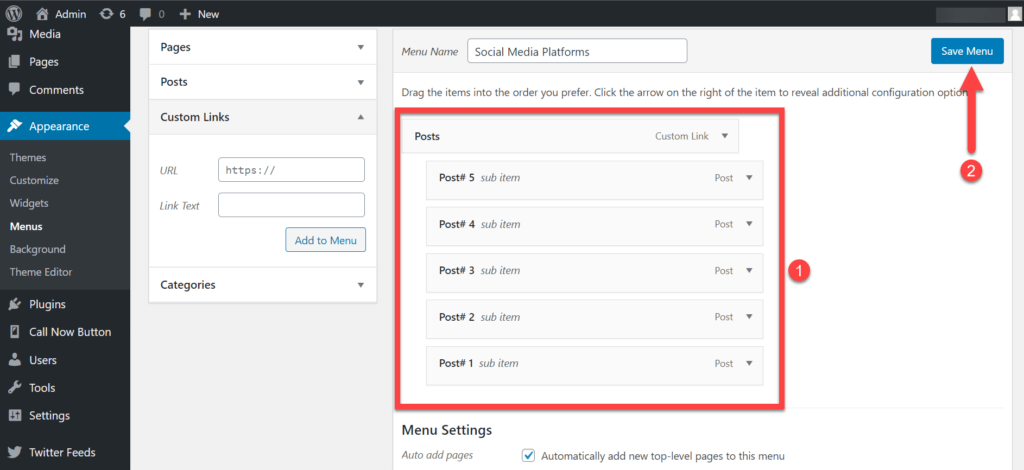
After adding the dummy menu item, adjust the menu structure however you like to display it in the menu bar. You can accomplish this by dragging and dropping a block of the menu item. Click on the Save Menu button to save it.
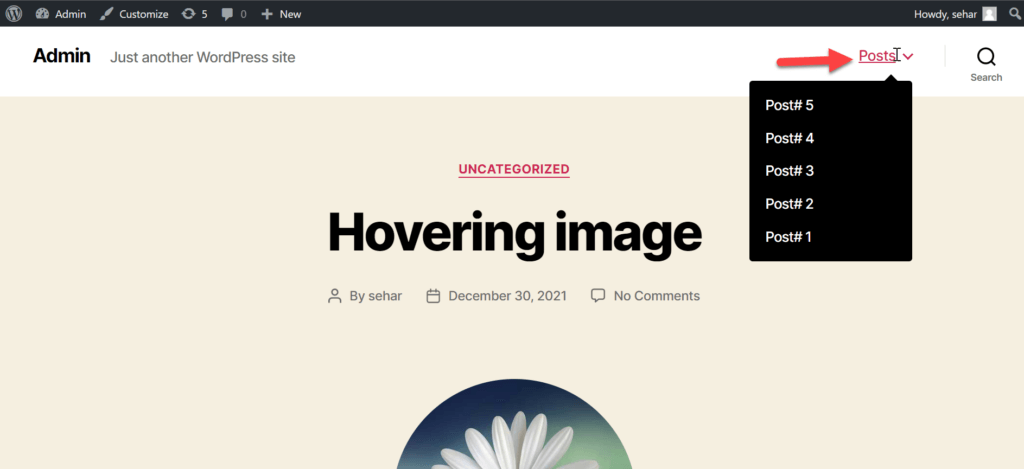
Now, if you go to your page and after refreshing, you’ll see that the menu item won’t redirect you anywhere. It means the menu item is now non-clickable.
Pro Tip:
The # symbol in the URL will prevent the page from being redirected. However, the button will still be clickable. There are a few more steps to make the button completely unclickable.
Go back to the “Menus” section and remove the # from the URL input bar.
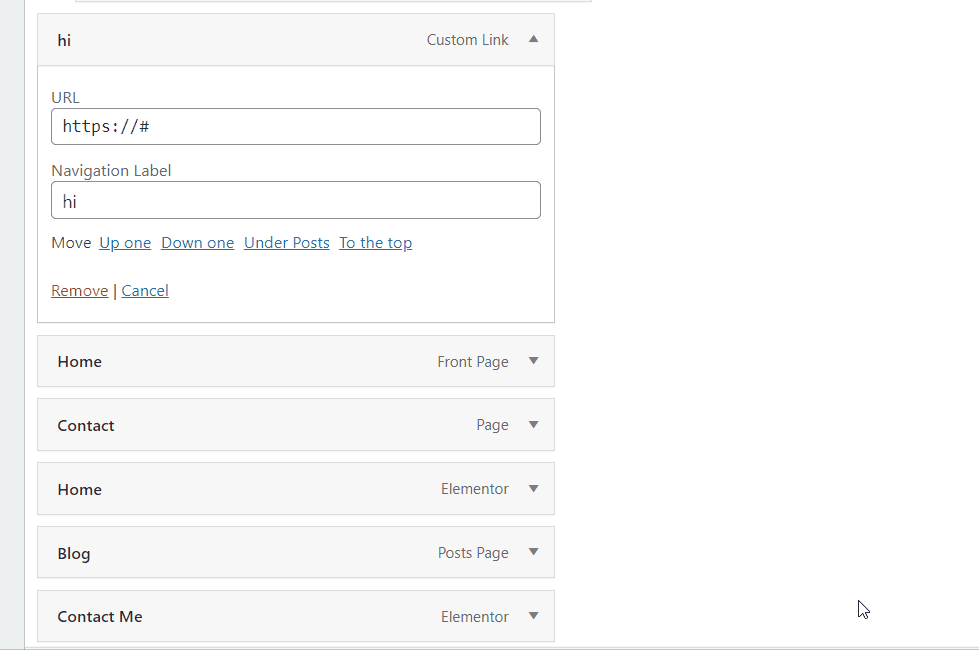
In order to save all the changes made to the standard menu item, click the “Save Menu” button.
Note: Ensure that you select the correct menu option, such as “Primary menu” or “Secondary menu.”
After refreshing the page again, you’ll be able to see that the button can no longer be clicked. The cursor will be visible.
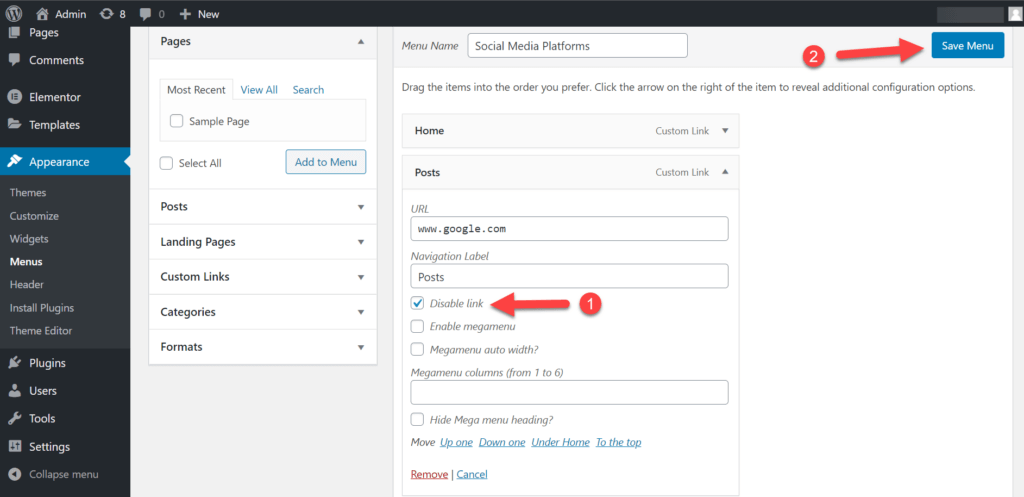
Method 2: Without Removing the URL
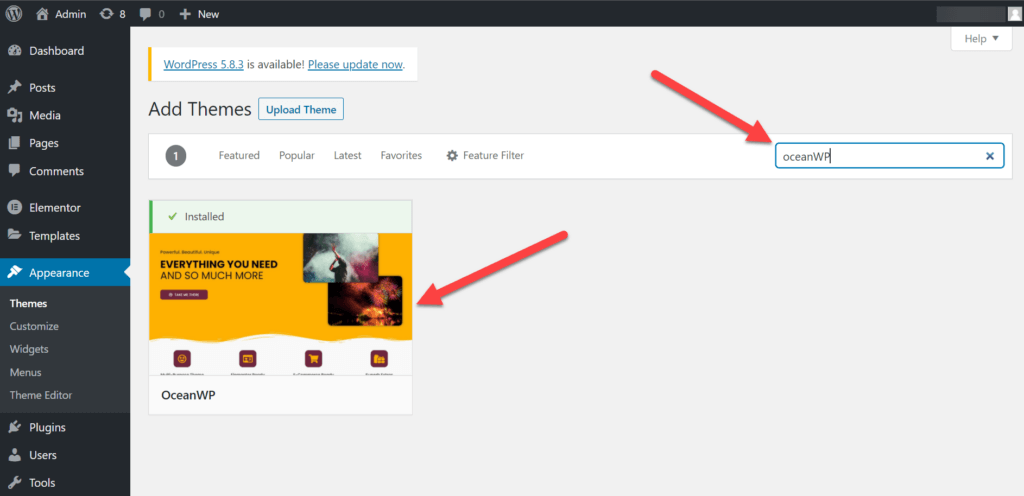
There is another way to make a menu item non-clickable. It’s even simpler than the previously mentioned method, but it requires you to change your theme. Or you can check with your current theme if they have a similar option. The name of the theme that I’ll use in this method is “OceanWP.”
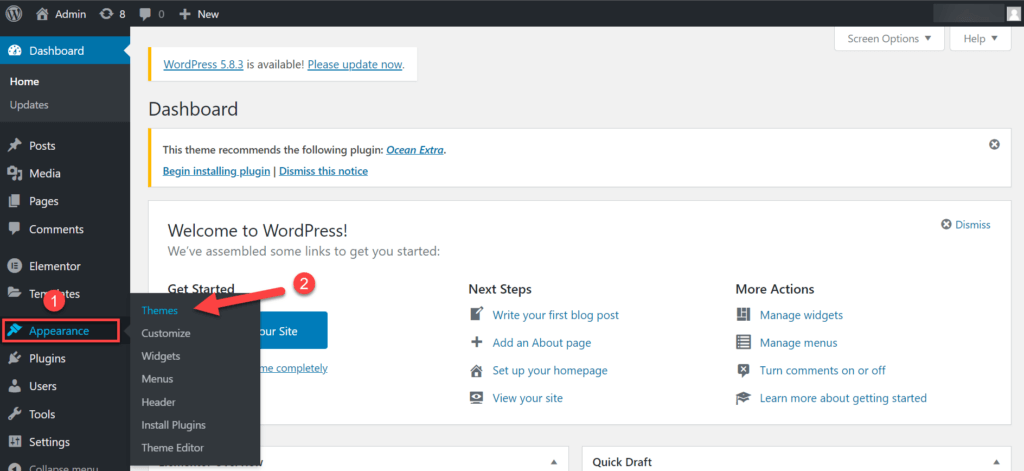
Go to “Themes” in the “Appearance” section.
Here, click on the “Add New” button.
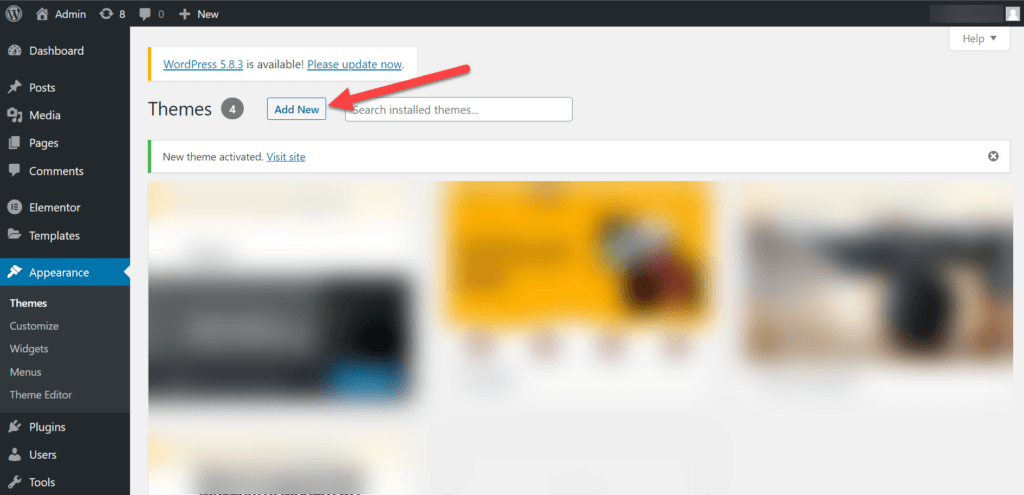
Now, search, install and activate the “OceanWP” theme.
After that, click on the “Menus” option in the “Appearance” section.
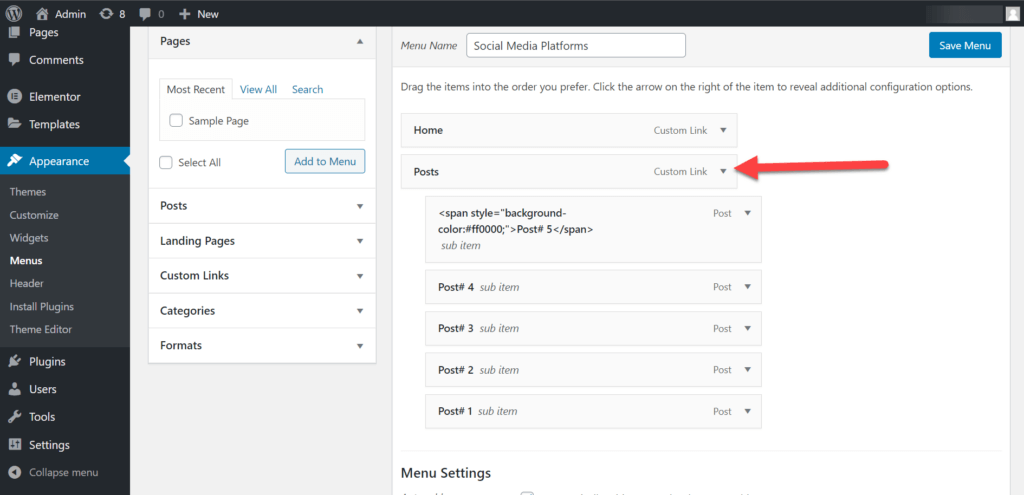
Select a menu item and make that particular menu item non-clickable.
There’s a checkbox in that menu item labelled as “Disable link,” which (as the name suggests) disables the given URL of the menu item.
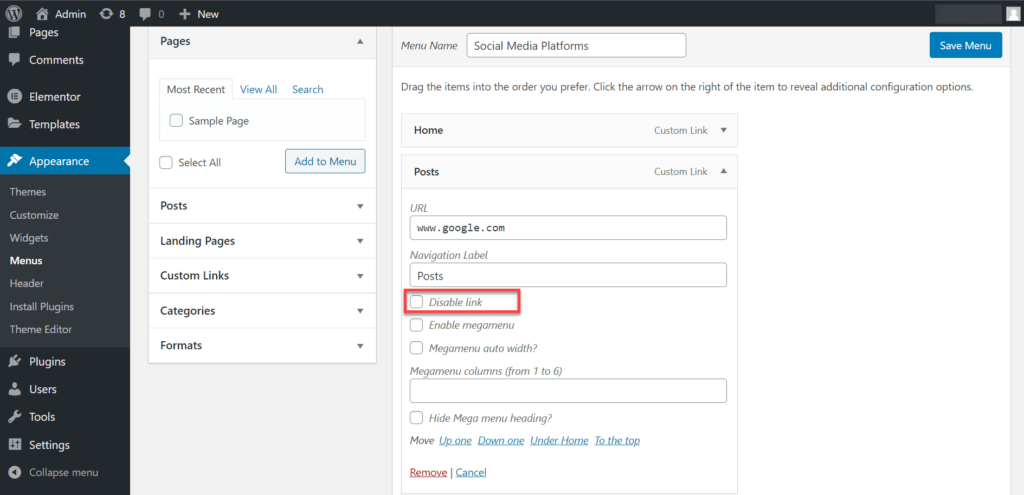
Check the box and click the “Save Menu” button.
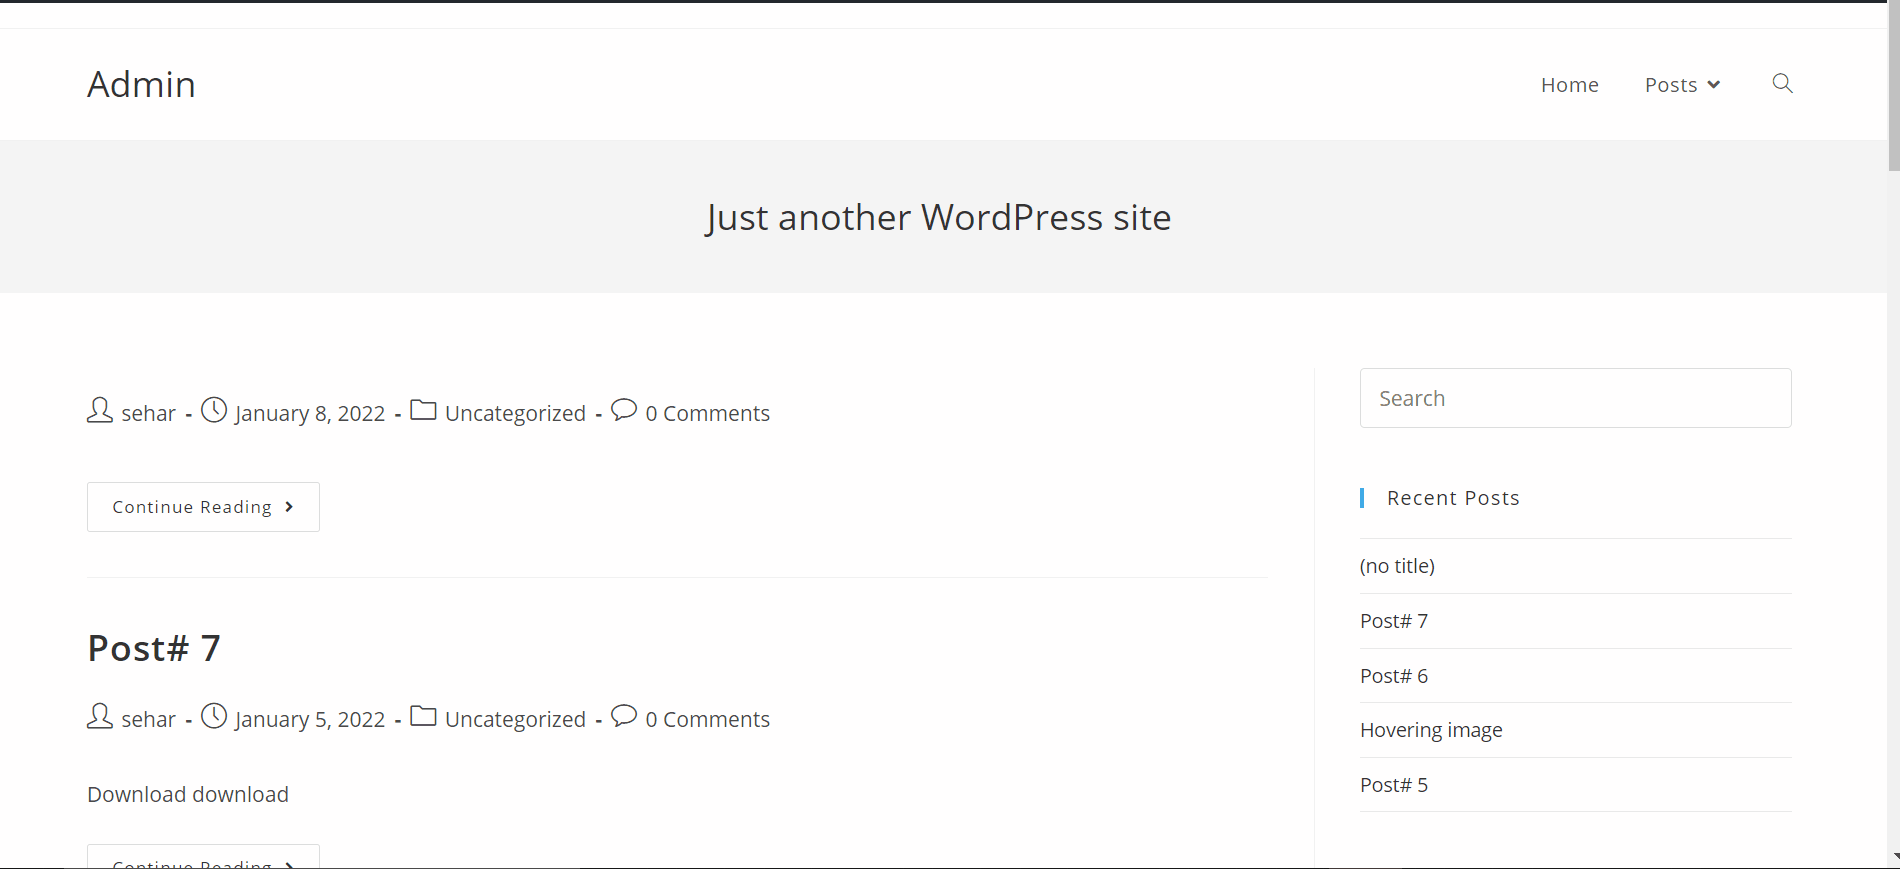
When you go back and refresh the website page, the menu item will become non-clickable, and the URL will still be visible.
On a website, you might have seen a menu bar with multiple options. These options are called menu items. These items can be either pages, posts, or anything. It entirely depends on the website owner to add any menu item.
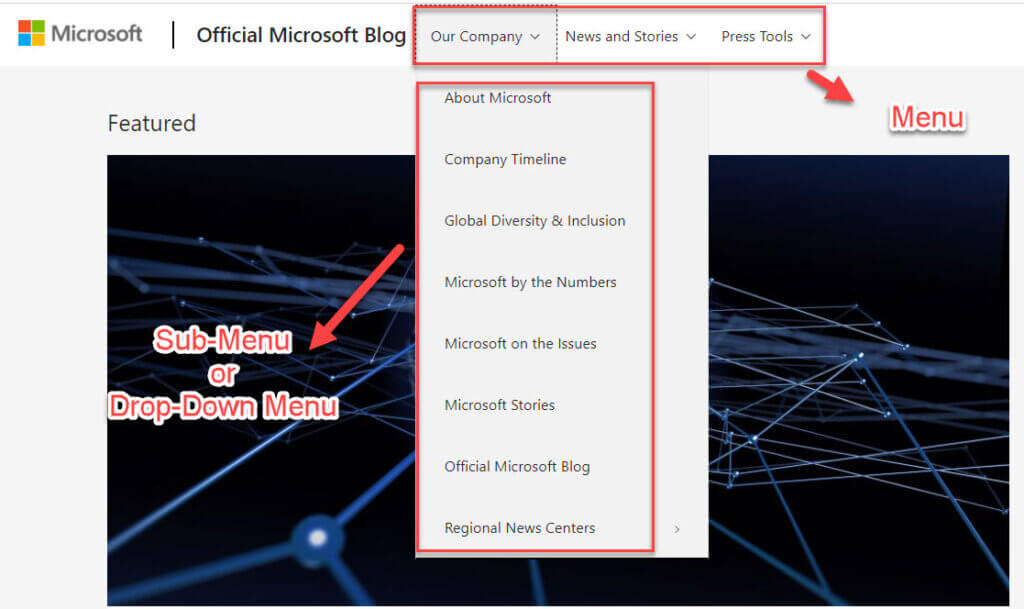
It can either be a default menu item or a custom one. Many people choose the default menu items option. However, those who wish to customize their menu items can create their own custom menu items.
Additionally, a menu item can be turned into a submenu item, which can be customized according to your needs.
There are two types of menus that can be categorized as follows:
- Clickable
- Non-clickable
When it comes to menu items, there are two types: clickable and non-clickable. Clickable menu items can be clicked on and will take the user to a new page or section within the website. Non-clickable menu items, on the other hand, cannot be clicked on and simply serve as titles or headings for the different sections of the website.
So, why would you want to have non-clickable menu items? Well, there are a few reasons. First, it can help to break up the website into different sections so that users can more easily find what they’re looking for. Second, it can be used as a way to navigate through the different pages on the website without having to click on anything.
Finally, non-clickable menu items can be helpful if you want to keep users from accidentally clicking on something that they didn’t mean to. For example, if you have a “Contact Us” link in your menu, you might not want users to accidentally click on it and be taken to a page where they have to fill out a form. By making the “Contact Us” link non-clickable, you can help to prevent this from happening.
There are times when a new visitor to a website wants to check the sub-menu section and will click on the main menu item. In the case of a menu item that has a link, instead of showing a list of submenus, it will go to another page.
In order to avoid mishaps of this nature, that particular menu item should be non-clickable. This prevents the user from accidentally going to another page.
The benefits of using non-clickable menu items include:
- Non-clickable menu items do not require the user to click on them in order to activate or deactivate them, which can save time and effort.
- Non-clickable menu items can be used to provide information that is not essential to the user’s task but which may be useful nonetheless. For example, a non-clickable menu item could be used to display the date or time.
- Non-clickable menu items can help to reduce visual clutter on a screen, as they do not need to be clicked on in order to be seen.
- Non-clickable menu items can serve as a reminder to the user that an action or task can be performed without being intrusive.
- Non-clickable menu items can be used as a form of documentation to remind the user of the purpose of a particular menu item.
Overall, non-clickable menu items can help to improve the usability of your site and make it easier for users to find their way around. If you’re looking to streamline your site’s navigation, consider adding some non-clickable menu items to your menu bar.
Thus, you not only improve the end-user experience (which is the main objective), but you also get rid of unnecessary linking and indirectly improve your SEO.
Takeaway
As I mentioned before, this isn’t a very straightforward method of making a non-clickable menu item, but it is also the simplest method. There is no limit on creating any parent or children menu items.
If you want to make multiple menu items non-clickable, you will have to first add the items one at a time and then edit them.
Comment below if you have any questions about anything covered in this article–we’re always happy to answer them.