How to Upload a PDF to WordPress [A Complete Visual Guide]

You have a valuable PDF file that you want to share with your visitors, but you’re not sure how to upload it to WordPress. You’ve tried searching online for help, but you’re still confused. You’re starting to get frustrated, and you’re wondering if it’s even possible to upload a PDF to WordPress.
The good news is that it is very possible to upload a PDF to WordPress. In fact, it’s a very simple process.
In this article, you will learn:
- Step-by-step guide to uploading a PDF to WordPress
- Why upload PDF files in WordPress
- Tips for uploading PDFs to WordPress
💡 Bonus Insight: And don’t worry if you run into any issues; I’ve got your back. Along with the guide, I’ll share some quick fixes for the most common problems people face when uploading PDFs to WordPress.
Now, let’s dive into the how-to part!
Table of Contents
Step By Step Guide to Upload a PDF to WordPress
For website owners who wish to share documents, brochures, e-books, and other resources with their visitors, uploading a PDF is a common practice.
Whether you’re aiming for accessibility, professionalism, or simply offering downloadable content, this step-by-step guide will walk you through the entire process.
Step 1: Preparing Your PDF Document for Upload
Before you even begin with WordPress, it’s essential to have your PDF document ready for a seamless upload. Properly preparing your PDF not only ensures a better user experience but also facilitates easy integration onto your website.
A crucial preparation step is optimizing the file size for quicker load times. Here’s a simple guide to reducing your PDF file size using a free online tool:
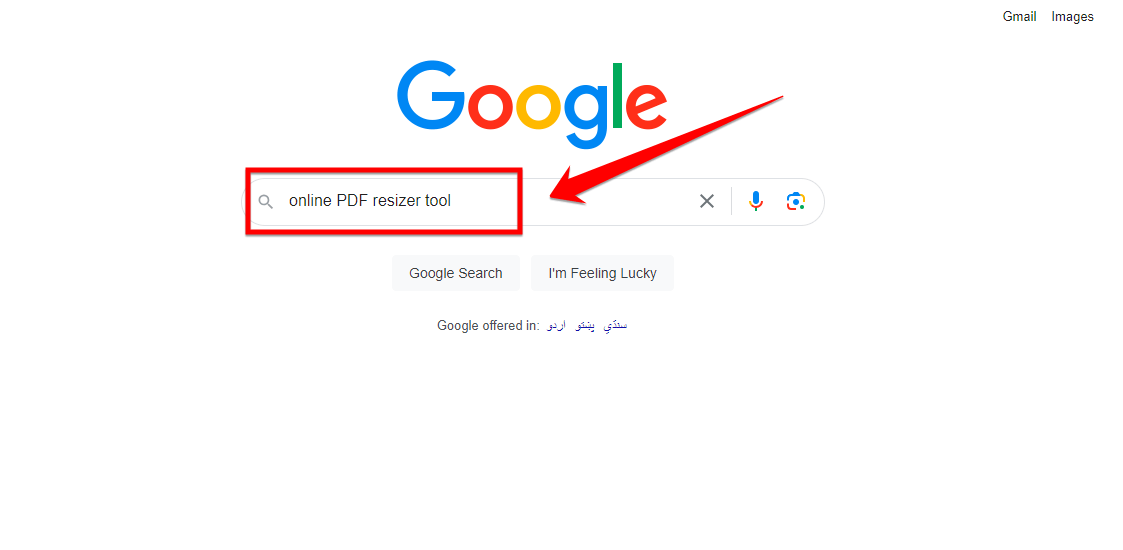
- Open your preferred web browser and head to a search engine, preferably “Google”.

- Type in the search bar, “online PDF resizer tool”, then press the search or enter button.
- Scan the search results and identify a reputable tool. Some popular options include “pdfresizer” and “PDF2Go”.
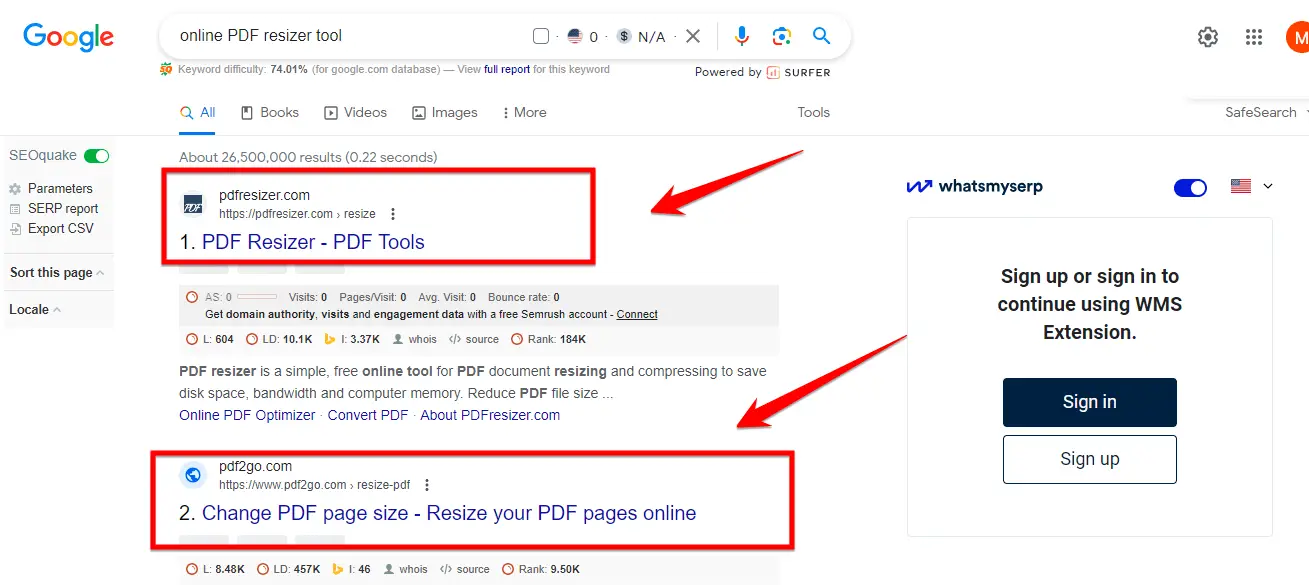
Note: Ensure the selected website appears genuine and trustworthy, minimizing potential security threats.
- You’ll then be prompted to either “Choose file” or “Upload Files”. Click on this to select your desired PDF from your device.
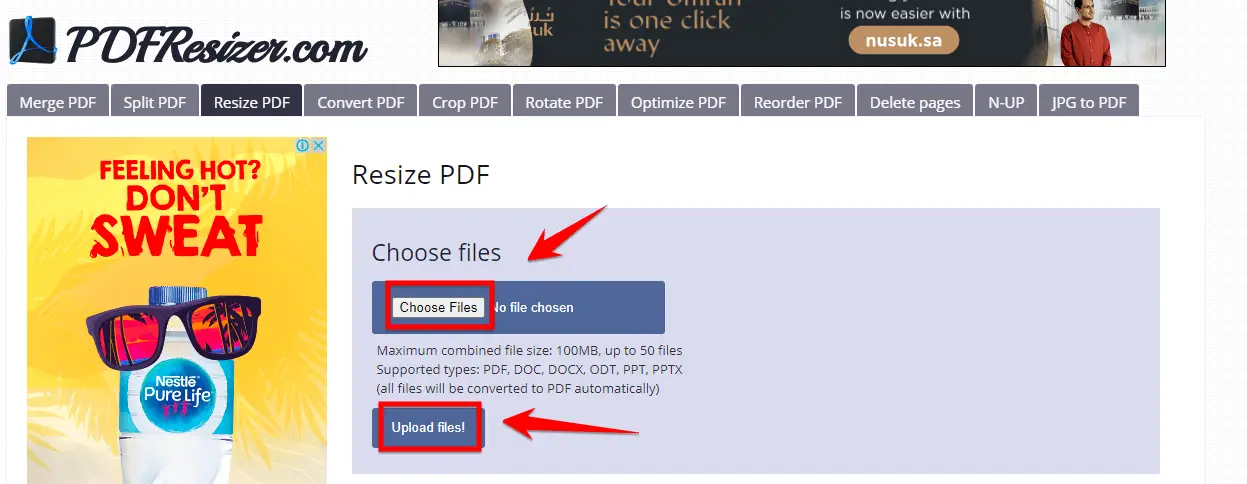
- After uploading, simply follow the platform’s specified instructions.
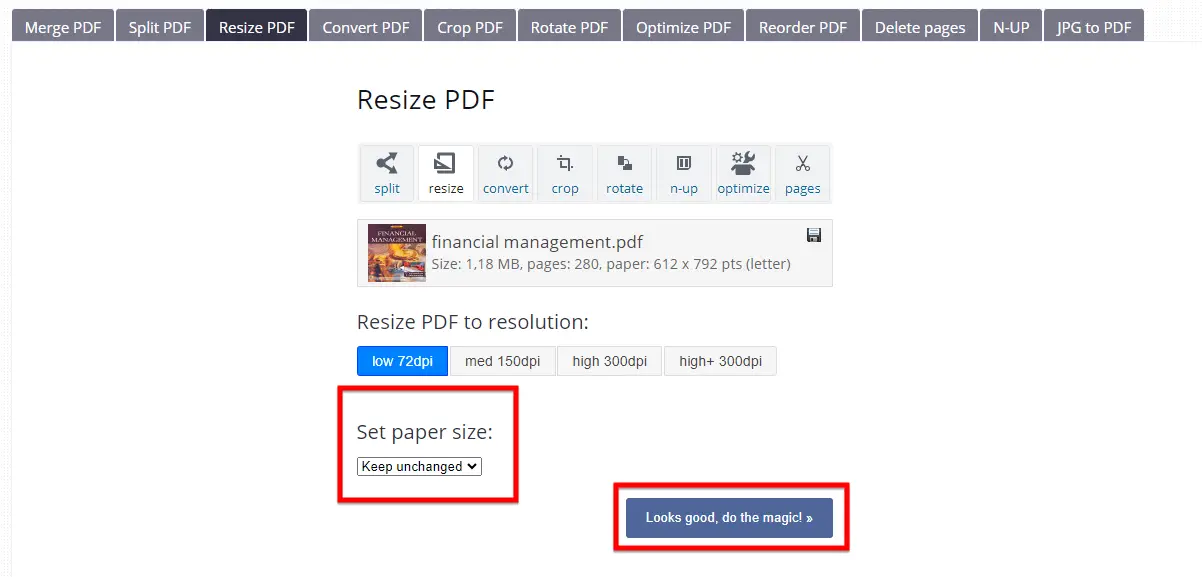
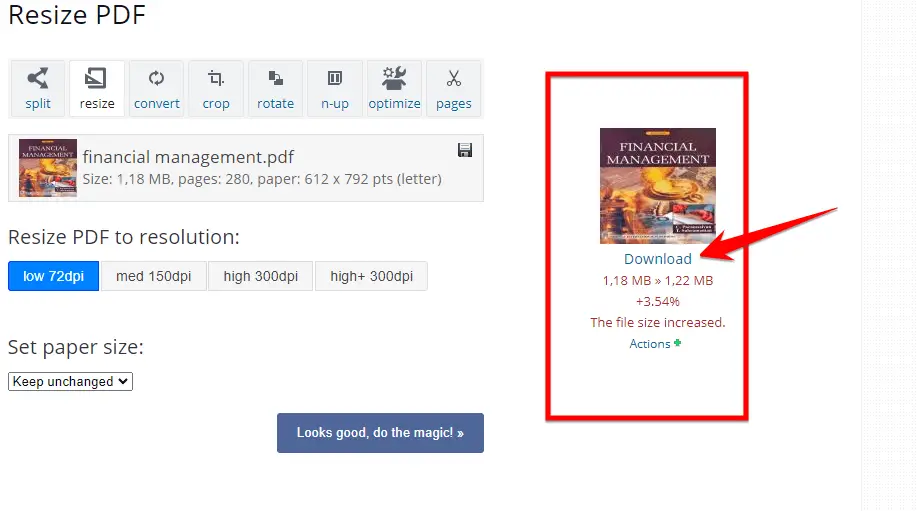
- After the compression is complete, hit the “Download” button and store the refined PDF on your device.
Step 2: Logging into Your WordPress Dashboard
To begin the journey of uploading a PDF to your WordPress site, you need to access your WordPress dashboard. This is where all the magic happens – where you create, edit, and maintain your website’s content and settings.
To log in, navigate to the admin login page and input your designated username and password. Once entered correctly, you’ll be granted access to manage and modify your website’s content and settings. Ensure you keep these login details secure to prevent unauthorized access.
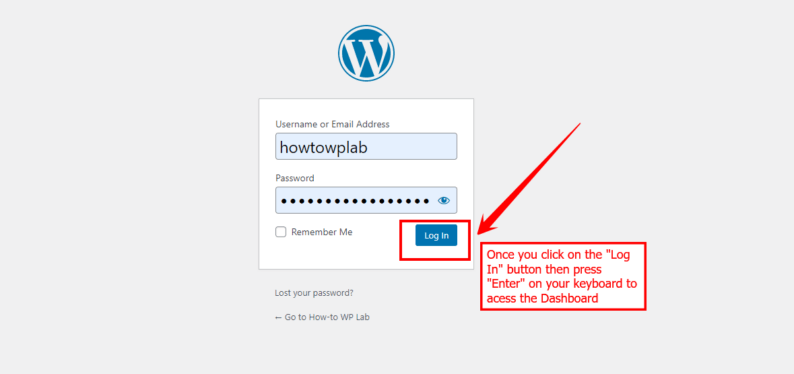
If you want to access the dashboard of your WordPress website, it’s essential to log in to the website’s admin page. This dashboard is the control center of your site, where you can manage content, settings, and other functionalities.
Step 3: Accessing the Media Library
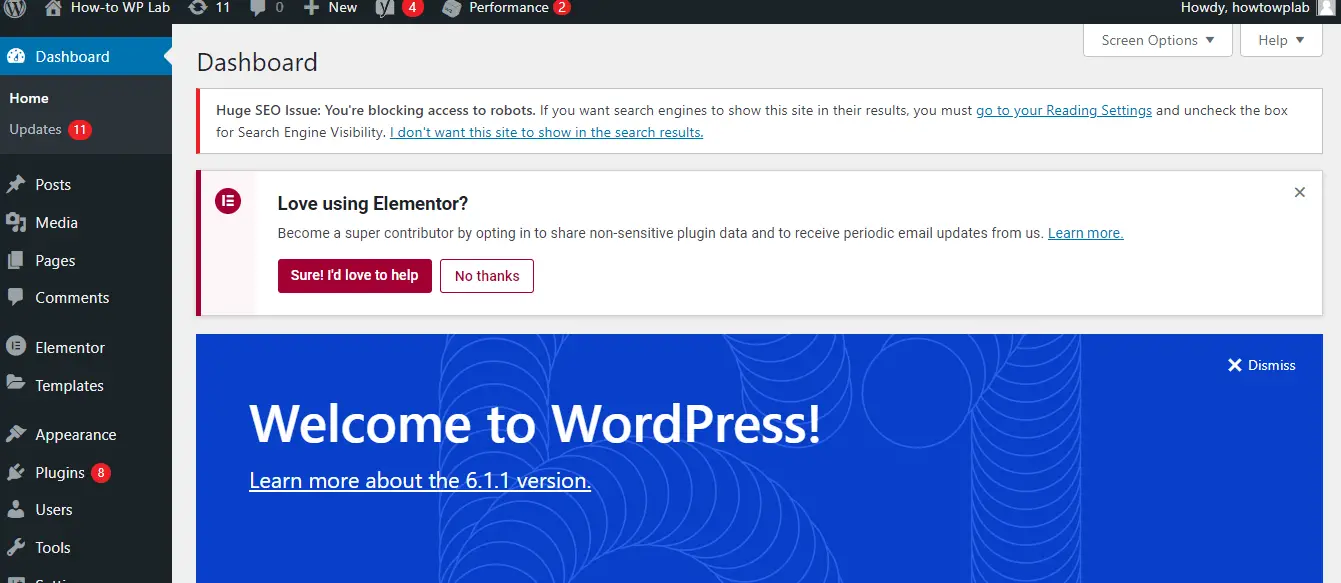
Once you’re logged in, it’s time to find your way to the Media Library.
In your WordPress dashboard, locate and click on the “Media” tab on the left-hand side. This will take you to the Media Library, where you can manage all your media files, including images, videos, and PDFs.
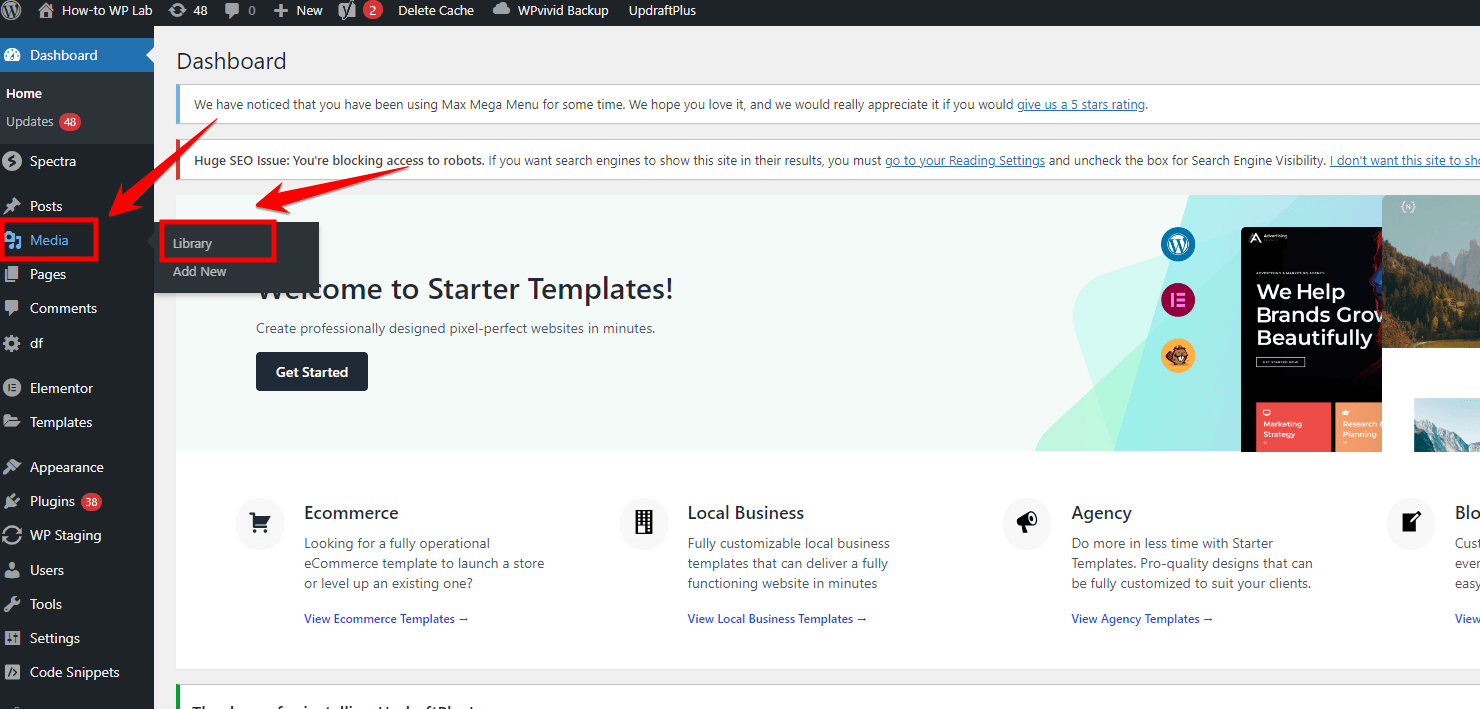
The Media Library serves as a centralized repository for your website’s media files, making it easy to organize and access them when needed.
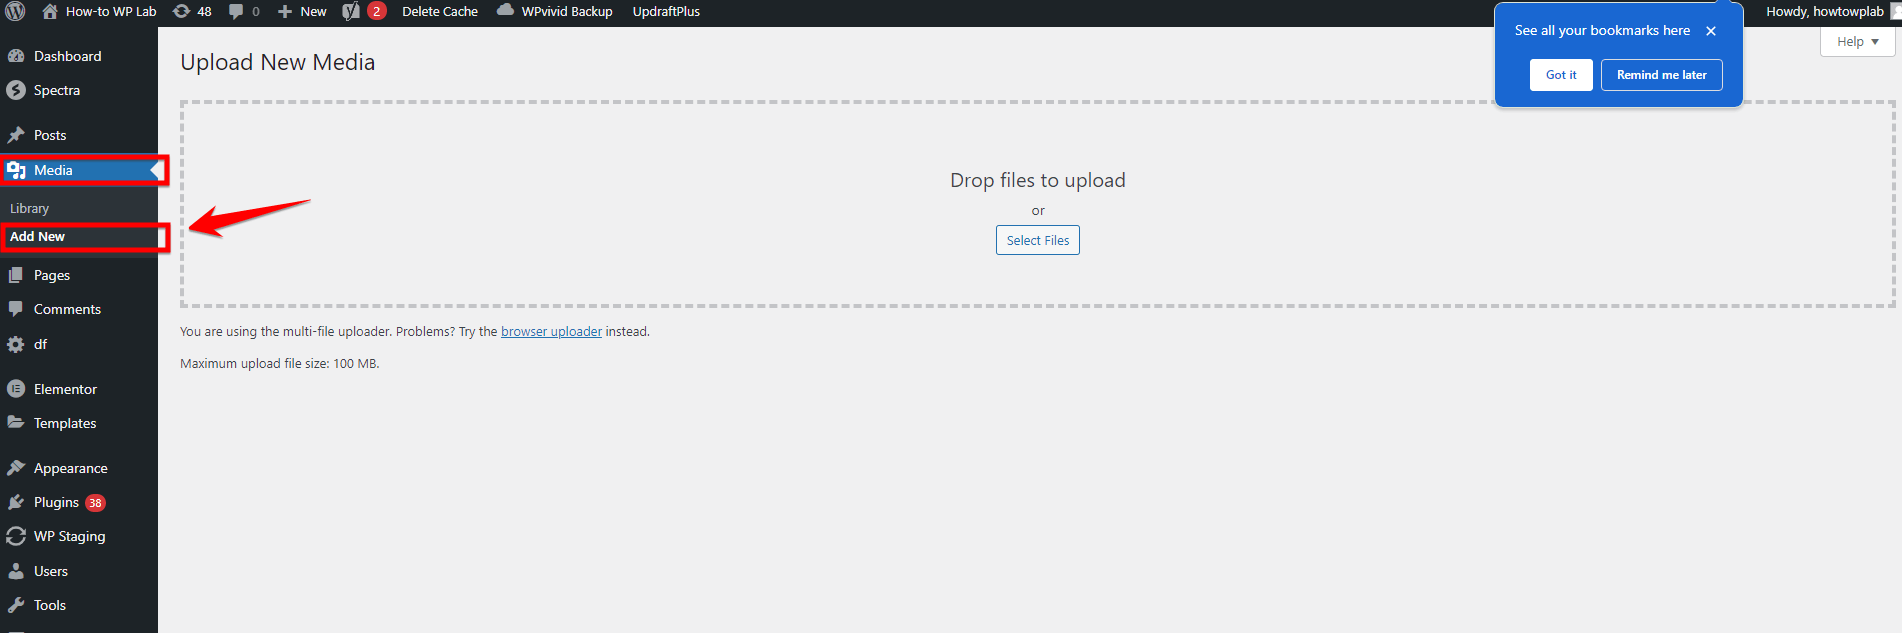
Step 4: Uploading the PDF
Now, it’s time to upload your PDF file to WordPress. In the Media Library, click the “Add New” button. This will open the media uploader.
Next, select the PDF file you want to upload from your computer by clicking the “Select Files” button. Once you’ve chosen the file, click “Open” to start the upload.
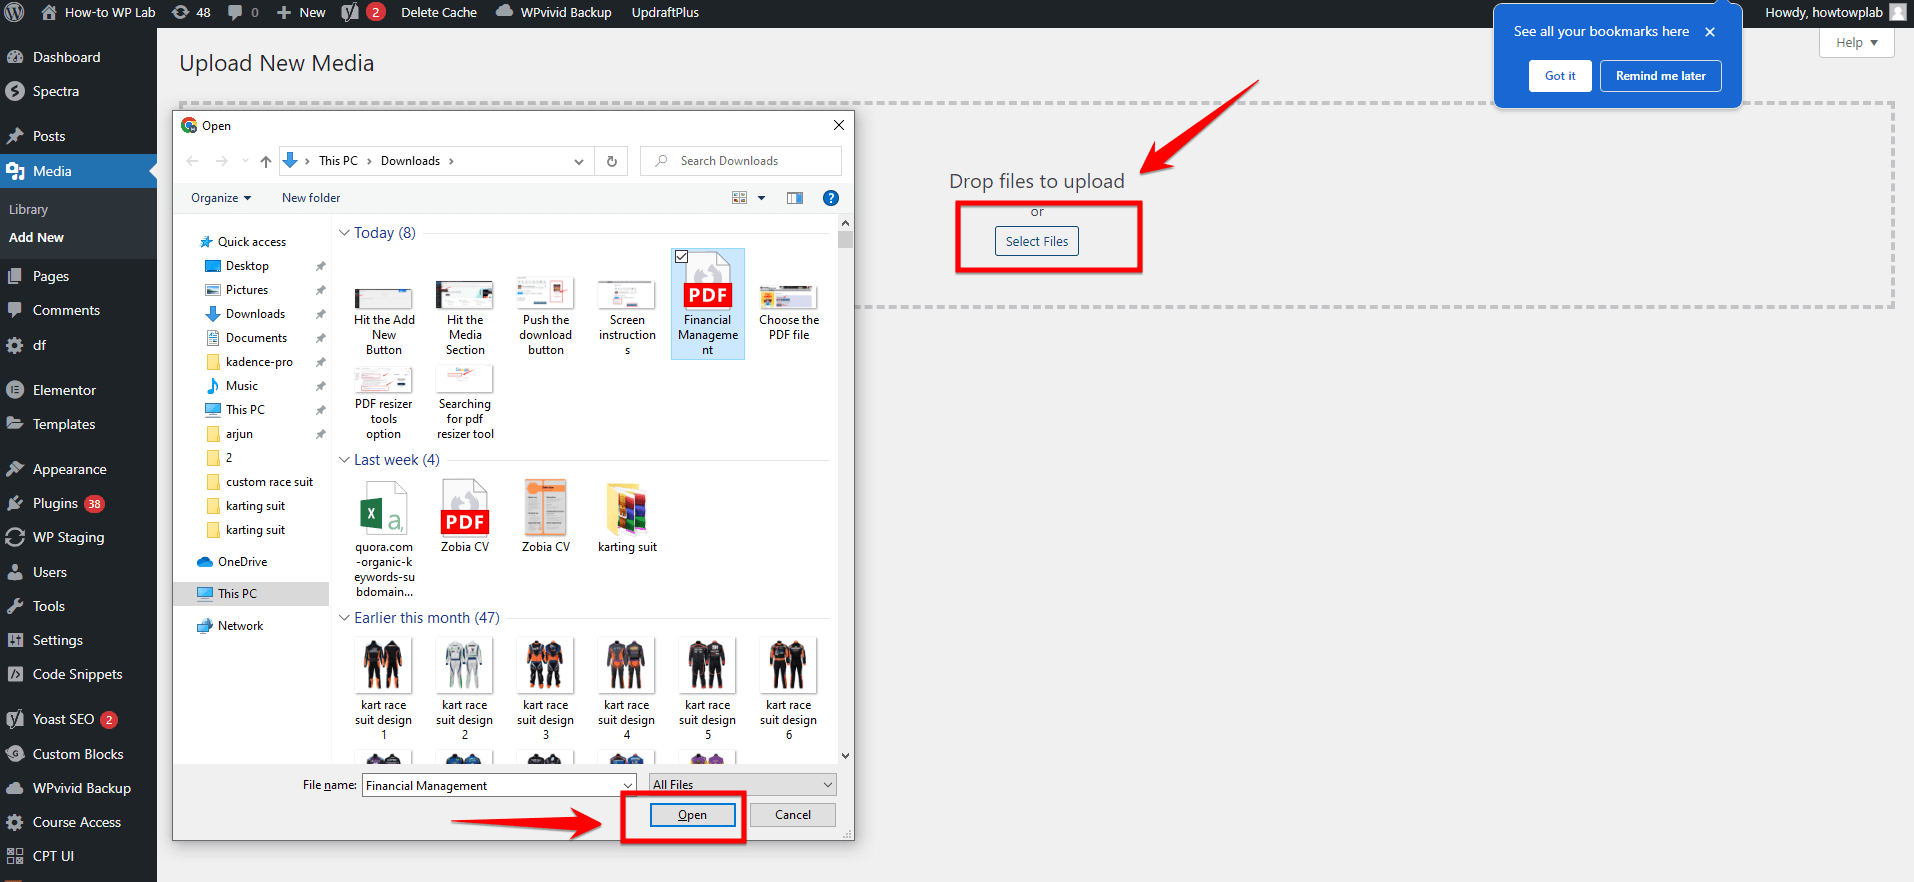
WordPress will display the upload progress, allowing you to monitor the process. Depending on the file size and your internet connection, this may take a moment
Step 5: Inserting the PDF into a Post or Page
Now that your PDF is uploaded and properly labeled, you can insert it into a post or page on your WordPress site.
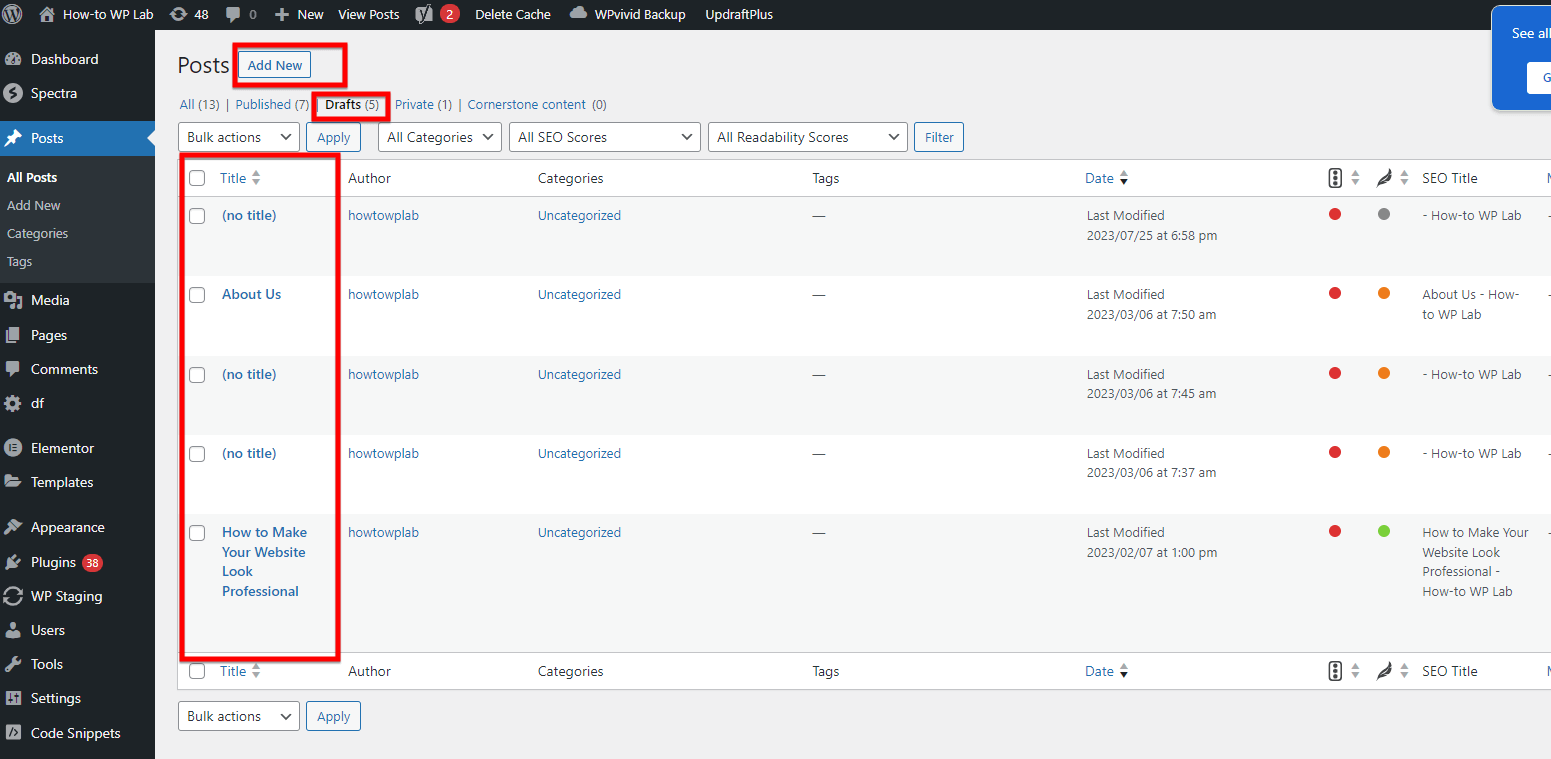
- Go to the section of WordPress where all your articles or pages are listed.
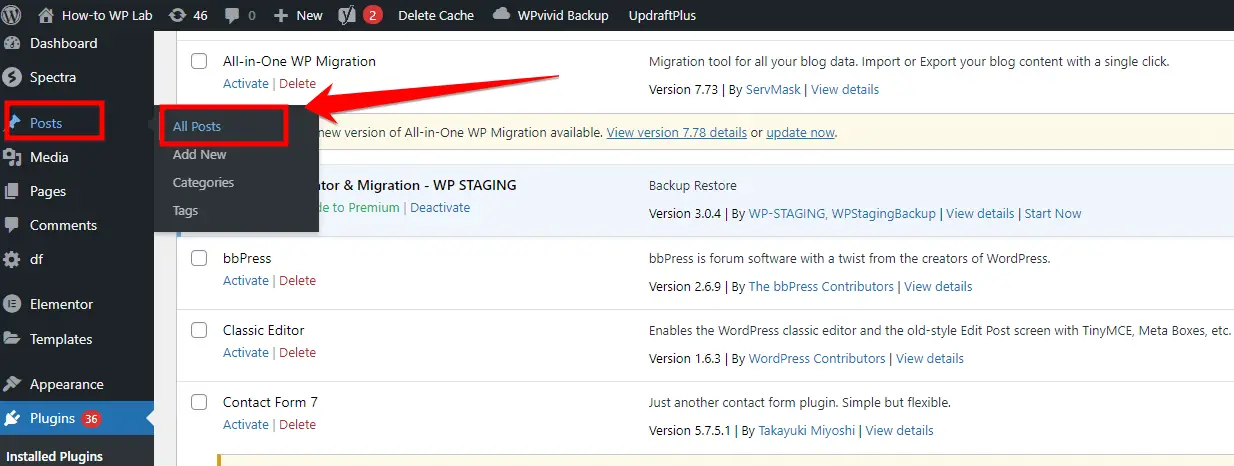
- Pick an existing article or create a new one, and hit the edit button to start making changes.
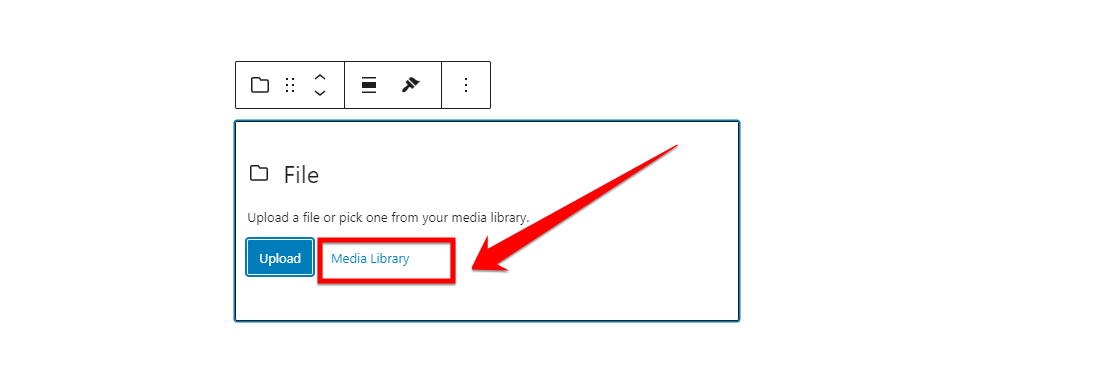
- Inside the editor, look for a “+” sign, which allows you to add new blocks of content.
- Once you click the “+” sign, type “file” in the search bar to find the right block type.
- Click on the icon that represents the file block to add it to your post or page.
- Above the area where you’re editing content, find and click the “Media Library” button.
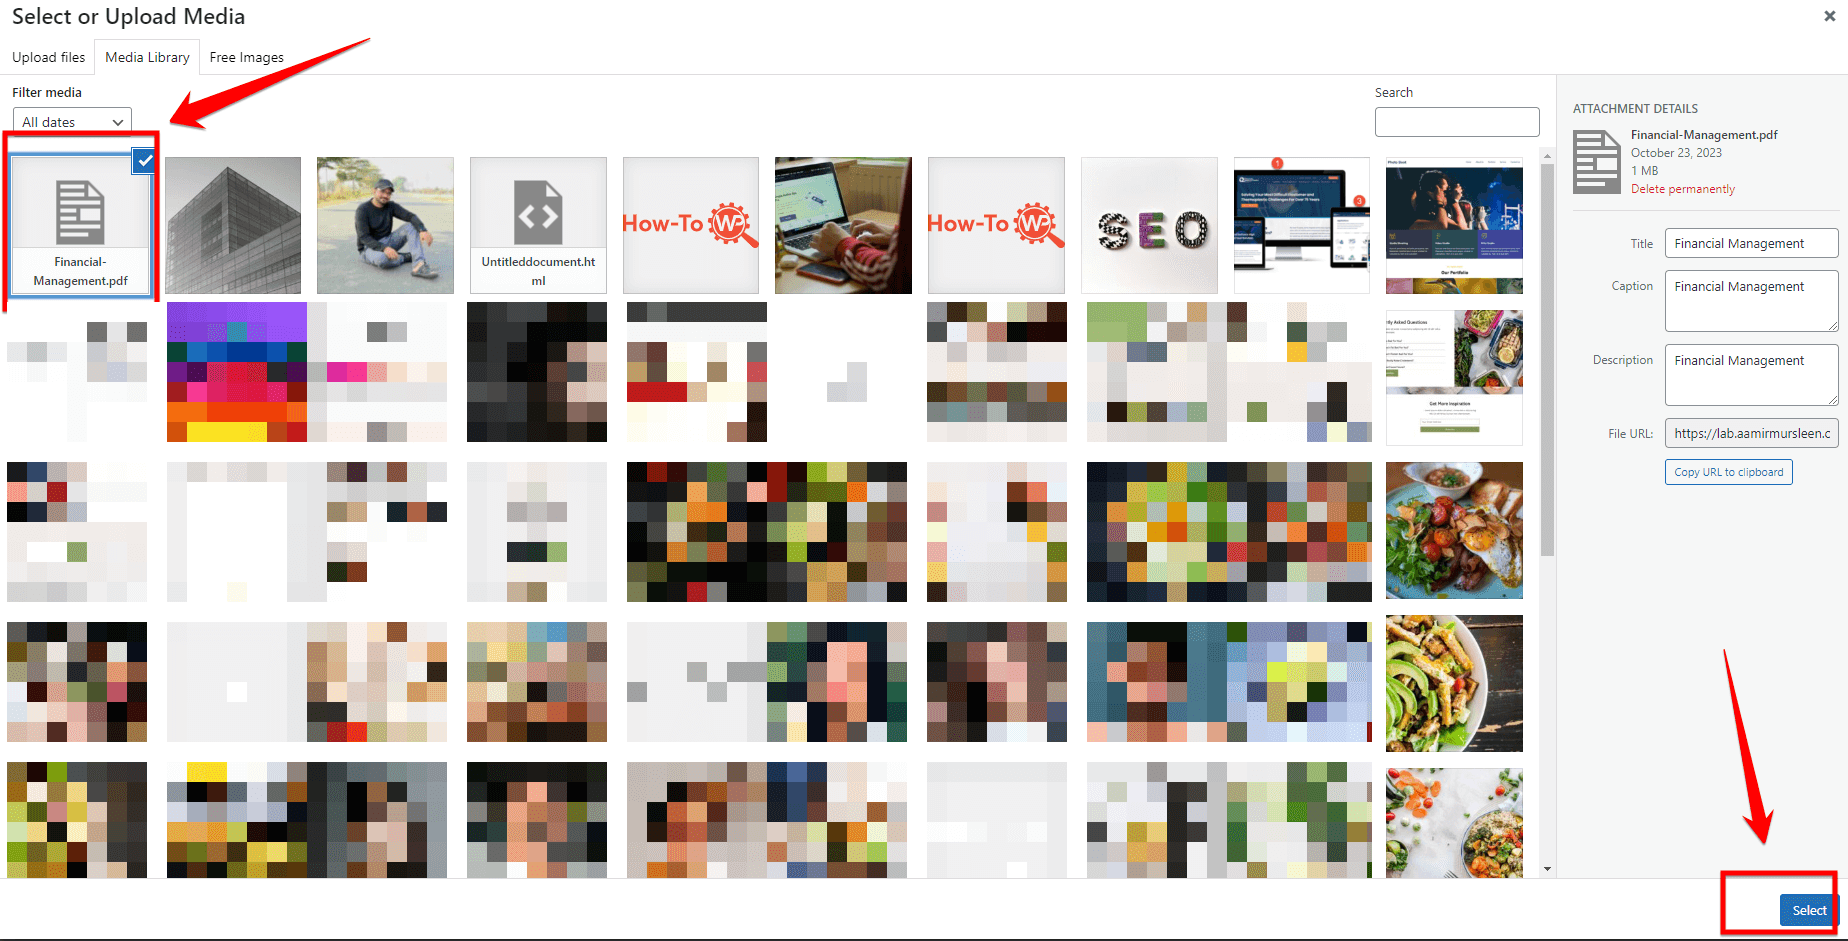
- Look for the PDF you uploaded earlier in the media library and select it.
- Add a title, caption, and description to give more information about the PDF file. Be detailed to help your visitors understand what the document contains.
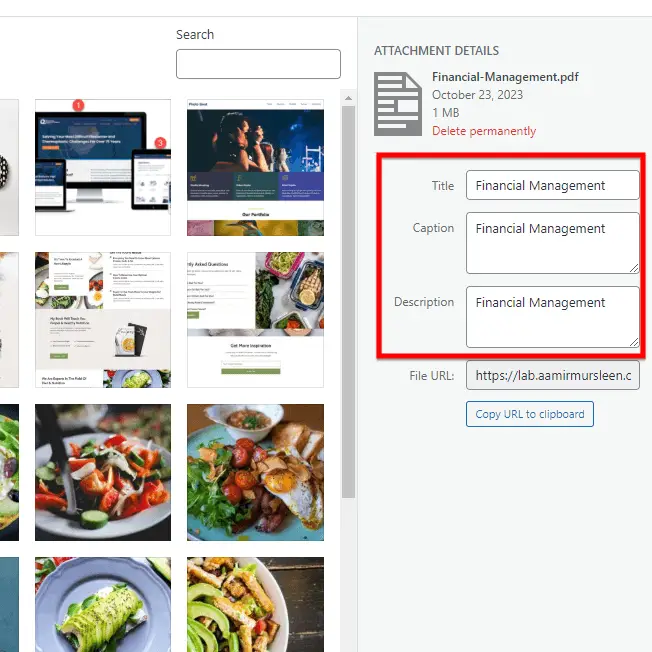
- Title: Give your PDF a clear and descriptive title.
- Caption: Add a brief note that explains the context or content of the PDF.
- Description: Provide a more detailed explanation or summary of the PDF’s contents.
- After filling in all the details, click the ‘Select’ button to confirm.

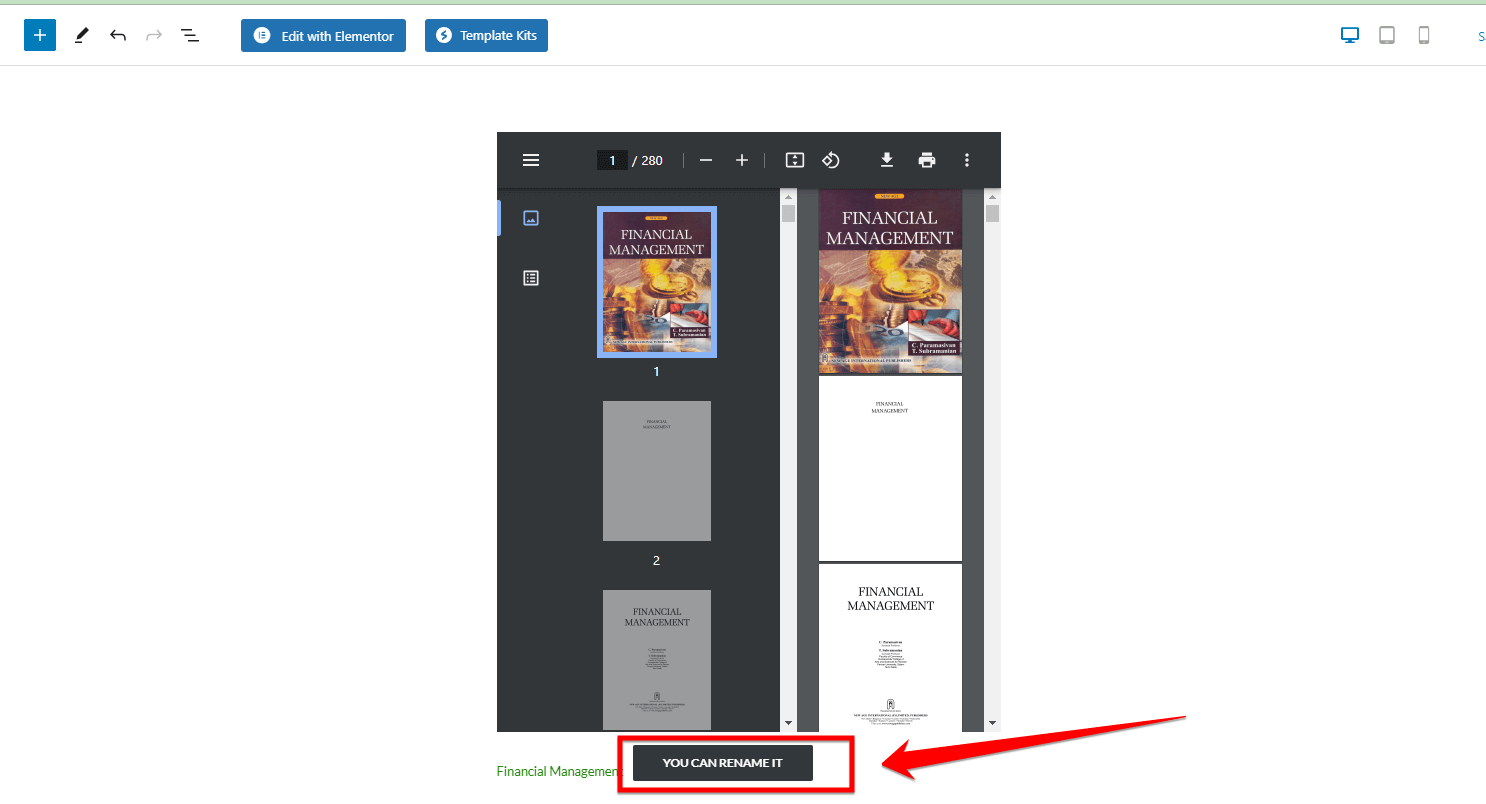
- Once your PDF is uploaded, you’ll notice a download button next to it. You can rename this button to anything you prefer.
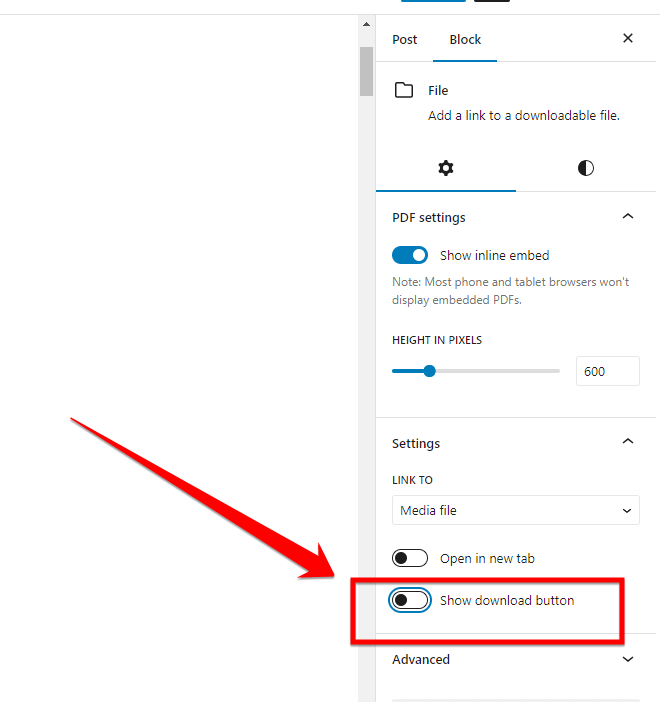
- If you’d rather not show a download button, go to the block settings and uncheck the “show download button” option.
Step 6: Publishing the Post or Page
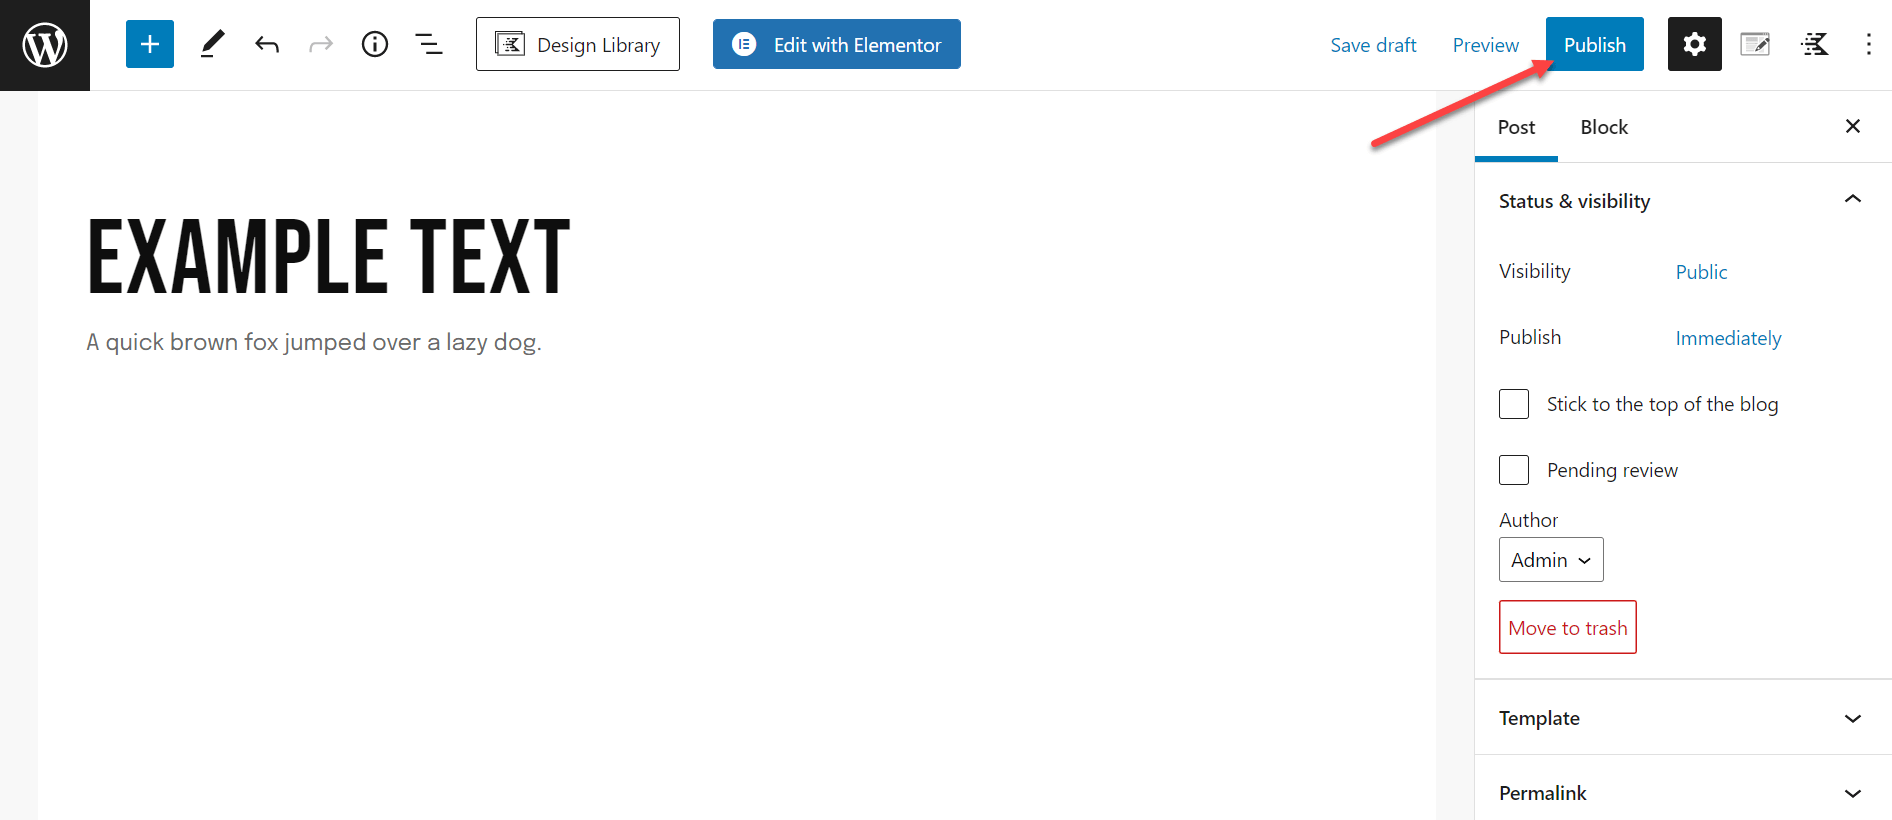
Before making your PDF accessible to your website visitors, it’s crucial to review your post or page. Preview it to ensure the PDF displays correctly and that the layout meets your expectations.
If everything looks good, click the “Publish” or “Update” button to make your post or page live on your website. Your PDF is now accessible to your audience.
Step 7: Testing the PDF
After publishing your post or page, it’s a good practice to test the PDF link to ensure it opens correctly. Click on the link to the PDF to verify that it loads and is readable.

Testing ensures that your audience won’t encounter any issues when trying to access the PDF content.
Why Upload a PDF File to WordPress?
Today, when content is king, how we present our content is just as important as the content itself. WordPress, being one of the most popular website platforms, offers versatility in how content is shared.
One of the often overlooked but highly effective ways is uploading PDF files. There are some stellar reasons for considering this method. Let’s dive into them.
Reason 1: Accessibility for Users
We live in a world that’s always on the move. Sometimes, our users might not have the luxury of an active internet connection. By providing downloadable PDF content, you give them the freedom to access your content wherever and whenever they need it without relying on a steady web connection.
Take the example of a student preparing for an exam or a professional traveling to a remote location with limited connectivity. They can simply download the required reading material from your site and access it offline.
If you plan to share substantial and detailed content, such as manuals, guides, or academic papers, this is a huge advantage. By offering this flexibility, you’re not only improving the user experience but also expanding your content’s reach.
Reason 2: Professional Appearance
Branding is essential, and consistency is a significant part of branding. Unlike web pages that can sometimes render differently across browsers and devices, a PDF retains its format. It’s like offering a printed brochure but in a digital format.
Think about it. The design, layout, fonts, and images remain consistent no matter where the PDF is viewed. Whether your user is viewing it on a large desktop monitor in New York or a smartphone in Tokyo, the experience is consistent. This uniformity provides a touch of professionalism to your content, making your brand appear more trustworthy and reliable.
It’s also worth noting that creating a PDF, with its layout and design, can often be quicker and more straightforward than trying to replicate the same design on a webpage. For businesses or individuals who often produce reports, portfolios, or catalogs, converting these into PDFs and uploading them to WordPress is a time-efficient way to ensure a professional appearance.
Reason 3: File Security and Control
Digital content, especially valuable or proprietary information, is always at risk of being copied, altered, or misused. By sharing your content as a PDF on WordPress, you’re adding an extra layer of protection.
When you host your own PDFs, you decide the rules. Who gets to see them? How can they access it? Do they need a password? Can they download it, or is it just for viewing? These are choices you can make.
WordPress offers various plugins that allow for more advanced control over your PDFs, such as watermarking, encryption, and restricted access.
Moreover, because PDFs are less prone to viruses and malware compared to other file formats, your users can trust the files they download from your site. In a digital era fraught with cybersecurity concerns, this peace of mind can significantly enhance your brand’s credibility.
Tips for Uploading PDFs to WordPress
WordPress is a fantastic platform that accommodates various media types, and PDFs are no exception. Uploading a PDF can seem straightforward, but there are several best practices you should keep in mind to ensure an optimal experience for both you and your users.
Here are some essential tips for making the most out of your PDF uploads.
Tip 1: Optimize Your PDFs Before Uploading
Before you even think about uploading your PDFs to WordPress, it’s crucial to optimize them. This process involves compressing the files for faster load times and ensuring clear readability. In the previous section, I outlined detailed steps for resizing PDFs, complete with illustrative visuals to guide you through each stage, ensuring that your files are not bulky and are easy to download or view online.
- Compressing for Faster Load Times: Large PDF files can slow down your website’s loading speed, affecting user experience and SEO rankings. Use tools like Adobe Acrobat or online PDF compressors to reduce the file size without compromising the quality.
- Ensuring Clear Readability: The text in your PDF should be clear and easily readable. Optimize the fonts and images, ensuring that they are sharp and that the text is legible even on smaller screens like mobile devices.
Tip 2: Use Descriptive File Names
The name of your PDF file matters more than you might think. It plays a pivotal role in improving SEO and aiding user understanding. A well-named file can inform users and search engine algorithms about the content of the PDF, improving its visibility in search results.
For instance, if your PDF is a guide on “how to install a WordPress plugin,” naming it “wordpress-plugin-installation-guide.pdf” is much more effective than a generic “file1.pdf.”
Tip 3: Update PDFs Regularly
In the digital world, content can quickly become outdated. To keep your website visitors engaged and ensure that your content remains relevant and accurate, make a habit of reviewing and updating your PDFs regularly.
This practice is not just for the sake of the users but also for SEO. Updated content is a positive signal to search engines, indicating that your website is maintained and current, which can contribute to higher rankings in search results.
Tip 4: Consider Using a PDF Viewer Plugin
One of the challenges with PDFs is that users typically need to download the file to view it, which can be a bit cumbersome. However, by using a PDF viewer plugin, you can enhance the user experience by allowing in-browser viewing.
Such plugins enable users to view the PDF content directly on your web page, making the consumption of content faster and more user-friendly. The added benefit is that users are more likely to engage with the content and spend more time on your site, positively impacting your SEO.
Troubleshooting Common Issues with Uploading and Viewing PDFs on WordPress
Encountering issues while trying to upload or view PDFs on WordPress can be frustrating, but fear not! We’ve crafted a detailed guide to help you navigate and resolve the most common problems. Let’s dive into each issue and explore practical solutions.
1. PDF Not Uploading
Sometimes, you might face difficulties while trying to upload a PDF. Here are some steps to resolve this:
- Check File Size: Ensure the PDF file size doesn’t exceed the maximum limit set by your WordPress site. You can compress the file using online tools if it’s too large.
- File Format: Make sure the file is in .pdf format. Convert it using a file conversion tool if needed.
- WordPress Upload Limits: Increase the WordPress file upload limit through the cPanel or by editing the .htaccess, php.ini, or wp-config.php files.
2. PDF Not Displaying
If the PDF doesn’t display after uploading, follow these steps:
- Verify the Link: Ensure that the URL to the PDF is correct. Test the link in different browsers to rule out browser-specific issues.
- Plugin Conflicts: Disable other plugins to see if there’s a conflict. If the PDF displays, reactivate each plugin one by one to identify the culprit.
- Update the PDF Viewer Plugin: Make sure your PDF viewer plugin is up-to-date. An outdated plugin might not work as intended.
3. Broken or Unresponsive Links
Broken links can affect the user experience. Here’s how to fix them:
- Re-upload the PDF: Delete the old file and upload it again. Create a new link and test it.
- Recreate the Link: Remove the old link from your post or page and insert it again. Make sure the URL is correct.
- Check for Coding Errors: Inspect the HTML of the page for any coding errors that might interfere with the link. Correct them as needed.
4. Slow Loading PDFs
For PDFs that are loading slowly:
- Optimize the PDF File Size: Use online tools to reduce the file size without compromising quality.
- Hosting Options: Consider upgrading your hosting plan or switching to a host that offers faster speeds.
- Test on Various Browsers: Check if the slow loading issue is browser-specific. If it is, optimize the PDF for that particular browser.
Summary
Great job on making it this far! You’veYou’ve now learned the steps to easily upload a PDF to your WordPress site. Remember, it’sit’s as simple as preparing your PDF, uploading it to the Media Library, and linking it to your post or page.
If any issues pop up, you’reyou’re fully equipped to tackle them head-on. A huge thank you for your time and effort. I believe in your ability to make the most out of your WordPress site. Each PDF you add will make your content richer and more informative.
Keep up the excellent work, and remember, every step you take is a leap toward a more engaging and resourceful website! Cheers to your success!
FAQs
How do I upload a document in WordPress?
Logging into your WordPress dashboard is the first step. From there, on the left sidebar, you will see a variety of options. One of these is titled Media.
Upon clicking Media, you will be redirected to the Media Library, a space where all your uploaded files are stored. At the top of this page, there’s an Add New button. Clicking this opens a new window where you can either drag and drop your file or select it manually from your computer. Follow these steps:
Step 1: Click Add New
Step 2: Drag and drop your file or click Select Files to choose a document from your computer
Step 3: Wait for the upload to complete
Your document, be it an image, PDF, or other file type, is now stored in the Media Library and can be added to posts or pages as needed.
How do I find the URL of a PDF?
After a PDF is uploaded to WordPress, finding its URL is straightforward. Navigate to the Media Library in your WordPress dashboard. Here, you’ll see a collection of the media you’ve uploaded, including images, audio, and documents like PDFs.
Browse through the Media Library to locate the desired PDF. Clicking on it opens an attachment details window. In this window, information about the file is displayed, including its URL. This URL can be copied and used to share the PDF directly or be embedded into a webpage.
How do I upload files to my WordPress server?
While the WordPress dashboard is user-friendly for uploading files, sometimes you might need to upload files directly to your server, especially for larger files or specific types of media. This is often done using an FTP (File Transfer Protocol) client.
First, you’ll need to install an FTP client like FileZilla. With this tool installed, connect to your server using the credentials provided by your hosting service. Navigate to the wp-content directory, where you’re free to upload files directly. Drag and drop your files from your computer to this directory on the server, and the upload process begins automatically.
How do I add a downloadable PDF to WordPress Elementor?
With Elementor, adding a downloadable PDF becomes a breeze, enhancing the visual editing experience. Begin by opening the page or post where you want the PDF link to appear, then initiate the Elementor editor.
In the Elementor editor, a variety of widgets are available to customize your page. Drag the Button widget to your layout where you want the download link. Under the button settings, you’ll find a Link option. A dynamic tags icon next to this option leads to a dropdown where Media File can be selected.
A wrench icon appears next, opening the path to select your PDF from the Media Library. With the PDF selected, the button on your webpage now serves as a direct download link for the PDF when clicked by visitors.