How to Manage Your WooCommerce Shipping Rates

If you’re running a WooCommerce store, then you know that shipping rates can be a bit of a hassle. It can be tough to find the right rates for your products and make sure your customers are happy with their shipping options. In this post, we’ll show you how to manage your WooCommerce shipping rates so that you can get your business running smoothly.
In this blog, you’ll learn:
- What are shipping rates
- What is a global shipping
- How to manage your WooCommerce shipping rates
- Features of WooCommerce Table Rate Shipping plugin
Let’s start with shipping rates.
Table of Contents
What Are Shipping Rates

Shipping rates are the additional costs in the procedure of getting the ordered item to a client’s preferred address. Rates can be defined based on the package size, amount of ordered items, etc. Shipping rates and their methods can vary and are often charged at the checkout.
When calculating the shipping rates, you must balance the budget of the client and yourself. If you’re too compassionate, you’ll have a short run in business as it will impact your budget. On the other hand, Charging far too much will be a cause for no clients.
The three most important factors directly affect shipping costs are:
- Dimensions
- Weight
- Destination
The shipping cost is directly affected by the dimension and weight factors, while the destination rate is calculated by how much distance the carrier has to travel for the package.
Therefore, we have three shipping options – Calculated, Flat, and Free. With Calculated, you consider the factors mentioned above, and that way, you determine the best possible cost. The only negative side about this one is that you need to do it for every product.
Flat is the fixed shipment fee that is the same for every ordered product, no matter its size or destination.
Free shipment is the most acceptable method by customers. They love that they won’t be paying a cent more than the product’s price.
What Is Global Shipping

Expanding your online business out of the homeland borders can benefit your eCommerce. Before diving headfirst into the process, you should be careful and create a strategy for every step of the way because there’s no telling what you’ll face.
Firstly you’ll need to determine which products you will ship and where. The goal is to expand worldwide gradually and persistently, and the best position to start is to ship somewhere near.
Furthermore, having a small and close shipment also lets you test the waters before expanding and make sure that they arrive on time and at a reasonable price.
Secondly, you should track your insights to see which state or country you are working the best with and focus your shipping on them. That could be beneficial and secure in terms of realizing the orders.
When you decide what countries will receive your shipments, you need to calculate the costs. There are a variety of parameters that need to be taken into consideration, such as:
- Transportation fees
- Currency conversion
- Taxes
Not to mention any other expenses that may occur depending on the laws of that particular country.
How to Manage Your WooCommerce Shipping Rates
The best plugin that can be used to manage your WooCommerce shipping rates is the WooCommerce Table Rate Shipping – PRO. The plugin has all the bells and whistles you need for rate management, but we’ll be using a free version of the plugin for this blog.
Let’s begin with the installation process.
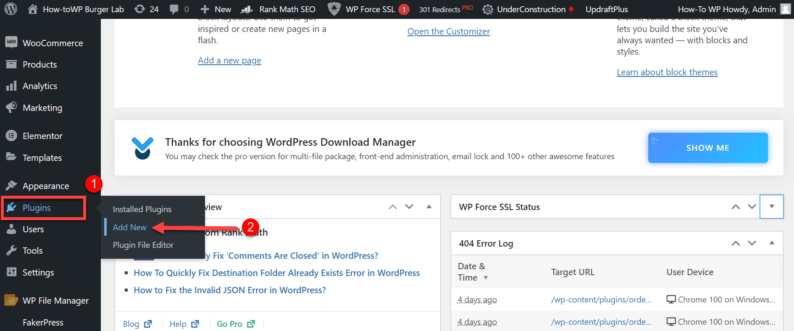
1. Installation
Hover on the “Plugins” option and click on the “Add New” option.
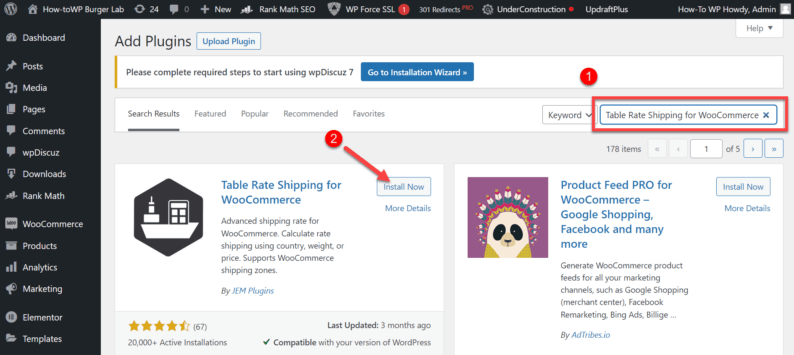
Search and install the “Table Rate Shipping for WooCommerce” plugin.
Note: It’s the free version of the “WooCommerce Table Rate Shipping” plugin. It has a few of the same features, but to utilize the plugin’s full potential, you’ll need to buy it.
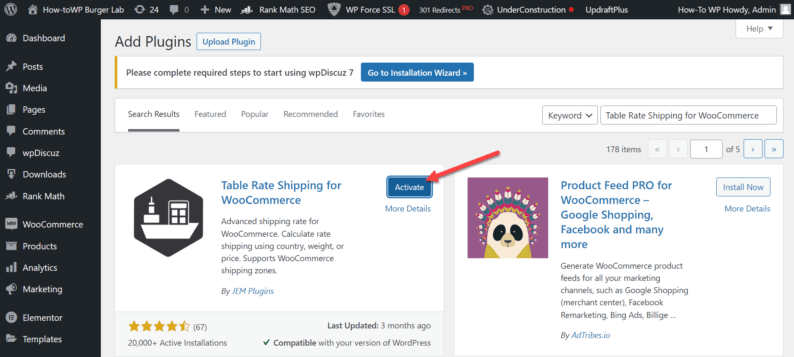
Stay on the same page and activate the plugin.
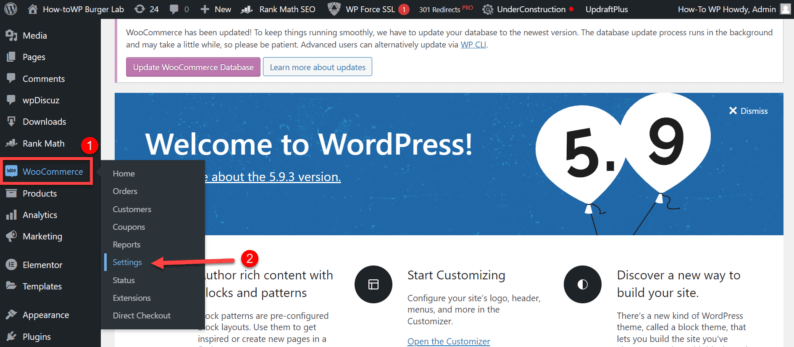
2. Implementing the Table Rate Option
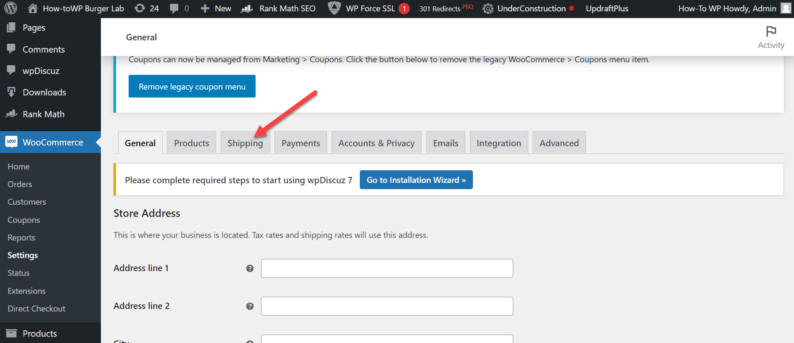
Next, you’ll need to go to “WooCommerce” and click on the “Settings” option.
Go to the “Settings” section.
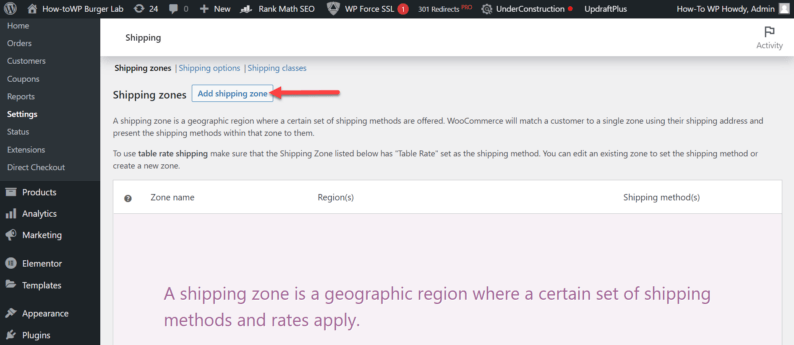
Click on the “Add shipping zone” button.
Enter the regional details and click on the “Add shipping method” button.
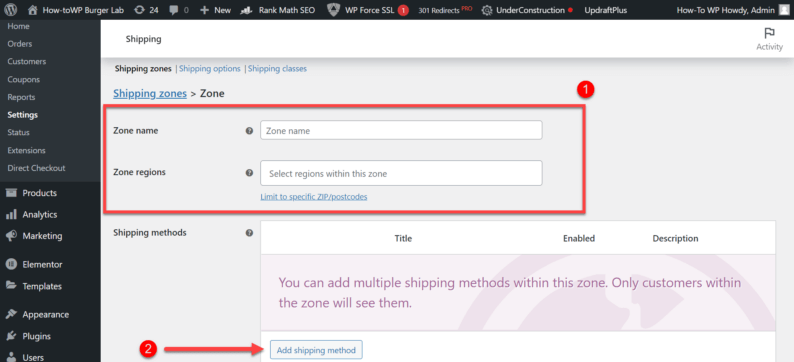
Select the “Table Rate” option and click on the “Add shipping method” button.

After that, click the “Save changes” button.
Note: Normally, it would automatically save the changes, but if not, then click on the “Save Changes” button.
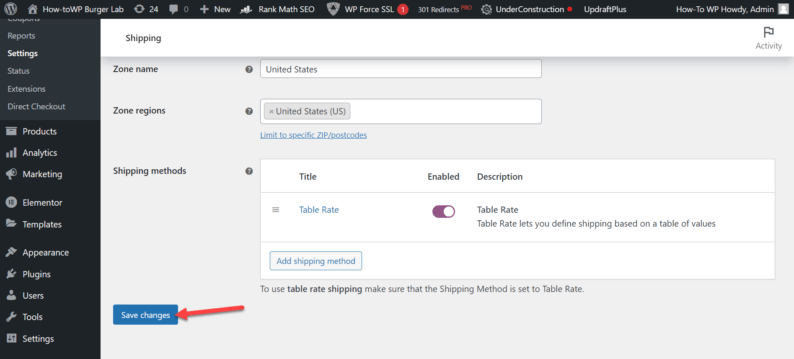
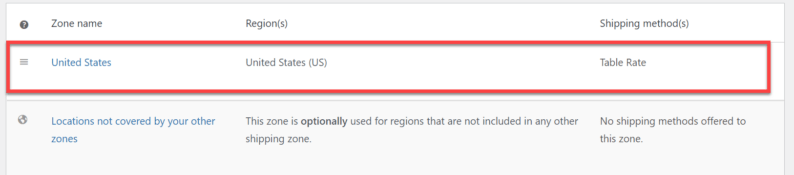
A new shipping zone is added with the “Table Rate” shipping method.
Features of WooCommerce Table Rate Shipping Plugin
WooCommerce Table Rate Shipping plugin is a robust tool with many features, including creating shipping rules based on weight, item count, and other factors and the ability to create unique shipping names that hide shipping methods.
Shipping methods can be imported, exported, and edited in Excel. You may also calculate postage depending on the country, postcode, weight, amount, and the total shipped items. It also helps the customer with an error-free experience during checkout.
Key Features
Some of the most useful features of this plugin are:
- Shipping Classes. Create and edit multiple shipping classes.
- Handling Fee. Set handling fees for a particular item.
- Setting Min/Max Amounts. Set a maximum amount for a product so that if the price goes over it, it’ll automatically round off and vice versa.
- Hide Shipping Method. Hide certain shipping methods for particular items.
- Ship Per Item. Calculate shipping according to the per item is shipped.
- Ship by Weight. Calculate shipping according to the weight of the item.
- Location-Based Rates. Set rates according to the different rates and taxes of the area.
- Change Labels. Change labels of the particular items in the cart.
Conclusion
Calculating the shipping may be seen as insignificant, but it directly affects your profitability and relationship with your customers.
With the right shipping price, you can either gain more customers and keep them as your regular clients or go downhill with your business. So the number of features this plugin provides for your WooCommerce site is extremely beneficial.
It’ll help you work efficiently and help you maintain a fast website. If you’ve already used this plugin, go to the comments section and share your experience.


