5+ Crucial Things You Must Do Before Changing WordPress Themes
Are you thinking about changing the theme of your WordPress website? Wait a minute!
Changing your theme might give your site a fresh look, but it also can cause some issues. You might lose important information or mess up your site layout. But don’t worry – we’re here to help.
In this article, I will show you easy steps to take before changing your WordPress theme. I will also share screenshots of each step to help you understand better.
Let’s get started!
Table of Contents
- 1: Backup Your Current WordPress Website
- 2: Make a Note of Any WordPress Theme Customizations
- 3: Get Current WordPress Theme Performance Metrics
- 4: Test All Functionality and Installed WordPress Plugins
- 5: Put Your WordPress Site Into Maintenance Mode
- Bonus: Inform Your Users That Your Website Is Now Live
1: Backup Your Current WordPress Website
Before making any changes, backup your entire WordPress site. This step is non-negotiable. Backups act as a safety net, allowing you to revert to your previous theme if anything goes wrong during the transition. Here’s how to do it:
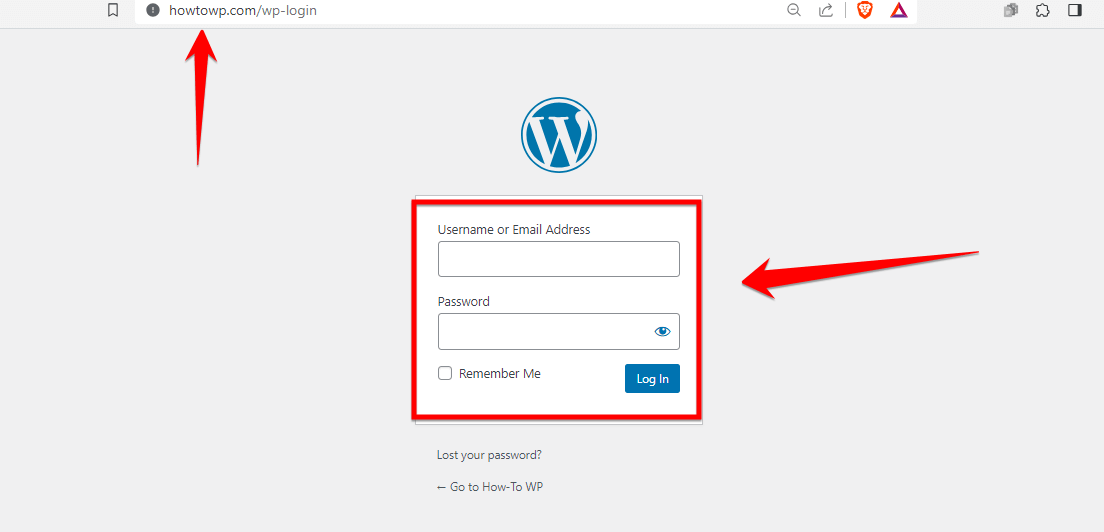
Step 1: Log into your “WordPress dashboard” by entering your username and password in the respective fields and clicking on the “Log In” button.
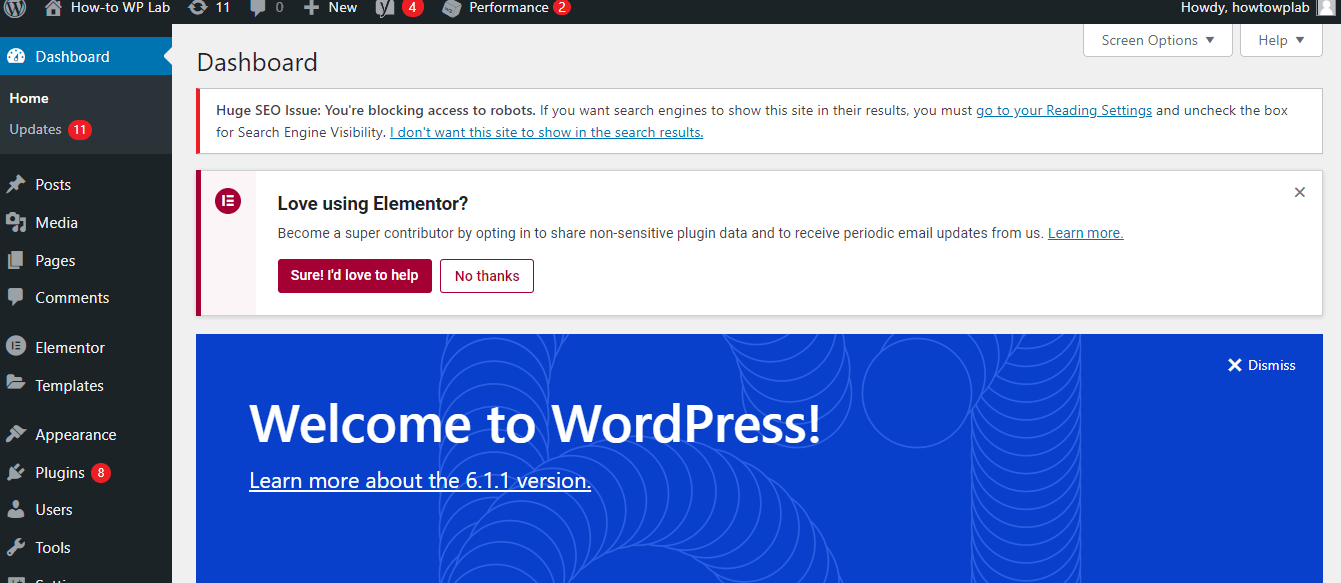
Note: Once you’re logged in, you’ll be taken to the WordPress dashboard. This is the main administration area of your website.
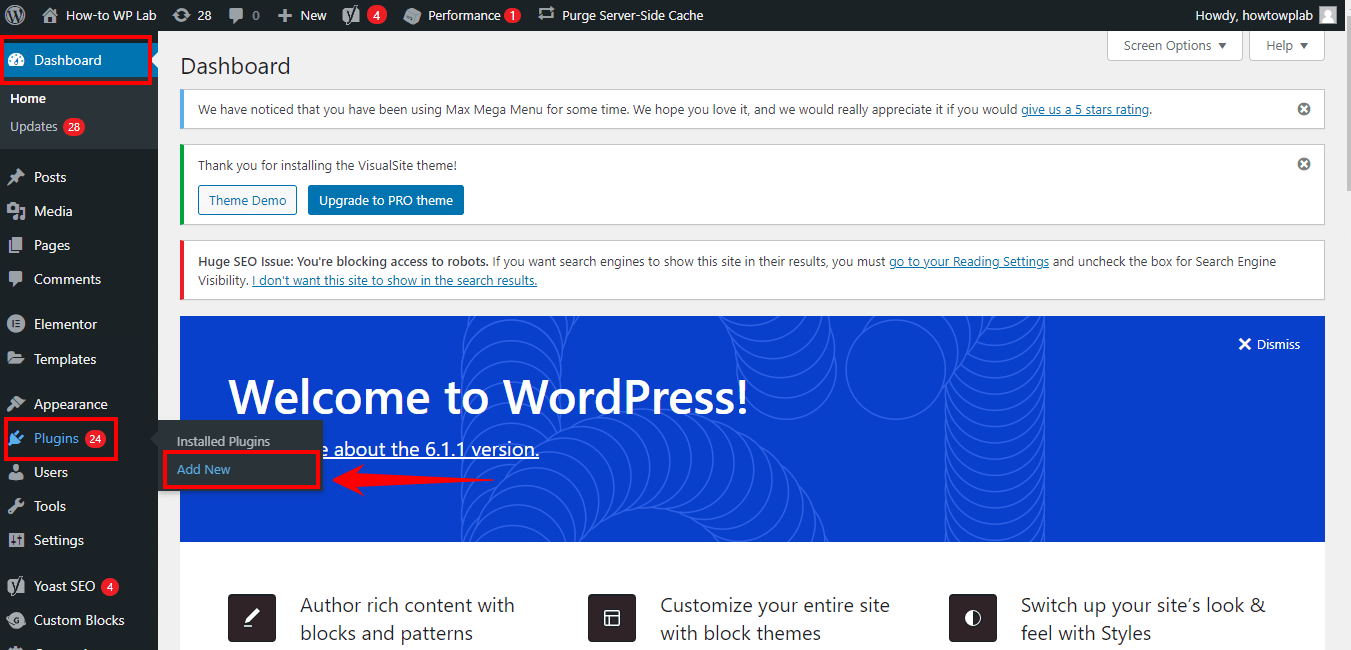
Step 3: Go to the “Plugins” part of your website. Look for the “Add New” button and click on it.

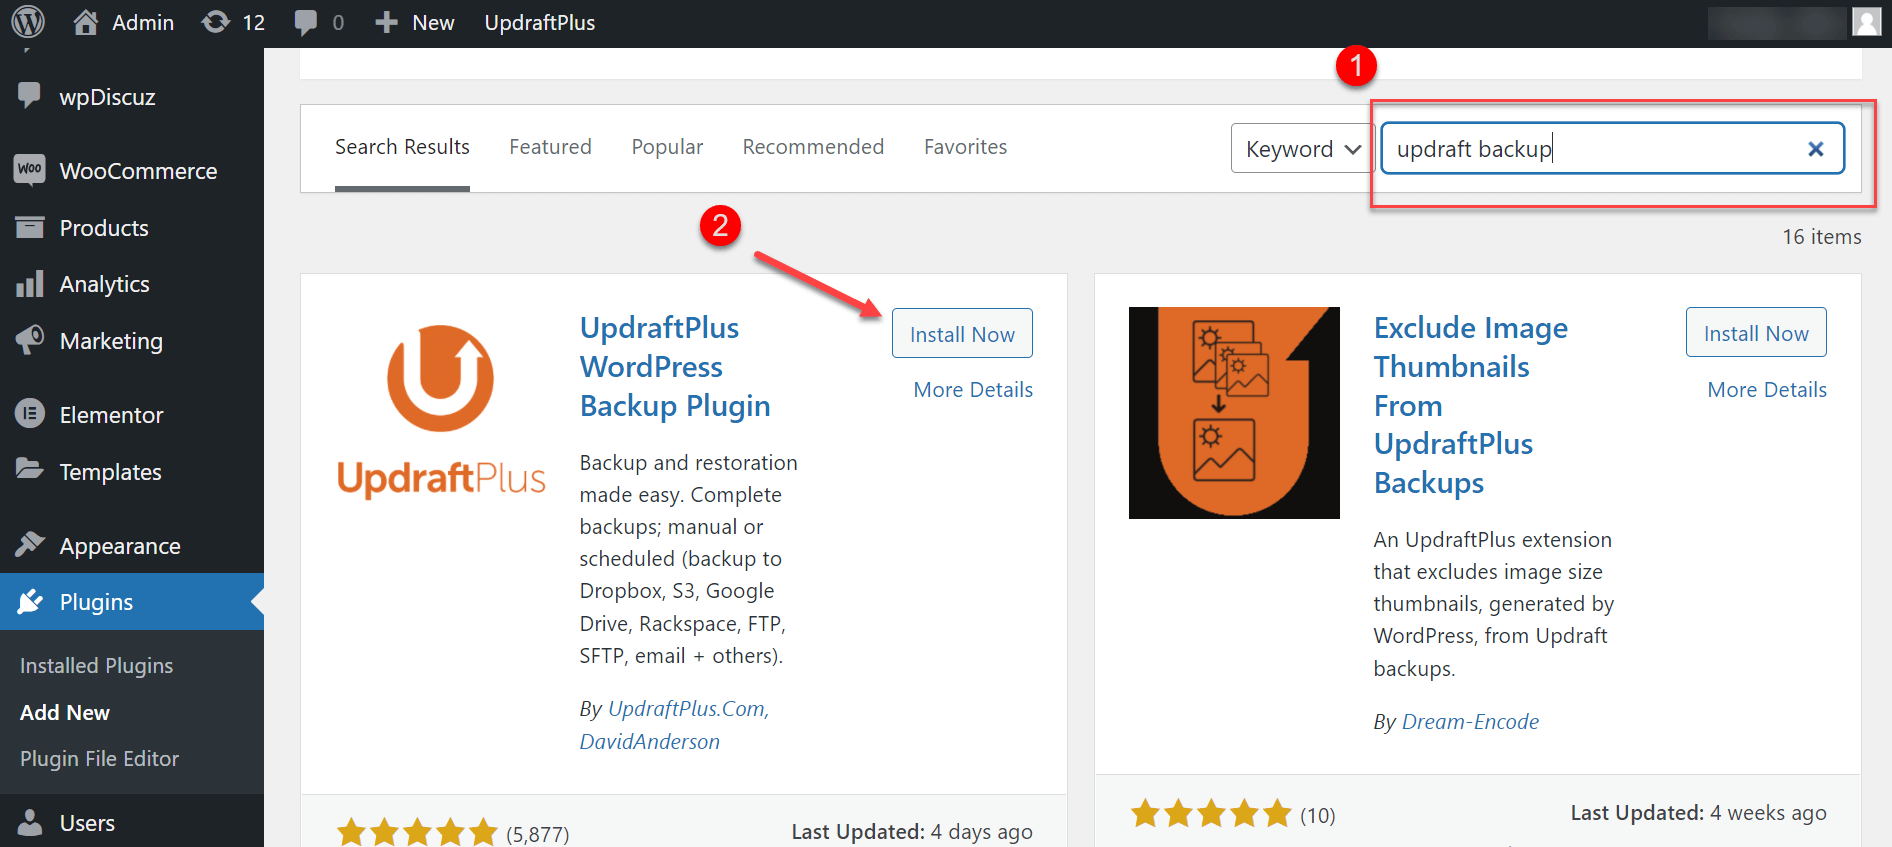
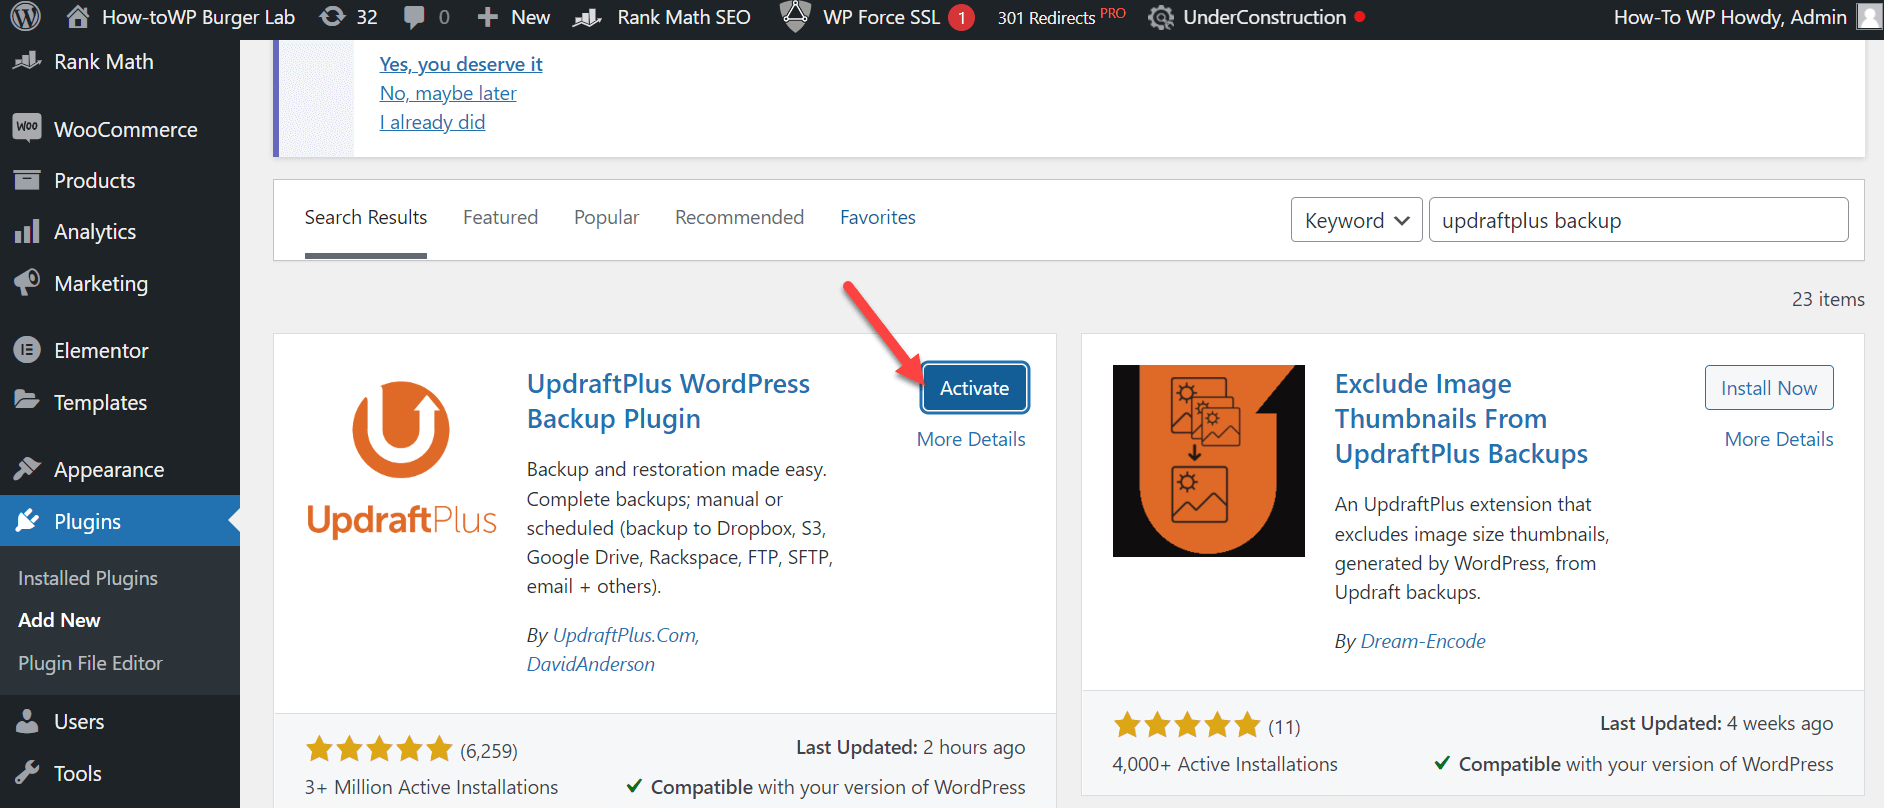
Step 4: Go to the “Add Plugins” interface and input “UpdraftPlus WordPress Backup” into the search field before pressing enter. Locate the “UpdraftPlus WordPress Backup” plugin and select the “Install Now” button.
Step 5: Once the installation is done, the “Install Now” button will change to “Activate”. Click the “Activate” button to make the plugin ready for use.
Step 6: Now, navigate to the “Settings” section on your WordPress dashboard’s left-hand menu.
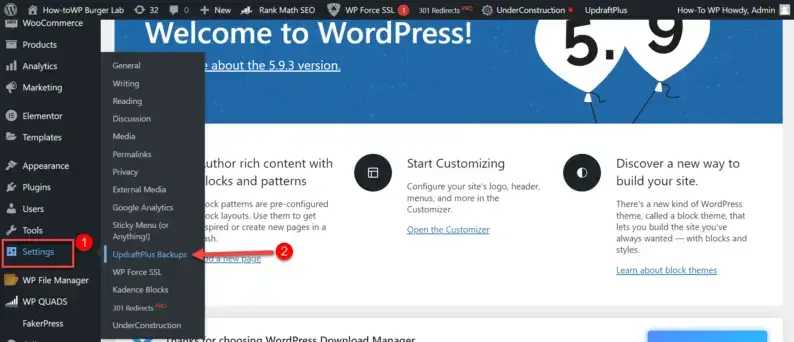
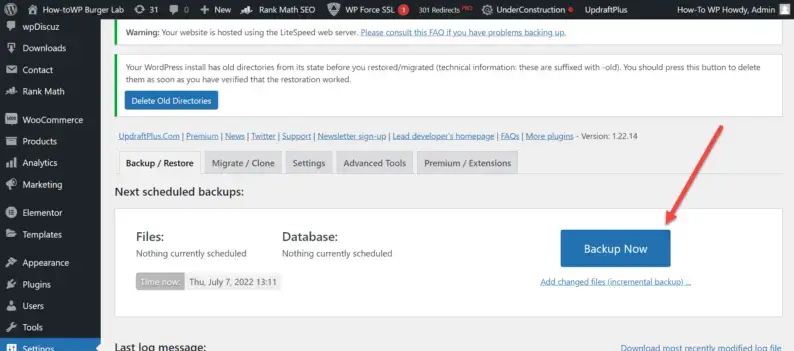
Step 7: In the dropdown list, find and click on the “UpdraftPlus Backups” option. This will direct you to the UpdraftPlus Backups page. Here, click the “Backup Now” button to initiate the backup process for your site.
Step 8: A popup window will appear, asking for your confirmation. Make sure to check both checkboxes: “Include your database” & “Include your files,” in this window before clicking the “Backup Now” button once more.
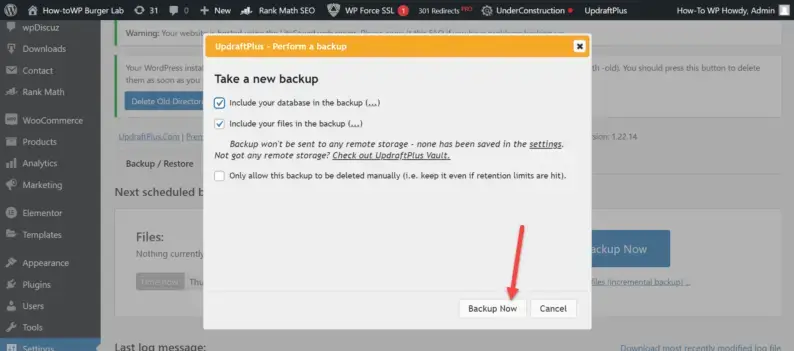
Step 9: Upon clicking “Backup Now”, the plugin will start making backups of your entire website, including all your plugins, themes, uploads, and the database.
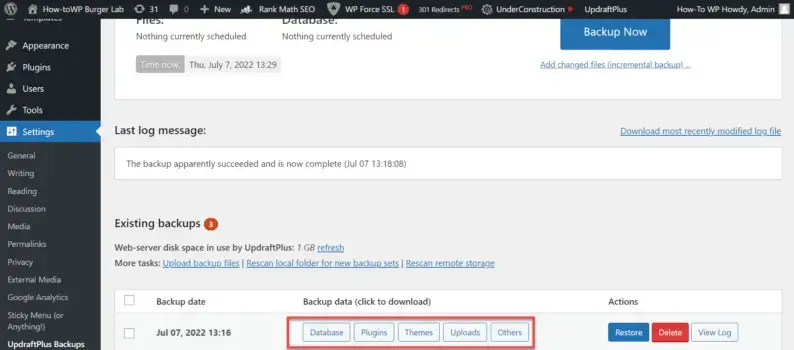
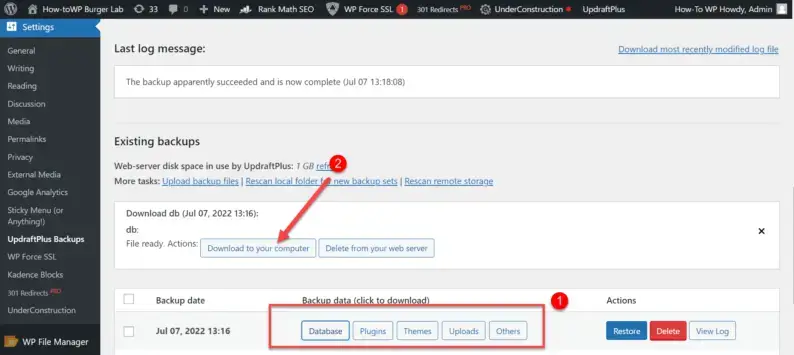
Step 10: Once the backup process is complete, you will be presented with a list of your backups. Here, you can download each part of your backup files one at a time by clicking the corresponding “Download to your computer” links.
By following these steps, you’ll have a full backup of your WordPress site on your computer, which will be useful when changing your WordPress theme.
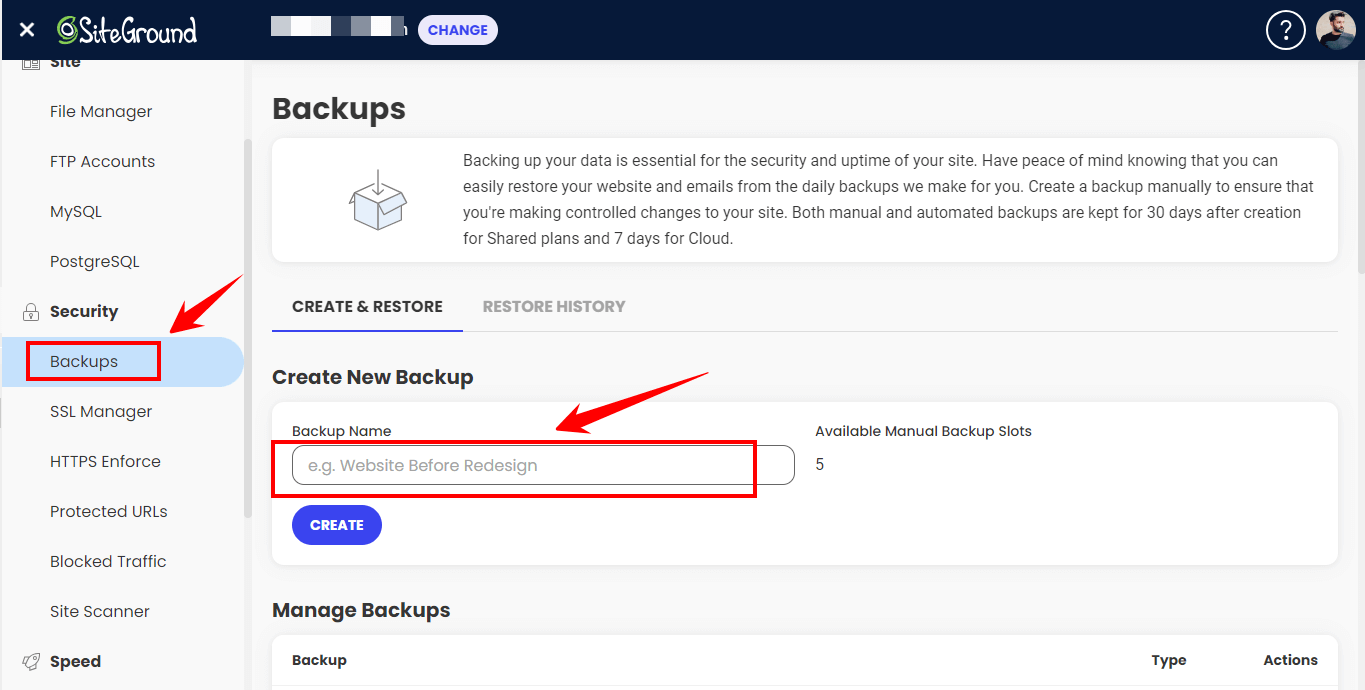
While the approach mentioned above is through a WordPress plugin, it’s important to note that many hosting like SiteGround, also offer an option to backup your site through their interface.
Regardless of the theme change, remember to always have up-to-date site backups. This safeguards your data and ensures you can restore your website to its original state if the theme change does not work as expected.
2: Make a Note of Any WordPress Theme Customizations
When you change your WordPress theme, any special tweaks or changes you made to the original theme’s code will disappear. This happens because those changes were part of the old theme, and when you switch, you start fresh.
To avoid losing these important adjustments, you need to identify and save them so you can add them to your new theme.
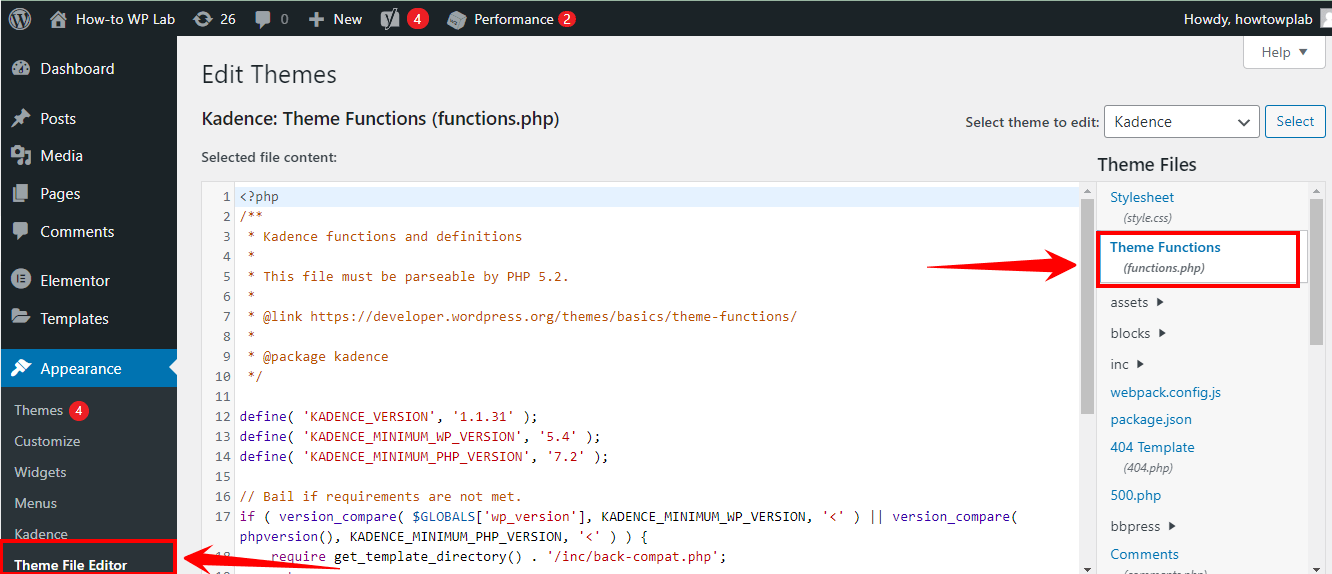
First, dive into the files of your current theme. You’re looking for any bits of code that you added or changed. This might be in the “functions.php” file or in other places where you made tweaks. Spot these custom bits so you can move them later.
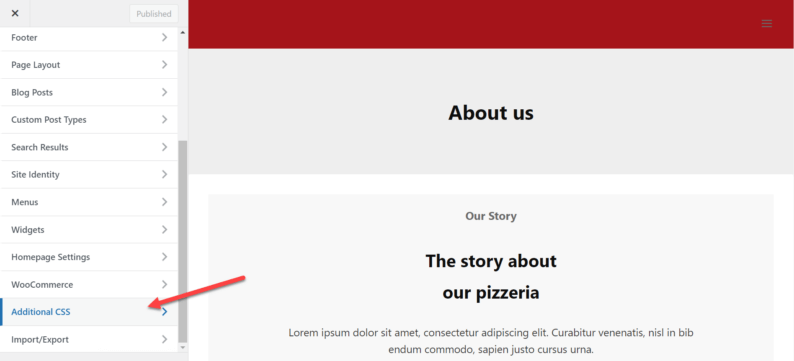
Additionally, if you’ve added custom CSS directly to your theme, you need to write it down or save it somewhere else. WordPress has a handy spot called “Additional CSS” in the Customizer, where you can add custom styles. Moving your CSS to the new theme is a breeze if you’ve used this.
A Pro Tip: Remember to keep these tips handy and do these steps before you switch your WordPress theme. This way, all the unique tweaks and changes you’ve made won’t get lost. You’ll be able to carry over all your personal touches to your new theme with ease.
3: Get Current WordPress Theme Performance Metrics
When pondering over a theme change for your WordPress site, one critical aspect you must consider is its current performance. You can’t accurately assess the impact of a new theme if you have no idea how your website is performing at present.
So, before making any changes, understand your site’s present performance metrics and then compare them afterward. You might wonder, ‘Why is knowing the current performance of my WordPress theme so important?’.
By understanding your site’s performance indicators, you’re setting a baseline against which to measure. Metrics like loading time, page size, and the number of requests your site makes all contribute to the user’s experience on your website.
Getting your site’s performance metrics is not as complex as you might think. Several tools can help make it an effortless process:
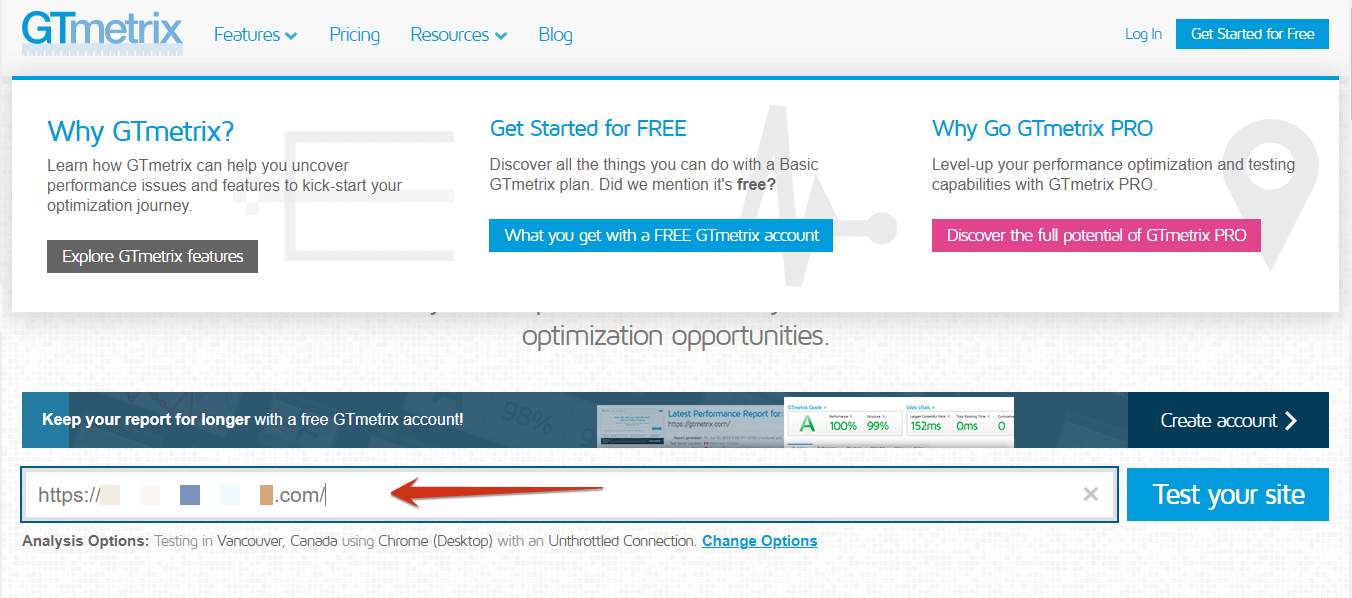
- GTmetrix or Pingdom: These are super-friendly tools that analyze your site’s performance by just entering your site’s URL. From loading times to page size and the number of requests, they give you all the details you need.
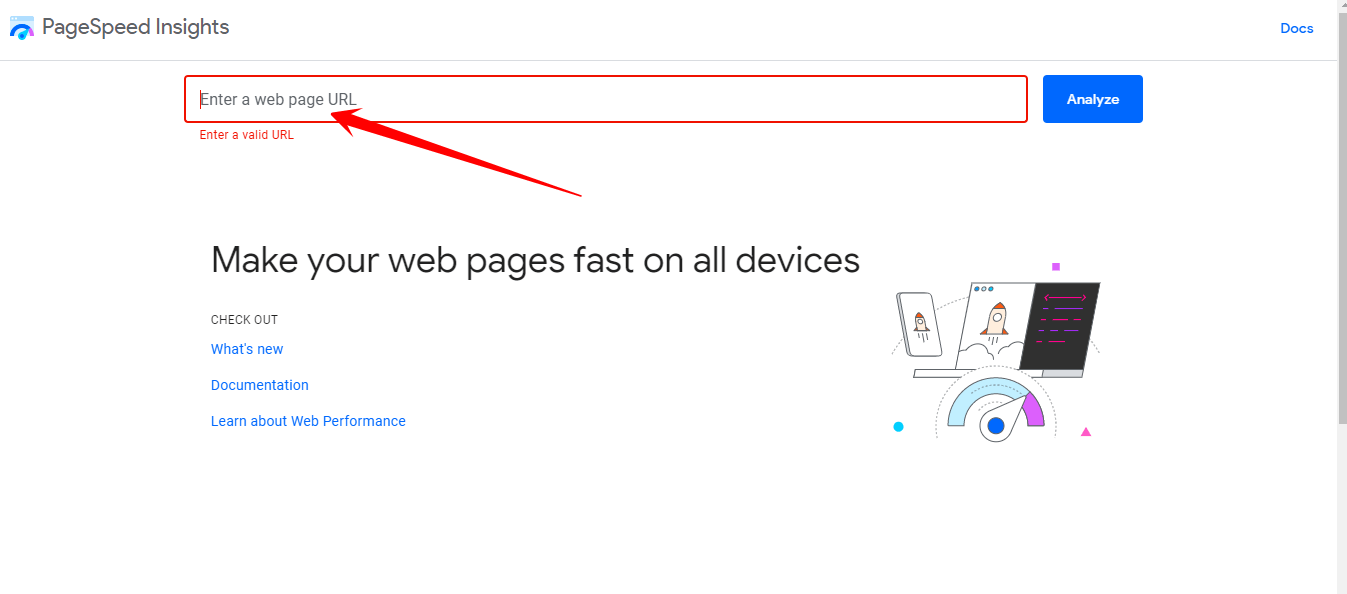
- Google PageSpeed Insights: For a more comprehensive analysis, you can utilize Google’s own performance tool. It helps you measure how your site performs on mobile and desktop versions and offers suggestions for improvement areas.
Remember, understanding these indicators will not just help you make an informed decision about whether to change your WordPress theme but also guide you on how to optimize your site for better performance.
Now that you know your site’s performance, you can start exploring other themes that offer improved compatibility and features that align with your website’s needs. That new theme may provide just the speed boost or design enhancement that your site needs!
4: Test All Functionality and Installed WordPress Plugins
Testing is an absolutely critical step that should not be overlooked. Here’s why it is so crucial: Not every theme is compatible with every plugin out there for WordPress. By conducting tests, we’re ensuring that your site’s functionality remains intact, even after a theme change. This prevents any unwanted surprises down the line.
If you need to test things, it’s good to have a staging site. What’s a staging site? Think of it as a copy of your website. Some places where you host your website give you this neat option to make a clone of your site. So you get a copy of your own site to test or try new themes without breaking anything on your real website.
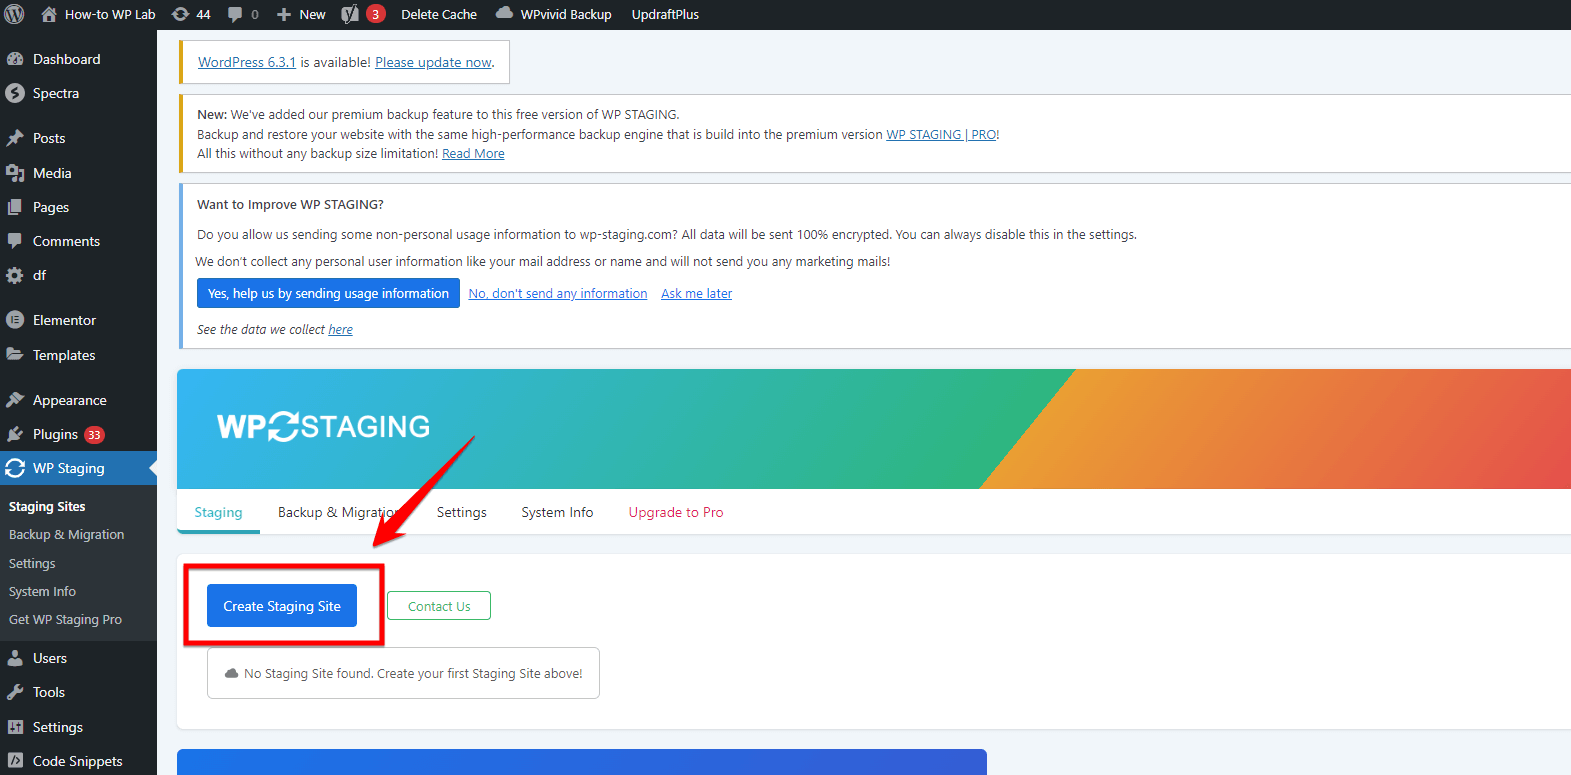
One easy way to make a staging site is with the “WP Staging” plugin. With “WP Staging”, you can easily clone your WordPress website for testing and building
Once you’ve activated the new theme on your staging site, the next step is checking how it gets along with your plugins. Like individuals, themes, too, have a say about their friends. So, it becomes very important to test each plugin one by one. Pay extra attention to plugins that add visible elements to your site, like page builders, contact forms, and more.
Note: Testing might seem like a drag at first but it’s all worth it. Tests are very much like your website’s insurance policy – they help avoid future issues. So, before you dive into changing the WordPress themes, get your ducks in a row and run thorough tests.
5: Put Your WordPress Site Into Maintenance Mode
Maintenance mode is sort of like a “be right back” sign for your website. It lets you work on improving your site without it affecting your visitors’ experience or your website’s SEO. In other words, it’s a neat way to tinker with your site without causing any interruption or inconvenience to your users.
Before you go about changing your WordPress theme, you might want to put your site into maintenance mode. Here’s how you can do that:
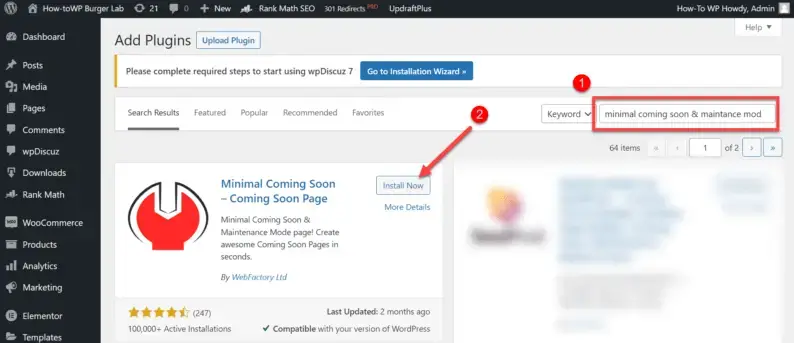
Step 1: Start by navigating to your WordPress dashboard. On the left-hand side, you will see an option called “Plugins”. Click on that, and then select the “Add New” option which will take you to a marketplace of various plugins.
Step 2: In the search bar, type in “Coming Soon & Maintenance Mode”. This is the plugin we are installing. Click ‘Install Now’ to begin the installation process.
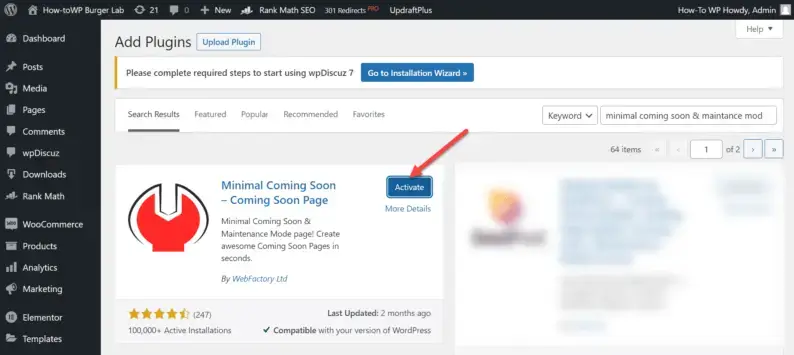
Note: We are using the free version of the plugin here, the name of the plugin might be slightly different. If you want more features, you can opt for the ‘pro’ version available on their official website for purchase.
Step 3: Once you have successfully installed the plugin, an “Activate” button will appear. Click on it to enable the plugin’s functionalities for your site.
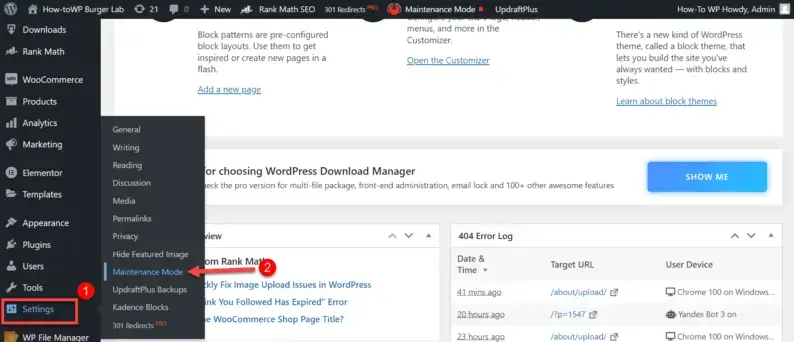
Step 4: Now that the plugin is active, you can start creating custom “coming soon” or maintenance pages for your website.
Step 5: In the dashboard on the left, scroll down to the “Settings” option and click it. Inside this menu, you’ll find “Maintenance Mode”. This is where you can manage the settings of your new plugin.
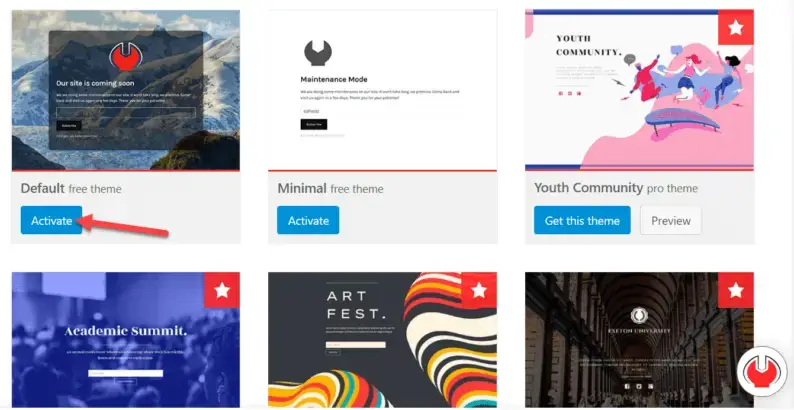
Step 6: Next is the “Themes” section. Here you’ll find various themes for your maintenance or upcoming page.
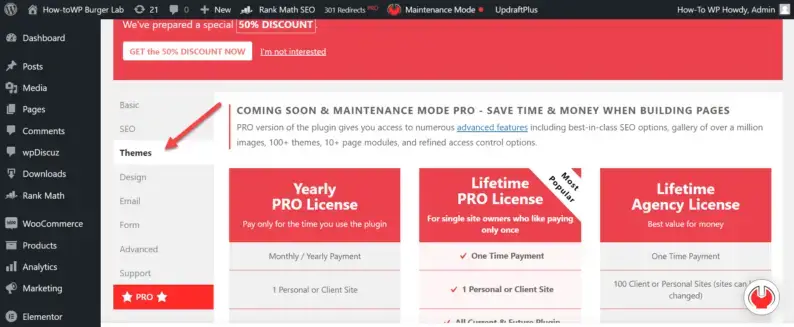
Step 7: Browse through the available themes. Once you find one that matches your aesthetic, you can enable it by clicking on the “Activate” button.
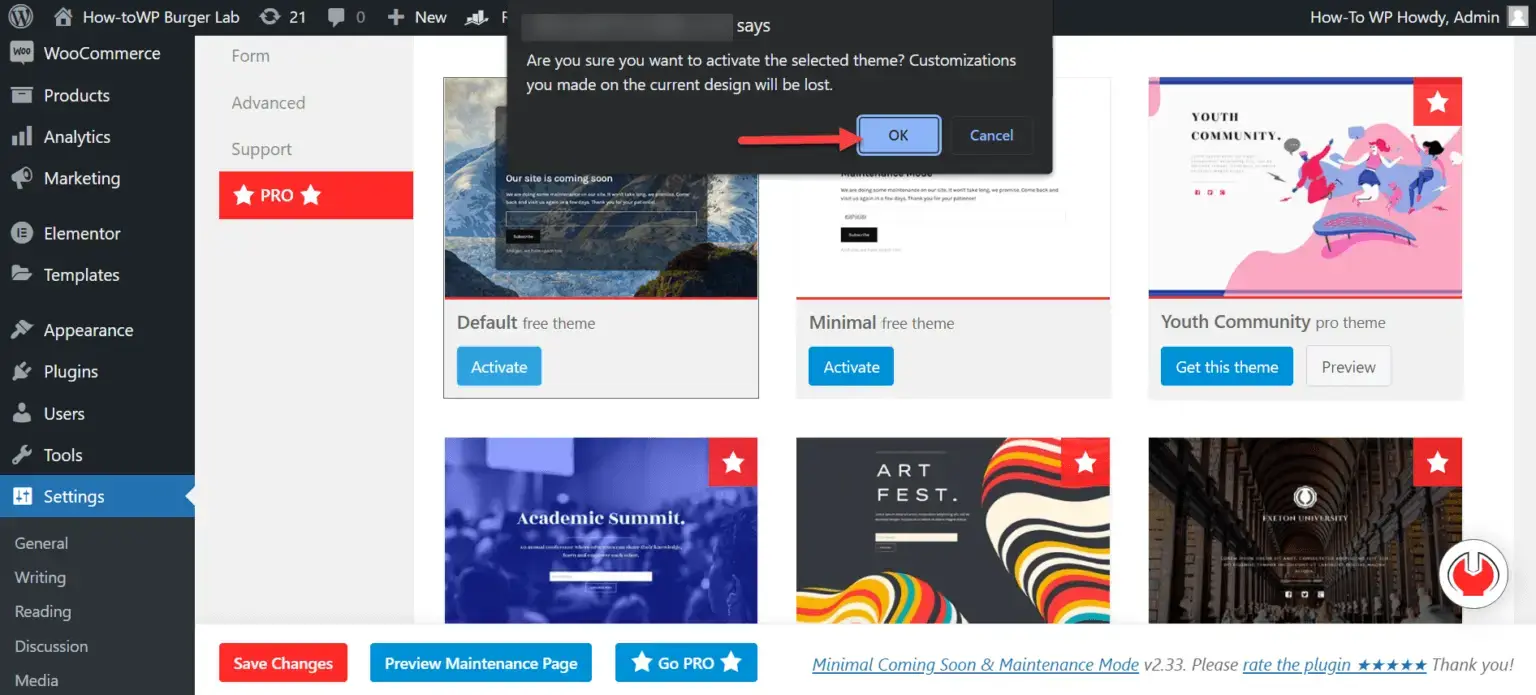
Step 8: A popup will show up on your screen, which is a confirmation of the theme activation. Continue by clicking on the “OK” button.
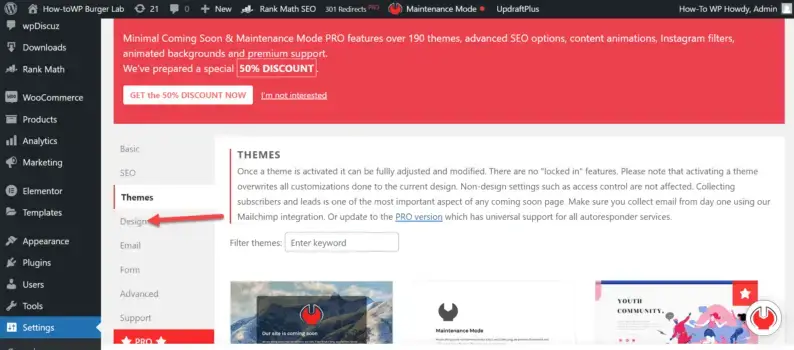
Step 9: Navigate to “Design”. This space allows you to tweak and customize various elements of your chosen theme to further personalize your “coming soon” page.
Step 10: Play around with the design elements and customize the page to your liking. Change colors and fonts or add images.
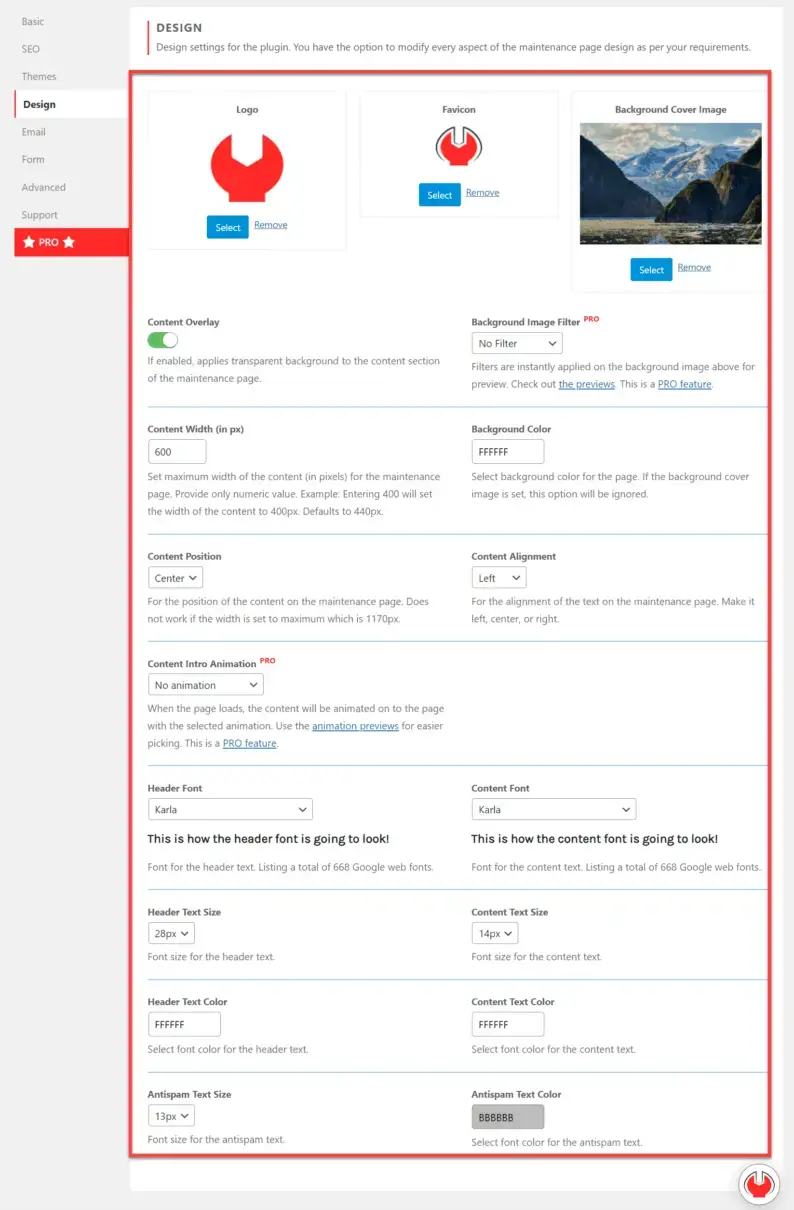
Step 11: Made all your changes? Great! Remember to save your progress. You can do this by clicking on the “Save Changes” button.

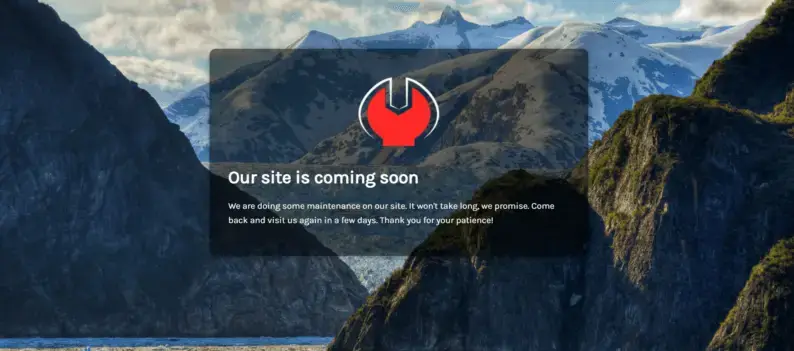
Step 12: Can’t wait to see how it looks live? Click on “Preview Maintenance Page”! You will be redirected to the preview of the maintenance or coming soon page, where you can see how your new page will look to your visitors.
So, you’ve tried the plugin, but there’s another simple way to put your site in maintenance mode. This time, it’s about changing a special file called the .htaccess file.
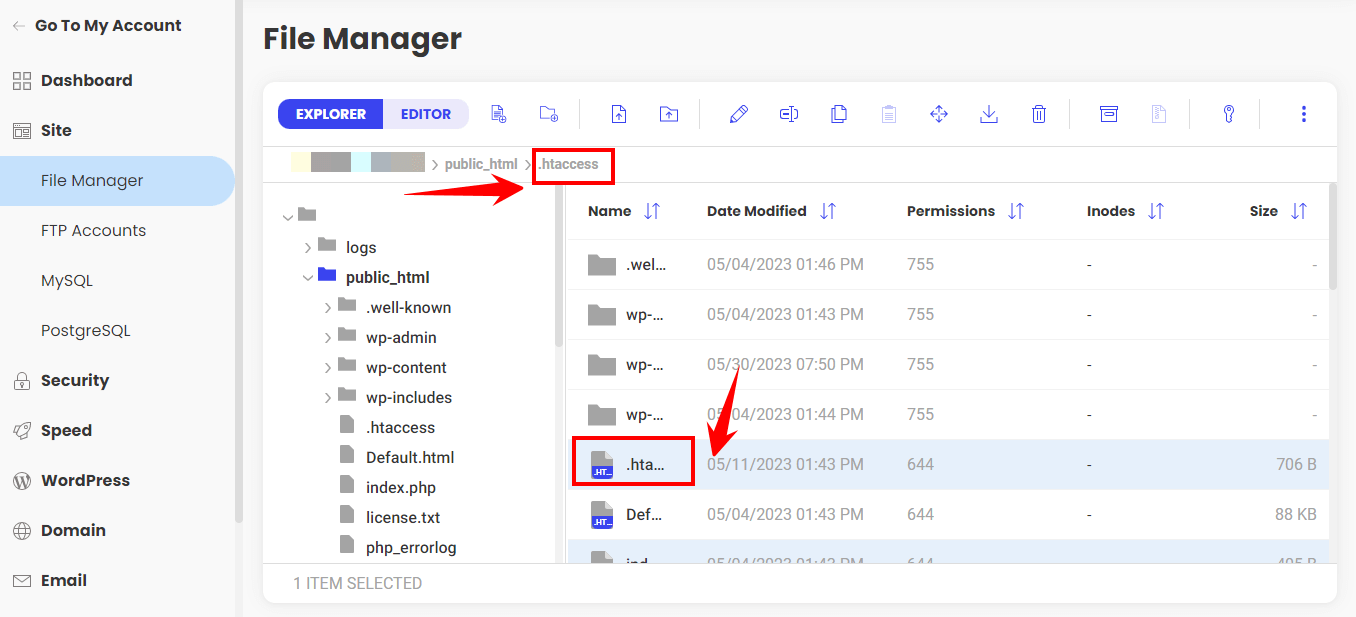
Using this method, you guide your visitors to a special page that says you’re fixing up the website.
Remember that working with the .htaccess file is a bit technical, but don’t worry; it’s just like following a recipe! If you like to do things on your own, this method is just the right thing to try. Enjoy making changes to your site!
Bonus: Inform Your Users That Your Website Is Now Live
Once you’ve switched off maintenance mode and your spiffy new website is up and running, let your users know. Inform them in a straightforward and cheerful way about the new features added. You can use an email newsletter or a simple message on your website to announce this.
Social media is another excellent tool for announcing your new website updates. Use your social media channels like Facebook, Twitter, LinkedIn, or Instagram to tell your followers about the facelift your website has received. You can also invite them to provide feedback on the site’s updated look and functionality.
Finally, consider publishing a detailed blog post on your site, explaining what’s new, the reasons behind the changes, and what users can expect moving forward. A blog post gives you the space to dive deeper into the upgrade and explain the benefits to your users.


