How to Build an Online Store With Nexcess Managed WooCommerce

Creating your very first online store can be difficult because, most of the time, people don’t have the knowledge to set up their online store.
That’s why Nexcess has brought a solution in the shape of WooCommerce (formerly known as StoreBuilder). Today, I’ll show you how to use WooCommerce so you can create your own store with ease.
You’ll learn about:
- What is WooCommerce
- How to use it
Let’s start with what is WooCommerce.
Table of Contents
What Is WooCommerce by Nexcess
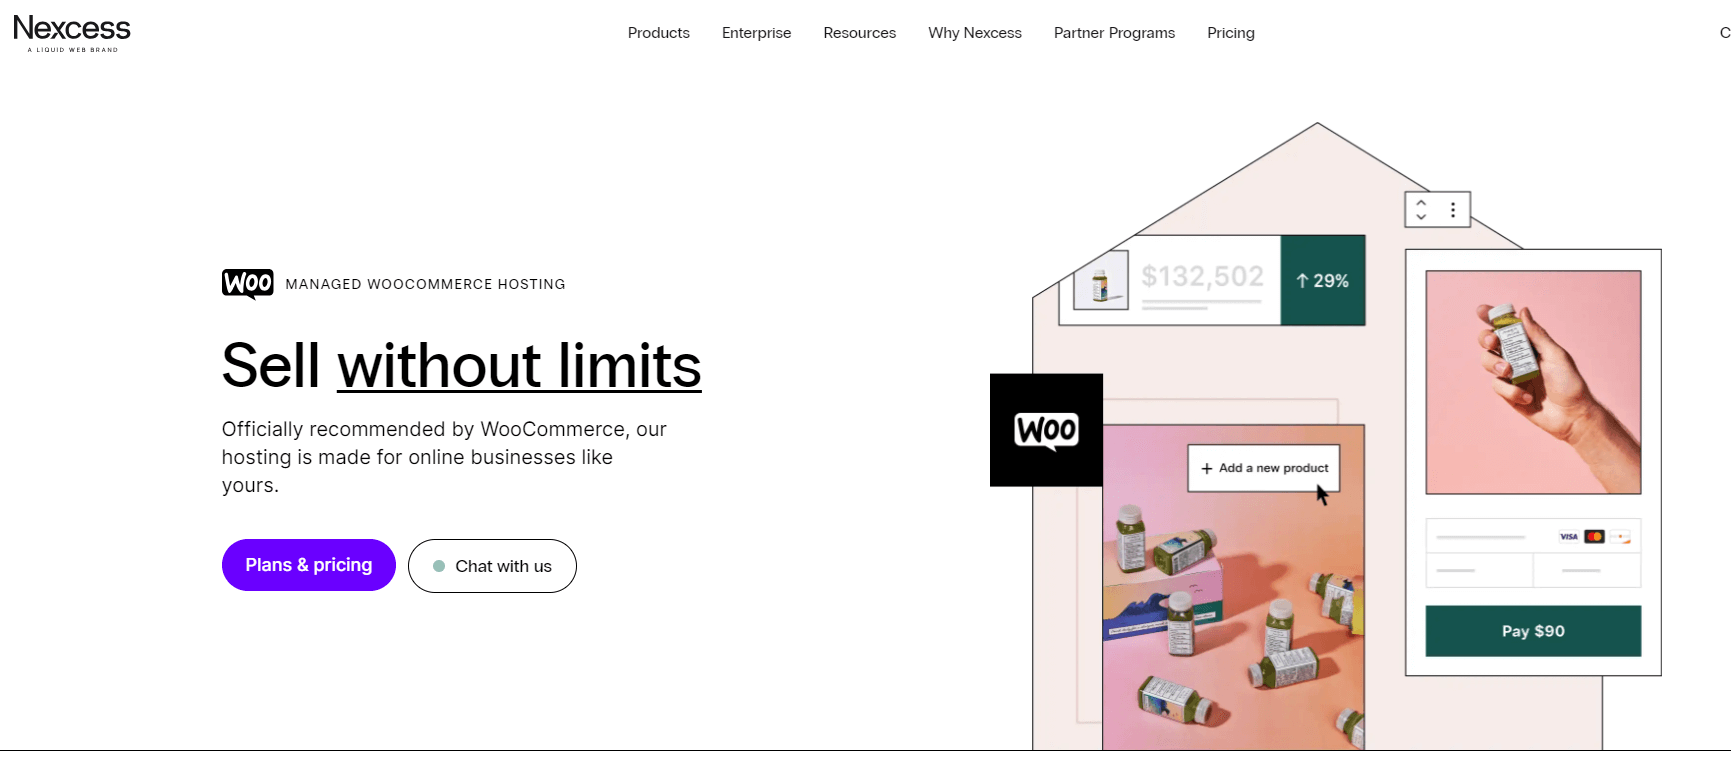
When it comes to online stores, WooCommerce is in a league of its own. This eCommerce platform provides users with everything they need to get started, including templates, themes, and advanced features such as product filtering and abandoned cart recovery
Whether you’re looking to sell products online or reach a global audience, WooCommerce has the tools you need to grow your business.
With its easy-to-use interface and comprehensive features, WooCommerce is the perfect solution for anyone looking to take their business to the next level.
Some of the features that make WooCommerce stand out among other eCommerce platforms include:
- Responsive website
- Single-page checkout
- Custom checkout features
- Coupons, discounts, and gift cards
- Product ratings and reviews
- And more.
How to Use WooCommerce by Nexcess
Knowing how to use WooCommerce can give you the running start that you’ll need. It doesn’t require any previous knowledge of online store creation. Just follow the steps one at a time, and you’ll be done in no time.
Step 1: Creating a Nexcess Account
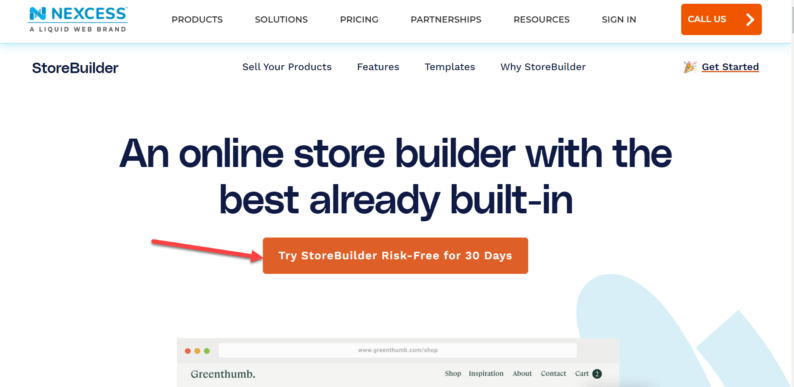
To use the WooCommerce platform, first, you’ll need to buy a Nexcess account for it. Luckily, they offer a 30-day trial period. For the first month, the WooCommerce is completely free to use. After the trial period, if you don’t like it, you can cancel the account altogether.
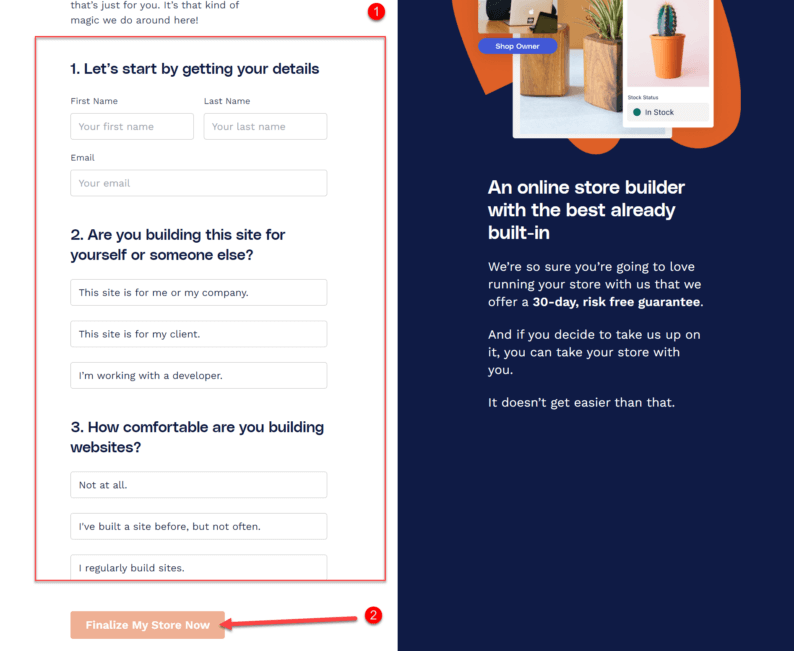
Start by going to the WooCommerce and clicking on the “Try WooCommerce risk free for 30 days“ button.
On the next page, you’ll enter all the necessary details about yourself. After that, click the “Finalize My Store Now” button.
Next, it’ll ask you to enter your account and billing details.
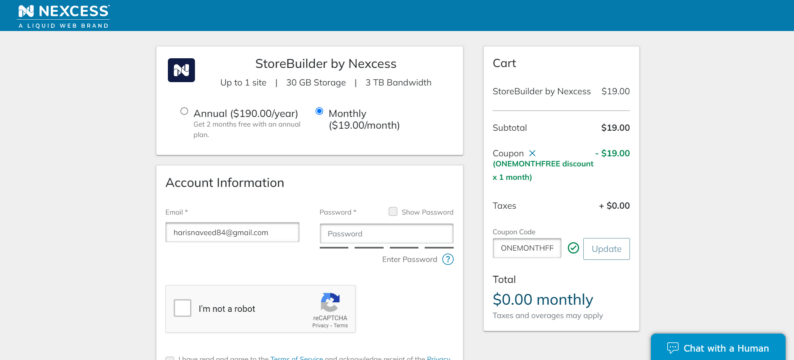
Once the procedure is complete, your account will be ready for use.
Step 2: Logging In Nexcess Account
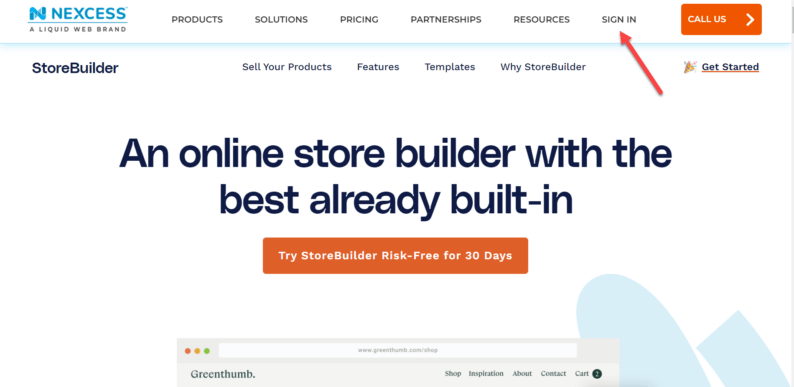
After creating your account, you’ll need to log in to it to access the dashboard. Go to the Nexcess website and click on the “SIGN IN” option in the main menu.
You’ll need to enter your account details on the next page. After entering them, check the box labeled “I’m not a robot.” It will determine if you’re a bot or a human being.
In the end, click the “Login” button.

Step 3: Go to WooCommerce
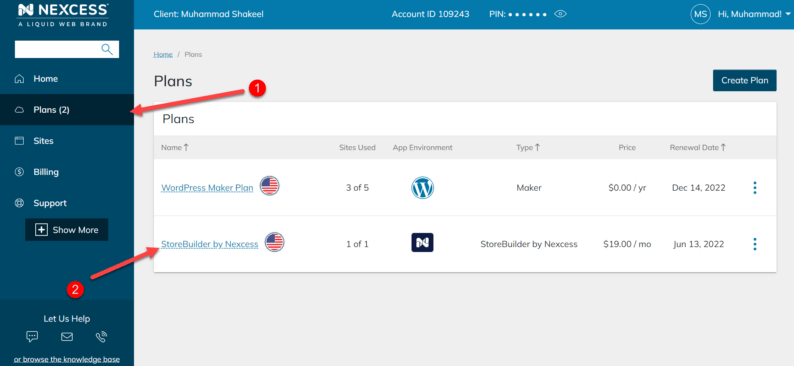
You’ll be able to view the dashboard after logging in to your Nexcess account. The next step involves you accessing the WooCommerce platform.
For this, you’ll first need to go to “Plans” and click on the “WooCommerceby Nexcess” option.
After that, you’ll see all the available domains. Click on the domain which you want to change.
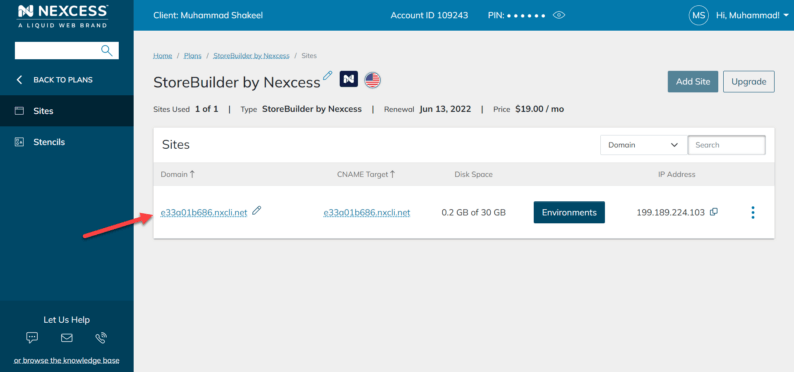
On the next page, you’ll be able to see all the credentials of the domain. From here, copy the “Hostname” of the domain.
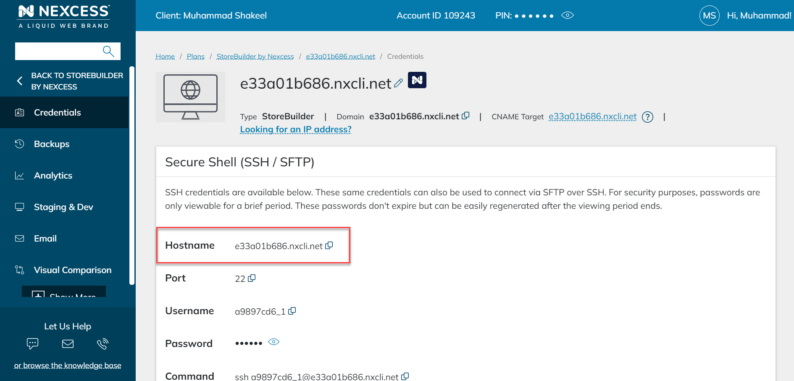
Open a new tab and paste the “Hostname” in the URL section of your browser.
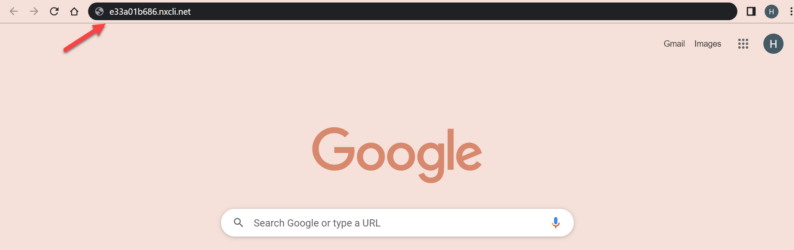
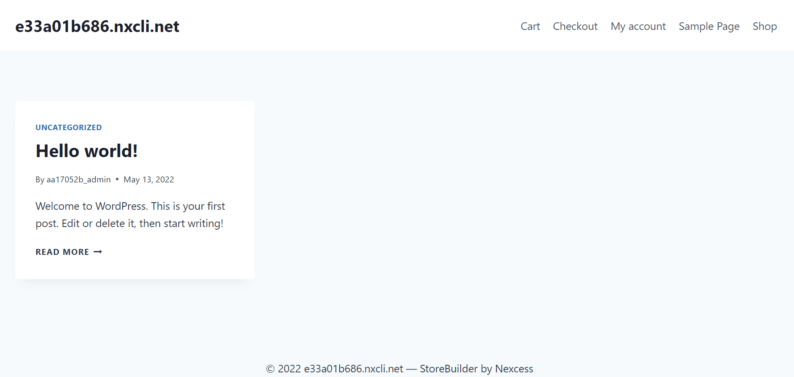
After pasting it, click the enter key, and you’ll be directly taken to the website created using the WooCommerce platform.
Step 4: Logging in to the WooCommerce Site
Now that you’ve seen the website, you can change it however you like by logging in to its dashboard.
Copy the “Hostname” again from your Nexcess account.

Just like before, paste it into the URL section of the tab, but this time, add “/login” at the end of it.
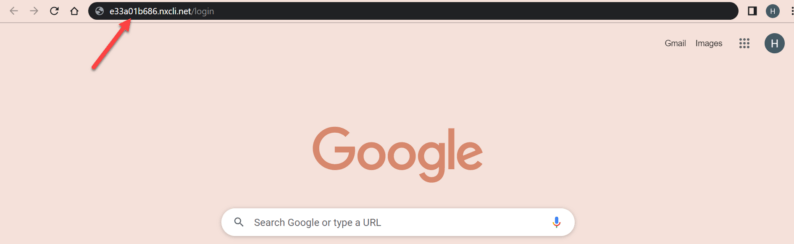
You’ll be redirected to a WordPress login page. To know your credentials, go to your Nexcess account and click on the same domain from which you copied the “Hostname.”
You’ll see the WordPress login credentials at the bottom of the page.
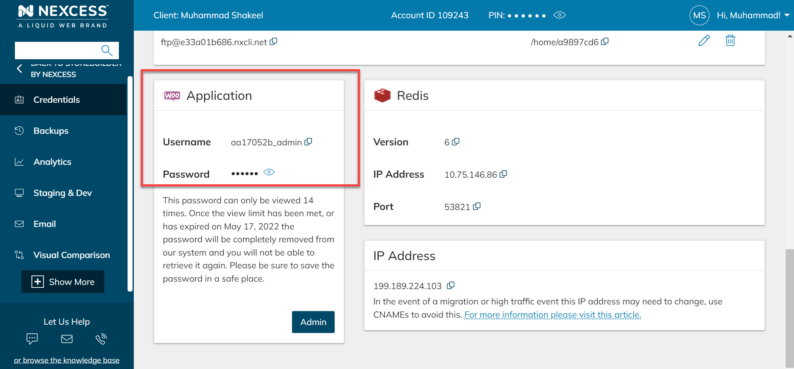
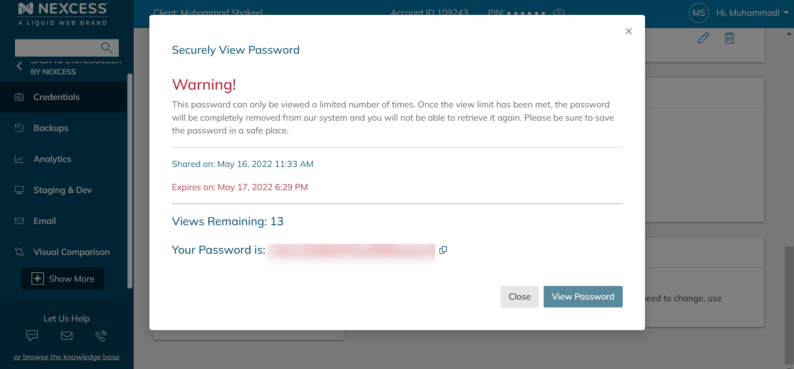
The username is visible but to view the password, click on the small eye icon next to “Password.” Next, click on the “View Password” button.
Note: There are a limited number of views, so it’s advisable that you save the password somewhere else.

You can copy the password from here.
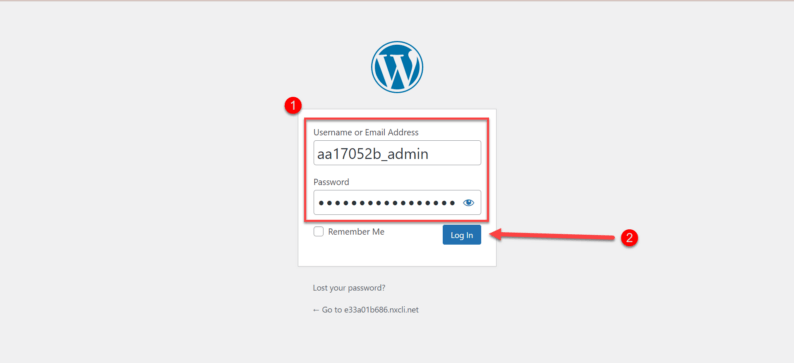
Now go back to the WordPress login page and paste the login details and click the “Log In” button.
Note: You can check the box labeled as “Remember Me” so you don’t have to enter the login details repeatedly.
Step 5: Setting Up Your Store
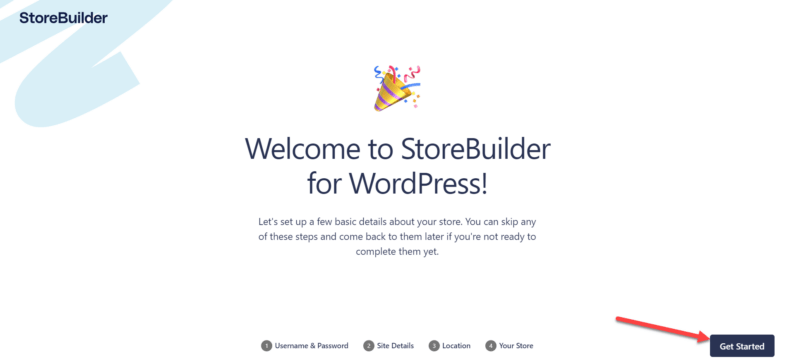
As soon as you log in for the first time, you’ll see a message about setting up your store. To start the set-up process, click on the “Get Started” on the bottom right-hand corner of the page.
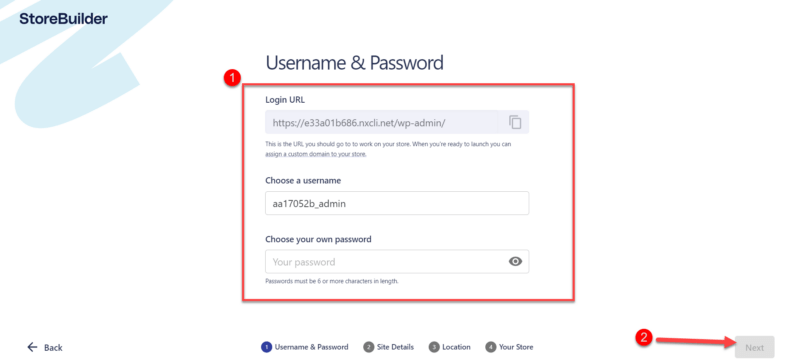
The step-up procedure is very simple. First, you’ll create a new username & password for your store. After that, click the “Next” button.
Note: You can use the same username & password you used for the WordPress login.
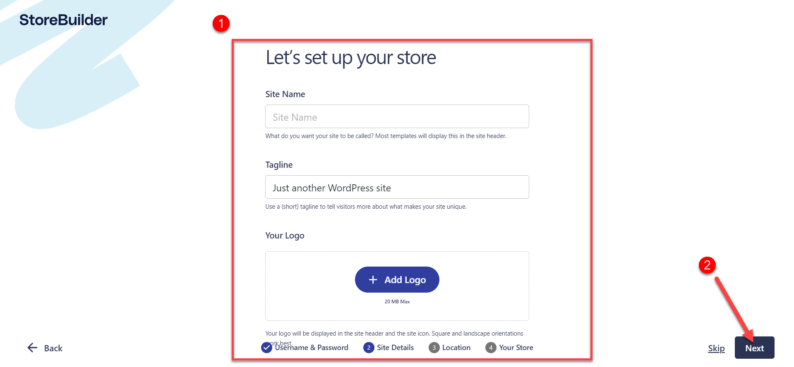
Next, enter site details such as site title, tagline, logo, etc., and click the “Next” button.
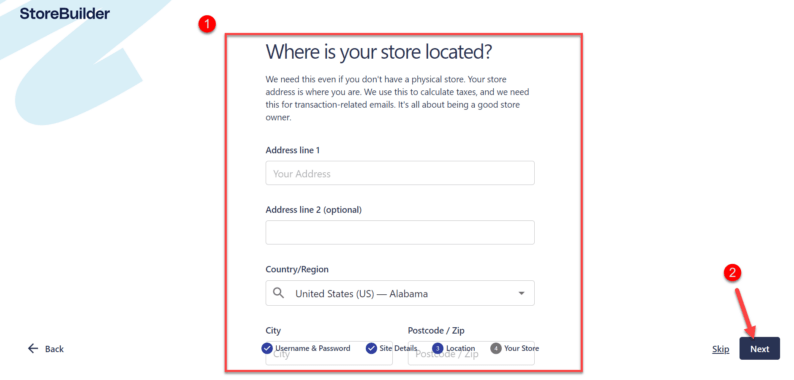
In the next step, you’ll enter the physical address of the store. It’s a necessity for online stores that mail things from one location to another.
Note: Even if you don’t have a physical store, enter the location where the parcels are to be sent from. Alternatively, you have the option to skip it.
In the last step, you’ll talk about the nature of your store. It includes the types of products, types of currency and number of products, etc. Click the “Next” button to proceed.
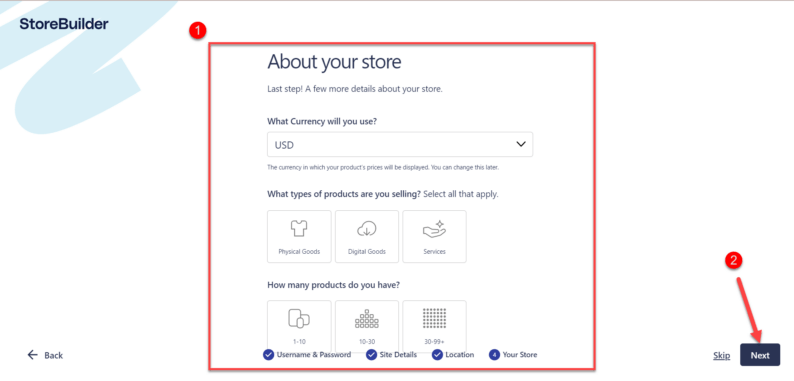
After that, it’ll show you a page where you’ll have to click on the “Save & Continue” button.
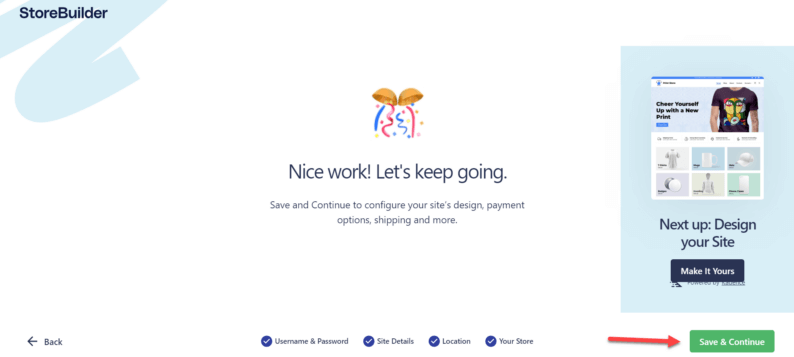
After that, you’ll see the dashboard of your store from where you can edit each and every aspect of the store.
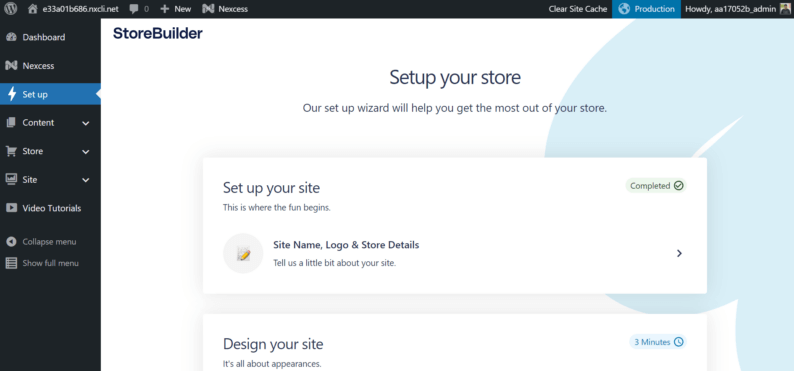
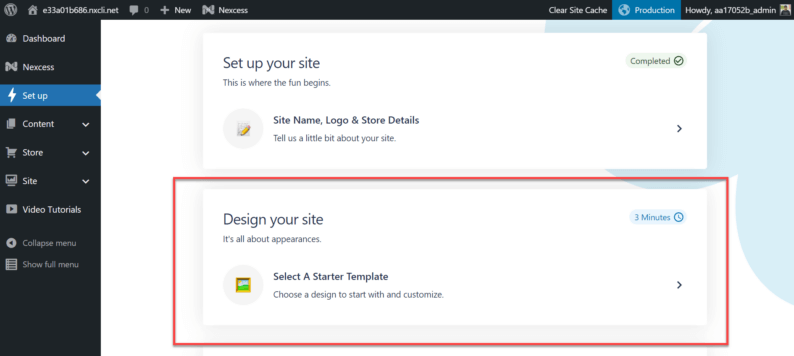
Step 6: Applying Template
The initial look of your store will be extremely simple and bland. You’ll need to apply a template to make it look appealing to the customer.
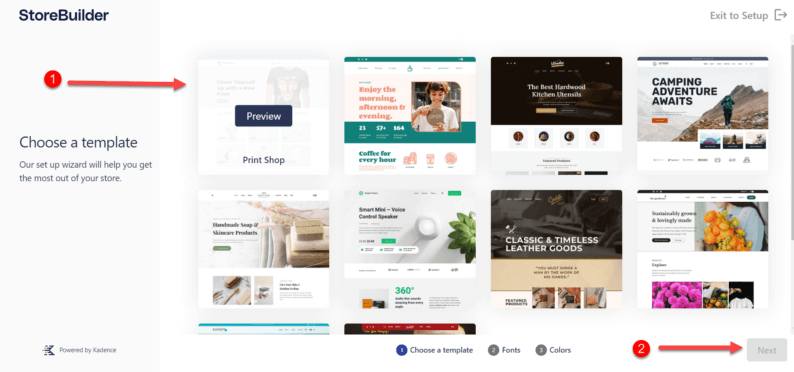
Go to the “Set up” option on the dashboard and click on the “Select A Starter Template” option.
Select a template you want to apply and click the “Next” button.
Note: You don’t really need to click the “Next” button. Just click on the template. Furthermore, You can preview the style of the template by simply clicking on the “Preview” button.
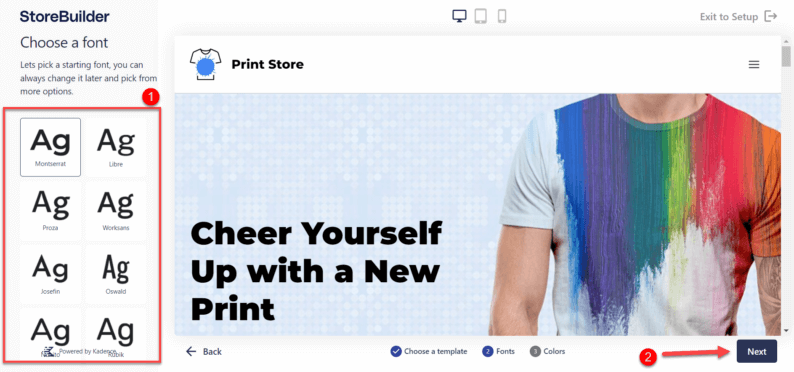
On the next page, you’ll have to select the type of font which you want to display in your store and click the “Next” button.
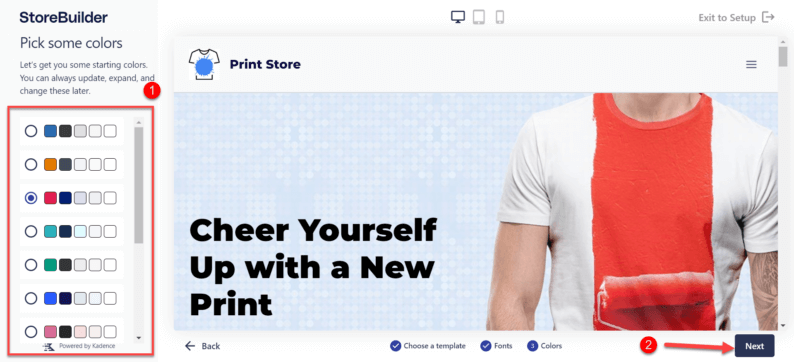
Next, select the color scheme of the site and click the “Next” button.
On the last page, click the “Save & Continue” button to start the importing process.
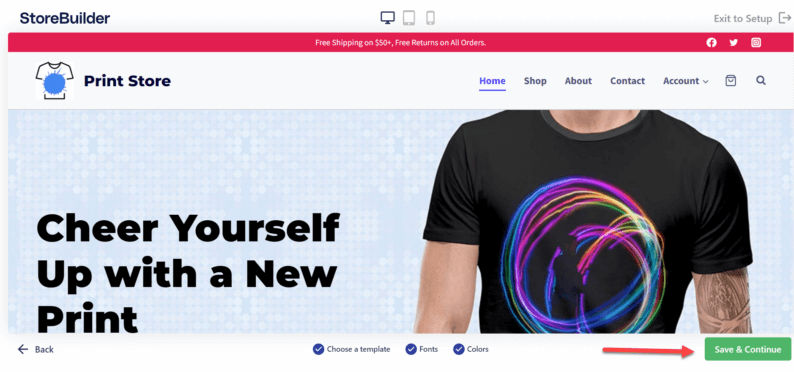
After that, go to your site, and the template will be applied to your store.
It makes your task of customizing the site much easier. All you have to do is make a few tweaks here & there, and you’ll be set.
Step 7: Setting Payment Plan
By default, there are 2 methods by which you can configure and connect with your store. These two methods are:
- PayPal
- Strip
Let’s start with setting up PayPal.
Setting Up PayPal
Click the “Connect PayPal” button in the “Set up” section.
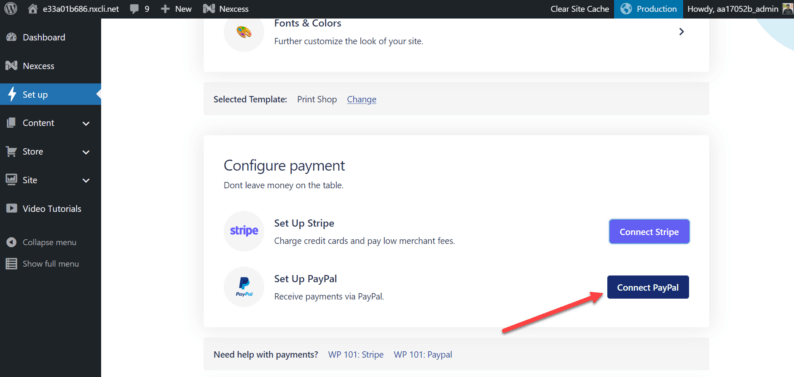
Click the “Activate PayPal” button at the bottom of the page.
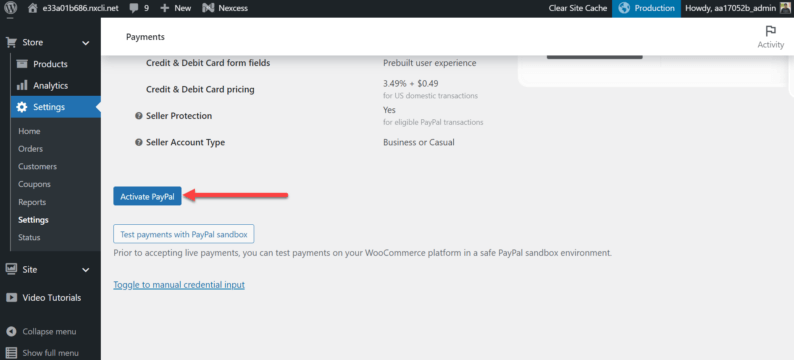
You’ll be redirected to the PayPal website, where you can connect your existing PayPal account.
Note: If you don’t own a PayPal account and want to create one, you can do so by using this method as well. Just give the necessary details, and you can create a PayPal account with ease.
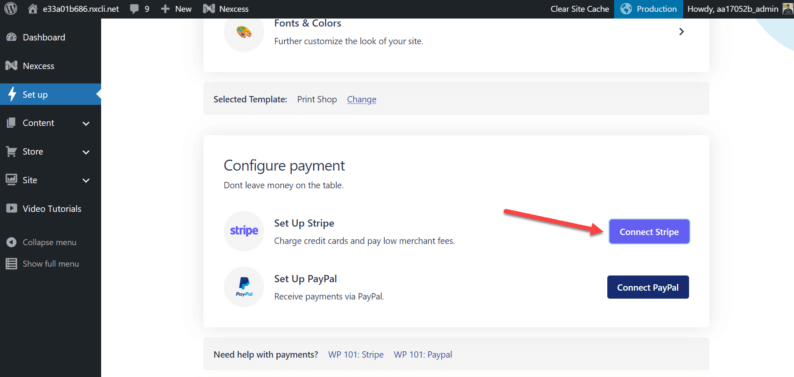
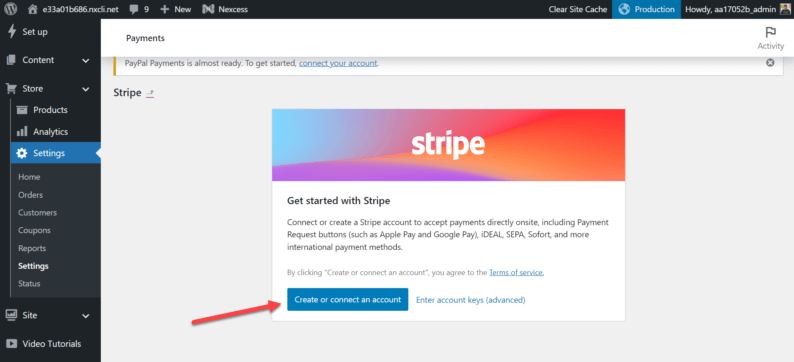
Setting Up Stripe
Stripe is another payment method that you can use with your store. To set it up, go to the “Set up” section of the dashboard and click on the “Connect Stripe” button.
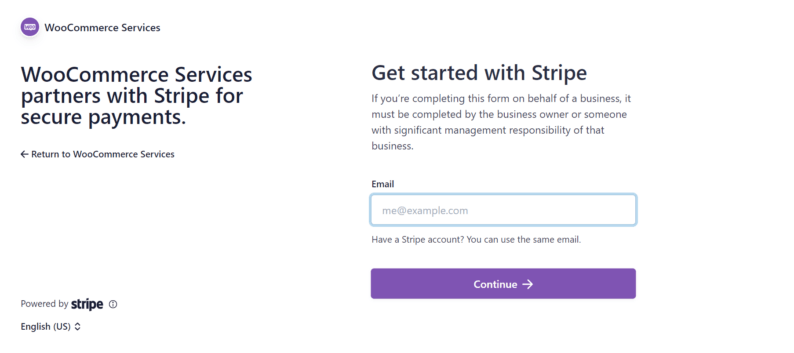
Next, click the “Create or connect an account” button.
You can create an account or simply log in to an existing one from the redirected age.
Conclusion
Now that you know how to use WooCommerce, creating your first online store will be a breeze. Having a basic understanding of how an online store works is all you need, and you’ll be shipping orders in no time.
WooCommerce provides everything you need to get started, including templates, themes, and advanced features such as product filtering and abandoned cart recovery.
So what are you waiting for? Get started today and have your very own online store up and running in no time! If there’s still anything you want to know, mention it in the comments section.