How to Deliver a WordPress Website to a Client

Delivering a finished WordPress website to a client can be a satisfying and exciting moment, as it marks the end of a project and the beginning of a new chapter for the client. However, it is crucial to take the time to properly deliver the website to the client in a way that ensures a smooth transition and sets the stage for a successful partnership.
Before delivering the finished WordPress website to the client, ensure it is fully functional and ready for launch by conducting thorough testing and making any necessary updates or adjustments. This will help ensure the client’s satisfaction with the final product and a positive experience from the start.
In this article, I’ll share how I deliver a WordPress website to a client. Whether you’re a seasoned pro or a new developer, this guide will provide valuable insights and best practices for delivering a website to a client. So let’s get started!
Table of Contents
Checklist for Delivering a WordPress Website
Before we dive into the delivery process, it’s essential to double-check all the details to make sure the website is ready for delivery.
As a WordPress web developer, I’ve learned the hard way that skipping this step can lead to costly mistakes and unhappy clients.
Trust me, you don’t want to hand over a website with broken links or missing long form content. So, take the time to review the website carefully and address any issues before delivering it to the client.
Here are some items I always check before delivering a WordPress website to a client:
- Website functionality and performance: Test the website thoroughly to ensure all the features are working correctly and the website is running smoothly.
- Content and design: Review the content and design to ensure they meet the client’s expectations and brand guidelines.
- Responsiveness on different devices: Check that the website, including any custom WordPress theme, looks and works well on various devices and screen sizes.
- Security measures: Implement necessary security measures to protect the website and the client’s data.
- Backup plan: Have a plan in place in case something goes wrong during the delivery process or after the website is live.
Once you’ve checked off these items, you can feel confident that the website is ready for delivery.
6 Steps to Successfully Handing Over Your WordPress Website to a Client
Once you have completed a WordPress website for a client, it’s important to properly deliver it to them in a way that sets them up for success. This includes ensuring the website is fully functional, optimized for performance and search engines, and tested on various devices and screen sizes. By ensuring that all the details are ironed out before handover, you can deliver the website to the client with confidence and peace of mind.
By following these steps, you can deliver a website to a client with confidence and peace of mind.
Let’s go over each method in more detail.
Step 1: Create A Custom Client Dashboard / Login Page
One of the first steps in delivering a WordPress website to a client is setting up a custom client dashboard. This allows the client to access the website’s dashboard and make changes to the content or settings as needed.
To create a custom client login page, here’s what you need to do.
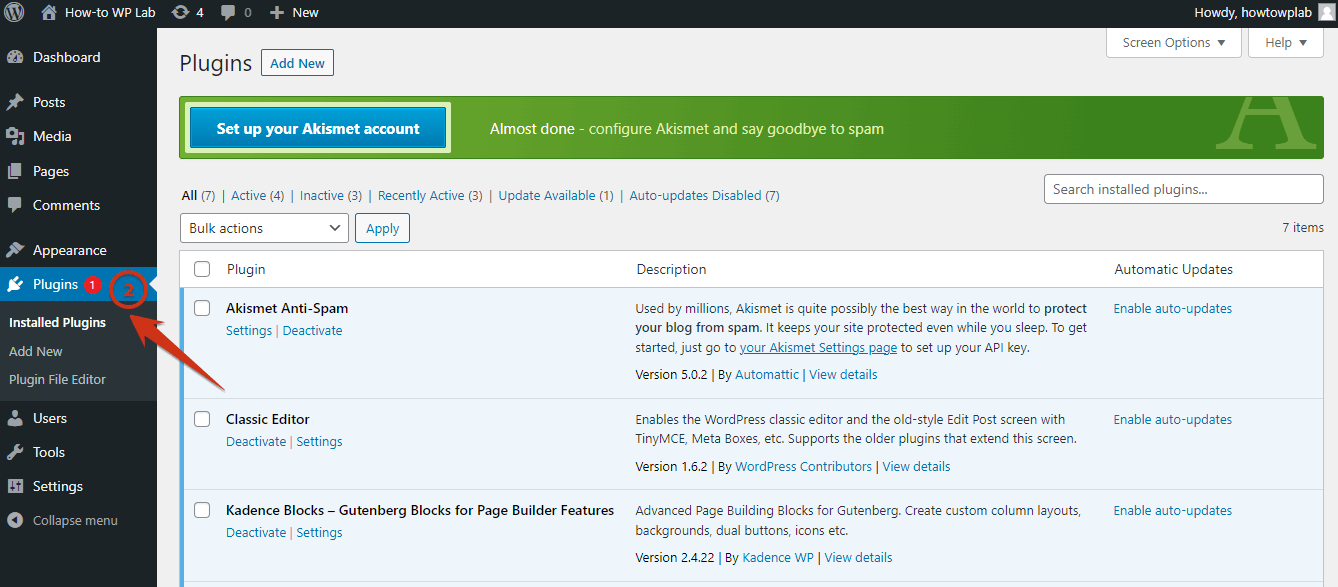
1. Log in to your WordPress website and go to the dashboard.
2. From the dashboard, navigate to the “Plugins” section.
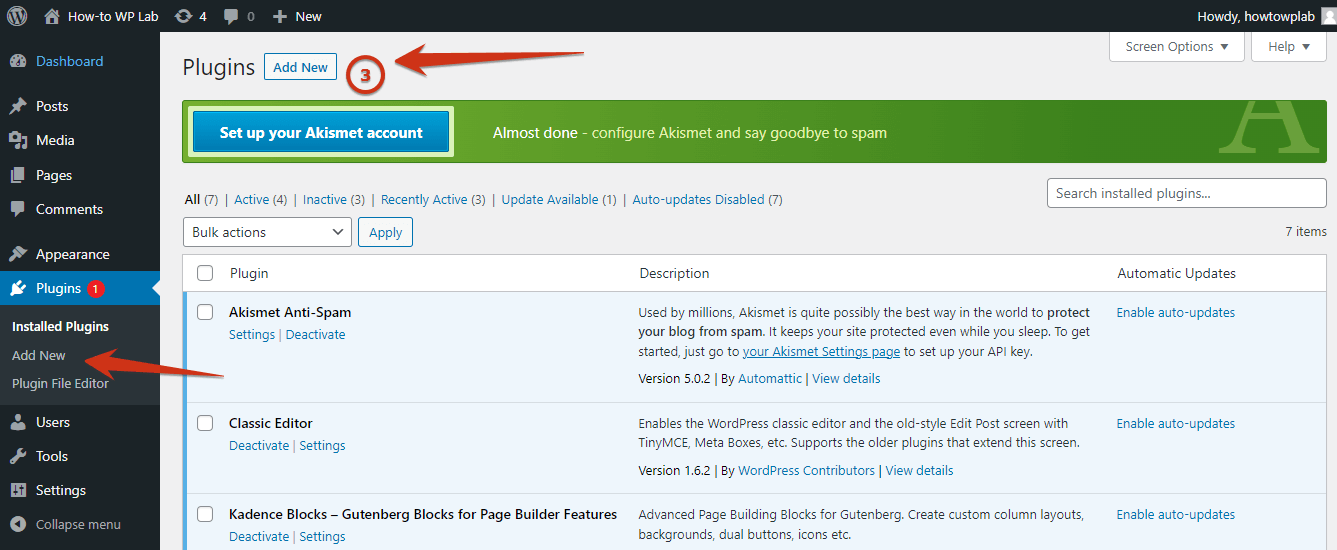
3. Click on the “Add New” button to add a new plugin to your WordPress website.
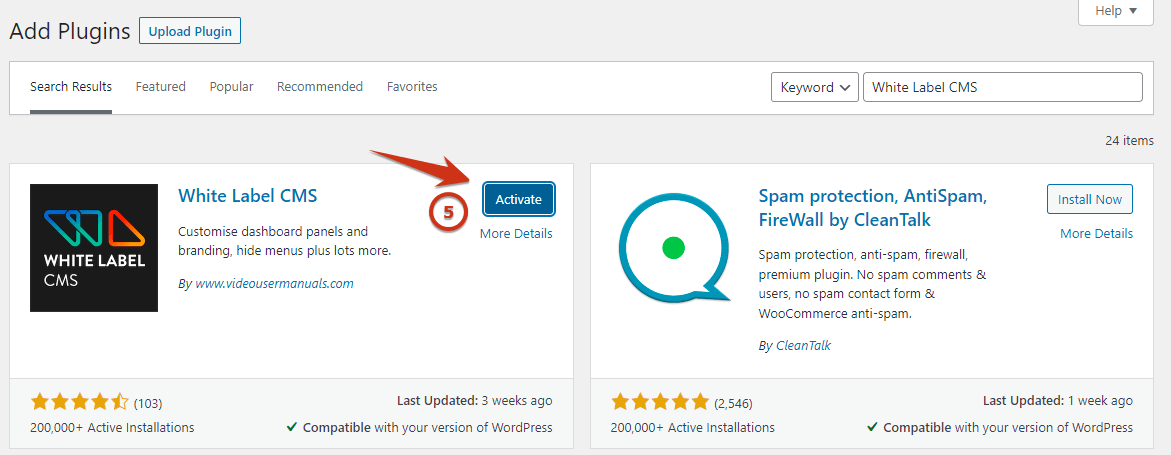
4. In the search field, type “White Label CMS” and press enter.
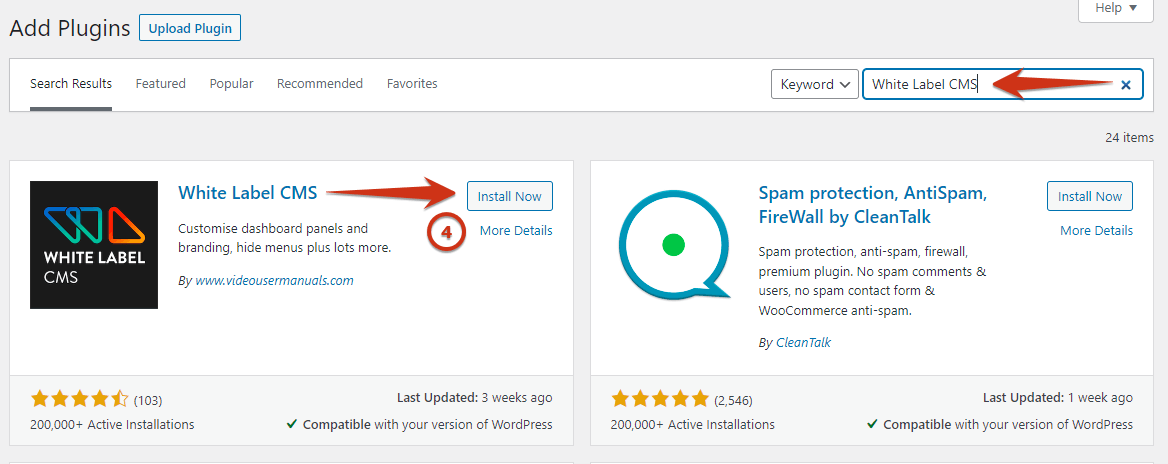
5. Click on the “Install Now” button next to the White Label CMS plugin. Once the plugin is installed, click on the “Activate” button to enable it on your WordPress website.
6. After activating the plugin, you should see a new menu item called “White Label CMS” in the setting dashboard.

7. From the options page, you can customize the branding and appearance of the client dashboard. You can change the logo, colors, and fonts to match your company’s branding.
Pro TIP: You can also set up custom pages for your clients by clicking on the “Custom Pages” tab. This allows you to create custom pages that are only visible to your clients, such as a project management page or a support forum.
Once you have set up the White Label CMS plugin, your clients will be able to log in to their own dashboard where they can view and manage their projects, access support resources, and more.
Step 2: Install Google Analytics
Another essential step in delivering a WordPress website to a client is setting up Google Analytics. This allows the client to track the website’s traffic and performance, which is crucial for measuring the success of the website and making informed decisions.

Google Analytics is a free web analytics service that provides valuable insights into website traffic, such as the number of visitors, the sources of traffic, and the most popular pages. It also offers advanced features such as conversion tracking and audience segmentation.
To install Google Analytics, follow these steps:
- Sign up for a Google Analytics account using the client’s email address.
- Get the tracking code from the Google Analytics account and copy it.
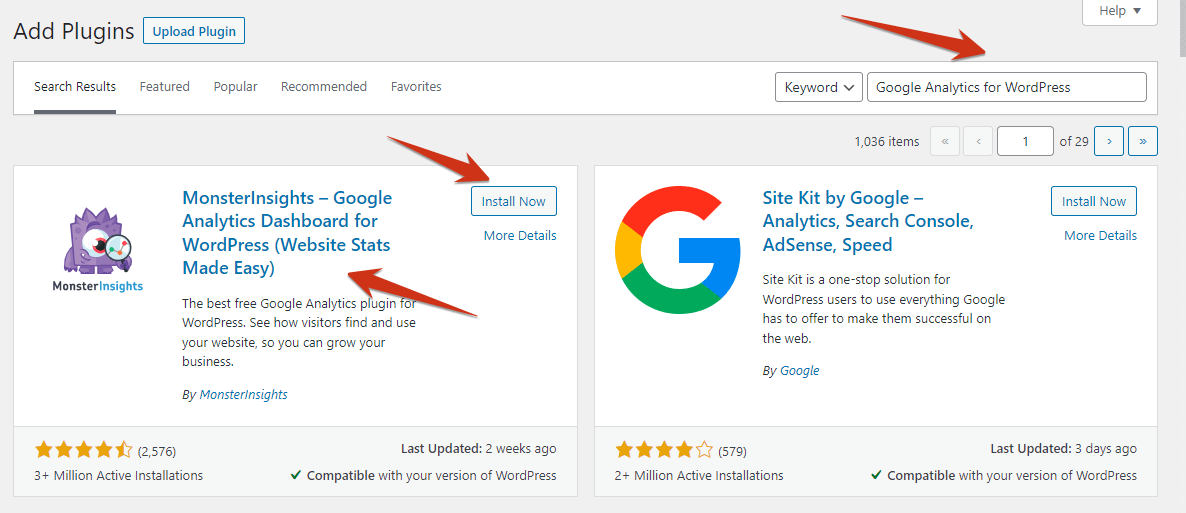
Install a plugin like Google Analytics for WordPress or Insert Headers and Footers.
- Paste the tracking code into the plugin’s settings.
- Save the changes and activate the plugin.
After installing Google Analytics, I provide the client with the login details and show them how to access the analytics data and interpret it. I also explain the different reports and features available in Google Analytics, and how they can be used to measure the success of the website and make informed decisions.
Google Analytics is a powerful tool that can help the client understand their website’s traffic and performance, and make informed decisions about their online presence.
Step 3: Add User Roles
One important aspect of delivering a WordPress website to a client is setting up user roles and permissions. This allows the client to control who has access to different areas of the website and what actions they are allowed to perform.
To add user roles, follow these steps:
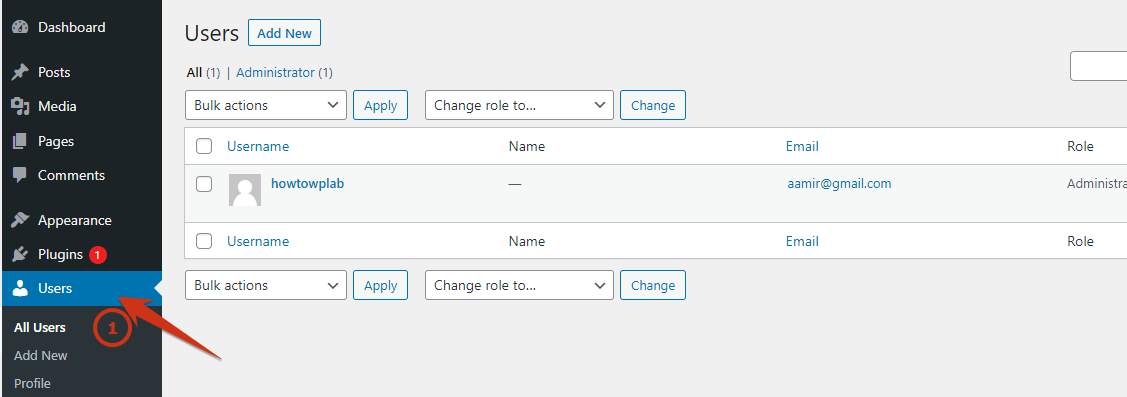
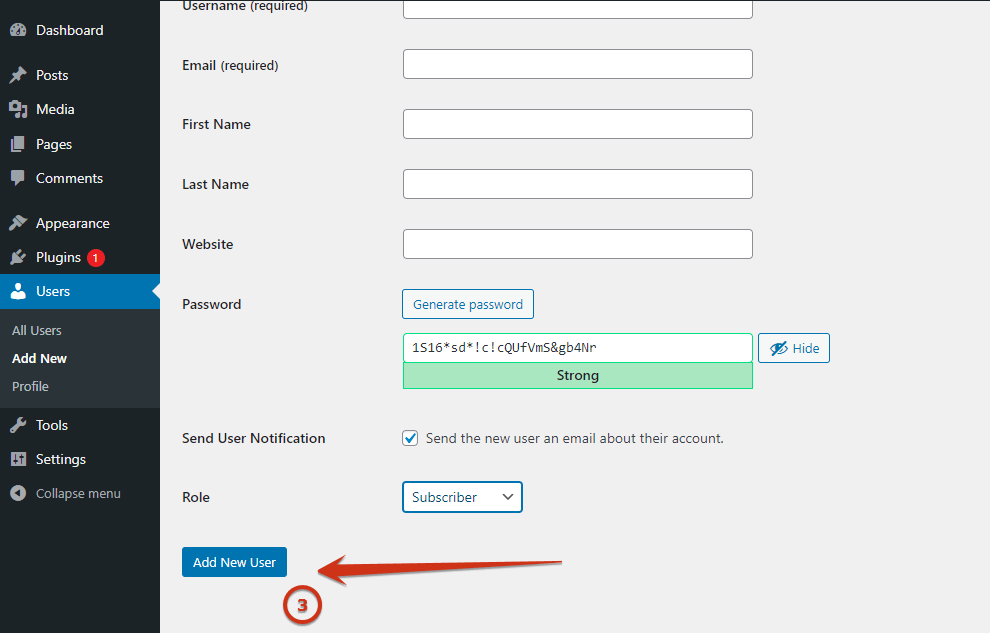
1. In the WordPress dashboard, go to “Users > All Users”
2. Go to the Users tab and click on the Add New button. Enter the new user’s information, including their Username, Email, and password. In the Role dropdown menu, select the appropriate role for the user. There are several built-in WordPress roles, including Administrator, Editor, Author, Contributor, and Subscriber. Each role has its own set of permissions, such as the ability to publish or edit posts, manage comments, or access specific settings.
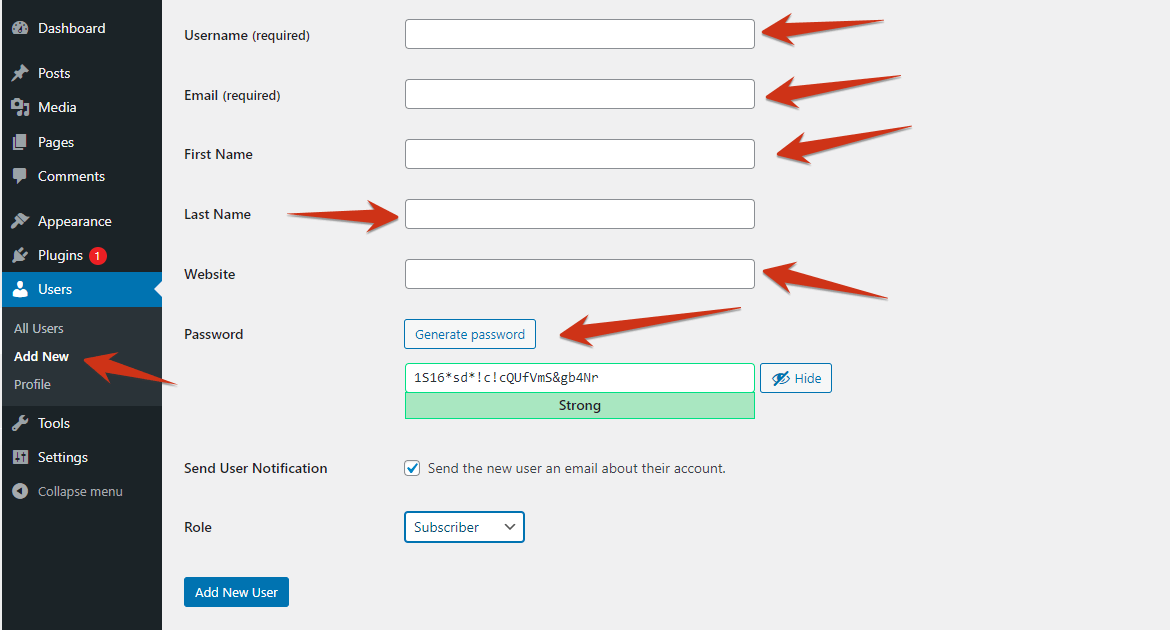
3. Click on the “Add New User” button to save the new user.
It’s important to carefully consider which user roles are necessary for the client’s website and assign them accordingly. For example, if the client plans to have multiple authors contributing to their website, they may want to assign the Author role to each of them. On the other hand, if the client only wants certain users to be able to manage specific aspects of the website, such as the appearance or settings, they may want to assign the Administrator role to those users.
By setting up user roles and permissions, the client can ensure that only authorized users have access to the website’s content and functions, and can easily manage and control who can do what on the website.
Step 4: Change the WordPress Favicon
A favicon is a small icon that appears in the browser tab and bookmark menu of a website. It’s a useful way to help users identify and differentiate the website, and can also improve the website’s branding and professionalism.
To change the WordPress favicon, you can follow these steps:
- Create a favicon image in the desired size and format. The recommended size is 512×512 pixels, and the recommended formats are .ico, .png, or .gif. You can use a graphic design tool such as Adobe Illustrator or a free online favicon generator to create the image.
- Upload the favicon image to the website’s media library by going to the Media tab in the WordPress dashboard and clicking on the Add New button.
- Copy the URL of the uploaded favicon image.
- Go to the Appearance tab in the WordPress dashboard and click on the Customize button.
- In the Customizer, click on the Site Identity tab.
- Paste the URL of the favicon image into the Site Icon field.
- Click on the Save & Publish button to save the changes.
After changing the favicon, it may take some time for it to be displayed on all browsers and devices. To ensure that the favicon is displayed correctly, it’s a good idea to test it on different browsers and devices, and to clear the browser cache.
Free TIP Alert: By changing the WordPress favicon, you can add a personalized touch to the website and improve its branding and professionalism. Be sure to explain to the client how to access and change the favicon in the future, if needed.
Step 5: Customize the WordPress Admin UI
The WordPress admin user interface (UI) is the backend interface that users see when they log in to the website’s dashboard. It’s the area where users can manage the website’s content, appearance, and settings.
To customize the WordPress admin UI, you can follow these steps:
Install a plugin such as Admin Custom Login or Custom Login Customizer. These plugins allow you to customize the login page and the dashboard with your own branding and design elements.
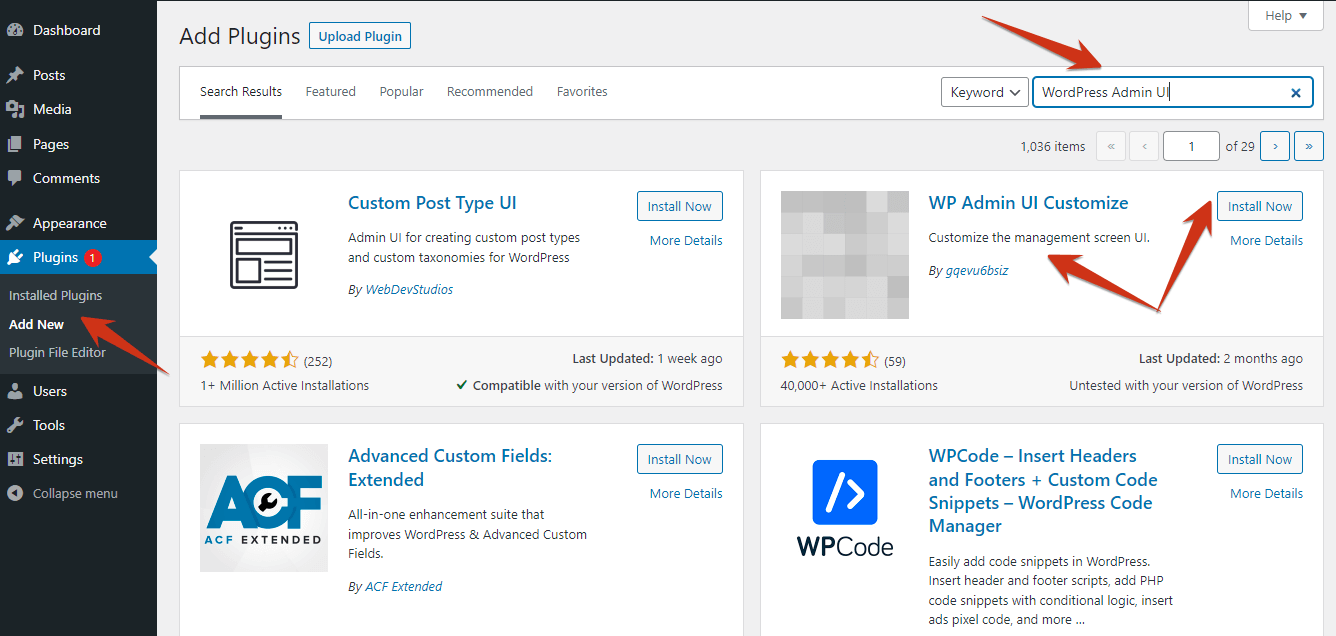
Go to the plugin’s settings page and customize the login page and dashboard according to your preferences. You can change the logo, background image, colors, and fonts, and add custom content such as a welcome message or social media links.
Click on the Save or Update button to save the changes.
By customizing the WordPress admin UI, you can create a more personalized and cohesive experience for users who log in to the website’s dashboard. This can improve the website’s branding and professionalism, and make it easier for users to navigate and use the dashboard. Be sure to explain to the client how to access and customize the WordPress admin UI in the future, if needed.
Step 6: Add an Explainer Video
An explainer video is a short, animated video that explains a product, service, or concept in a simple and engaging way. Adding an explainer video to a website can be a powerful way to grab the attention of visitors and communicate complex ideas in a clear and concise manner.
To add an explainer video to a WordPress website, you can follow these steps:
- Create an explainer video using a video editing software such as Adobe Premiere or a free online explainer video tool such as Animaker or Powtoon.
- Upload the explainer video to a video hosting platform such as YouTube or Vimeo.
- Copy the URL of the uploaded video.
- Go to the page or post where you want to add the video and click on the Add Media button.
- In the Insert Media window, select the Embed tab and paste the URL of the video into the Embed field.
- Click on the Insert into page button to add the video to the page or post.
- Preview the page or post to make sure that the video is displayed correctly.
By adding an explainer video to the website, you can engage and educate visitors in a visually appealing and effective way. Be sure to explain to the client how to add and manage videos on the website in the future, if needed. You can provide them with instructions on how to upload and embed videos using the WordPress media library and the Add Media button. You can also show them how to edit or delete videos, and how to add captions or transcriptions for accessibility.
Pro Tip: It’s important to make sure that the client understands how to use and manage the website effectively, so that they can maintain and update the website on their own. Providing clear and concise instructions, as well as offering ongoing support and assistance, can help the client feel confident and empowered to manage the website on their own.
Top Tips for Delivering a Professional WordPress Website to a Client
An accomplished web developer or designer can stand proud when they deliver a finished WordPress website to a client. It marks the end of a project and the moment when the client gets to see the final product. However, the delivery process is also an opportunity to build a strong relationship with the client and set the tone for future projects.
Here are a few ways to make a positive impact during the delivery process:
- Be Organized and Prepared: Gather all necessary information and documents beforehand, including login credentials, hosting information, and any design or branding assets the client has provided. Having everything in order before delivering the website will make the process much smoother and help avoid any potential delays or complications.
- Test and Troubleshoot Thoroughly: Before delivering the website to the client, be sure to test every feature and fix any bugs or issues. A website that is free of errors and glitches will give the client confidence in your work and help establish trust in your ongoing relationship.
- Provide Clear and Concise Documentation: The client will need to know how to access and manage their website, so be sure to provide clear and concise documentation on everything they need to know. This could include login credentials, instructions for adding and updating content, and any other relevant information.
- Offer Training and Support: Depending on the client’s level of experience with WordPress, they may need some guidance on how to use and update their new website. Offer to provide training or answer any questions they may have to ensure that they feel comfortable and confident managing their site.
- Follow Up and check In: After the website has been delivered, it’s important to follow up with the client to make sure they are satisfied with the final product. Offer to assist with any issues or updates they may need in the future to establish a helpful and responsive working relationship.
Wrapping Up
In conclusion, delivering a WordPress website to a client is an important step that requires careful planning and organization. By following the checklist and steps outlined in this article,
you can ensure that the website is ready for delivery and hand it over to the client with confidence.
This includes creating a custom client dashboard, setting up hosting and domain names, transferring ownership, providing documentation and training, and setting up a backup plan. By taking the time to properly deliver the website, you can ensure a smooth handover and a happy client.
Frequently Asked Questions
How do I transfer a domain name to a client?
To transfer a domain name to a client, you’ll need to follow the steps provided by the current domain registrar. This usually involves transferring the domain to the client’s account and updating the DNS settings to point to the correct hosting provider.
How do I set up hosting for a client’s WordPress website?
To set up hosting for a client’s WordPress website, you’ll need to choose a reliable hosting provider and set up the website on their servers. This usually involves creating a new account, installing WordPress, and uploading the website files. Be sure to test the website on the new hosting environment to ensure everything is working as expected.
How do I provide login details and instructions to a client?
To provide login details and instructions to a client, it’s important to gather all necessary information and document it clearly and concisely. This could include login details for the website’s dashboard, hosting provider, domain registrar, and instructions on how to use the website and make updates. It’s a good idea to provide this information in a written format, such as a PDF or Google Doc, to ensure the client has a reference to refer back to.
How do I send a local WordPress site to a client?
To send a local WordPress site to a client, you’ll need to follow these steps:
1. Export the website from your local development environment.
Import the website into the client’s hosting environment.
2. Update the domain name and DNS settings to point to the client’s hosting provider.
3. Test the website on the client’s hosting environment to ensure everything is working as expected.
4. Provide the client with login details for the website’s dashboard and any necessary accounts, such as the hosting provider and domain registrar.


