How to Embed a Video on a WordPress Page or Post

If you want to know how to embed videos into your WordPress posts or pages, don’t worry! It’s actually pretty simple and easy to do
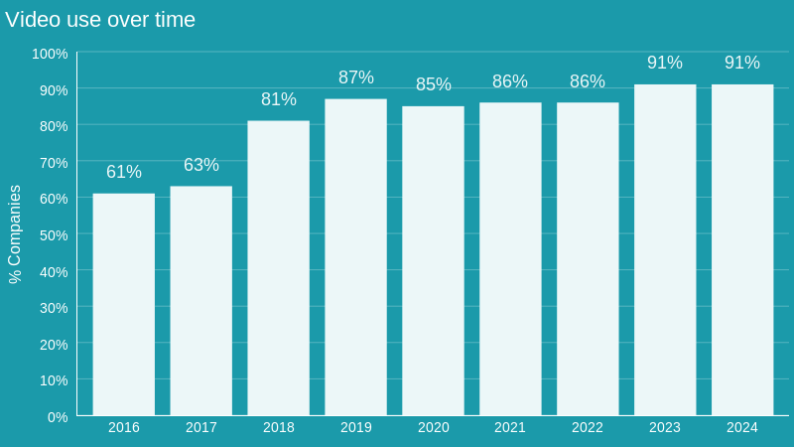
A recent study by Wyzowl shows that 92% of people who work in marketing use video. This shows that videos are effective at getting users interested and making them more likely to buy things.
WordPress has different ways to add videos, and these ways work for people with different skill levels and videos from different places.
In this article, you will learn:
- Different methods to embed a video on a WordPress page or post
- Embedding vs. uploading videos in WordPress
- Why embedding videos in your WordPress website is beneficial
By the time you finish reading this article, you’ll know exactly what to do to make your WordPress blog more exciting with cool videos. Let’s get started!
Table of Contents
- Top 5 Methods to Embed Videos in WordPress
- Method 1: Using the oEmbed Method (The Easiest Way)
- Method 2: Using the WordPress Block Editor (Built-in Features)
- Method 3: Embedding Videos Using the Classic Editor (For Older Versions)
- Method 4: Using the Sidebar Widgets (For Self-Hosted Videos)
- Method 5: Embedding Videos Using a Video Embedding Plugin
- Embedding vs. Uploading Videos in WordPress
- FAQs
Top 5 Methods to Embed Videos in WordPress
We talked about how great videos can be, and now it’s time to try it yourself. There are many easy ways to embed videos on your WordPress site. Some methods are super simple, while others give you more control over how the video looks.
The good news is that I’ll show you how to do each method with proper screenshots so you can follow along. I’ll also tell you what’s good and bad about each method so you can choose the one that works best for your video and your skills.
Are you ready to become really good at adding videos? Let’s look at the 5 best ways to put videos on your WordPress page or post!
Method 1: Using the oEmbed Method (The Easiest Way)
In WordPress, one of the simplest ways to embed videos is by utilizing the oEmbed method. Before delving into the step-by-step guide, let’s understand what oEmbed is.
oEmbed is a format that facilitates an embedded representation of a URL on a webpage, allowing websites to display embedded content like videos simply by pasting a URL, without the need for manual embedding of code snippets.
This method enables you to effortlessly embed videos from various platforms such as YouTube, Vimeo, or Dailymotion by seamlessly pasting the video URL into the editor of your post or page. Below are detailed instructions on how to embed videos using the oEmbed method:
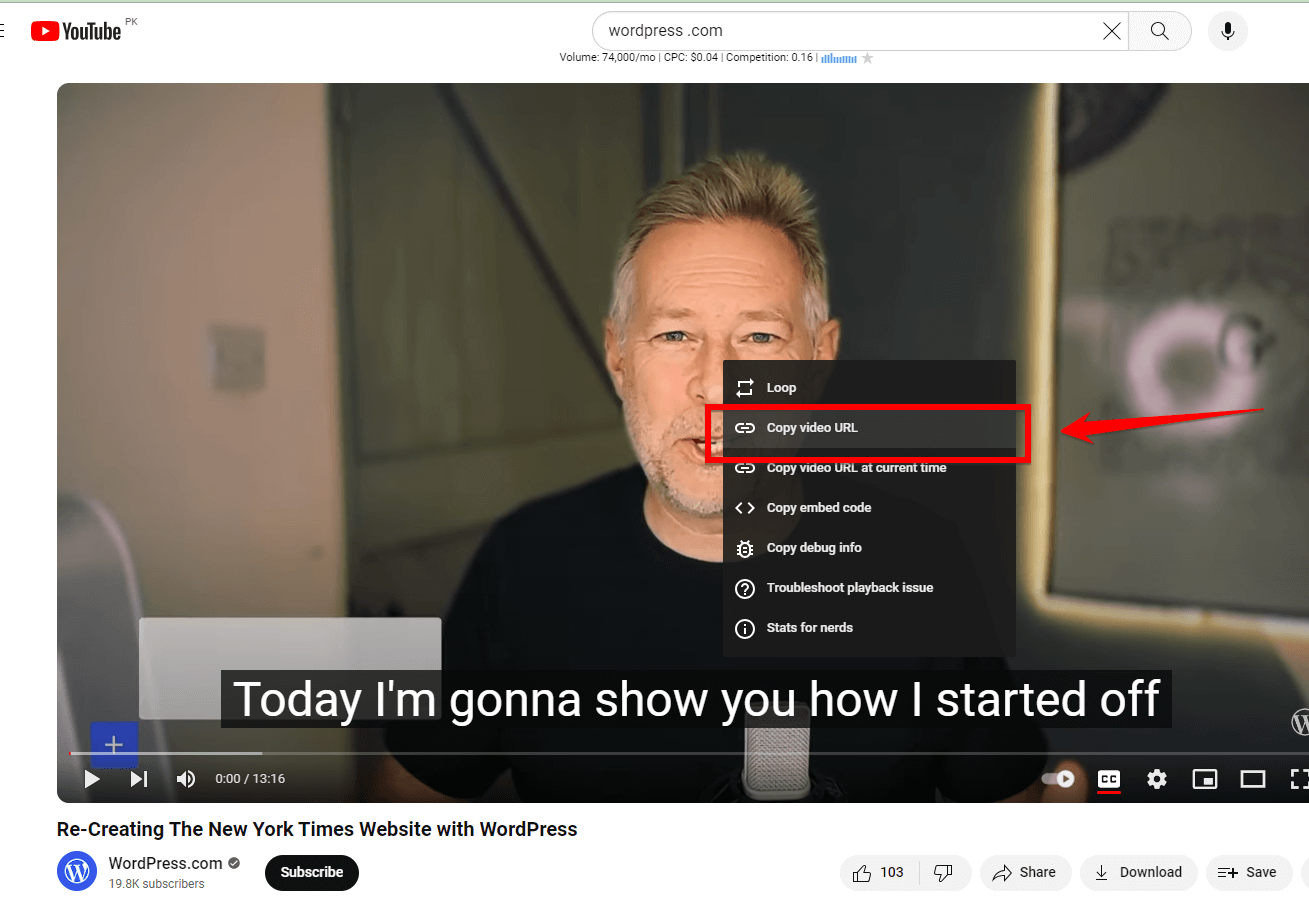
Step 1: Locate the URL of the video you wish to embed from platforms like “YouTube,” “Vimeo,” or “Dailymotion.”
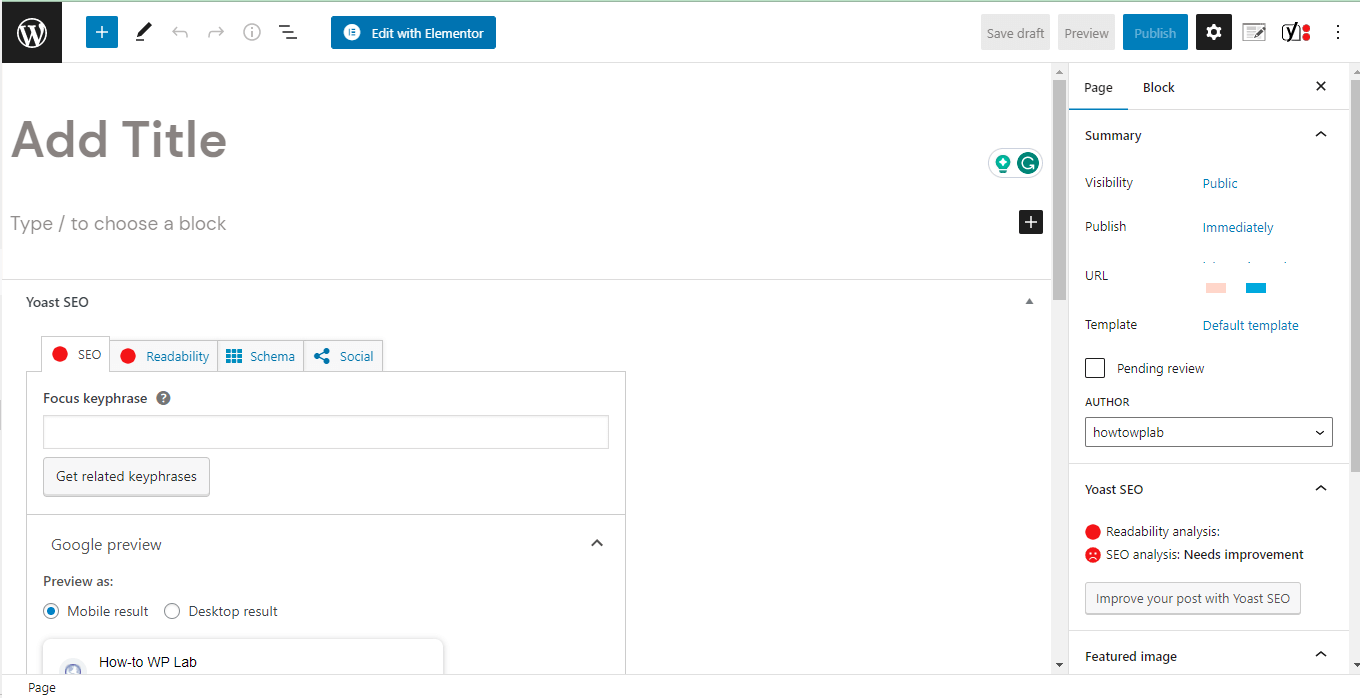
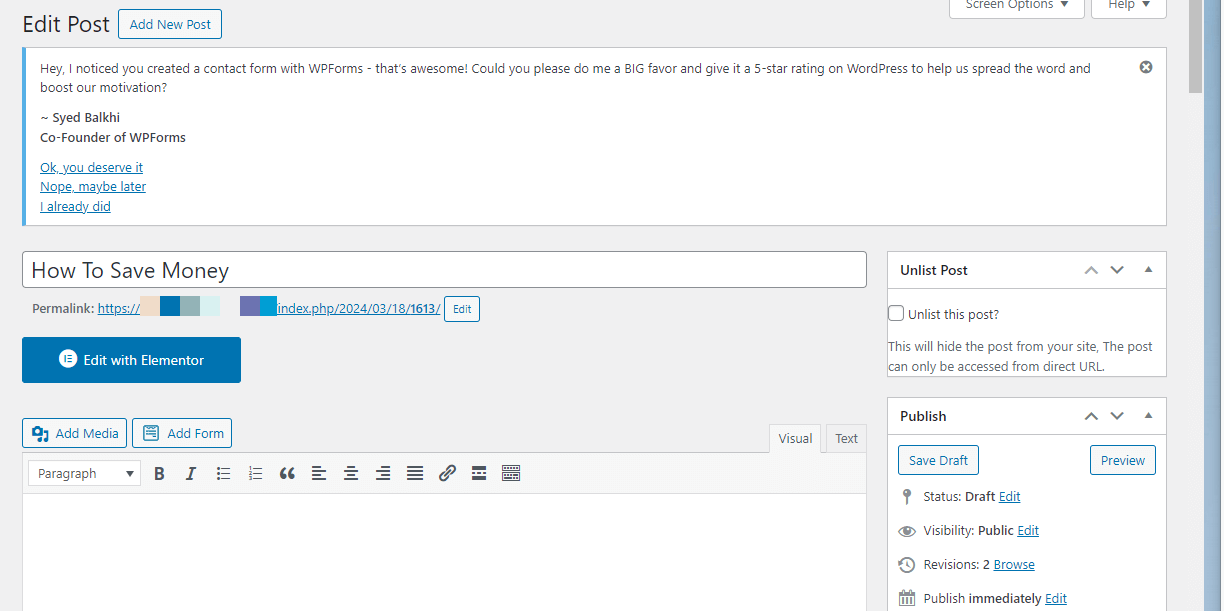
Step 2: Log in to your “WordPress dashboard” and open the desired post or page where you want to embed the video.
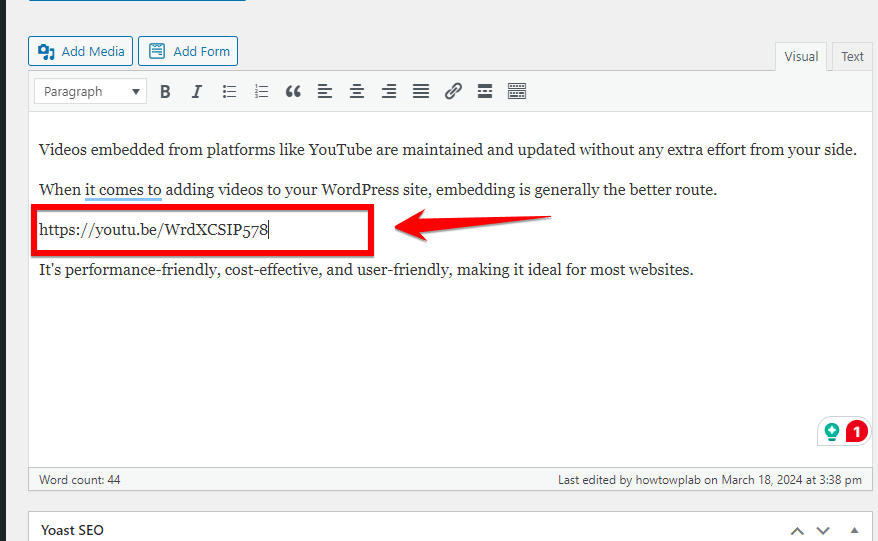
Step 3: Within your WordPress editor (Gutenberg or Classic), directly paste the “URL” of the video at the spot where you want it to appear. Ensure the URL stands alone on a separate line without any additional formatting.

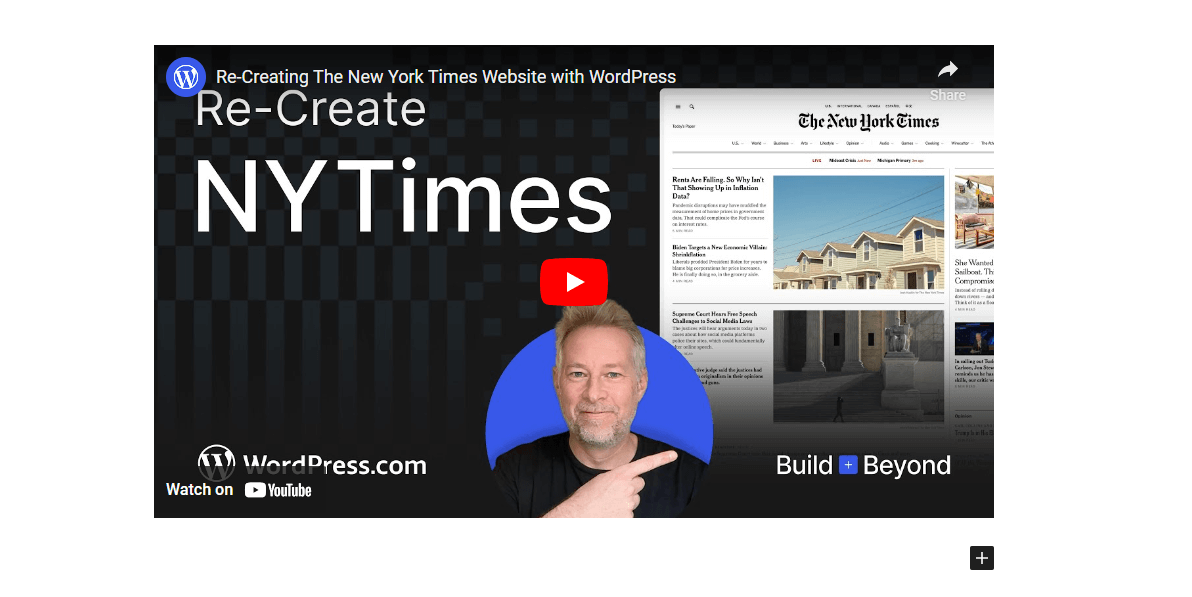
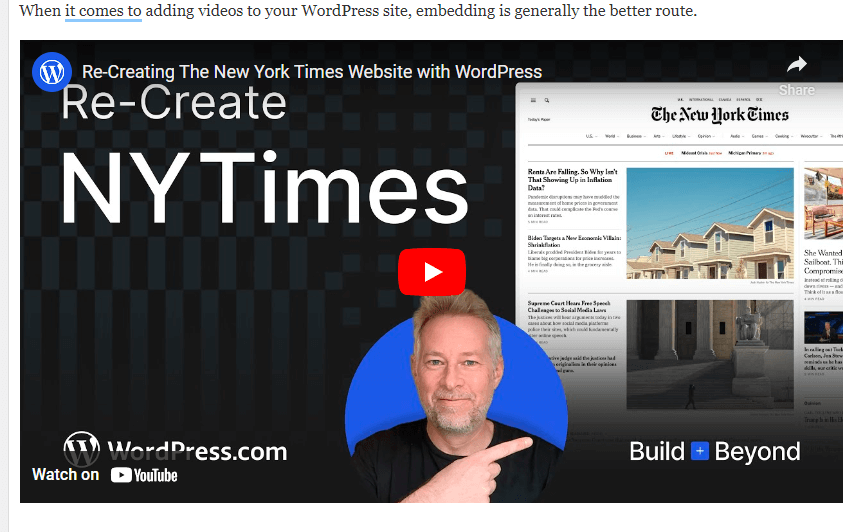
Step 4: WordPress will automatically recognize the “URL” as a video and convert it into an embedded video preview on your post or page.
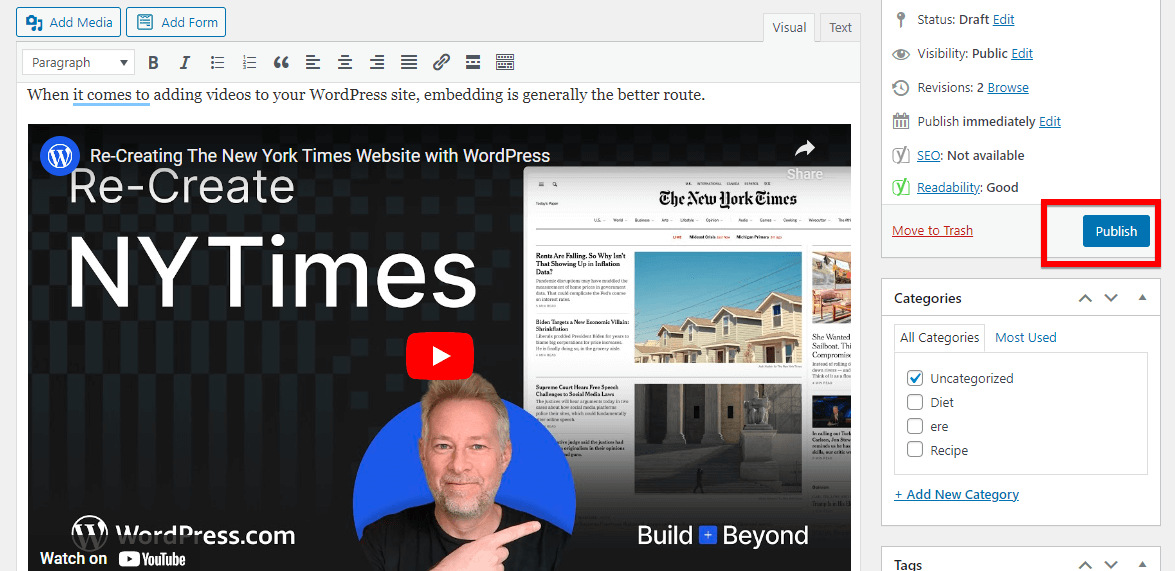
Step 5: Preview the content to check if the video has been embedded correctly. Once satisfied, hit the publish button to make the video live on your site.
Benefits of Using the oEmbed Method:
- Ease of Use: This method eliminates the need for manual embedding codes, making the process straightforward and hassle-free.
- Automatic Formatting: WordPress takes care of formatting the embedded video seamlessly within your content, maintaining a consistent appearance.
- Cross-Device Compatibility: Videos embedded via the oEmbed method are designed to display uniformly across various devices and screen sizes.
Drawbacks of oEmbed:
- Limited Customization: While convenient, oEmbed may offer limited options for customizing the appearance and behavior of the embedded video player.
- Platform Dependency: The availability of oEmbed support is dependent on the provider. Not all platforms offer oEmbed for their content.
If you’re looking for the quickest and easiest way to embed videos from popular platforms, then the oEmbed method is your champion! It’s perfect for beginners or anyone who wants a hassle-free solution.
Coming up next! We’ll check out another way to add videos, so stay tuned, website wizards!
Method 2: Using the WordPress Block Editor (Built-in Features)
If you prefer a more concise and direct approach, you can use the built-in video embedding feature of the WordPress Block Editor (Gutenberg). This method streamlines the process by eliminating the need for additional plugins or custom code.
With just a few clicks, you can add videos to your posts or pages, whether you choose to upload them directly to your WordPress media library or embed them from popular video platforms like YouTube or Vimeo.
To embed videos using the WordPress Block Editor, follow these steps:
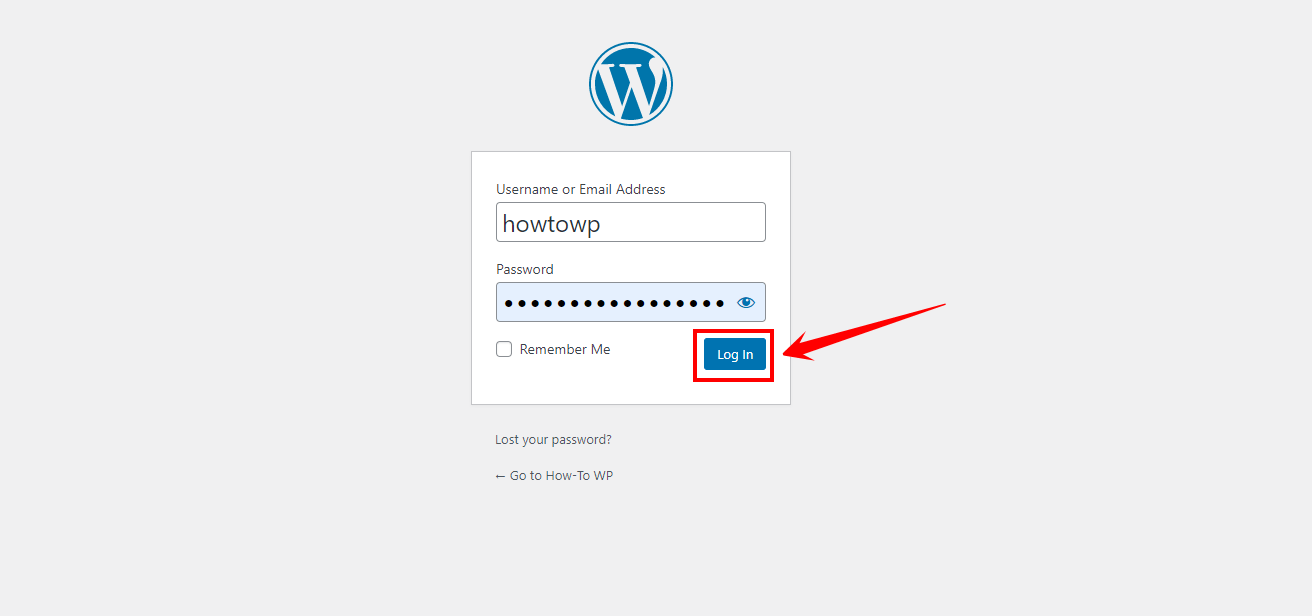
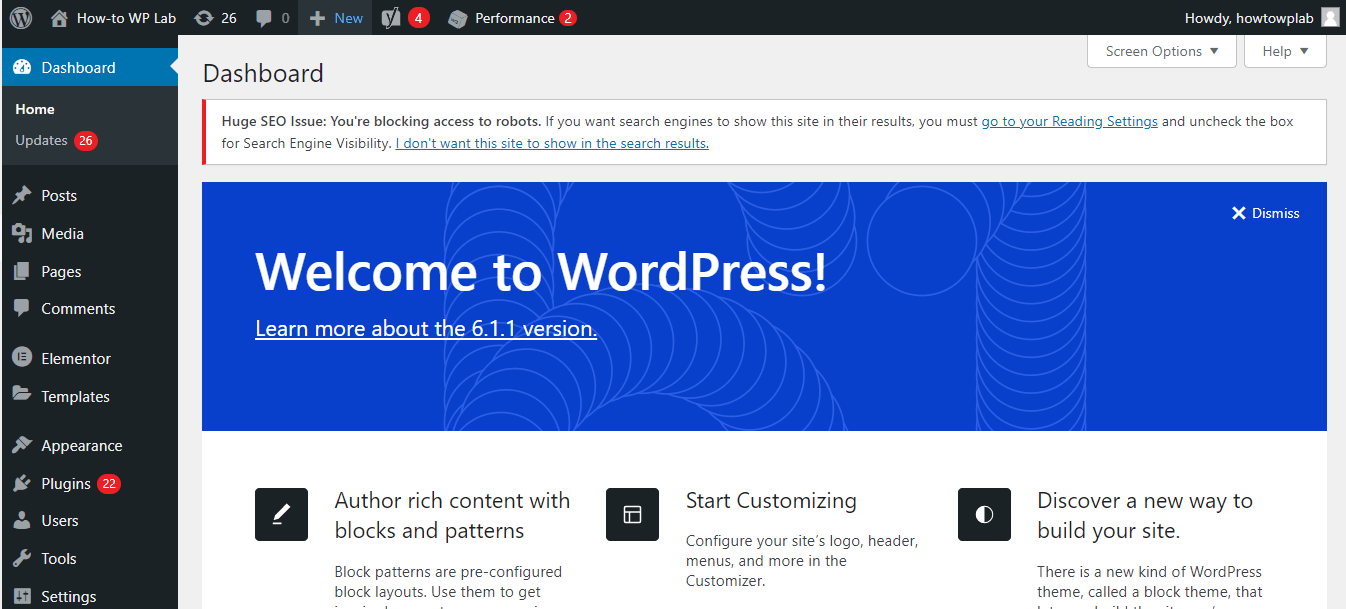
Step 1: Log in to your “WordPress admin dashboard” using your credentials. After logging in, you will be directed to the dashboard.

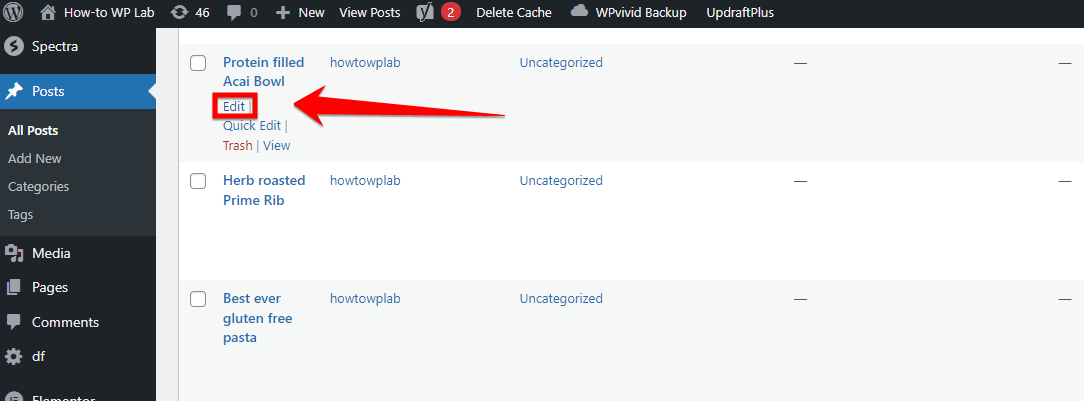
Step 2: Navigate to the page or post where you want to embed the video and click on “Edit” to open the WordPress Block Editor.
Step 3: Click on the “+” icon to add a new block. Search for “Video” in the block search bar or look for it in the “Common Blocks” section.
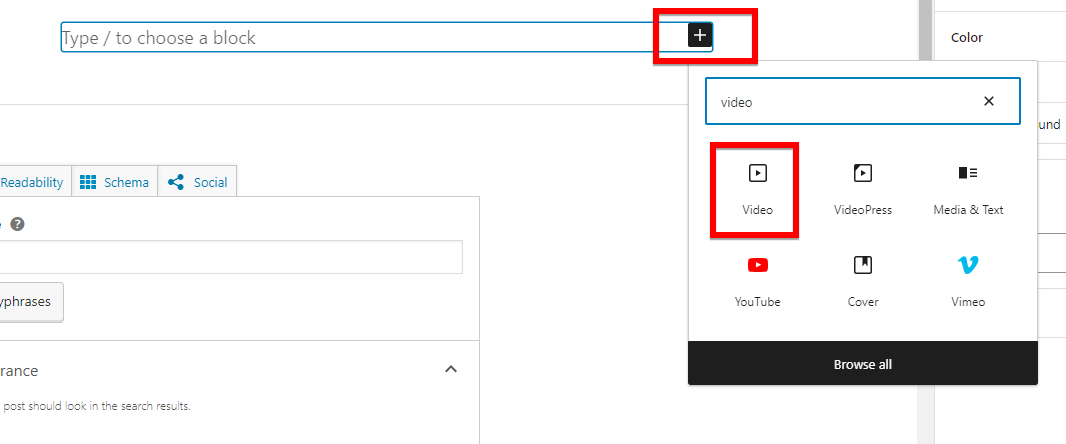
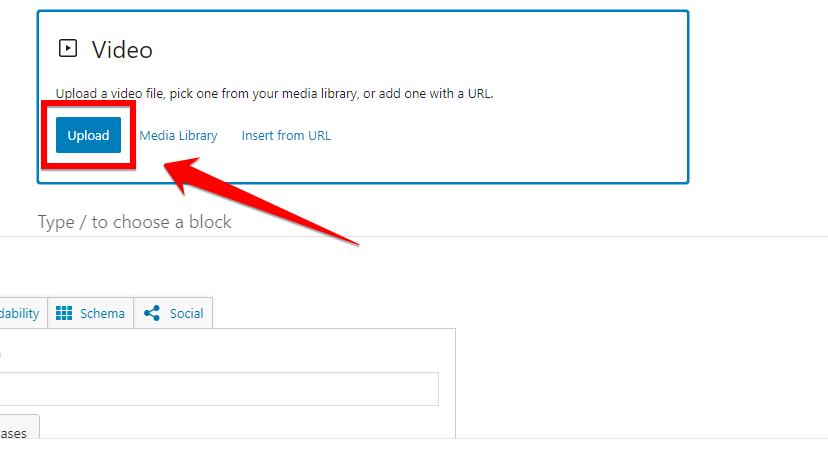
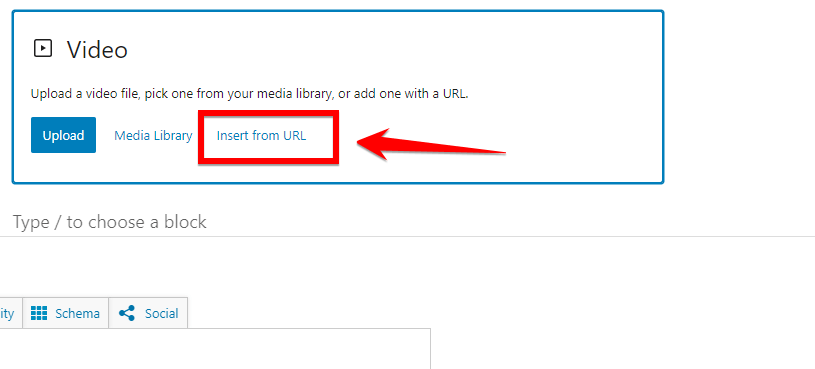
Step 4: Once you select the “Video” block type. You’ll see different options for adding the video. You can choose to upload a video directly, use a video URL, or embed it from a video hosting service like YouTube or Vimeo.
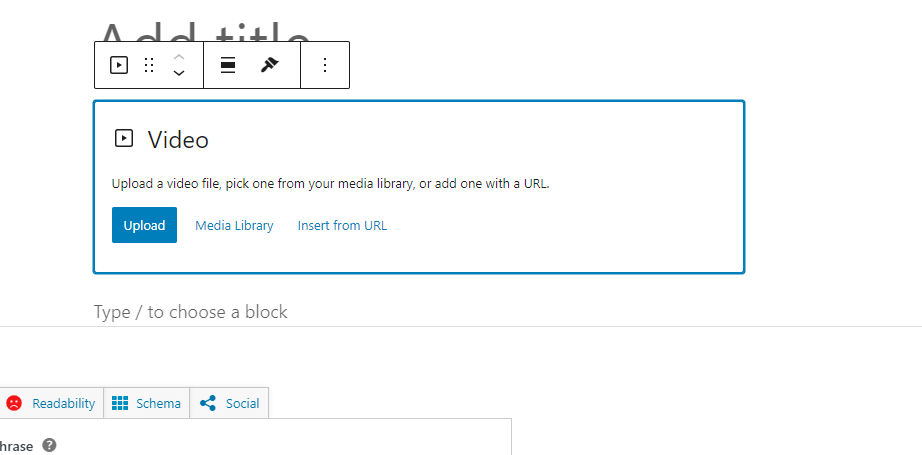
Noted: If you are embedding a video from a site like YouTube, Vimeo, or any other supported provider, paste the video URL in the block settings. WordPress will automatically fetch the video and display it in the editor.
Step 5: If you choose to “Upload” the video option, it will be added to your WordPress media library, and you can customize the video settings, such as autoplay, loop, and more.
Step 6: If you choose the “Insert from a URL” option, WordPress will automatically embed it from the respective platform (e.g., YouTube or Vimeo).
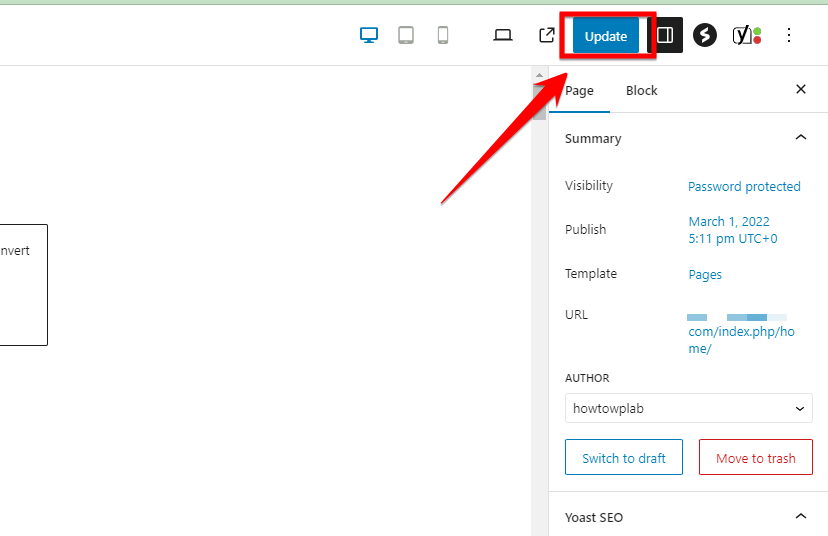
Step 7: Once you’ve added the video and configured the settings to your liking, click on “Publish” or “Update” to save the changes to your WordPress page or post.
Step 8: Preview your page or post to ensure that the video displays correctly. If it doesn’t appear as expected, make any necessary adjustments.
Benefits of Using the Block Editor Method:
- Easy to use: The WordPress Block Editor makes it simple to embed videos without any technical knowledge or coding skills.
- No additional plugins required: You can embed videos using the built-in features of WordPress, eliminating the need for extra plugins.
- Supports various video formats and platforms: WordPress’s video block supports popular video formats and platforms, making it versatile and flexible.
- Customizable settings: You can customize video settings, such as autoplay, loop, and dimensions, directly within the block editor.
Drawbacks of Using the Block Editor Method:
- Limited storage space: Uploading videos directly to your WordPress media library can quickly consume your storage space, especially if you have a large number of videos or limited hosting resources.
- Potential performance impact: Embedding a large number of videos or uploading high-resolution videos may affect your website’s loading speed and overall performance.
WordPress’s built-in video block supports various video formats and platforms, making it easy to embed videos without the need for additional plugins or code. The block editor also provides a user-friendly interface for managing and customizing your embedded videos.
Method 3: Embedding Videos Using the Classic Editor (For Older Versions)
If you are still using an older version of WordPress that relies on the Classic Editor, you can easily embed videos into your posts or pages. The Classic Editor, although not as feature-rich as the newer block editor (Gutenberg), still provides a straightforward method for adding videos to your content.
This method involves pasting the video URL from supported platforms directly into the editor, allowing WordPress to automatically embed the video. Here, I will guide you through the steps to embed videos using the Classic Editor and discuss the advantages and drawbacks of this approach.
So, let’s get started.
Step 1: Copy the URL of the video you want to embed from the video hosting platform (e.g., YouTube, Vimeo).
Step 2: Open your “WordPress dashboard” and navigate to the post or page where you want to embed the video.
Step 3: Once you have selected the post to edit, position your cursor at the desired location within the WordPress Classic Editor where you wish to display the video.
Step 4: In the Classic Editor, paste the video URL on a separate line within your content.
Step 5: WordPress will automatically detect the video URL and embed the video into your post or page.
Step 6: If you want to customize the appearance of the embedded video, you can wrap the URL in the
</code> shortcode and add parameters like width and height. For example: <code>https://www.youtube.com/watch?v=VIDEO_ID
Step 7: Preview your post or page to ensure the video is embedded correctly. Publish or update your post or page to make the embedded video live on your website.
Benefits of using the Classic Editor for embedding videos:
- Simplicity: The process of embedding videos in the Classic Editor is straightforward and requires minimal technical knowledge.
- Compatibility: The Classic Editor is compatible with a wide range of WordPress versions, making it accessible to users who haven’t updated to the latest version of WordPress.
- Familiarity: Many WordPress users are already accustomed to using the Classic Editor, so they may find it more comfortable to work with when embedding videos.
- Shortcode flexibility: By using the
shortcode, users have more control over the appearance and dimensions of the embedded video.
Drawbacks of using the Classic Editor for embedding videos:
- Limited formatting options: The Classic Editor lacks some of the advanced formatting options and blocks available in the newer Gutenberg editor, which may limit the overall design flexibility of your post or page.
- Outdated interface: As WordPress continues to evolve, the Classic Editor may feel outdated and lack some of the modern features and improvements found in the Gutenberg editor.
While the Classic Editor provides a simple way to embed videos in older versions of WordPress, it’s important to note that newer versions of WordPress offer more advanced and user-friendly methods for embedding videos, such as the block editor (Gutenberg) and dedicated video embedding plugins.
WordPress provides a convenient way to embed videos in your sidebar widgets, just like you would in a post or page. This method allows you to showcase relevant videos to your website visitors, increasing engagement and providing additional content.
Utilizing the built-in video widget allows you to easily add videos from popular platforms such as YouTube, Vimeo, and TED without coding knowledge.
Follow these steps to embed a video in your WordPress sidebar:
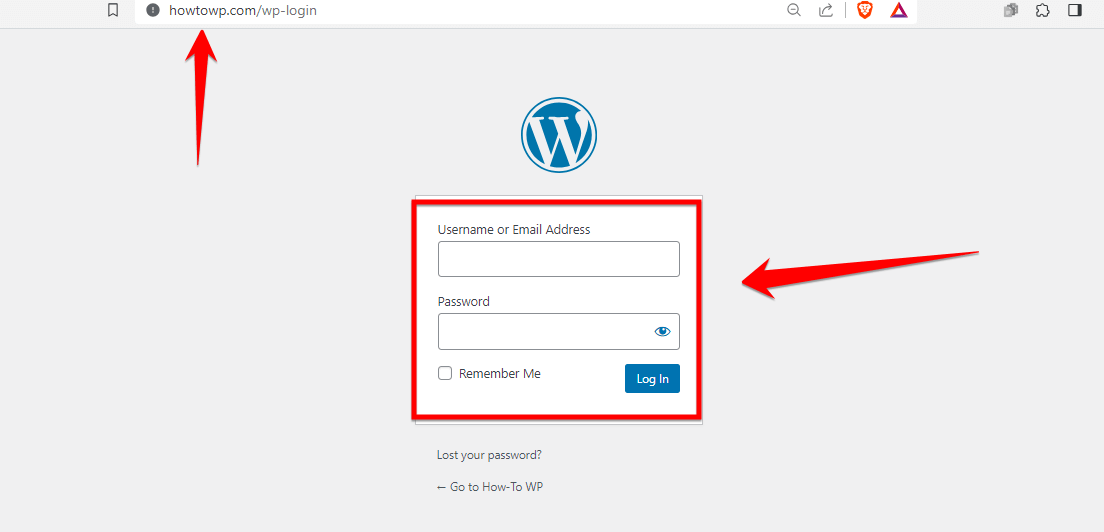
Step 1: Access your WordPress admin panel by entering your credentials to log in successfully and gain access to the behind-the-scenes management of your website.
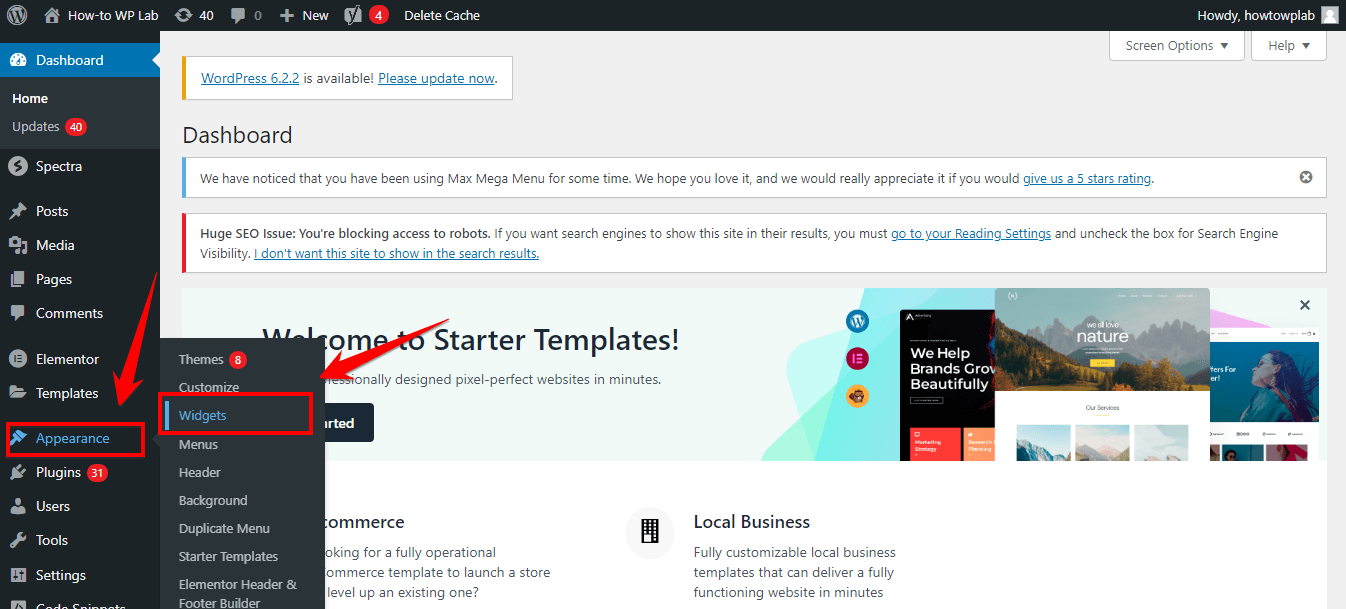
Step 2: From the dashboard, explore and navigate to the “Appearance” section, which provides you with options to customize the visual aspects of your website.
Step 3: Within the “Appearance” menu, specifically select and click on the “Widgets” option to manage and add widgets to various sections of your website.
Step 4: Identify the exact sidebar area on your website where you wish to display your videos for your audience to view.
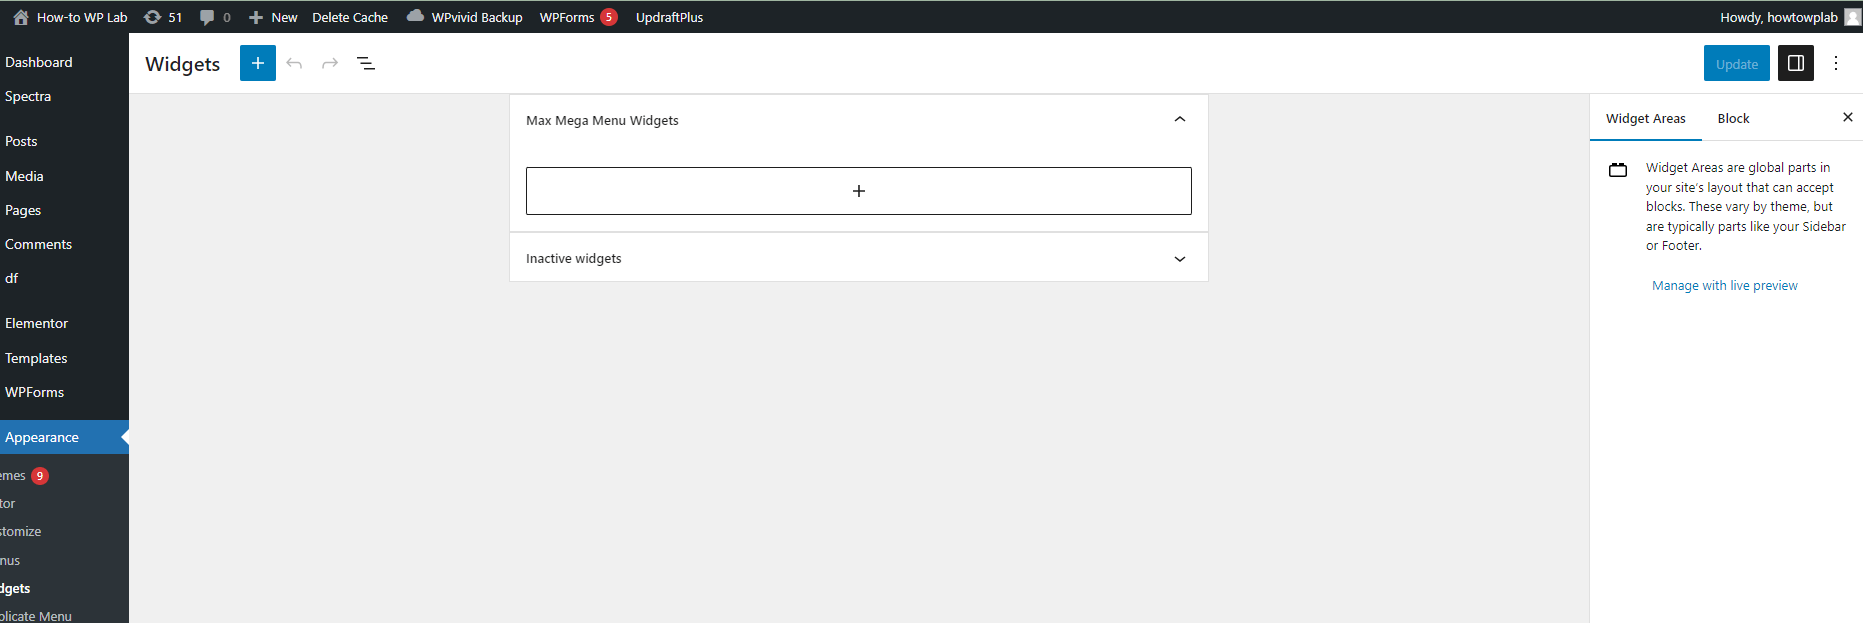
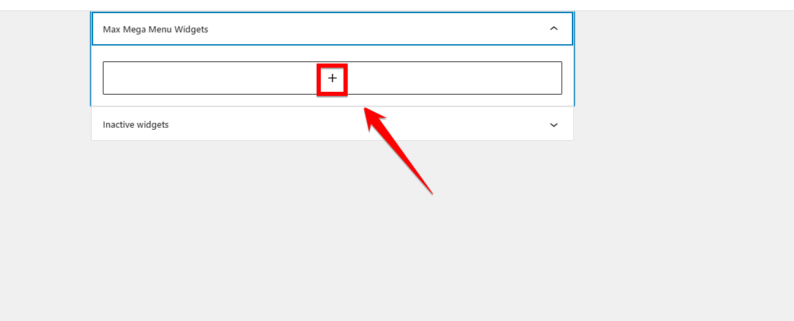
Step 5: Within the selected sidebar, locate the “+” icon and proceed by clicking on it to initiate the process of adding a new widget to the chosen section.
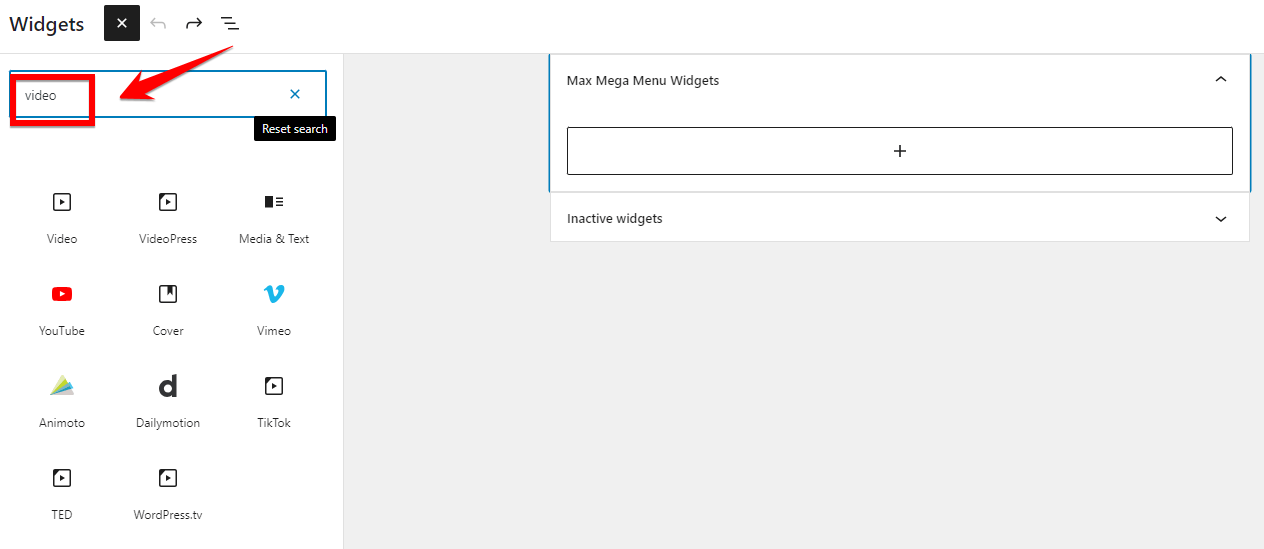
Step 6: Within the available widget options, utilize the search box functionality and type “video” to filter relevant video-related widgets that you can add to your sidebar.
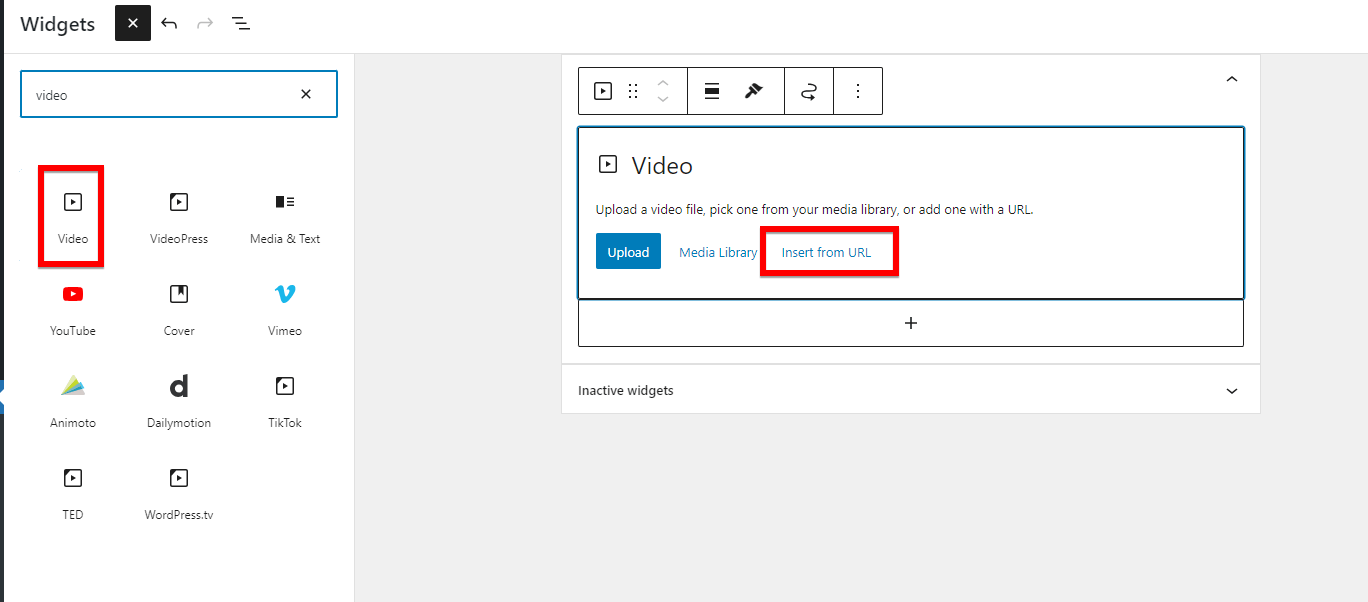
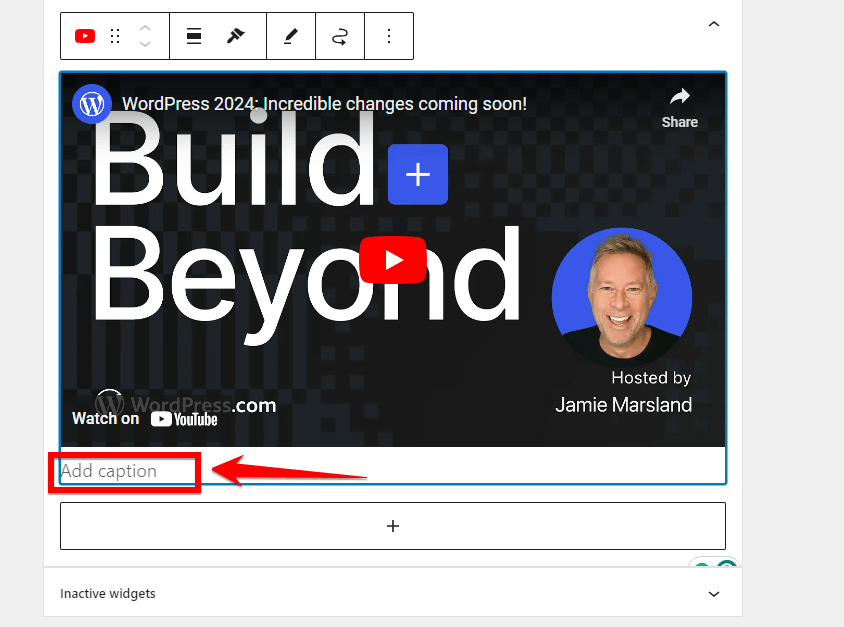
Step 7: Click on the “Video” button after selecting the appropriate video widget and opt for the “Insert from URL” option. Paste the video URL obtained from the hosting source into the provided box to embed the video in the widget.
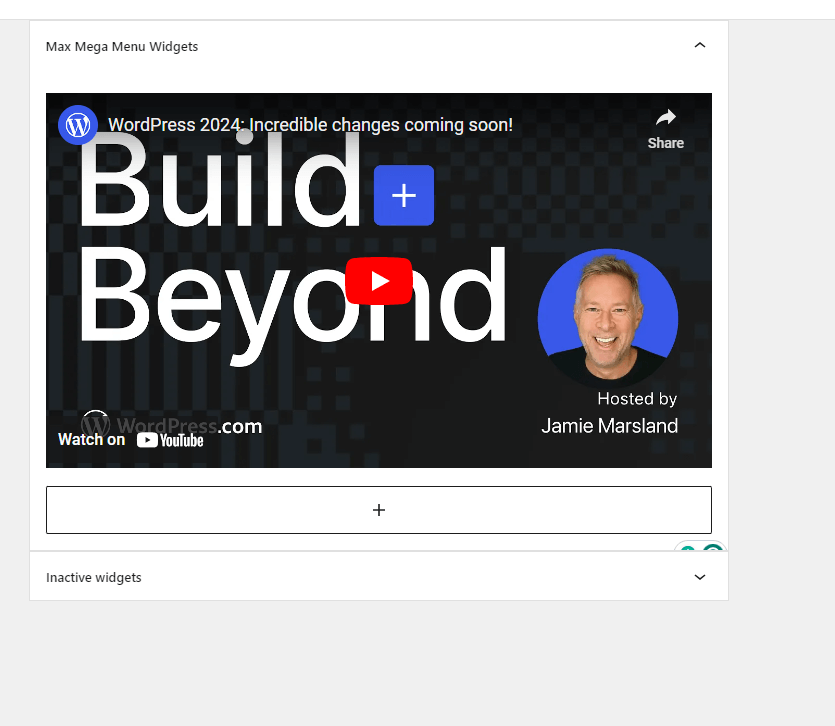
Step 8: Go back to YouTube, copy the video link you want to use, and paste it into the designated area. Wait for the video preview to show up. Once you see the preview, confirm the addition of the video to finish embedding it.
Note: If you want to customize your video widget further, consider adding a descriptive caption for the video in the settings located at the bottom.
Step 9: After configuring and setting up the video widget to your satisfaction, ensure to click on the “Update” button to apply the changes live on your website and make the video widget visible for your website visitors to enjoy.
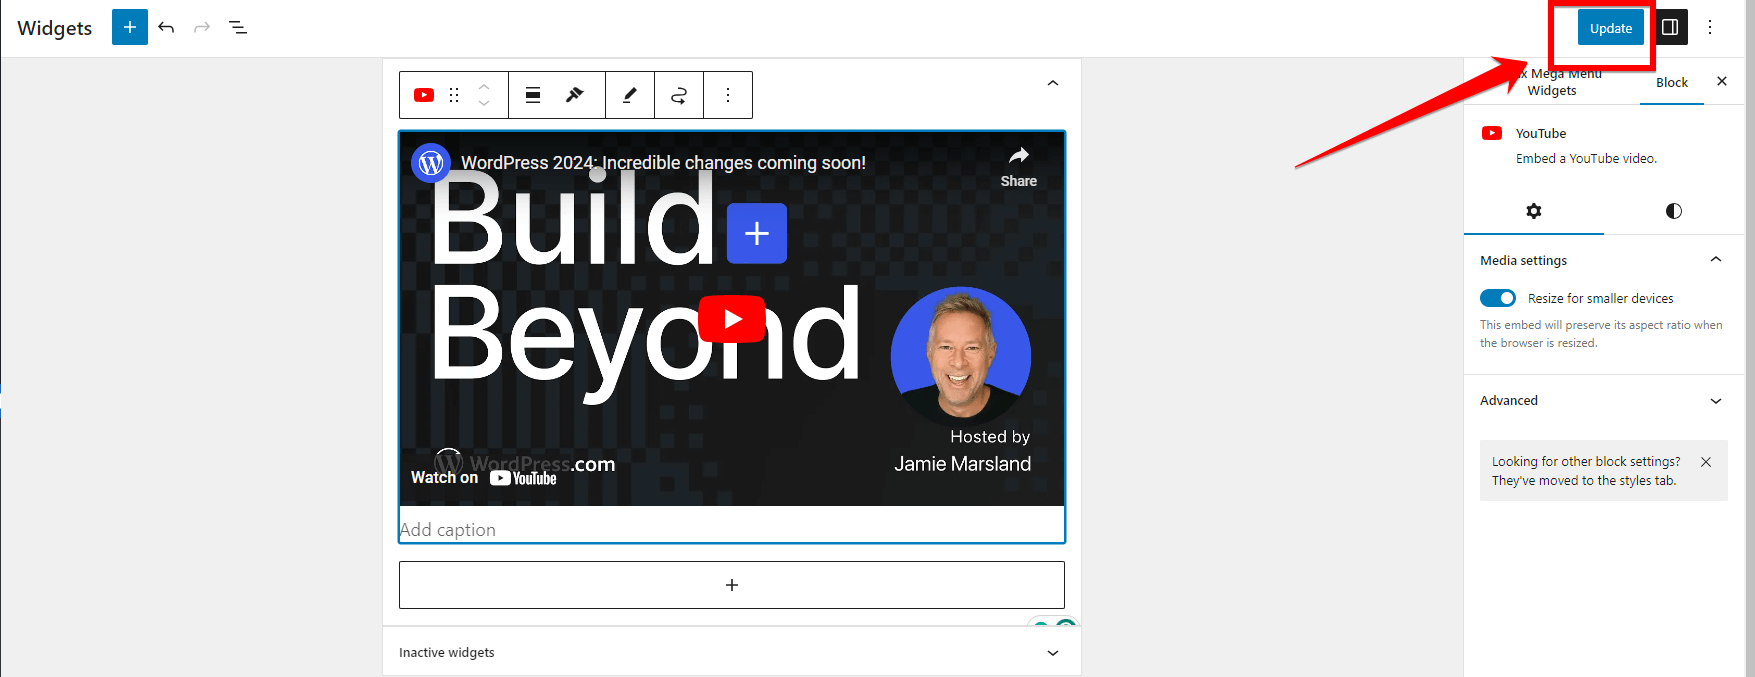
Once you’ve completed these steps, visit your website to see the embedded video in action. The video size will automatically adjust to fit the dimensions of your widget area.
Benefits of Using Sidebar Widgets for Self-Hosted Videos:
- User-Friendly: This method is beginner-friendly and doesn’t require advanced technical skills.
- Quick Setup: With a few simple steps, you can embed videos on your website rapidly.
- No Coding Required: You can add videos without the need to edit any code or install additional plugins.
- Visual Appeal: Video widgets in the sidebar can enhance the visual appeal of your website.
Drawbacks of Using Sidebar Widgets for Self-Hosted Videos:
- Limited Customization: Some limitations may exist in customizing the video widget’s appearance compared to other embedding methods.
- Responsive Design Challenges: Videos in the sidebar may not always adapt well to smaller screens, affecting user experience on mobile devices.
While embedding YouTube videos in your WordPress sidebar using the built-in video widget is a quick and easy solution, it does come with some limitations.
If you’re looking for more flexibility and control over your embedded videos, be sure to explore our next method, which offers advanced customization options and settings to take your video embeds to the next level.
Method 5: Embedding Videos Using a Video Embedding Plugin
I personally know that if you’ve been following along and implementing the steps I’ve provided in the above four methods, you’ve successfully embedded your YouTube videos in your article.
However, if you’re still facing challenges or looking for more advanced features and customization options, don’t worry! We have another method that utilizes a powerful plugin to make the process even smoother.
While numerous plugins are available for embedding videos in WordPress, after extensive testing and personal experience, we’ve found Presto Player to be a standout option.
This video-embedded plugin offers a wide range of features and customization options, making it an excellent choice for users who want to enhance their video embedding.
Let’s walk together through the process of embedding your videos in WordPress using the Presto Player plugin. Follow these steps:
Step 1: Log in to your WordPress dashboard to access the backend of your website, where you can manage various aspects, including plugins.
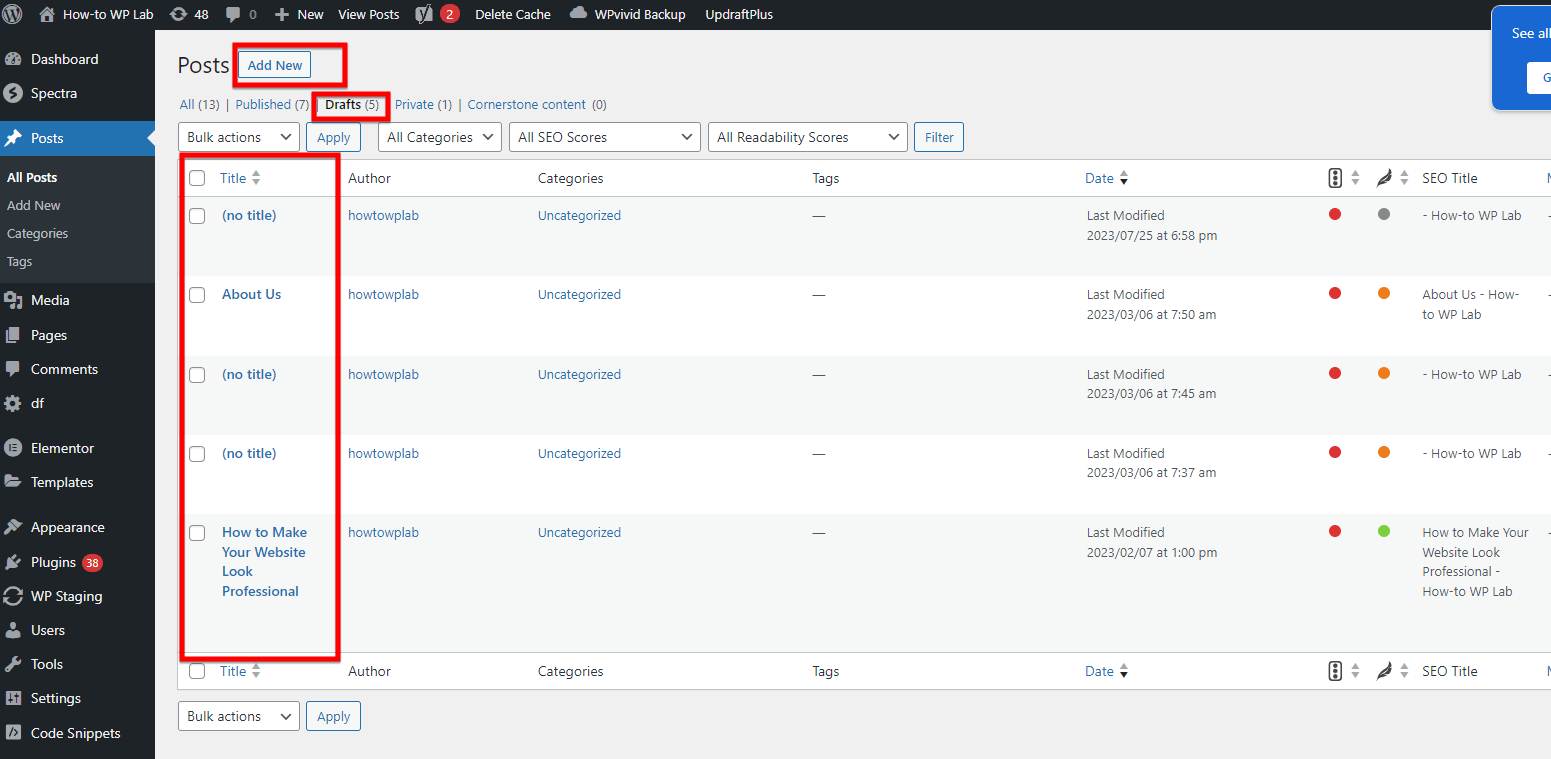
Step 2: Go to the “Plugins” section located in the left sidebar of your WordPress dashboard. Click on “Add New” to proceed with adding a new plugin to your website.
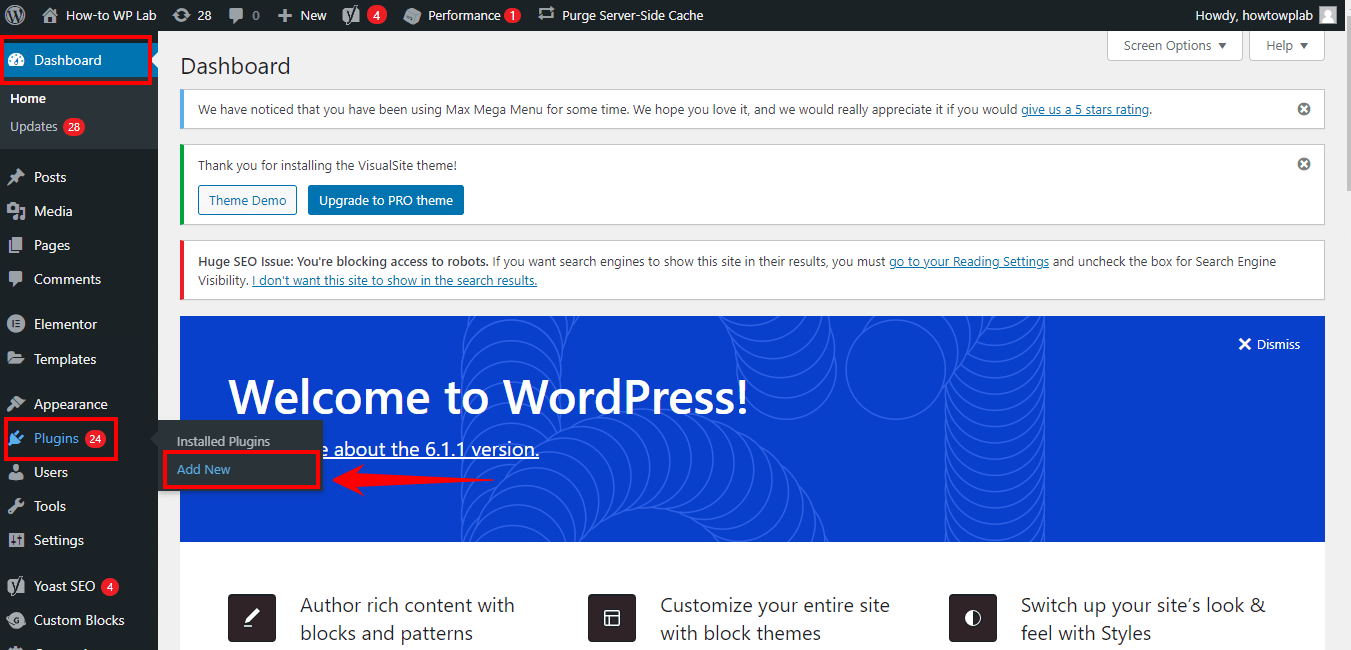
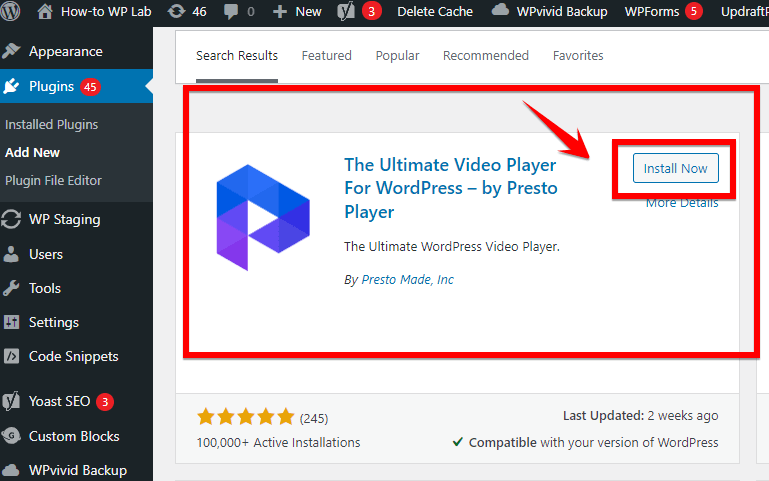
Step 3: In the search bar within the Plugins section, type “Presto Player” and press Enter. This action will initiate a search for the Presto Player plugin in the WordPress plugin repository.
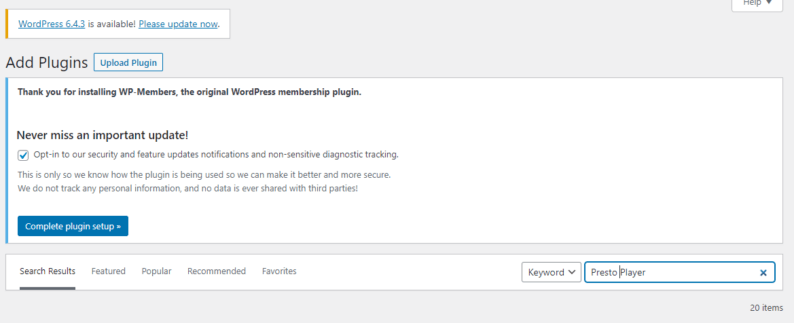
Step 4: Once the search results appear, find the Presto Player plugin from the list. Click on the “Install Now” button next to the plugin to begin the installation process on your website.
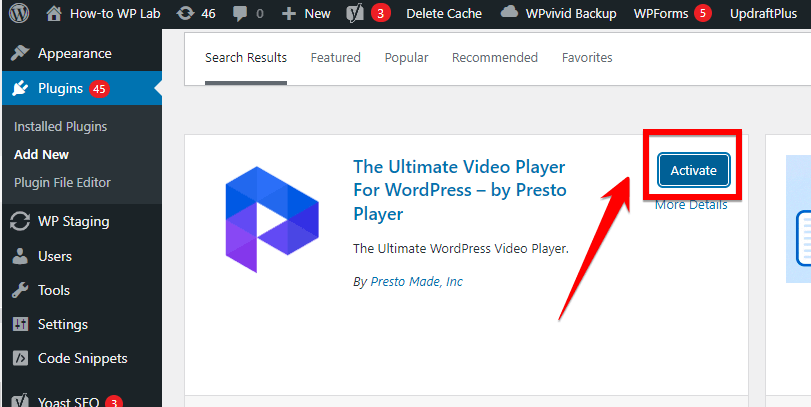
Step 5: After successful installation, click on the “Activate” button to activate the Presto Player plugin on your WordPress site.
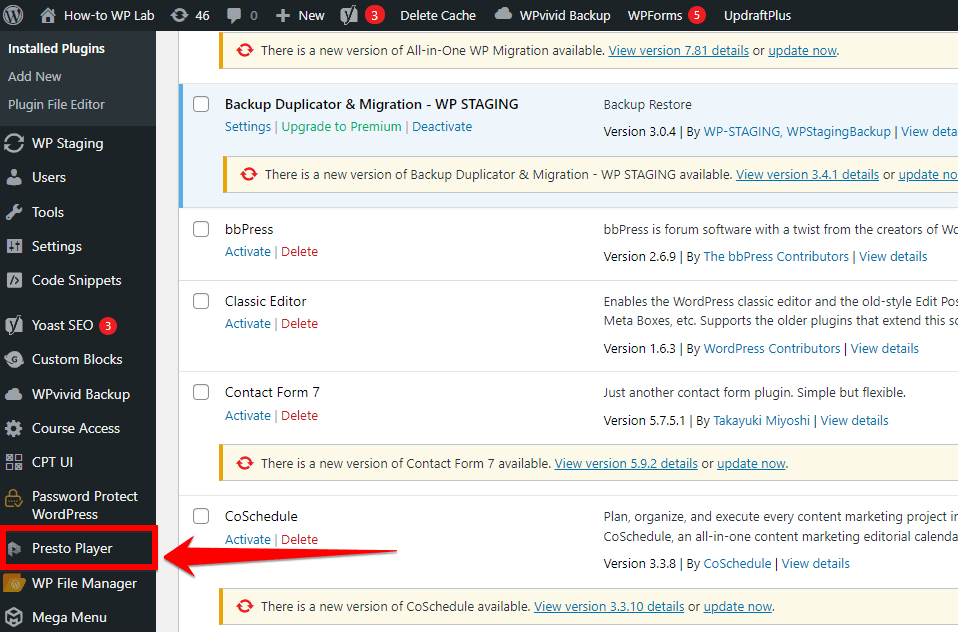
Step 6: In your WordPress dashboard, navigate to “Presto Player” in the left sidebar.
Step 6: After successfully activating the plugin, navigate to your dashboard and click on the “All Posts” section.
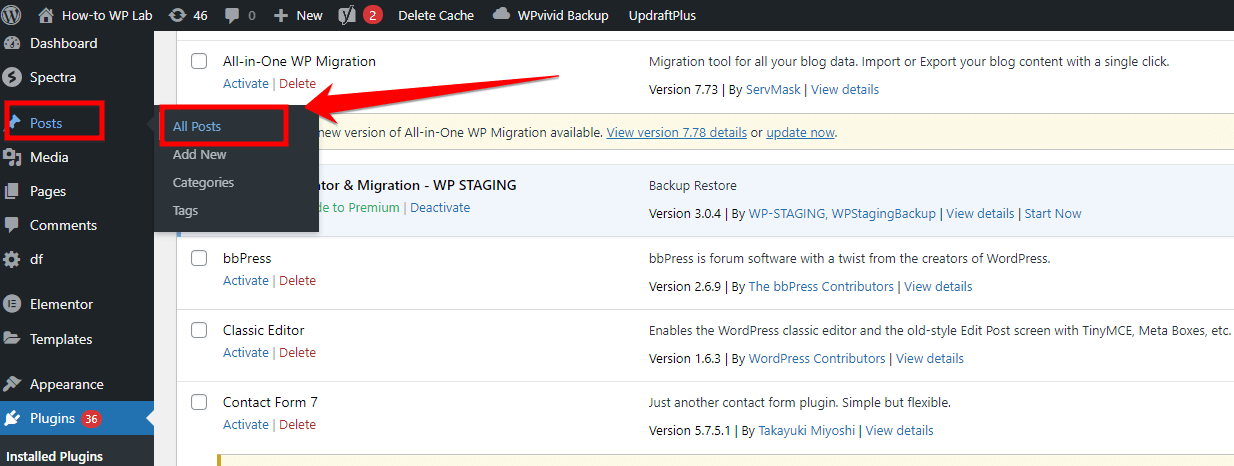
Step 7: Within the “Post” section, you have the option to edit your existing posts or create a new post. To edit an existing post, simply click on the “Edit” button for the desired post.
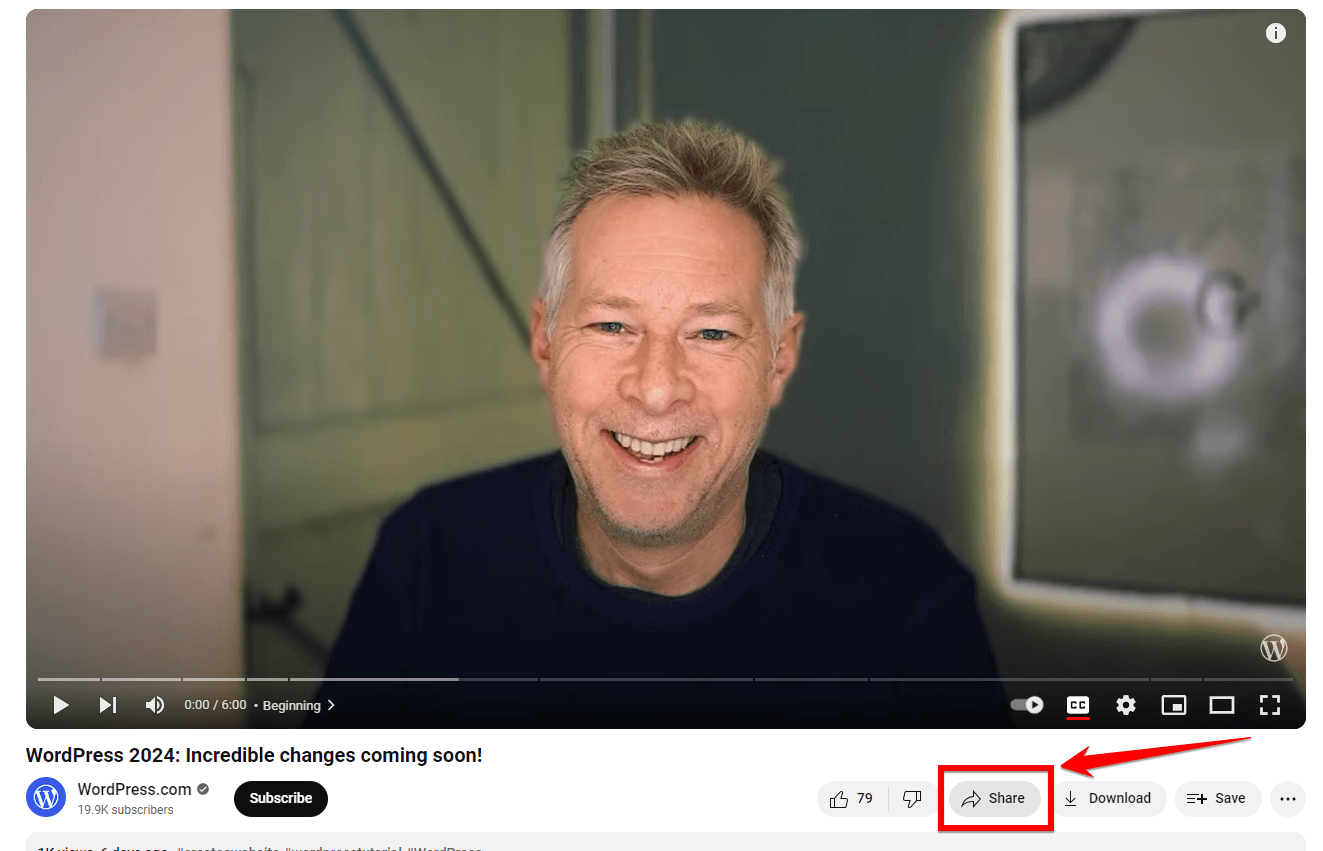
Step 8: You will be directed to your post editor interface. To find the video for embedding, visit YouTube and locate the specific video you want to embed. Click on the “Share” button below the video player.
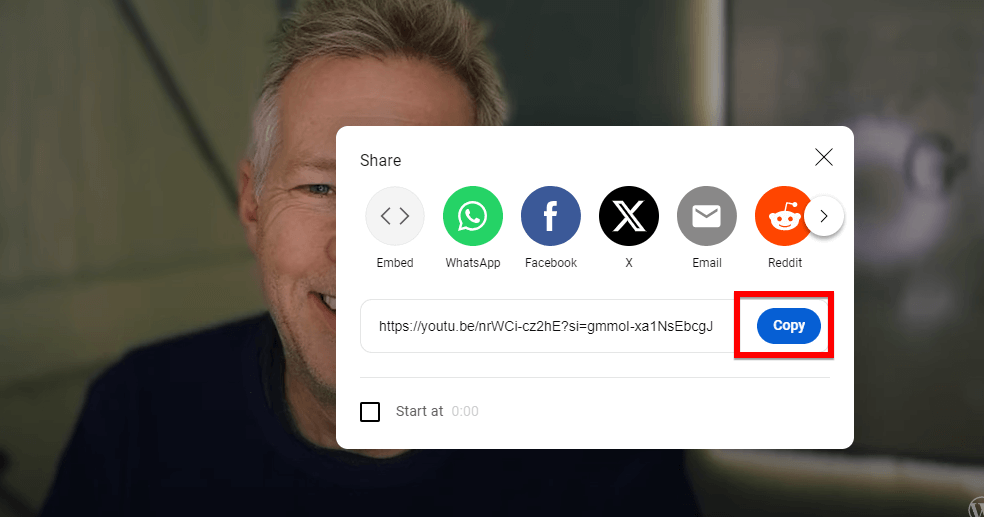
Step 9: Upon clicking the “Share” button, an option to copy the URL will be presented. Click on the “Copy” option to copy the video’s URL to your clipboard.
Step 10: Return to the post editor and click on the “+” button to add a new content block where the video will be embedded.
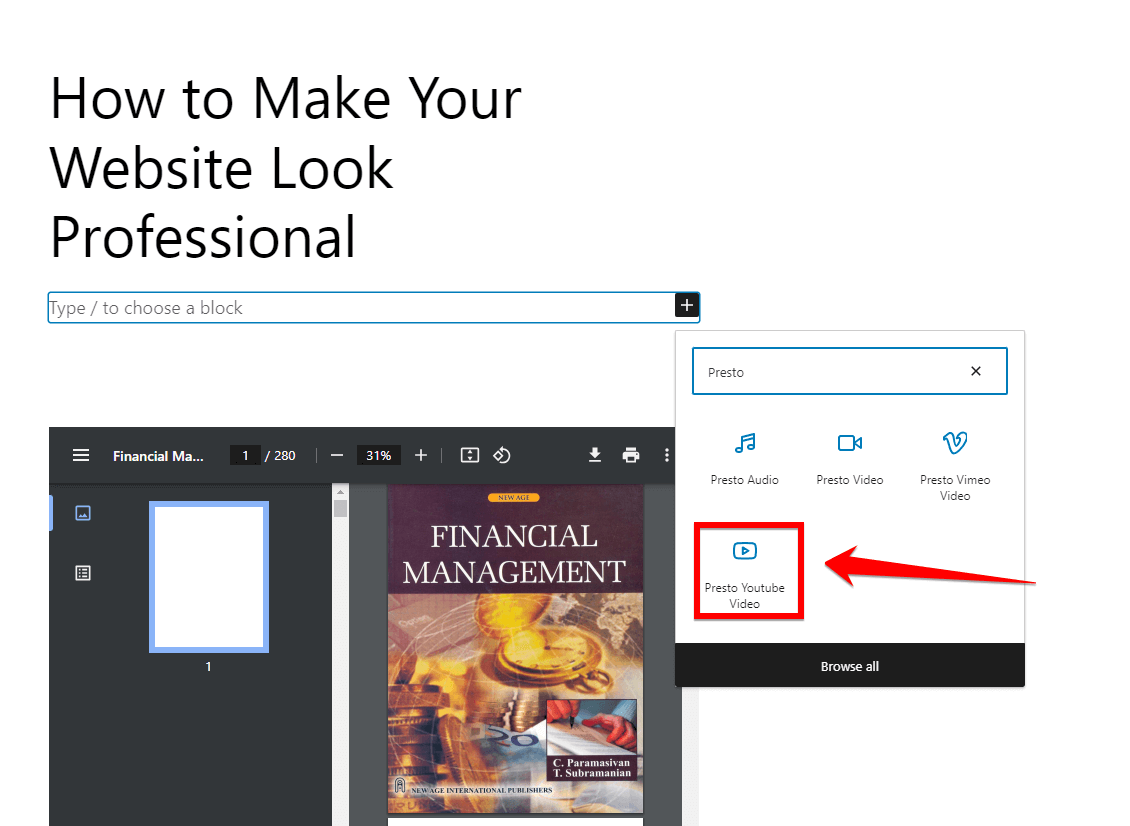
Step 11: Search for “Presto” within the available blocks to locate the Presto blocks for video embedding.
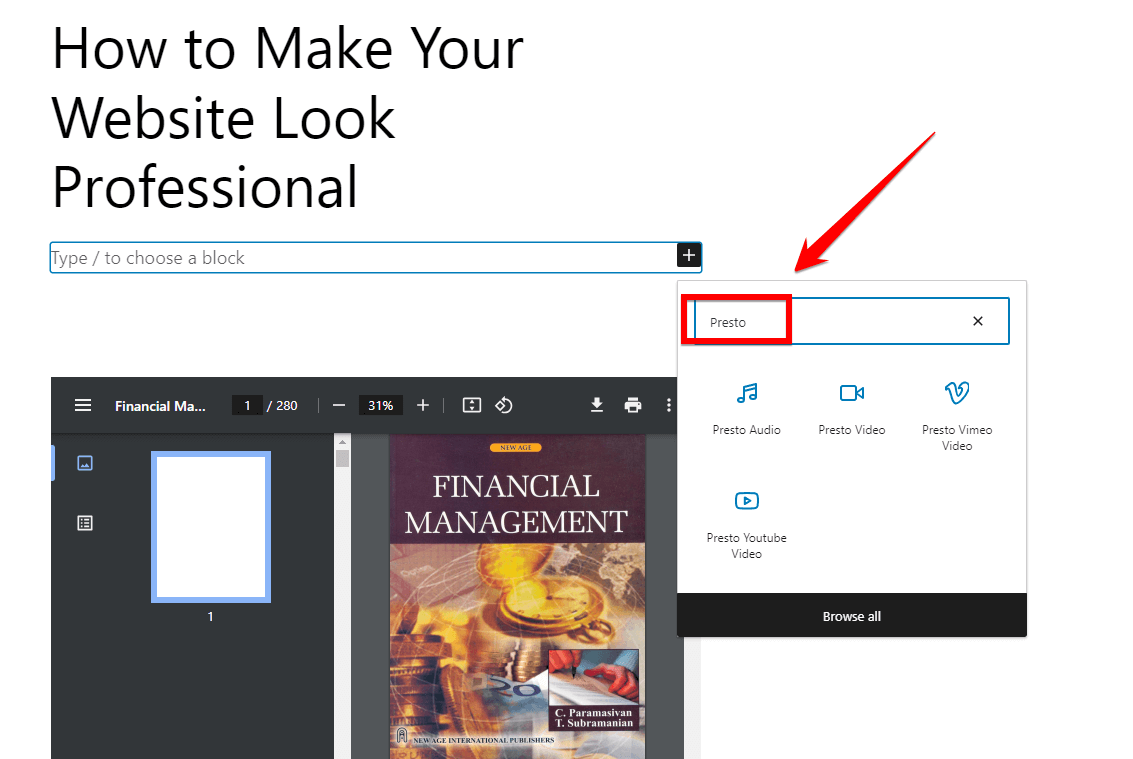
Step 12: Choose the “Presto YouTube Video” source within the blocks to proceed with adding the YouTube video.
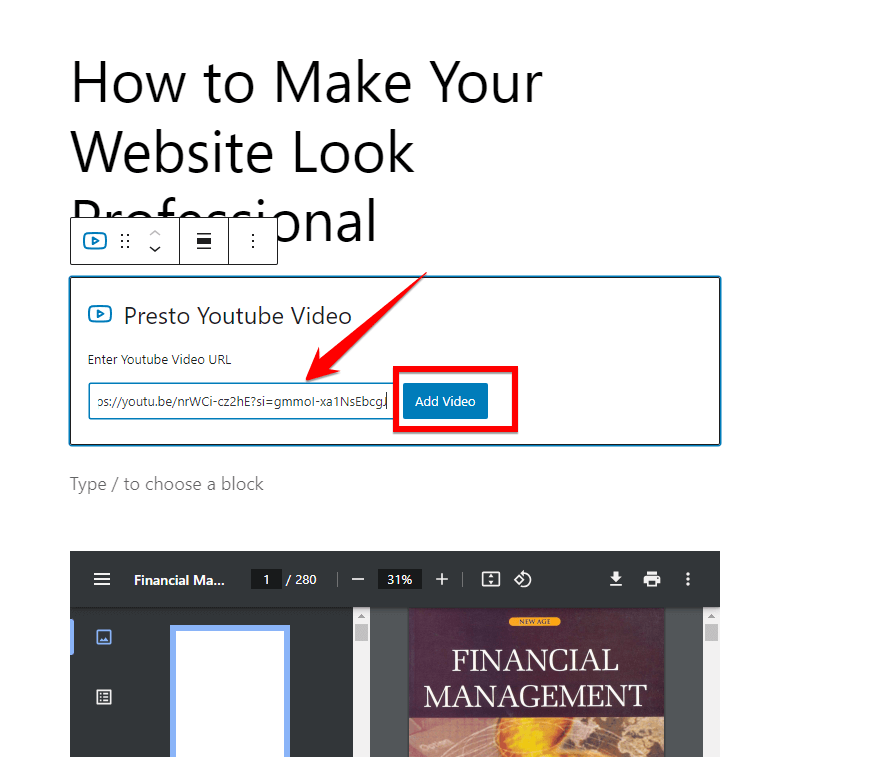
Step 13: Paste the copied video URL into the required section and then click on “Add Video” to embed the video into your post.
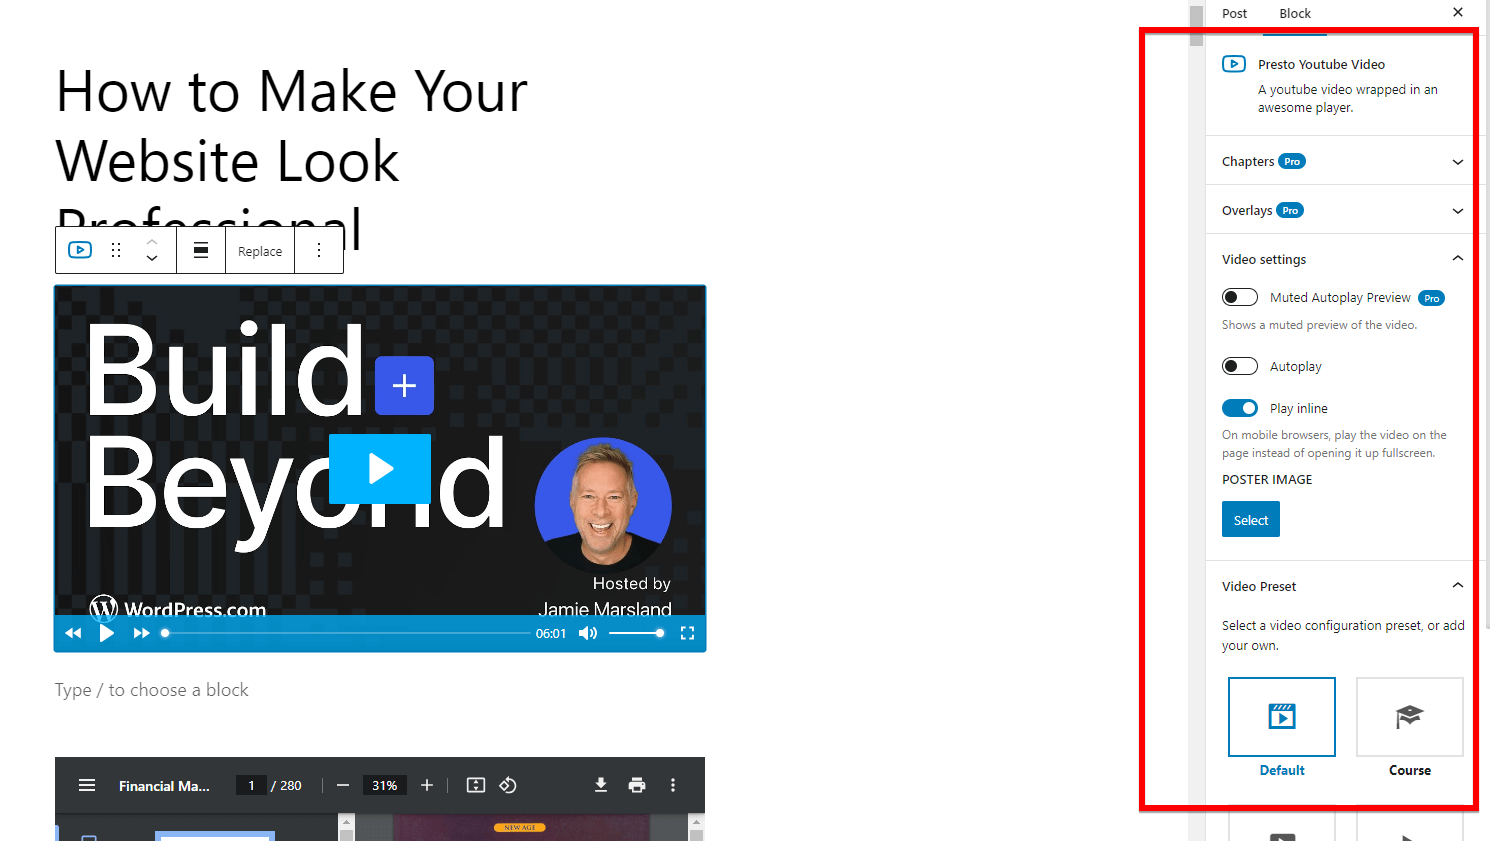
Step 14: Customize the embedded video by selecting various options available in the right sidebar of the post editor.
Step 15: Once you have customized the video settings to your preference, remember to click on the “Update” or “Publish” button to save your changes and make the video live on your post.
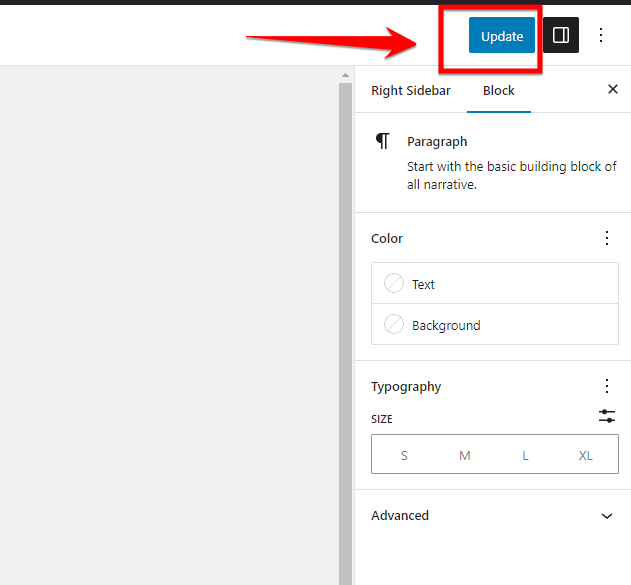
Once you have customized the video settings to your liking, open your WordPress post in a new tab to see the results of the successful video embedding.
Benefits of Using Video Embedding Plugin
- Easy Embedding Process: This method simplifies the process of embedding videos from YouTube using the Presto Player plugin, making it straightforward for users to add video content to their posts without extensive technical knowledge.
- Customization Options: You can change things about the video, like how it looks or works, using the options in the Presto Player plugin. This lets you make the videos fit better with your website.
- Efficient Editing Workflow: You can easily change posts you already made and add new videos right inside WordPress. This saves you time and makes it easier to add videos to your website.
Drawbacks of Using Video Embedding Plugin
- Dependency on Plugin: You have to use the Presto Player plugin to put the videos on your site this way. If the plugin has problems or doesn’t work with other parts of your site, it might be hard to add videos.
- Limited Embedding Sources: This way of adding videos only works if you want to use YouTube videos. If you want to use videos from other places, you might not be able to do so with this plugin.
Remember, while the free version of Presto Player provides a solid foundation for video embedding, it may have some limitations compared to the premium version. However, for most users, the free version should suffice to create captivating video experiences.
So, go ahead and give it a try! Embed your videos using Presto Player and witness how they enhance your WordPress site’s content and engage your visitors like never before. If you have any further questions or need assistance along the way, don’t hesitate to reach out. Happy video embedding!
Embedding vs. Uploading Videos in WordPress
You can add videos to your WordPress website in two ways: embedding or uploading. Embedding means you use a video from another website, like YouTube, and put it on your site. Uploading means you put the video file directly on your website.
Both ways can work, but embedding videos from YouTube is often better. It can make your website faster and work better overall. Here, we’ll look closely at why embedding YouTube videos is a great choice for most WordPress websites.
Performance Differences
Performance is a critical aspect of your website’s user experience and search engine ranking. Here’s a detailed comparison of how embedding and uploading videos affect your site’s performance:
| It is slower, as the video is hosted and loaded from your site. | Embedding | Uploading |
|---|---|---|
| Page Load Time | Faster, as the video streams from an external server. | Lower since the video is hosted externally. |
| Server Load | No storage space is needed on your server. | Higher, as your server hosts and streams the video. |
| Storage Space | Generally free or at a lower cost due to external hosting. | Requires substantial storage space on your server. |
| Bandwidth Usage | Lower, as the video is streamed from the external server. | Higher, consuming more of your site’s bandwidth. |
| Scalability | Better, as external platforms can handle high traffic. | Limited by your server’s capacity and bandwidth. |
| Cost | This is potentially positive, as faster load times benefit SEO. | Potentially high due to increased server and bandwidth needs. |
| Ease of Management | Simpler, with most maintenance handled by the video platform. | Requires more hands-on management for updates, backups, etc. |
| Customization | Limited to the options provided by the external platform. | Full control over the video player and hosting aspects. |
| SEO Impact | Potentially positive, as faster load times benefit SEO. | Could be negative if large files slow down your site. |
| Content Control | Dependent on the external platform’s policies and stability. | Complete control over the video content and availability. |
In the comparison, it’s clear that while uploading gives you more control and customization options, embedding shines in terms of performance, ease of use, and cost-efficiency.
For most WordPress users, especially those focusing on content delivery and user experience, embedding from a platform like YouTube is often the preferred method.
FAQs
How do I embed a video in WordPress without YouTube?
To embed a video in WordPress without using YouTube, you can take advantage of the platform’s built-in video embedding capabilities. Instead of relying solely on YouTube, you have the option to directly upload an MP4 file to your WordPress site. This method not only provides more control over your content but also increases your site’s SEO profile.
Does WordPress allow embedding?
WordPress does indeed allow embedding various types of content, including videos, through its block editor. This feature enables users to embed videos, images, audio files, and more directly into their WordPress posts and pages. By utilizing the platform’s embedding functionality, you can enhance the visual appeal and engagement of your website.
How do I add an mp4 to my WordPress site?
To add an MP4 file to your WordPress site, you can simply navigate to the post or page where you want to include the video. Click on the “Add Media” button, then select the MP4 file from your computer for uploading. Once uploaded, you can insert the video into your content, ensuring a seamless viewing experience for your visitors.
Why can’t I embed it in WordPress?
If you are encountering difficulties embedding content in WordPress, there could be several reasons behind the issue. Common causes include incompatible file formats, conflicting plugins, or theme restrictions. To address this, ensure your file format is supported, deactivate conflicting plugins, and consider switching to a default theme to troubleshoot the problem.
In the WordPress block editor (Gutenberg), accessing the embed button is a straightforward process. When creating or editing a post or page, click on the (+) icon to add a new block. Search for the “Embed” block type, which allows you to input the URL or embed code of the video you wish to include. This simple feature streamlines the embedding process and enhances the multimedia capabilities of your WordPress site.
In the Classic Editor, the embed button is not available by default. However, you can paste the video URL directly into the editor, and WordPress will automatically convert it into an embedded video.
By following these methods and troubleshooting tips, you should be able to successfully embed videos in your WordPress site without relying on YouTube.


