How to Remove Date from URL in WordPress [Visual Guide]
WordPress automatically adds the date to post and page URLs by default. Having dates in permalinks may create issues with broken links if you update or change content later on. Luckily, removing the date from URLs in WordPress is an easy change you can make to create cleaner and more SEO-friendly permalinks.
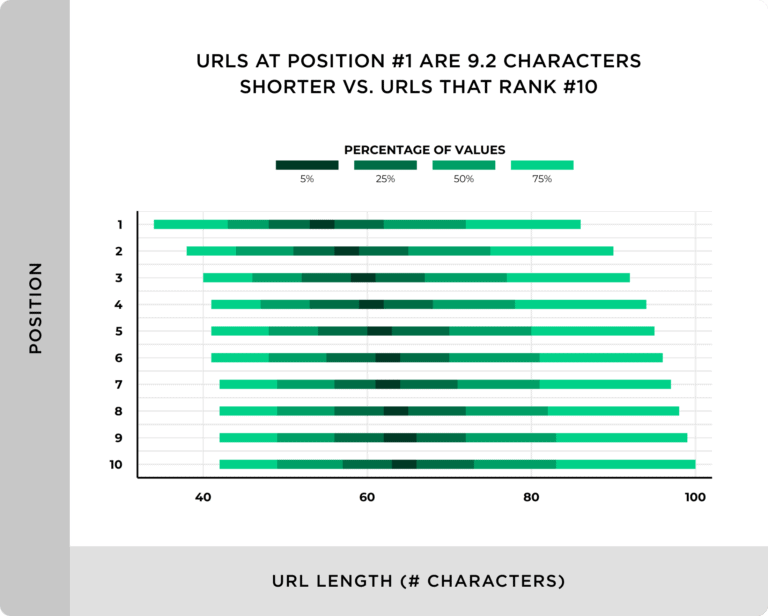
According to Backlinko, URLs in the top position on Google are, on average, 9.2 characters shorter than URLs in the 10th position. This insight highlights the importance of concise URLs for better SEO performance.
So, how do you make this change on your WordPress site? It’s simpler than you might think.
In this article, I will guide you through the following:
- What you need before starting
- Easy steps to remove the date from your WordPress website URLs
- Why WordPress URLs often include dates
💡 Along with guiding you through the process, I’ll also share some smart tips. These will help ensure your website is visually appealing and highly functional for all who visit.
Remember, a small change like this can make a big difference in how your site performs in search engines and how users perceive your content.
So, are you ready to make your website even better? Let’s get started! Before we jump into the steps, there are a few points you need to ponder.
Table of Contents
Things to Think About Before You Change Live URLs in Your WordPress Site
Let’s talk about what you need to know before removing dates from your WordPress site’s URLs.
Before we start changing URLs in your WordPress site, let’s get ready the right way. If your blog is new and you haven’t told the world about it yet, go ahead and change those URLs!
You can do this without worrying about any problems.
But, if you’ve had your website for a while, there are some important things to think about:
- 404 Errors Can Happen: When you change your URLs, like by taking out the dates, it can confuse both people and search engines. They might get ‘404 errors’, which is a fancy way of saying they can’t find the page they’re looking for. This can also make warning signs pop up in your Google Search Console.
- Your Website’s Ranking Might Change: Search engines like Google use your URLs to understand your site. When you change them, it can affect where your site shows up in search results. Also, if other websites have backlinks to your posts, those links will stop working properly, leading to more than 404 errors.
- Social Share Counts Reset: Have you seen how many times people share your posts on sites like Facebook or Twitter? When you change your URLs, these numbers might go back to zero. Most of the time, the tools that count your shares can’t follow the new, changed links.
Don’t worry, though! I’m going to help you figure out how to deal with these changes. We’ll learn about setting up ‘redirects’ so people and search engines can find your posts, even after the URLs change.
Stick with me throughout the article, and I’ll show you how to make these updates without any big problems. We’re going to go through everything step by step, so it’s super easy to understand.
But first, let’s dive into the how-to part. I’ll guide you through each step to change your WordPress URLs the right way. Let’s get started.
Step-by-Step Guide to Remove Dates
Alright, let’s get into how you can take out those dates from your WordPress site’s URLs. We’ll do this in three simple steps.
Step 1: Take a Backup of Your WordPress Site
Before making any changes, it’s super important to back up your site. Think of it like saving your game before trying something new. If something goes wrong, you can always go back to where you were.
We’re going to use a plugin called “UpdraftPlus” for this. There are other plugins like “VaultPress” and “BackupBuddy,” but “UpdraftPlus” is really user-friendly and perfect for what we need. Here’s how to do it:
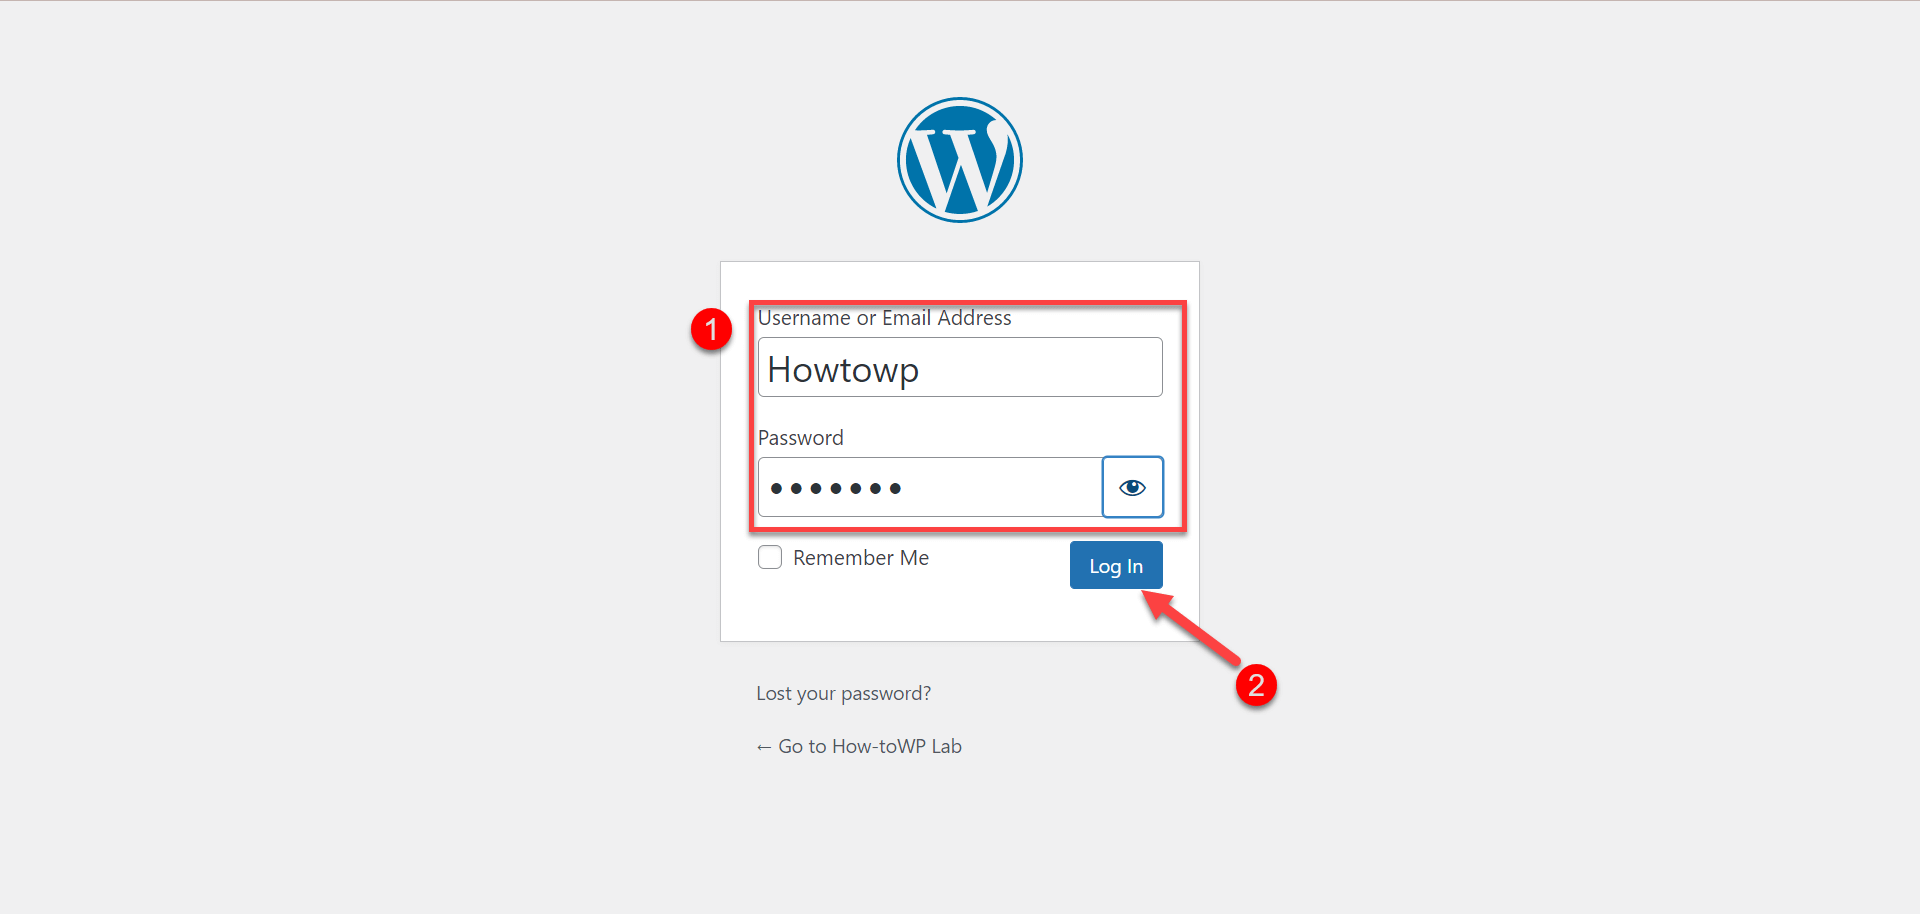
- Open your preferred web browser and go to your WordPress login page.
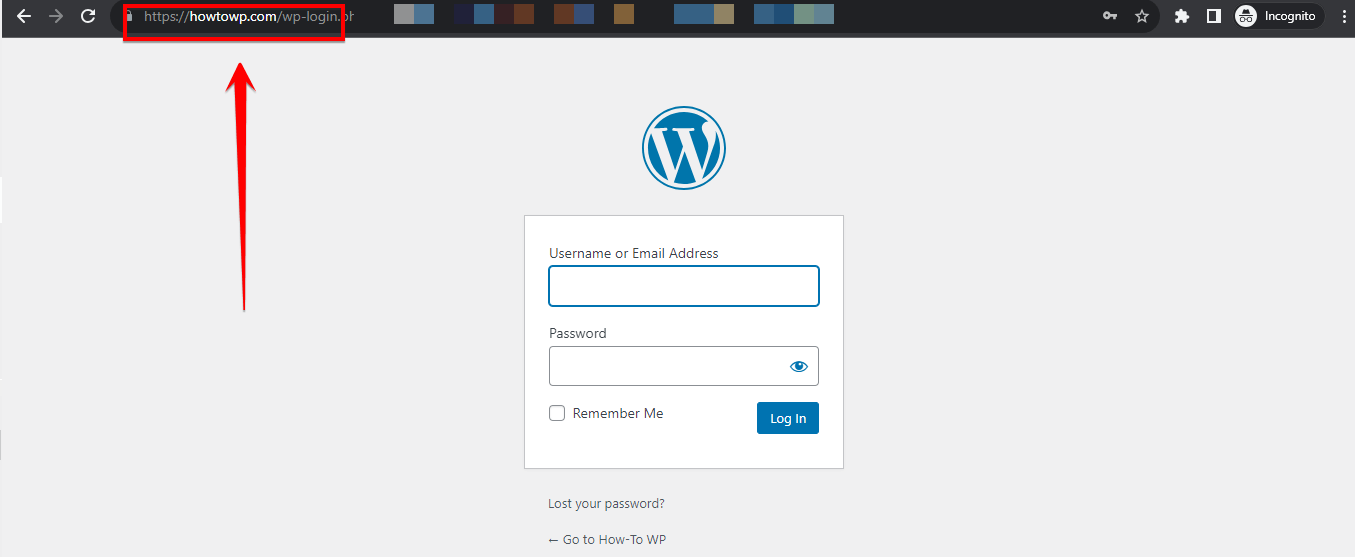
- Enter your username and password in the login form, then click the “Log In” button to access your WordPress dashboard
- On the left-hand side of the dashboard, locate and click on the “Plugins” tab. This will display a submenu.
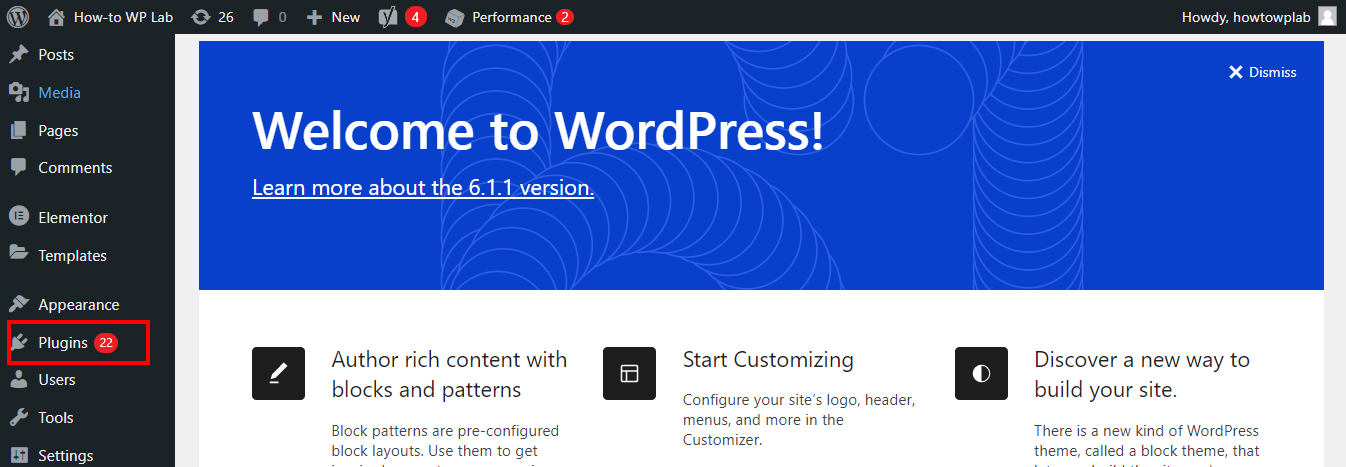
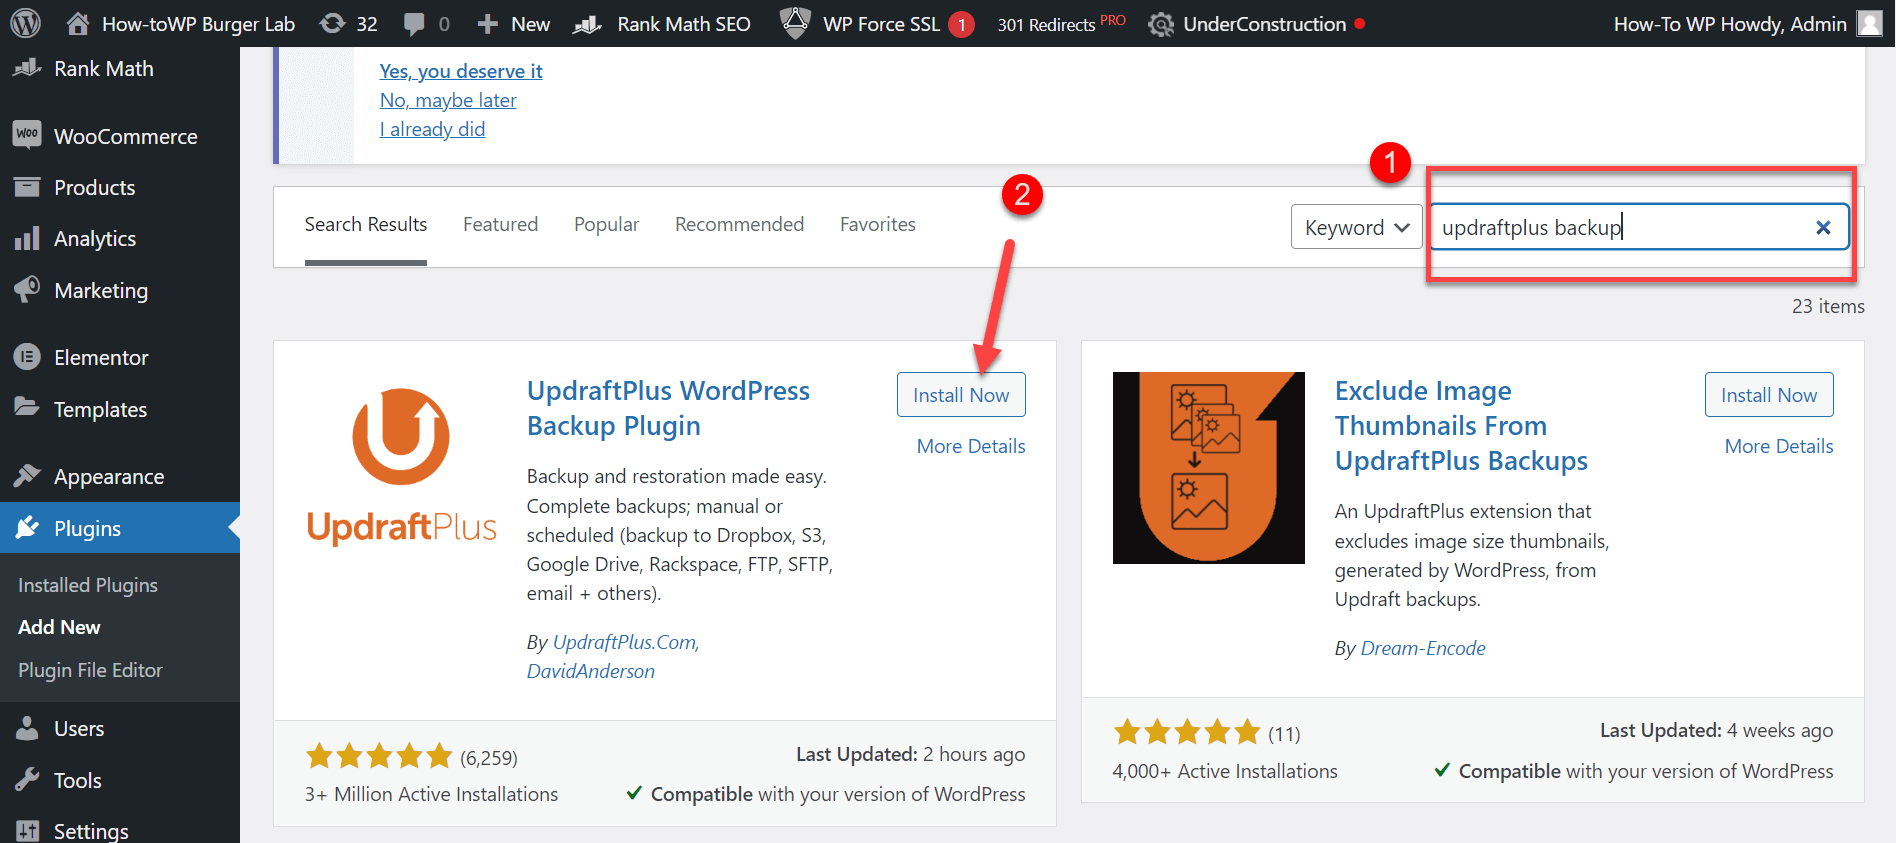
- Click on “Add New” and search for “UpdraftPlus.” Install and turn it on.
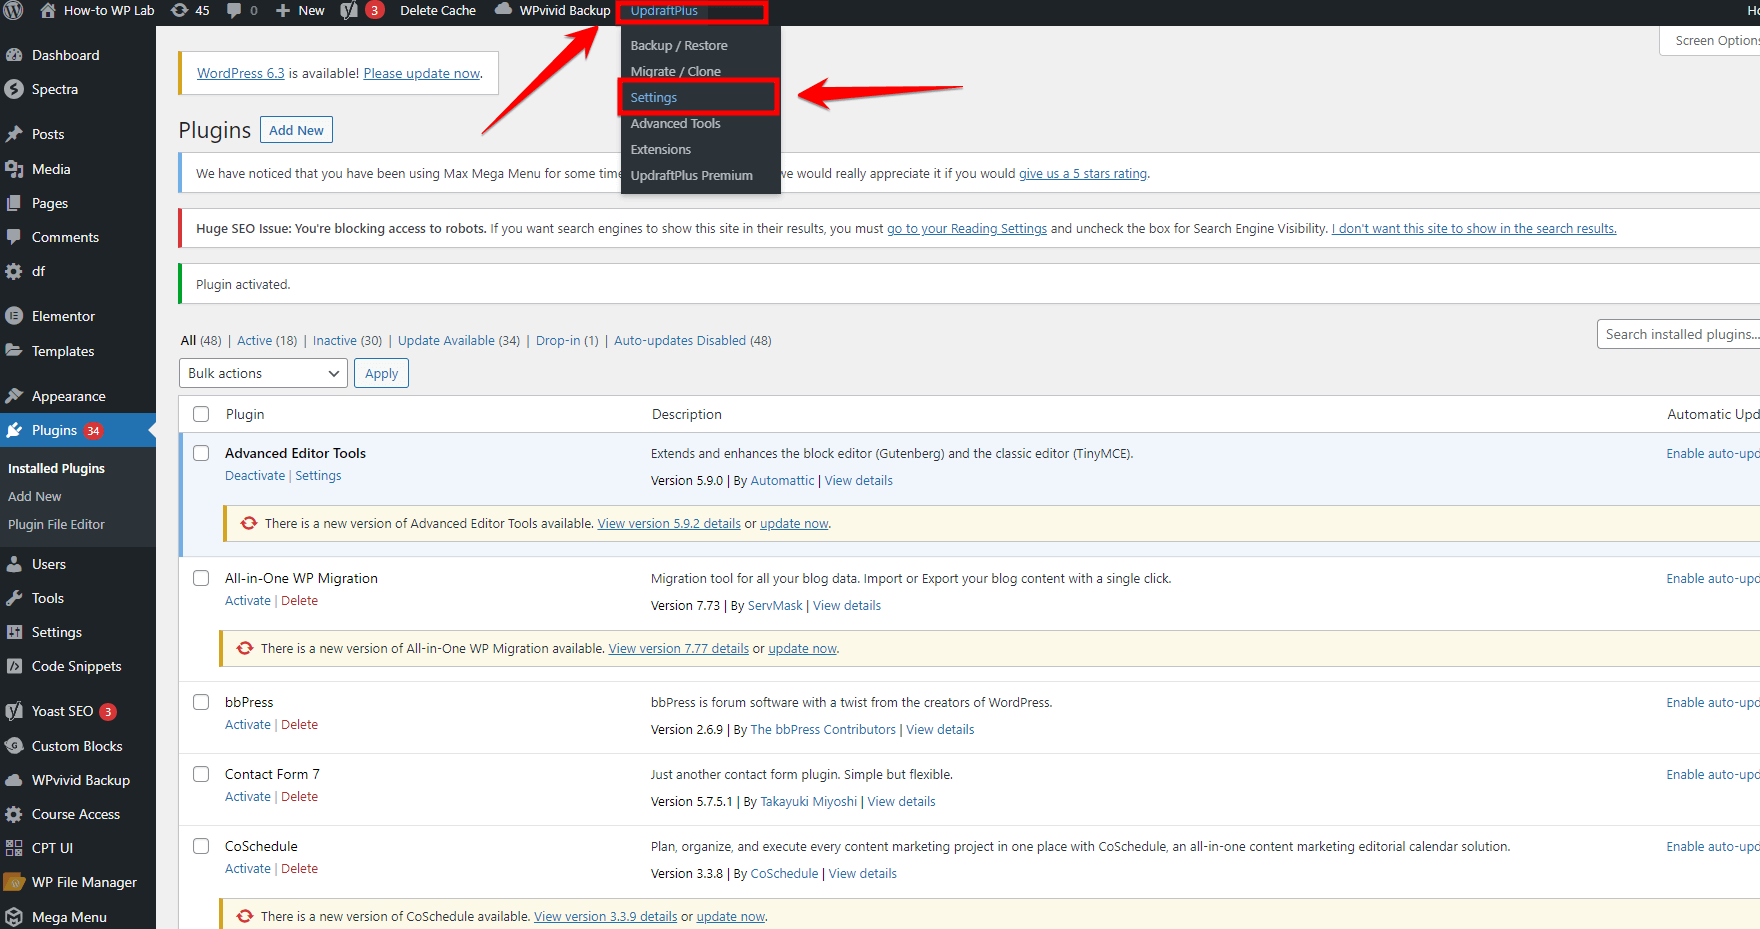
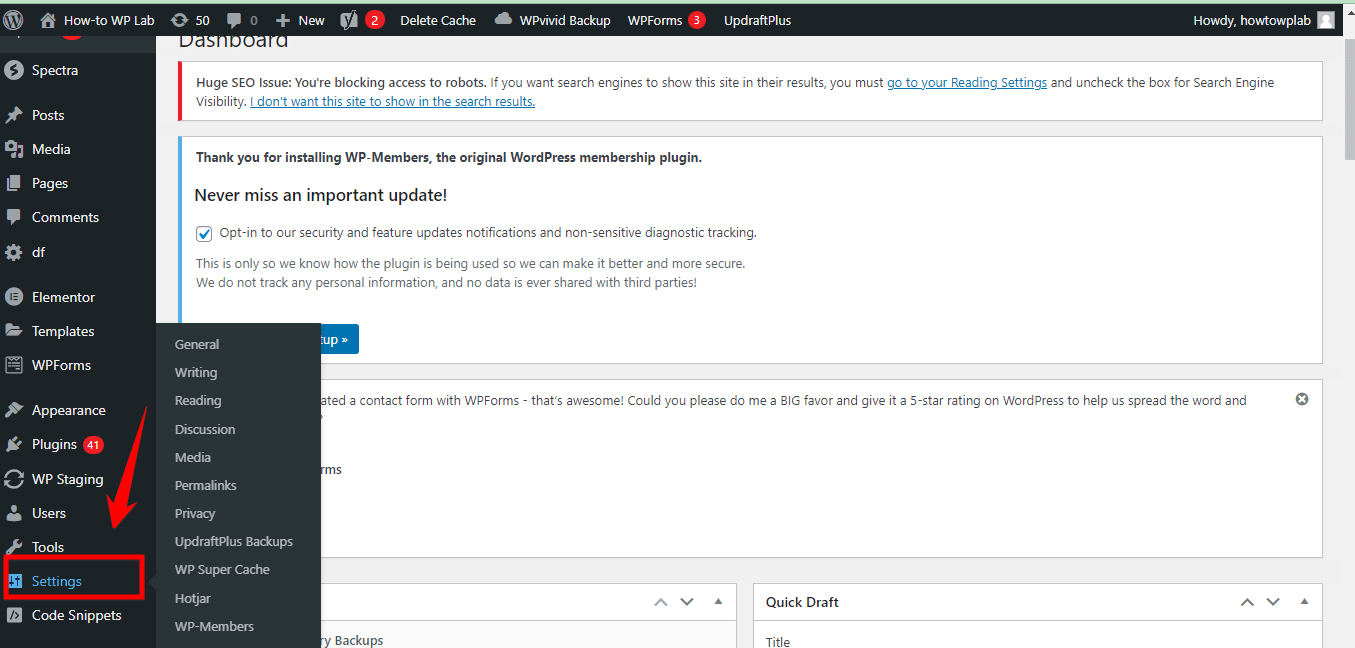
- After turning it on, go back to the main menu and find UpdraftPlus “Settings”.
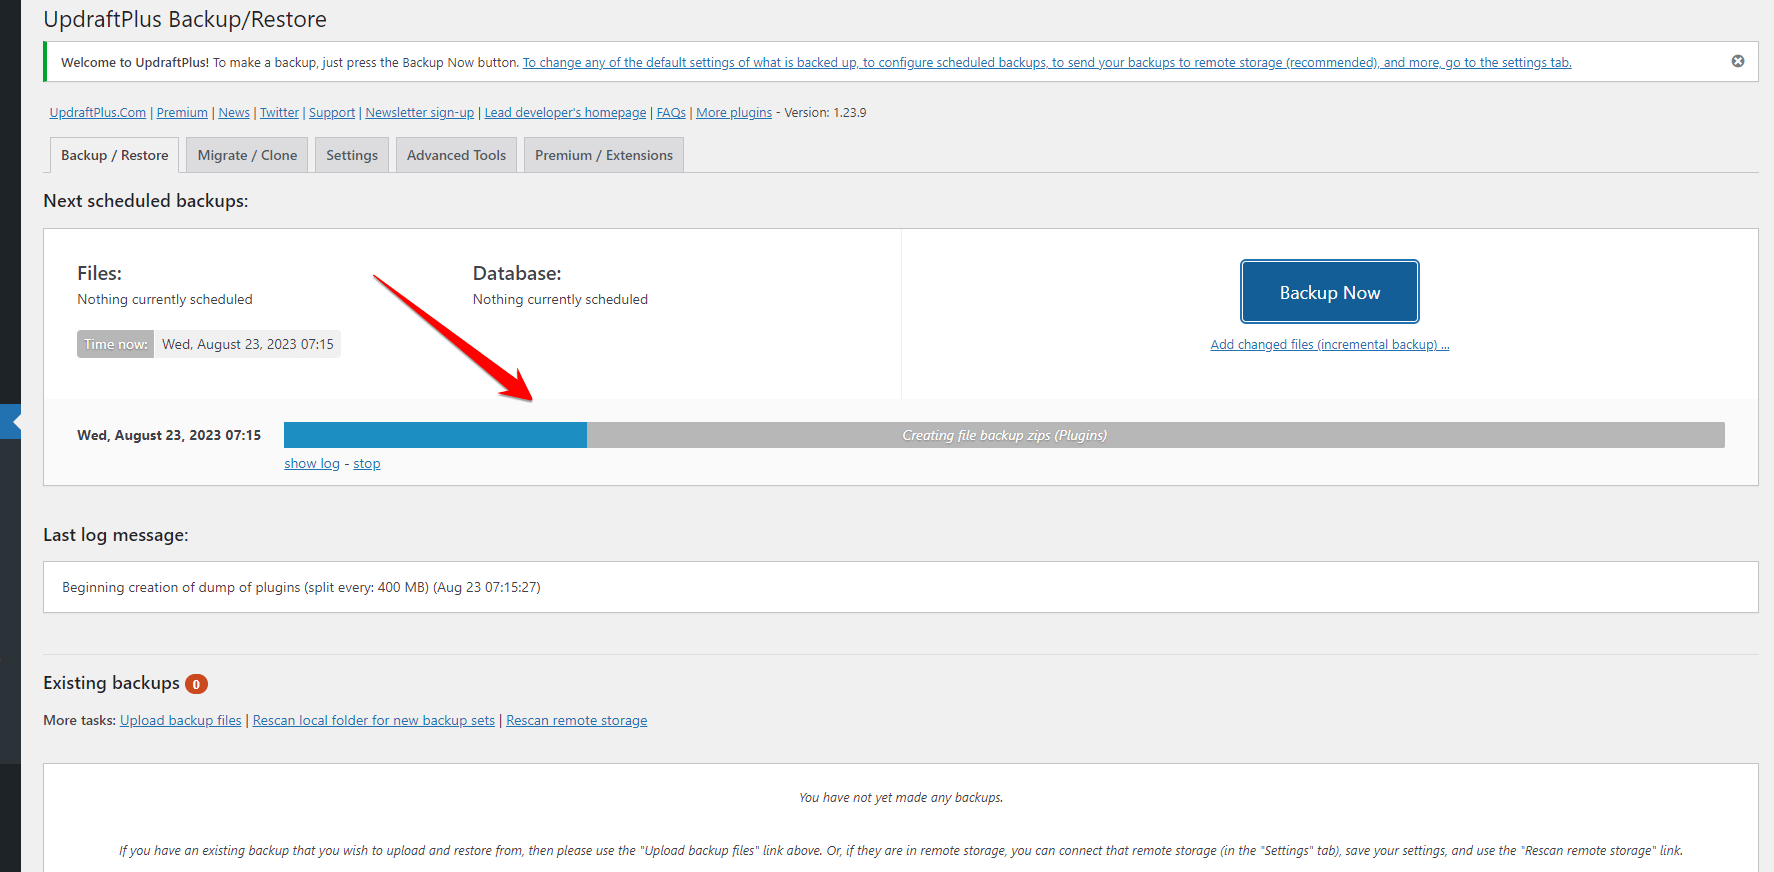
- Go to the UpdraftPlus page and click on the large blue button that says “Backup Now.”
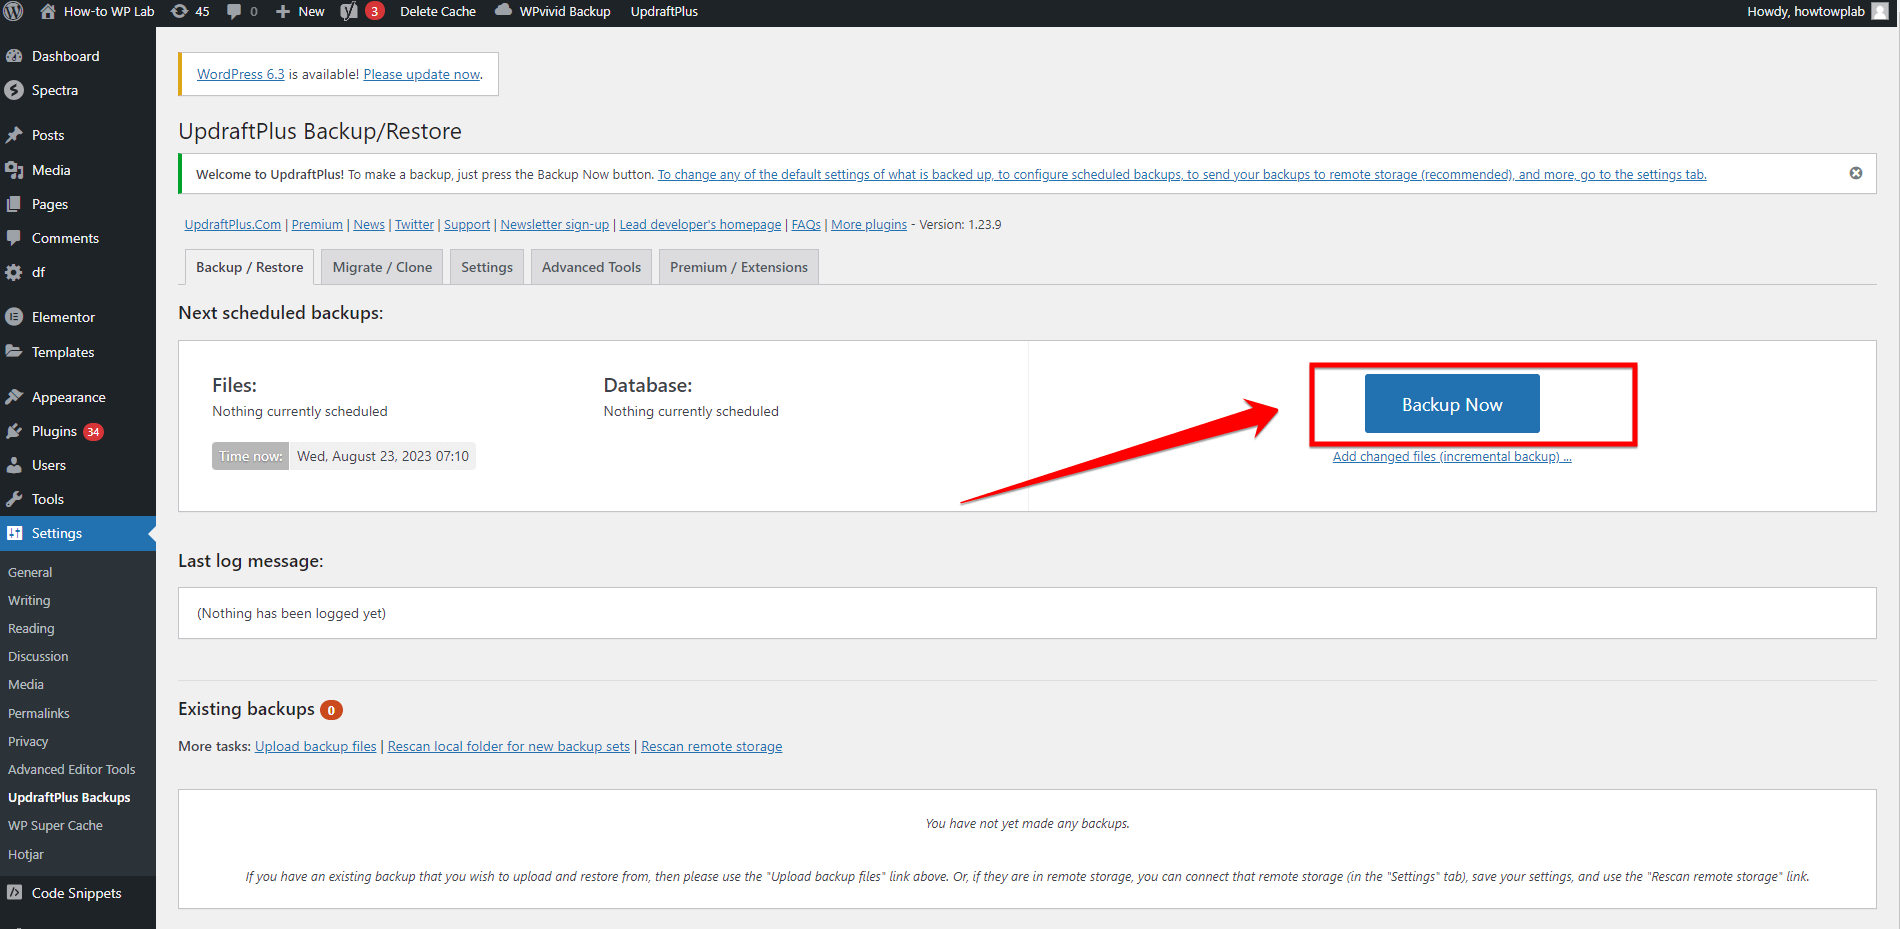
- A little window will appear. In this window, make sure you select choices like “Include your database” and “Include your files” if you want to keep them.
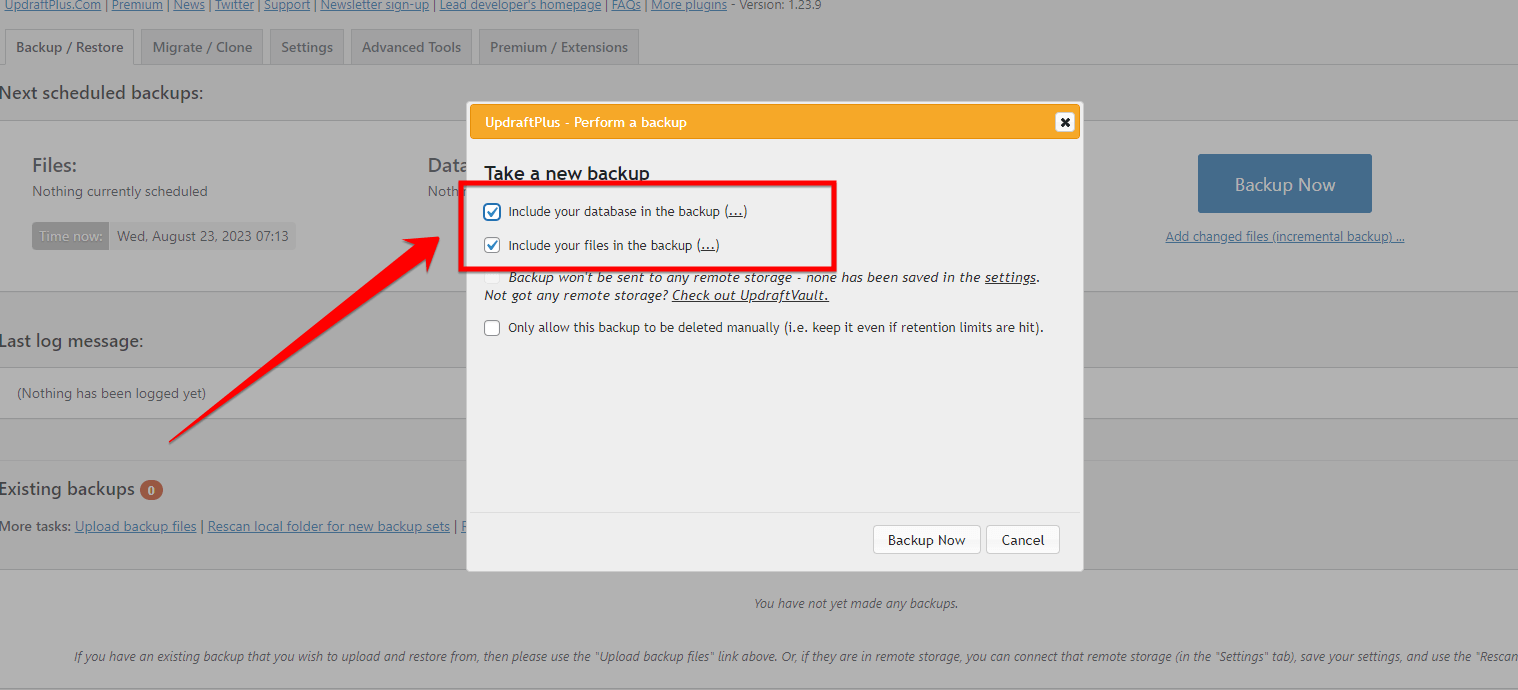
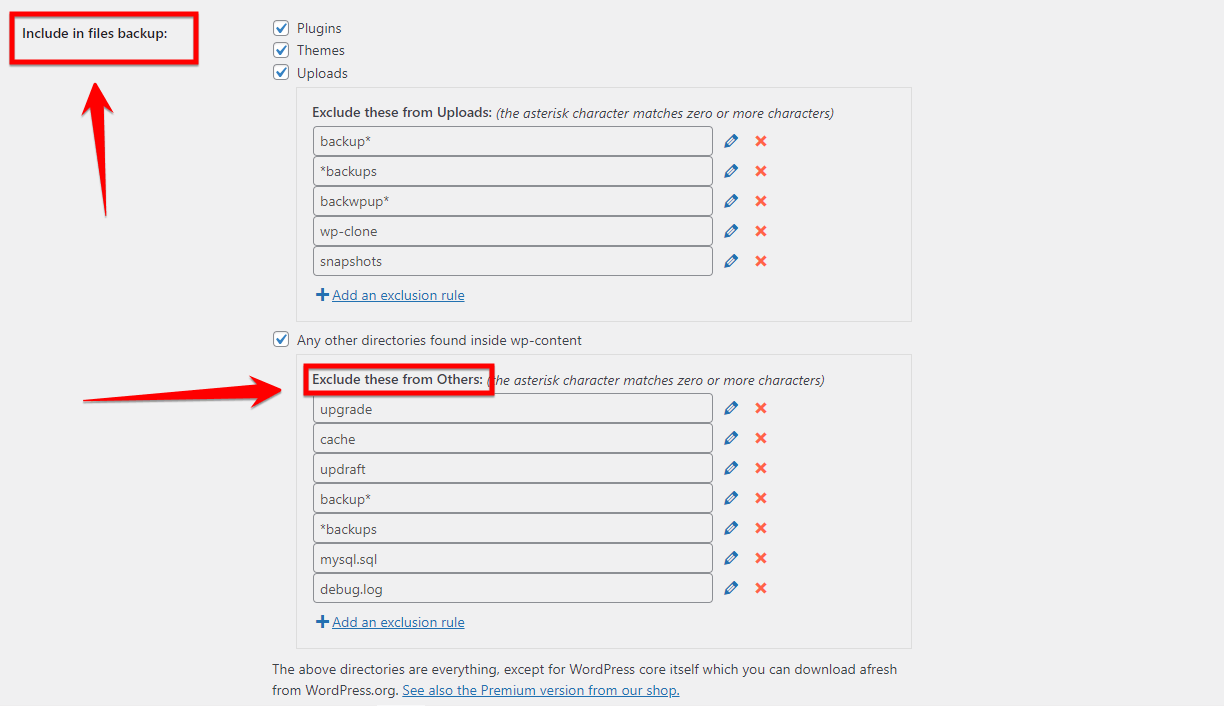
Note: In simple terms, you have the option to choose specific items that you want to keep or exclude from saving, such as particular plugins or themes.
- In the “Settings” of UpdraftPlus, choose the location where you want to store your backup files. Simply follow the instructions displayed on your screen.
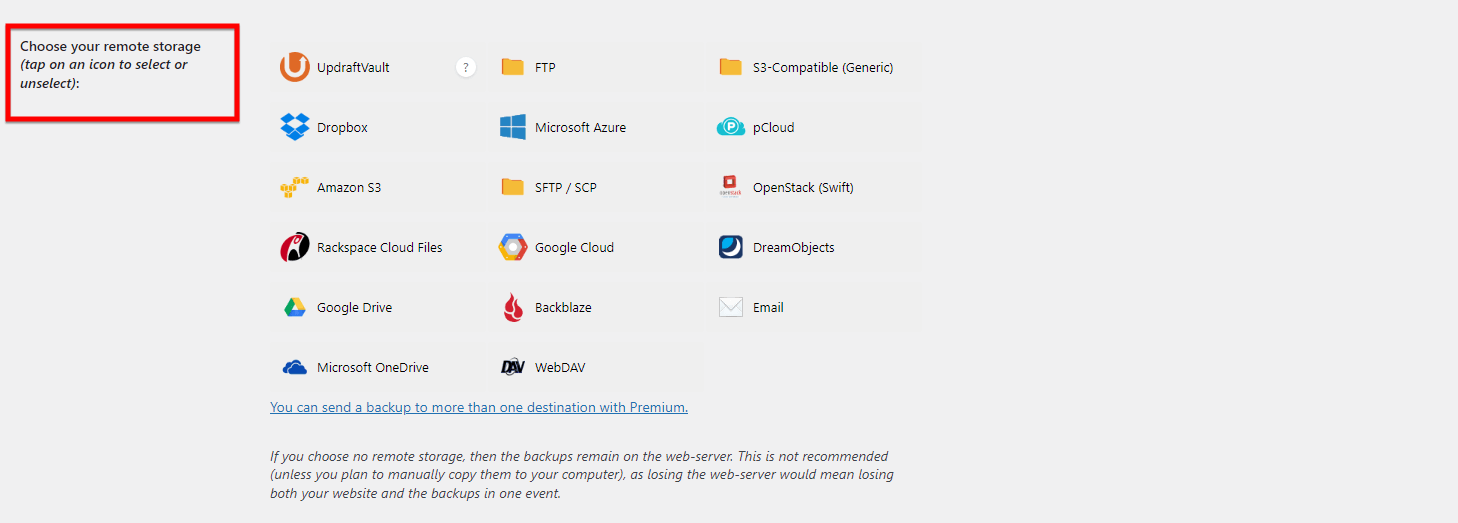
Note: If you don’t choose a location, UpdraftPlus will automatically save it on your website server.
- Once you have decided what to save and where to save it, click on the “Backup Now” button in the small window to begin the saving process.
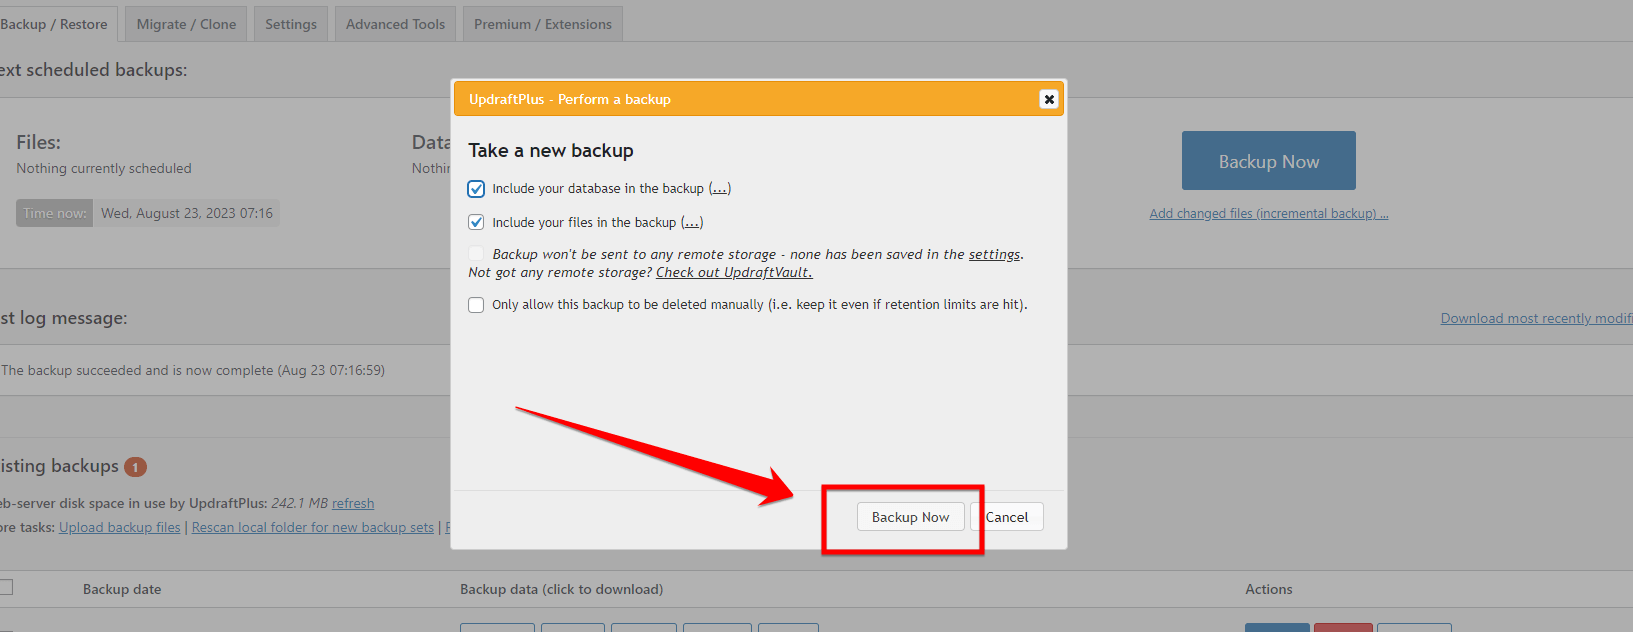
- UpdraftPlus will let you see how much is saved while it progresses. Just wait until it’s done.
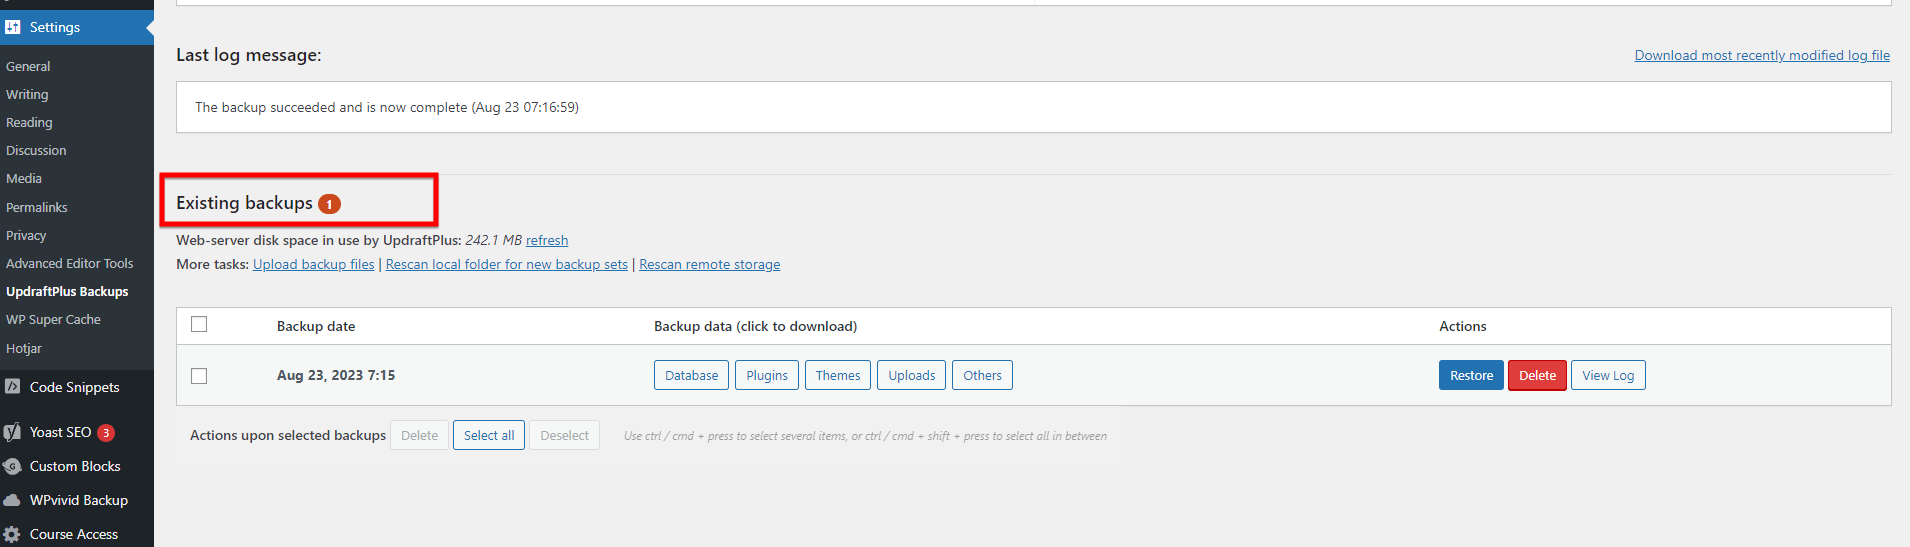
- After it’s finished, you can go to the “Existing Backups” section on the UpdraftPlus page to confirm if your saved files are present.
A Pro Tip: If you want backups to happen by themselves, you can decide how frequently they occur in the “Settings” section of UpdraftPlus. You have the option to select a backup schedule ranging from every day to every month.
Now that we have finished creating a website, it’s important to backup your work in a safe place. This ensures that you have a copy of your website in case anything goes wrong. You are now ready to make changes to the way your website’s URLs are structured.
Step 2: Change the Permalink Setting to ‘Post Name’
Let’s change how your URLs look. We’ll set it to just show the post name, which makes your URLs shorter and better for SEO (which means your site can be found easier on Google).
Step 1: In the dashboard menu, find the “Settings” option and hover your mouse over it. A drop-down menu with different options will appear.
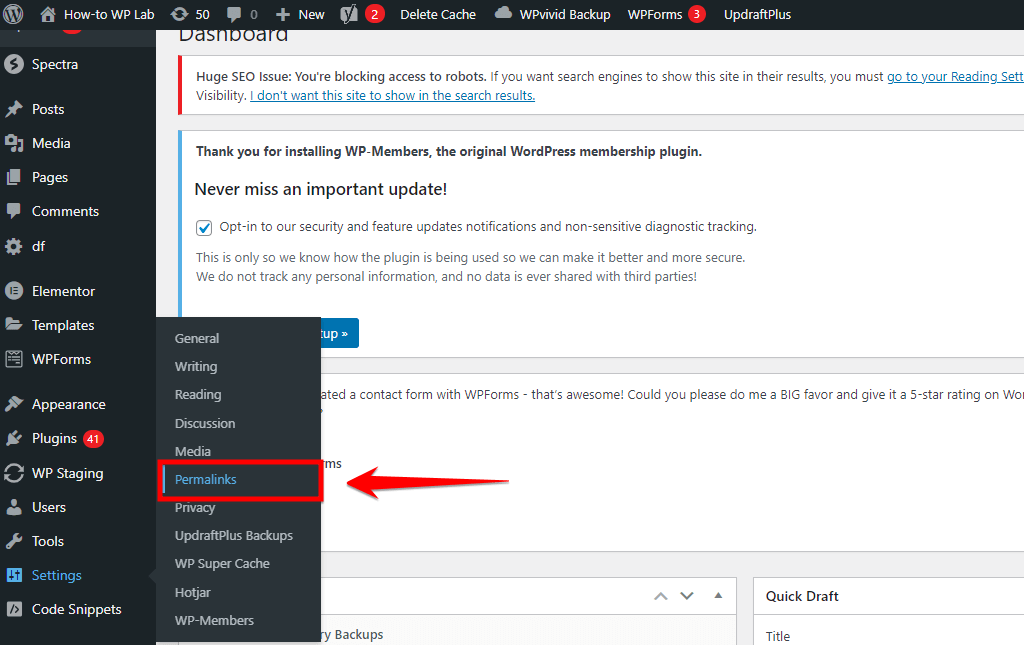
Step 2: From the drop-down menu, click on “Permalinks.” This will take you to the Permalink Settings page.
Step 3: On the Permalink Settings page, you will see a list of different permalink options. Under the “Common Settings” section, look for the option called “Post Name” and click on the button next to it.
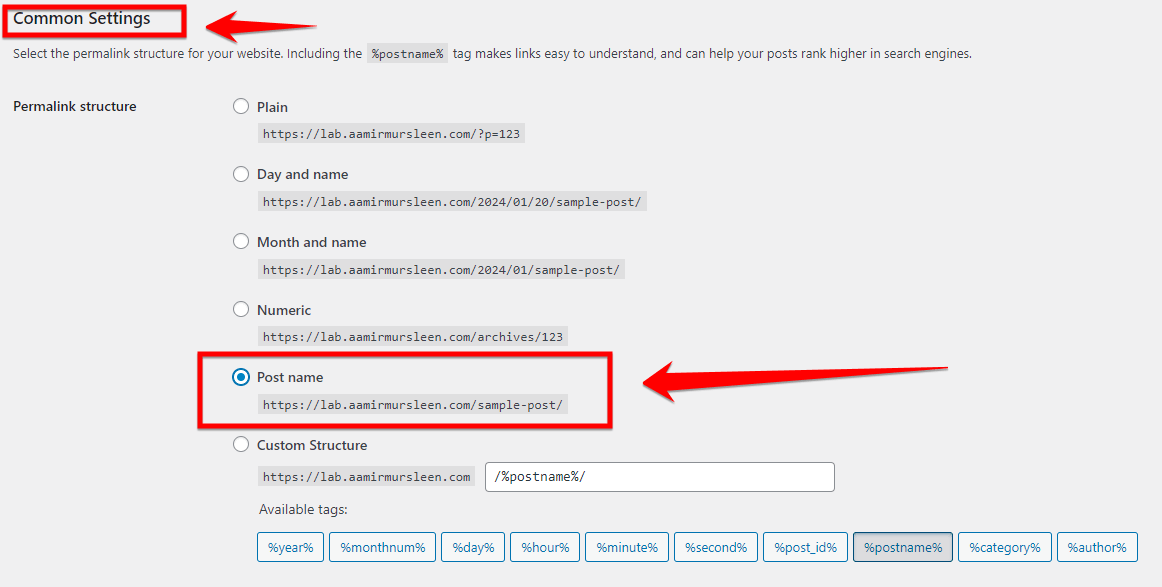
You might be wondering why I’m suggesting you choose the “Post Name” option instead of the “Custom Structure” or any other option.
Well, here’s the reason: selecting “Post Name” will make your website’s URLs shorter and easier to understand. This makes it simpler for people to remember and share them. What’s more, search engines also prefer URLs that are uncomplicated and straightforward.
Step 3: Save Your Changes
Now, you’re almost done! After selecting “Post Name”, scroll down and click the “Save Changes” button. WordPress will now use this new format for all your posts.

When you click “Save Changes”, WordPress automatically updates your URLs. Your existing posts will no longer have dates in their URLs, and any new posts you create will use the new, cleaner URL structure.
And that’s it! You’ve now removed the dates from your WordPress URLs. This small change makes your site more user-friendly and better for search engines. Your URLs are now neat and clean, and your posts are easier to find and share.
Now, go ahead and give your WordPress site a nice little update!
But wait, remember the issues I mentioned before? Like how changing URLs can cause ‘404 errors’ and affect your site in search engines? And remember the solution I talked about?
Well, now let’s move towards that solution. It’s something you really need to do because it’s the best thing for your site’s SEO and for how search engines see your website.
Doing this update is super important. It makes your website easier for people to use and find. And when search engines like Google can understand your site better, they’re more likely to show it to more people.
So, let’s get started on making your WordPress URLs better and your website even more awesome!
Set Up Redirection After Removing Dates from WordPress URLs
After you’ve updated your URLs, the next big step is to set up 301 redirects. This is super important, especially after removing dates from your WordPress URLs.
As I mentioned earlier, when you remove dates from your URLs, the old links (the ones with dates) won’t work anymore. This could lead to ‘404 errors’ for your visitors and affect your site’s ranking in search engines. Redirection is like giving directions – it tells browsers and search engines where to find your posts on their new URLs.
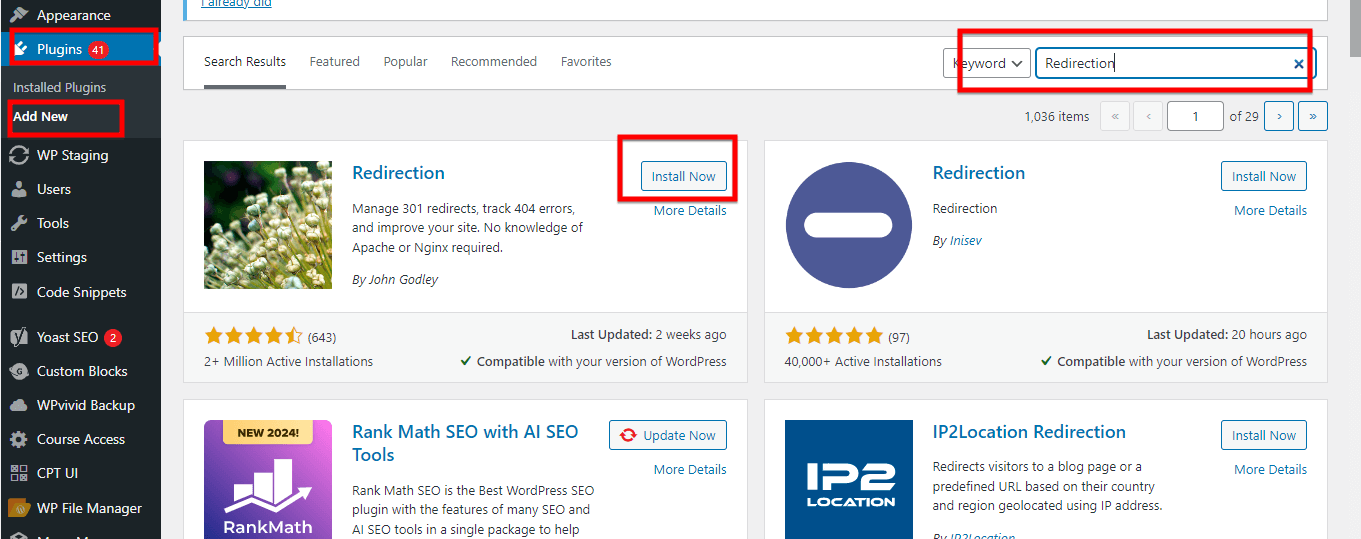
You’ll find many options on the internet for setting up redirects, and some of them cost money. But don’t worry, we’re going to use a free and easy solution: the “Redirection” plugin.
- Find and download the “Redirection” plugin from the WordPress plugins directory. This can be done by searching for the plugin and clicking on the download option. Once downloaded, you can install it by clicking “Install Now”.
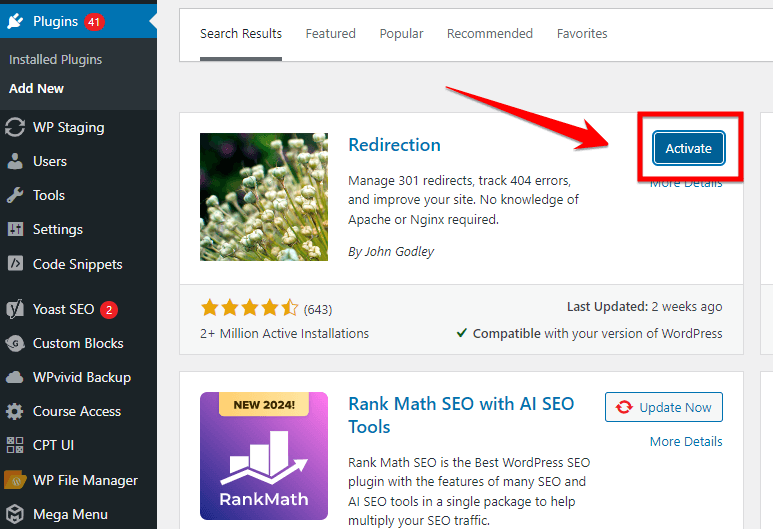
- Once you’ve finished installing the plugin, just click on the “Activate” button in order to turn it on and make it functional.
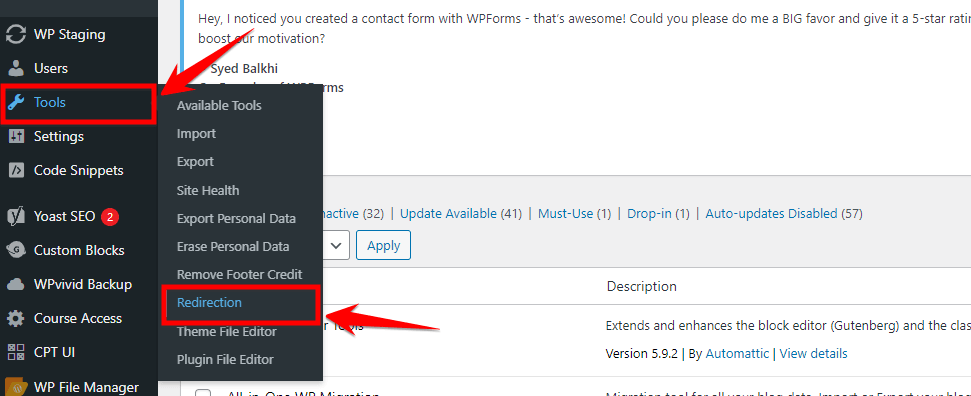
- After activating, click on “Tools” in the left sidebar, then click “Redirection” in the dropdown menu.
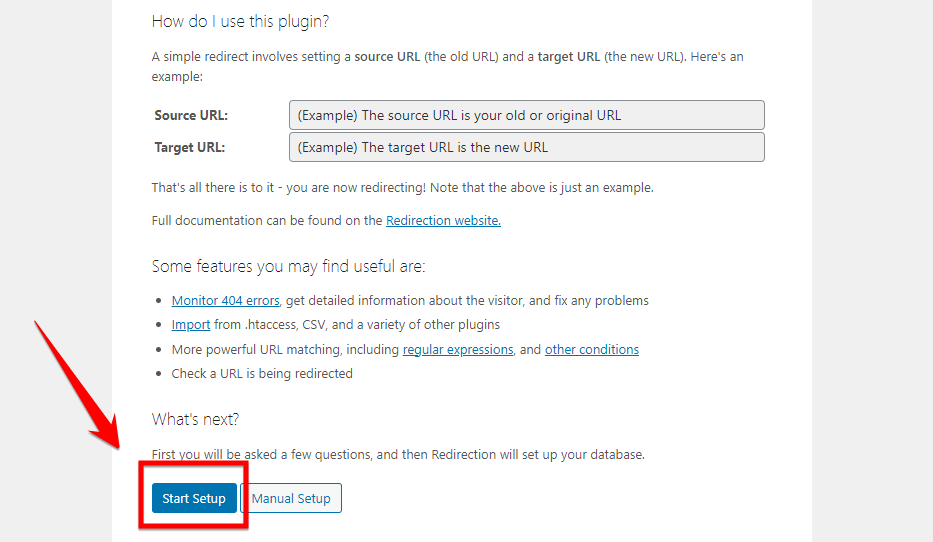
- On the redirection page, press the button that says “Start Setup.” This will prepare the plugin to create redirects.
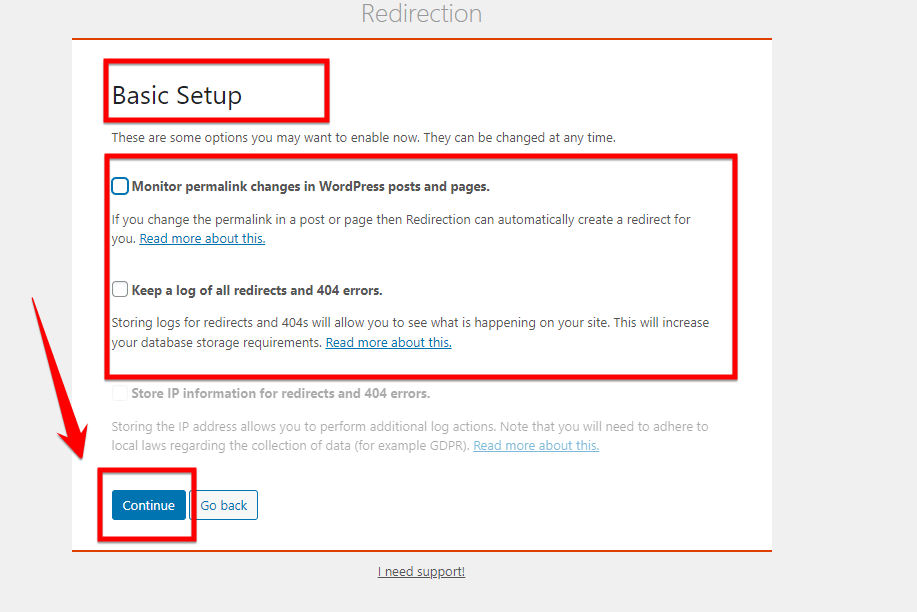
- Once you click, you will be taken to a page called the “Basic Setup” page. On this page, you will see a few options. You can choose to select them by ticking the boxes if you want, but remember that they are not necessary. After that, click on the “Continue” button to move on to the next step.
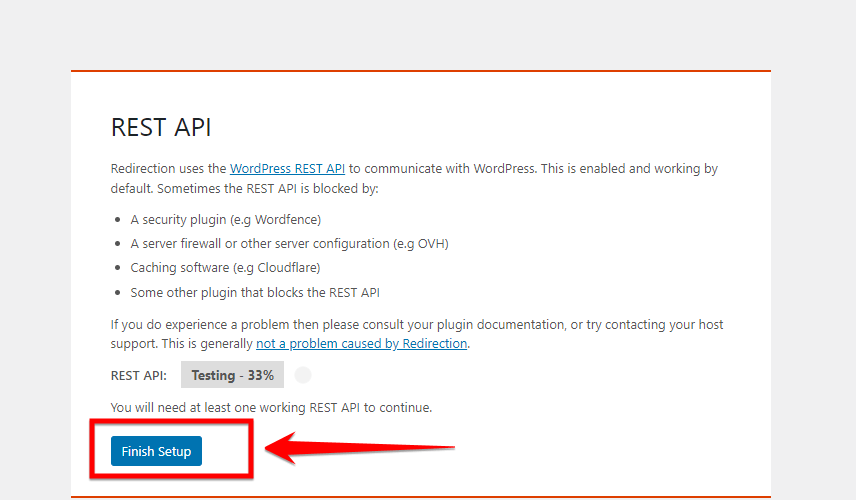
- After completing the previous step, find the “Finish Setup” button and give it a click. This final action will conclude the setup process and ensure that all your selected preferences and settings are saved and applied.
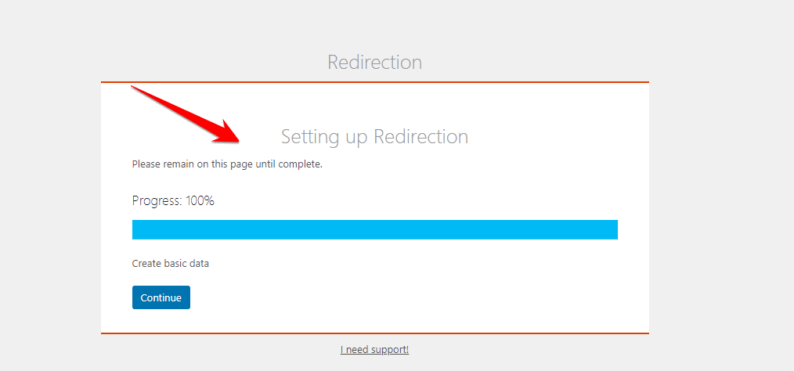
- Once the previous step is done, you will notice that the plugin displays the percentage of redirection. Make sure it shows 100%, and then click on the “Continue” button to proceed.
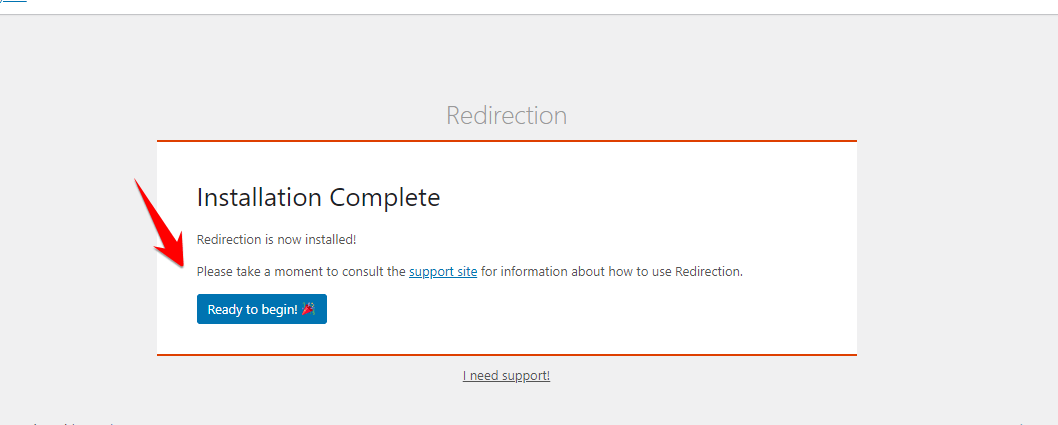
- Once the installation process is complete, locate and click on the “Ready to Begin” button. This action will signify that you are prepared to embark on the next phase or task associated with the plugin.
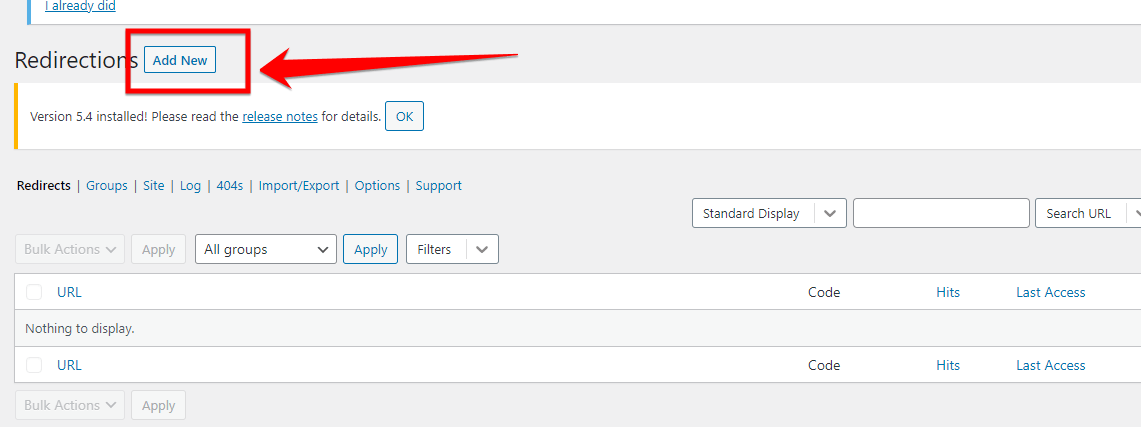
- Once you finish, you will be taken to a page where you will find a section called “Redirects”. Since we are creating a new redirect, click on the “Add New” button to start the process.
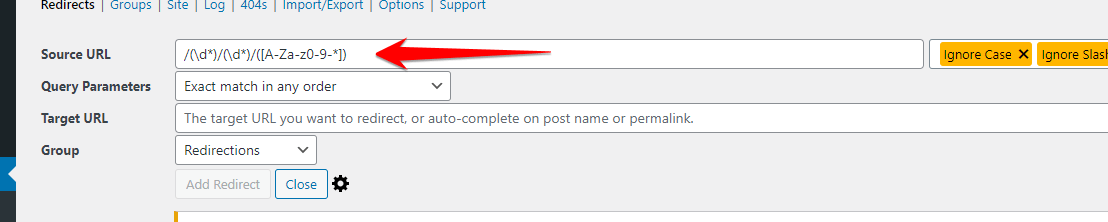
- In the “Source” field, enter the old URL structure you want to redirect from. For instance,, if you previously used day, month, year, and name URLs like “/12/25/2021/product-name”, enter this source: /(\d*)/(\d*)/(\d*)/([A-Za-z0-9-*])
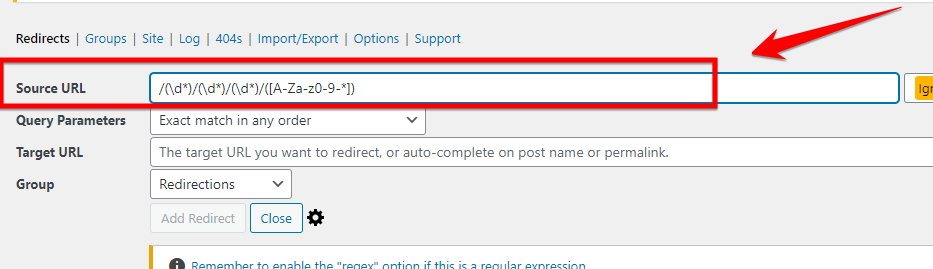
- If you previously used month and name URLs like “/12/product-name”, enter this source: /(\d*)/(\d*)/([A-Za-z0-9-*])
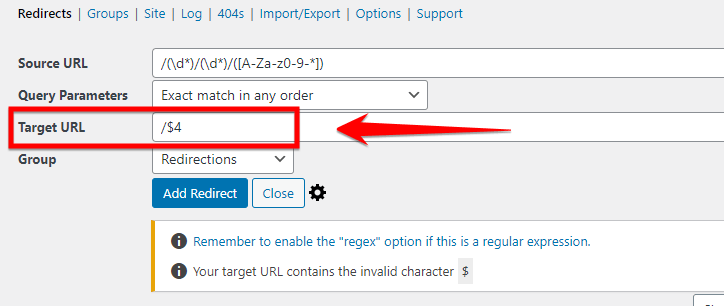
- In the “Target” field, enter the new URL structure you want to redirect to. For the day, month, year, and name example URL, enter the Target: /$4.
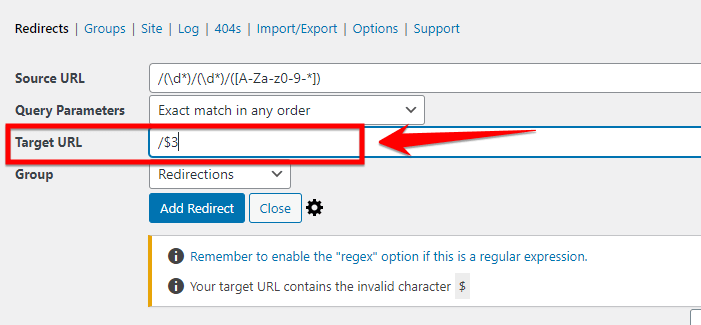
- For the month and name example URL, enter the /$3 in “Target URL” option.
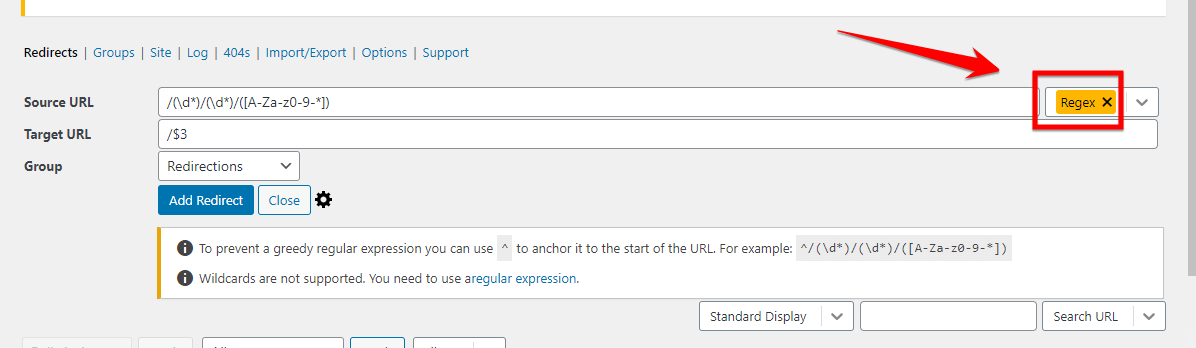
- Below the redirect form, you will see an option labeled “Regex”; just select it. Because it enables the Regular Expression functionality, allowing for more flexible redirection rules.
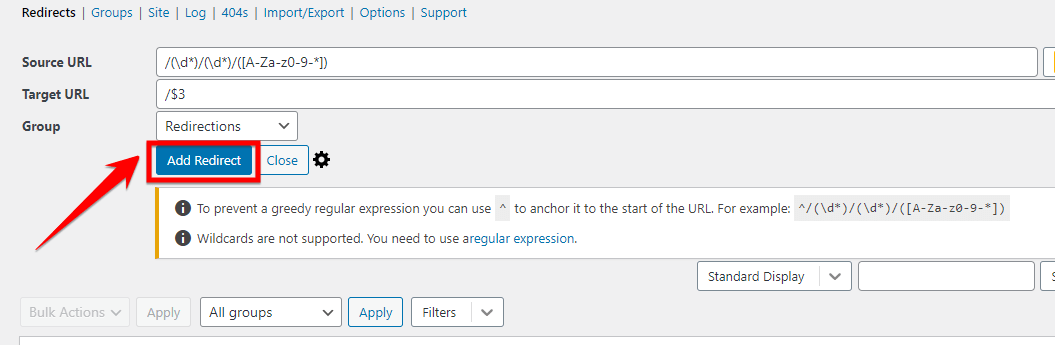
- Finally, click on the “Add Redirect” button to save the redirect rule you created, completing the process.
Now that you’ve set up redirects, you’ve taken a big step in improving your WordPress site. Removing dates from your URLs and setting up proper redirection is more than just a cosmetic change. It’s about making your site easier to navigate, both for your visitors and for search engines.
By doing this, you’re helping your site stay friendly and accessible, and that’s key to good SEO. It’s like making sure every road on a map leads to the right place – no one gets lost, and everyone is happy!
But you might be wondering why there were dates in your WordPress URLs in the first place. Let’s move on to understand this better. We’re going to explore why WordPress includes dates in URLs by default and what impact this has on your website. This knowledge will help you make even more informed decisions about managing your WordPress site.
So, let’s dive into the next part.
Why WordPress URLs Often Include Dates
When you first create a WordPress website, the URLs can look a bit confusing. They usually have a format that’s not easy to read, like https://example.com/?p=123. This is because WordPress uses the post’s ID number in the URL, which isn’t very user-friendly or helpful for SEO.
WordPress, however, gives you the power to change these default URLs to something better. In the ‘Permalinks’ section of the WordPress settings, you can choose different styles for your URLs. Some people pick options like ‘Month and name’ or ‘Day and name’, which add the year, month, and sometimes the day to the URL.
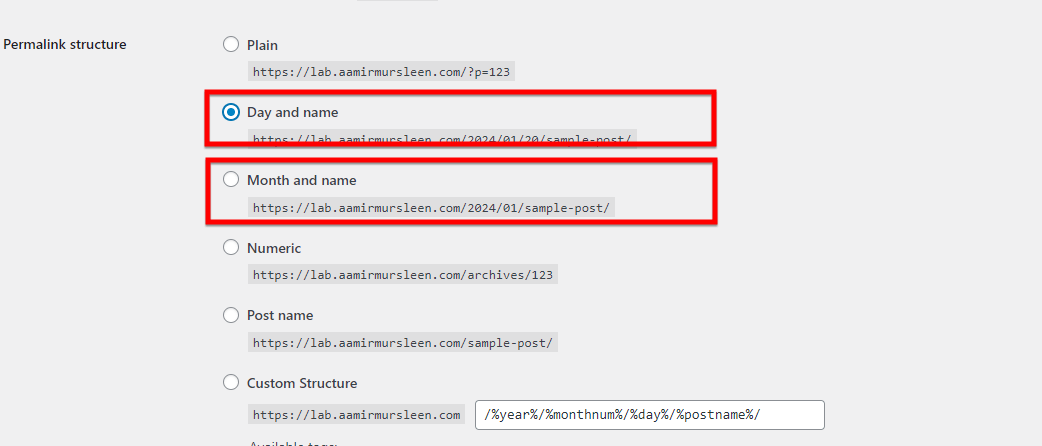
For example, a ‘Day and name’ URL might look like https://example.com/2023/09/03/sample-post/, and a ‘Month and name’ URL could be https://example.com/2023/09/sample-post/.
These URL styles are an improvement over the default ones. They’re easier to read and can help with SEO. However, they have a downside: the dates in the URLs can make your content seem outdated over time.
That’s why many people prefer the ‘Post name’ style. This option removes the date and just uses the title of your post in the URL, like https://example.com/sample-post/.
It’s simple, clear, SEO-friendly, and keeps your content looking timeless. This style is particularly beneficial if your content is evergreen and remains relevant regardless of the posting date.
Helpful Tips for Making Great WordPress URLs
Now that you know how to change your WordPress URLs and why it’s a good idea, let’s talk about some smart tips. These tips will help your website be even better and easier for people to use and find.
- Short and Sweet URLs: Try to make your URLs short. Long URLs can be hard to remember and don’t look as nice. Think of making your URLs like a short story title, like www.yoursite.com/fun-day-park. This is much better than something long and confusing.
- Keywords are Key: Put important words in your URLs that show what your post is about. If you write about gardening, use a URL like www.yoursite.com/gardening-tips. This helps people know what your page is about just by looking at the URL. It’s also good for Google, so your website shows up when people search for gardening.
- Don’t Keep Changing Your URLs: Once you pick a good style for your URLs, try not to change them too much. If you keep changing them, it might confuse your visitors and search engines. It’s like if you keep changing your home address, people won’t know where to find you!
- Look Out for Broken Links: After you change your URLs, check to see if all your links are working. If some links don’t work, people might get lost on your website. It’s like giving someone a map with missing roads; they won’t know where to go!
- Let Google Know: Use tools like Google Search Console to tell Google about your new URLs. This helps Google understand your website better and show it to more people when they search for stuff you write about.
- Be Consistent with Your Style: Keep your URL style the same across your website. If one URL is about a recipe and it looks like www.yoursite.com/yummy-cake, make sure other recipe URLs look similar. This consistency makes your site look professional and easy to understand.
By following these tips, your WordPress URLs will be easy for people to use, remember, and find on Google. It’s like giving your website a bright, friendly sign that says, “Hey, come visit me!”
Summary
We’ve learned a lot about WordPress URLs together! From taking out dates to setting up redirects and even some super smart tips, we’ve covered a bunch. I hope you feel like a bit of a WordPress pro now.
Let’s wrap up what we’ve learned:
- Removing Dates from URLs: We saw how taking dates out of your WordPress URLs can make your site look cleaner and help with SEO.
- Setting Up Redirects: Remember, setting up redirects is super important. It helps make sure that people can still find your posts, even after you change the URLs.
- Smart Tips for URLs: Keeping your URLs short, using keywords, and being consistent can really help your site. It makes it easier for people and search engines to understand what your site is about.
Changing your WordPress URLs might seem a bit scary at first, but it’s actually pretty easy. And it can make a big difference for your website. Just like cleaning your room makes it nicer to live in, cleaning up your URLs makes your website better for your visitors and for Google.
Thanks for sticking with me through this journey. Now, go make your WordPress site the best it can be with your new URL skills! And remember, if you ever get stuck, there’s always more to learn and explore in the world of WordPress. Keep being curious and keep improving your website. You’re doing great!
FAQs
How do I hide the date in WordPress?
You can hide the date in WordPress in a few ways. If you’re good with coding, you can edit your theme’s files. Look for codes like and remove or comment them out. But if you’re not into coding, no worries! You can use a plugin. There are plugins like “WP Meta and Date Remover” that can hide the date for you. Just install the plugin, activate it, and follow the instructions to hide the date.
Hiding both the author and the date in WordPress is similar to hiding just the date. You can edit your theme’s files and look for codes that show the author and date, then remove or comment them out. Or, you can use a plugin like “WP Meta and Date Remover.” This plugin makes it easy to hide both the author’s name and the date from your posts.
To remove the author URL in WordPress, you can edit your theme’s files. Look for a code that displays the author link – it usually looks like . You can either remove this code or replace it with to just show the author’s name without a link. If you’re not comfortable with coding, you might want to ask a developer for help or look for a plugin that can do this for you.
Can I edit the published date on WordPress?
Yes, you can change the published date on WordPress. When you’re editing a post, look for the “Publish” box on the right side. There, you’ll see the date when the post was published. Click on the date, and you can change it to whatever date you want. Then, click “Update” to save your changes. This is handy if you want to rearrange the order of your posts or update the date for a refreshed post.


