How to Hide a Page in WordPress [Step By Step Visual Guide]

Do you want to hide a page on your WordPress website from visitors? Maybe it’s the draft that isn’t quite ready to be shared or the special page meant for a select few.
Let me paint a picture for you: Imagine you’re running a business and using WordPress for your site. You’ve got an exciting new product, but you’re still getting ready for everyone to see it. Or perhaps there’s a private page crafted especially for your top-tier customers, which you’d rather keep hidden from your regular visitors.
Sounds familiar?
In this article, I will show you:
- Different ways to hide a page in WordPress
- Why would you want to hide a page in WordPress
- Quick troubleshooting tips for hiding pages in WordPress
WordPress is a powerful tool, not just for what it can show but also for what it can hide. Let’s explore how to use this feature for a short hideaway or a more permanent secret spot.
Table of Contents
- 6 Ways to Hide a Page in WordPress
- Method 1: Use Yoast SEO to Hide a WordPress Page from Google
- Method 2: Hide Pages in WordPress Using Your Robots.txt File
- Method 3: Hide a Page by Setting the Visibility to Private
- Method 4: Hide a Page in WordPress by Password Protecting It
- Method 5: Hide a Page in WordPress from the Navigation Menu
- Method 6: Hide a Page by Using a WordPress Plugin
- Quick Troubleshooting Tips for Hiding Pages in WordPress
- Why Would You Want to Hide a Page in WordPress
- Summary
- FAQs
6 Ways to Hide a Page in WordPress
When you have a website on WordPress, there are multiple scenarios in which you want to hide specific pages. Maybe it’s a ‘Coming Soon’ page, perhaps you’re testing something out, or it could be sensitive content that’s not for public view.
Here, I will guide you through five methods I have found to accomplish this over the years. Each has its unique advantages, and the one you choose will depend on your specific needs and familiarity with WordPress tools.
Let’s dive into the first method.
Method 1: Use Yoast SEO to Hide a WordPress Page from Google
The Yoast SEO plugin has emerged as a favorite for many WordPress users. Not only does it enhance SEO strategies, but it also offers features to hide specific pages from search engines. By using the ‘noindex’ tag, this plugin ensures your selected pages remain undetected in search results.
This method is best suited for users who prioritize search engine optimization and are looking for a way to keep certain pages from appearing in search results. If you’re a blogger, online retailer, or business owner aiming to gain traction through search engines but also need to keep some pages hidden, this method could be your best bet.
Here’s a breakdown of how to do it:
💡 Quick Insight: Before diving into the steps, I’d like to shed light on a crucial term: ‘noindex.’ It is a critical meta tag in HTML that lets search engines know when specific pages or posts should be excluded from search results. For pages with repetitive or minimal content or those that are not optimized for search engine optimization, it is common to use the ‘noindex’ tag.
Step 1: Launch your favorite web browser—be it Google Chrome, Mozilla Firefox, Safari, or others. Ensure your internet connection is stable for smooth navigation.
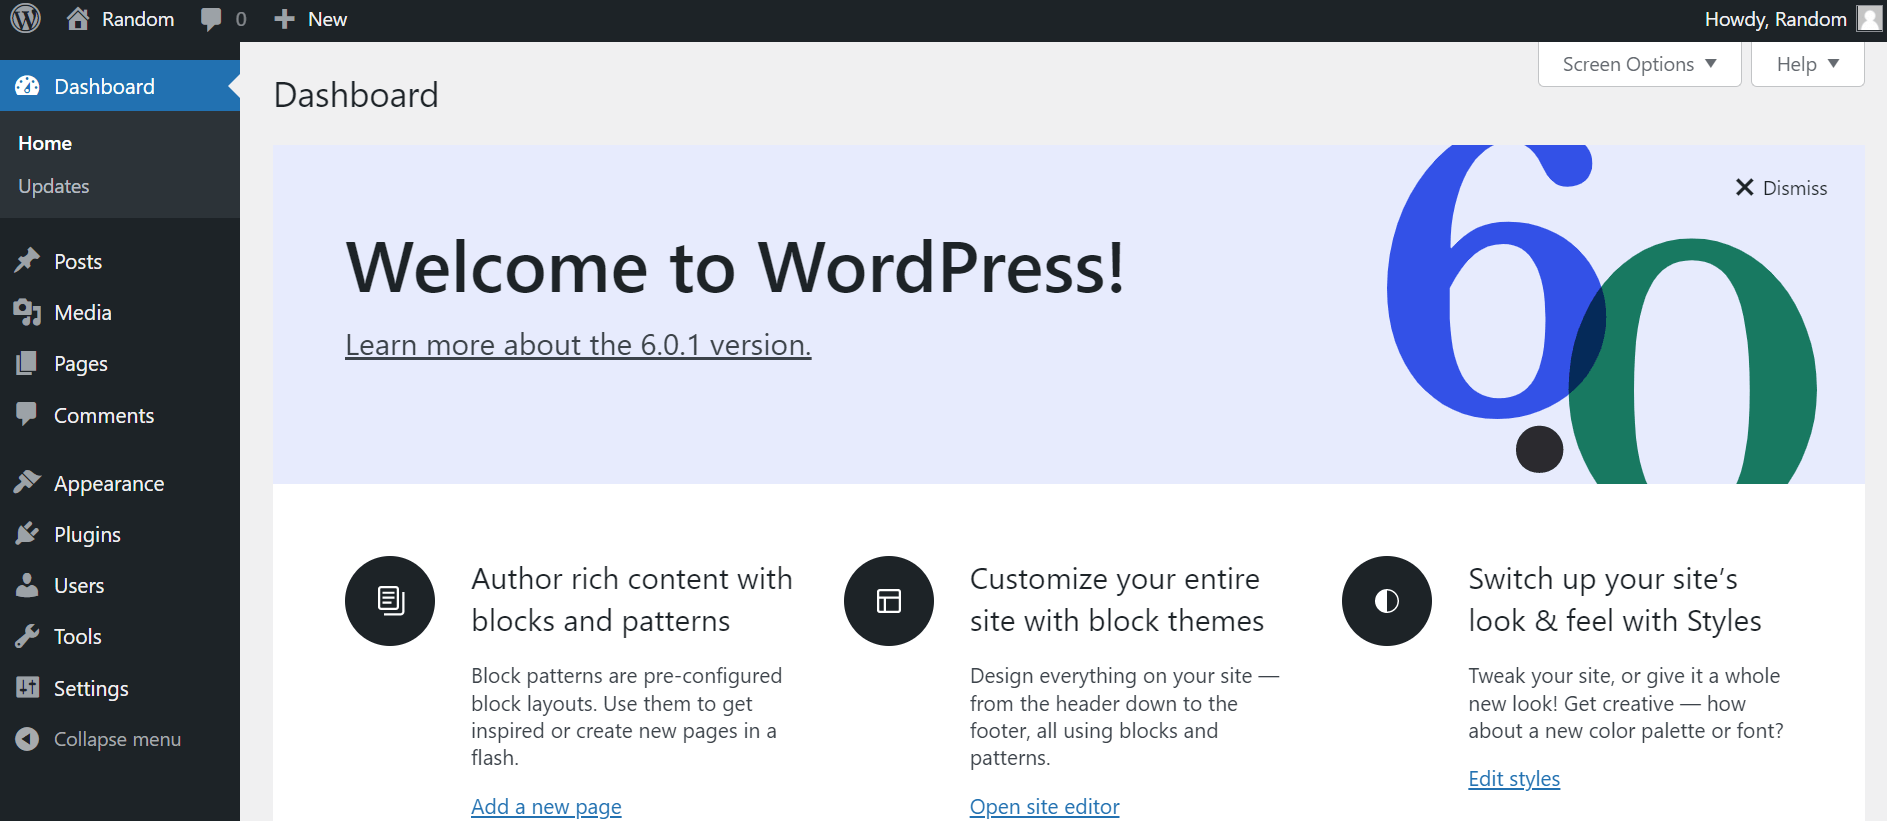
Step 2: Head over to your WordPress dashboard by entering your login credentials and hitting the “Log In” button.
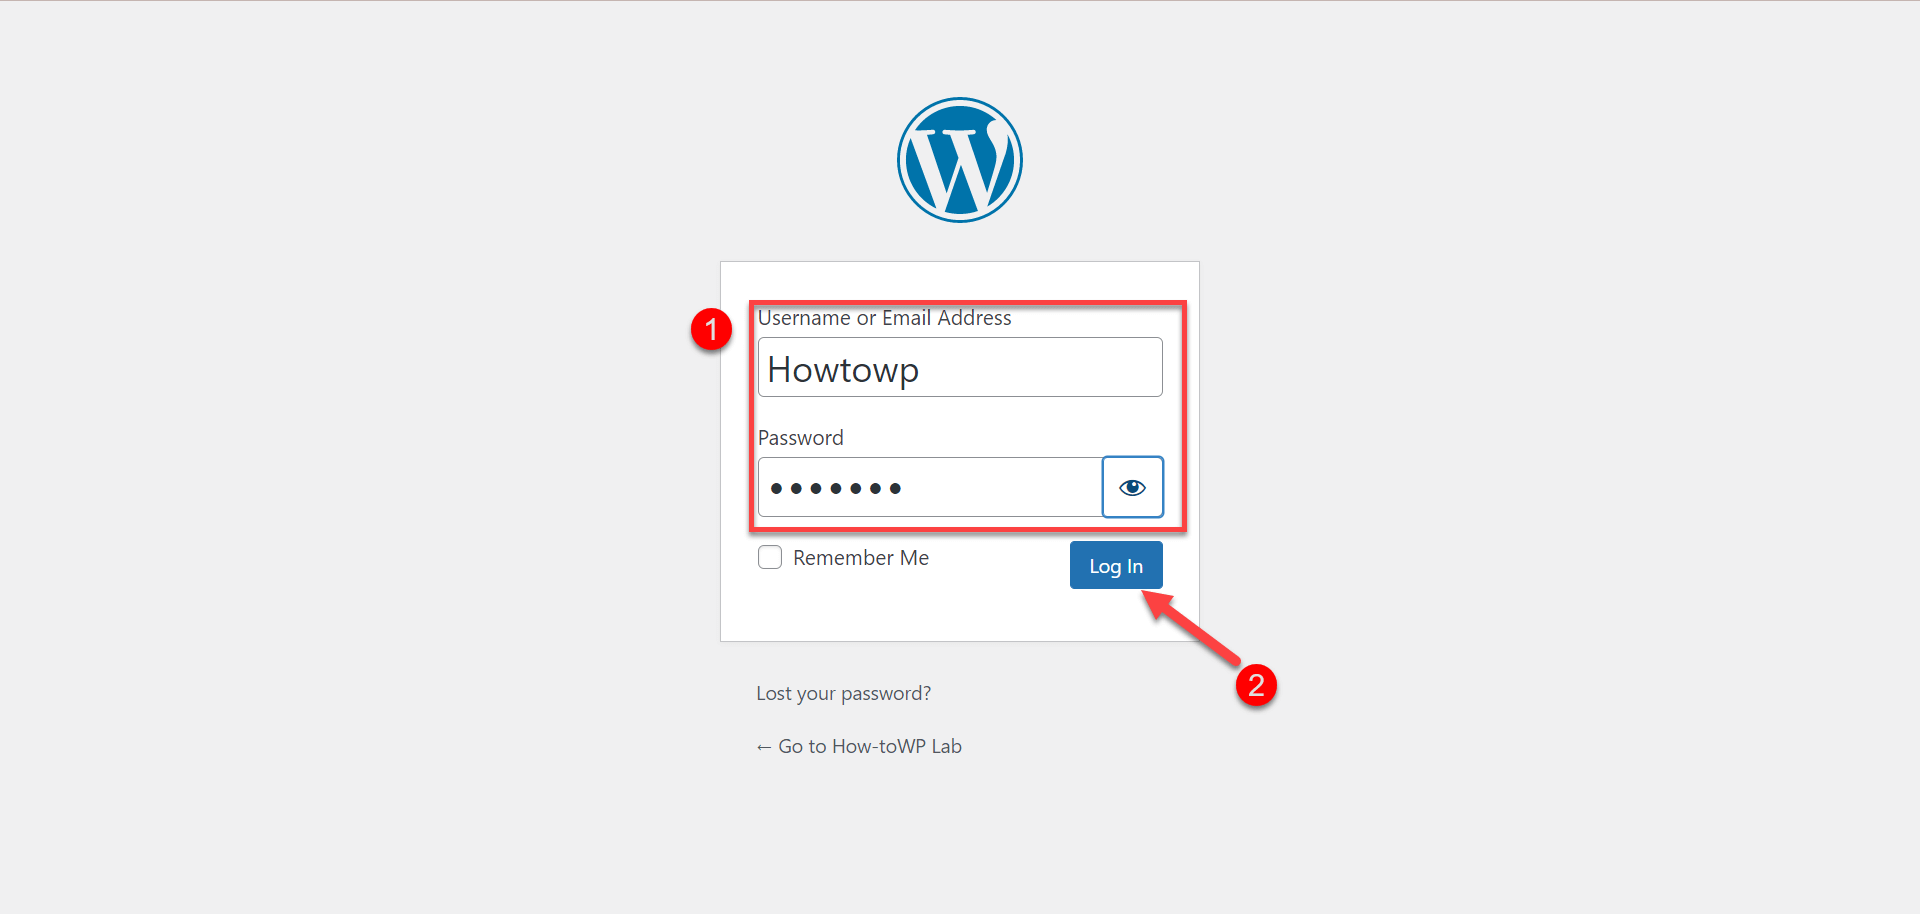
Step 3: Upon successful login, you’ll land on the central admin area of your site, known as the WordPress dashboard.
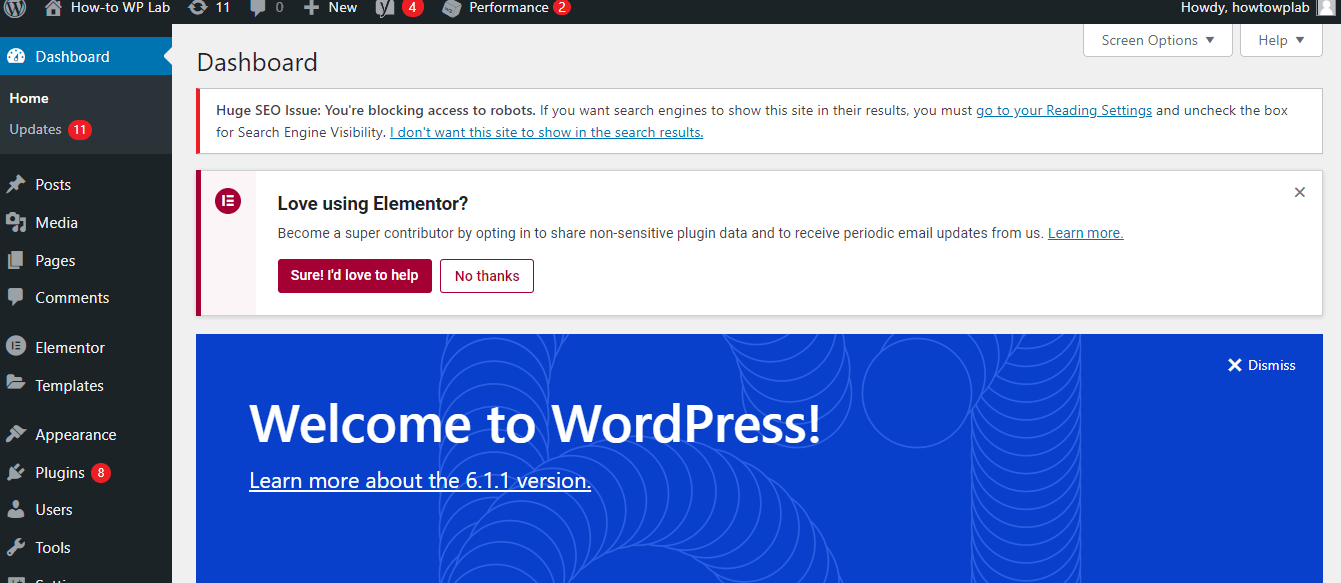
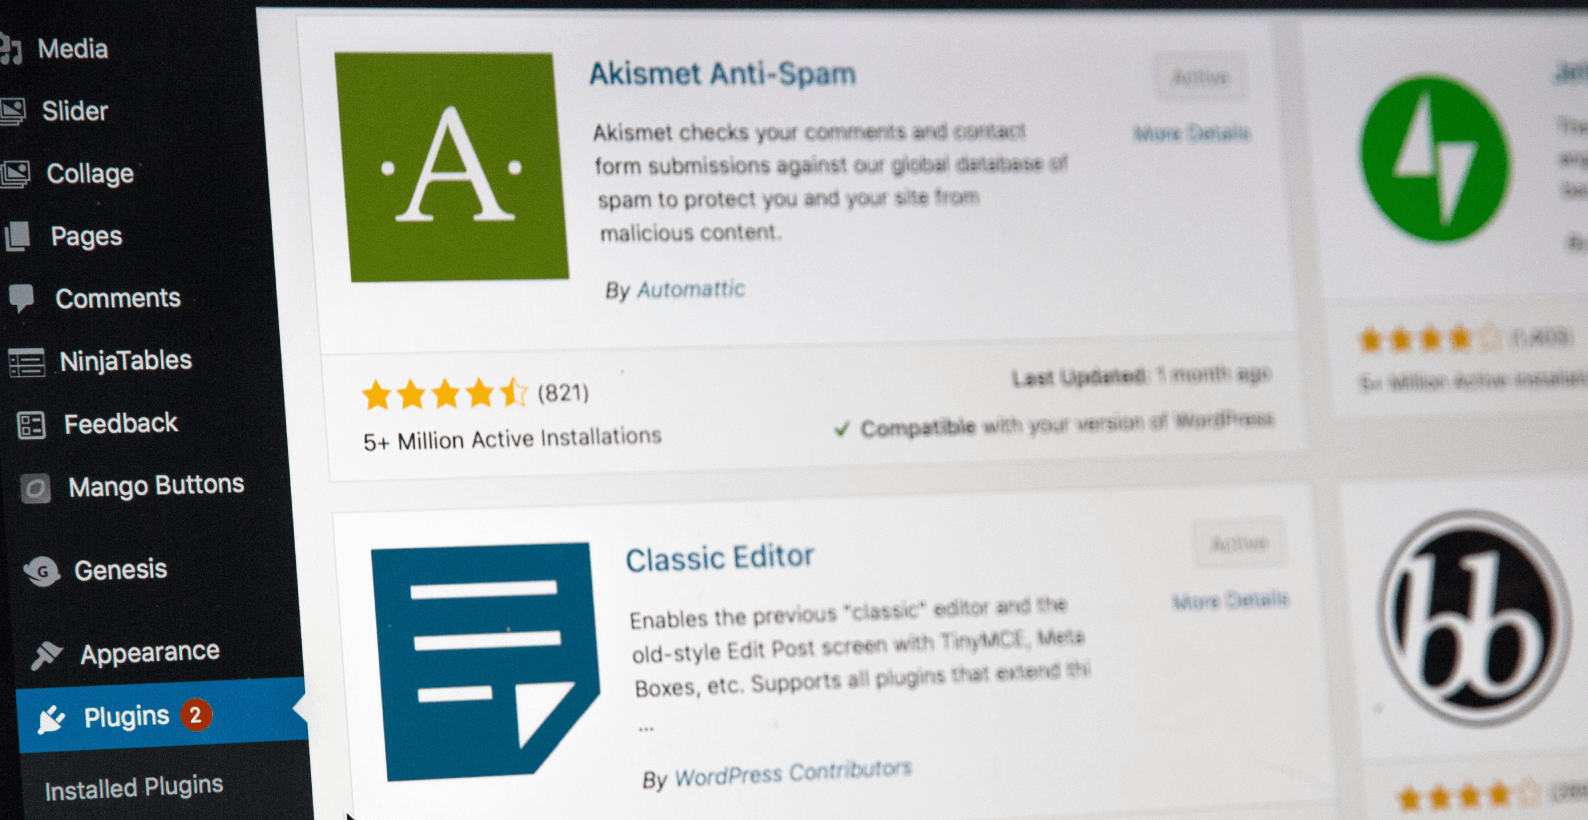
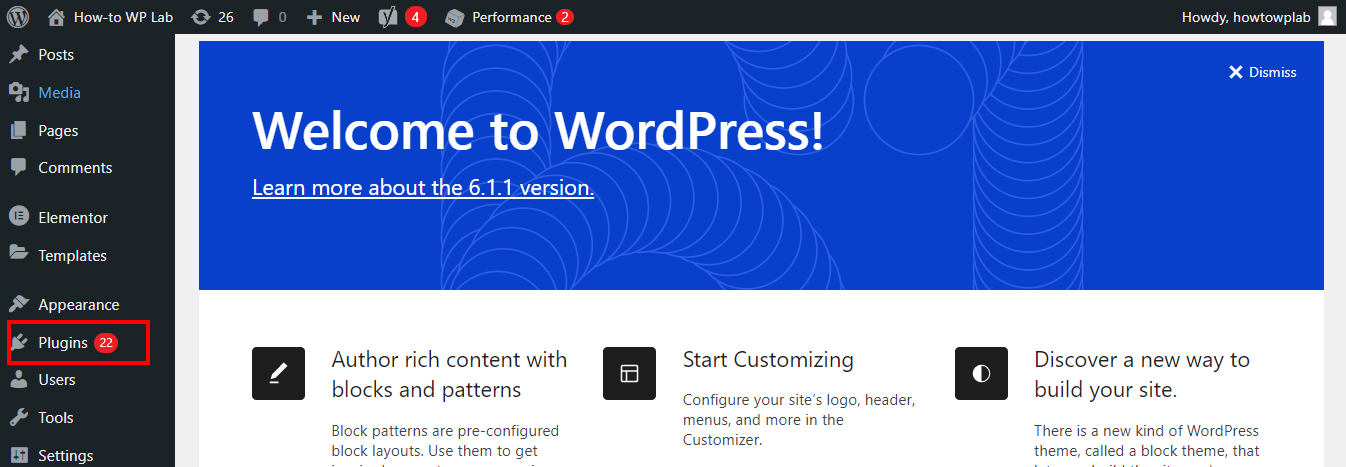
Step 4: From here, locate the “Plugins” tab on the left sidebar.
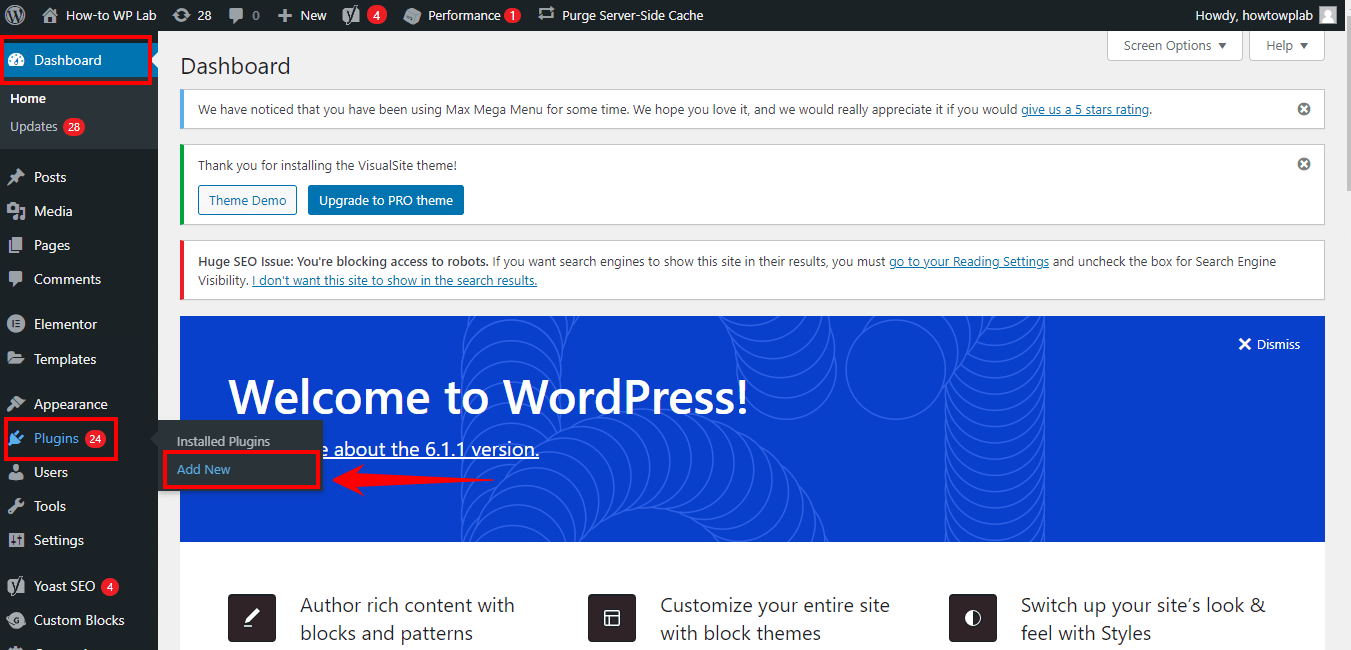
Step 5: Inside the “Plugins” area, click the “Add New” button to explore new plugins.
Step 6: Now, there’s a search functionality to your right. Type in “Yoast SEO” and press enter.
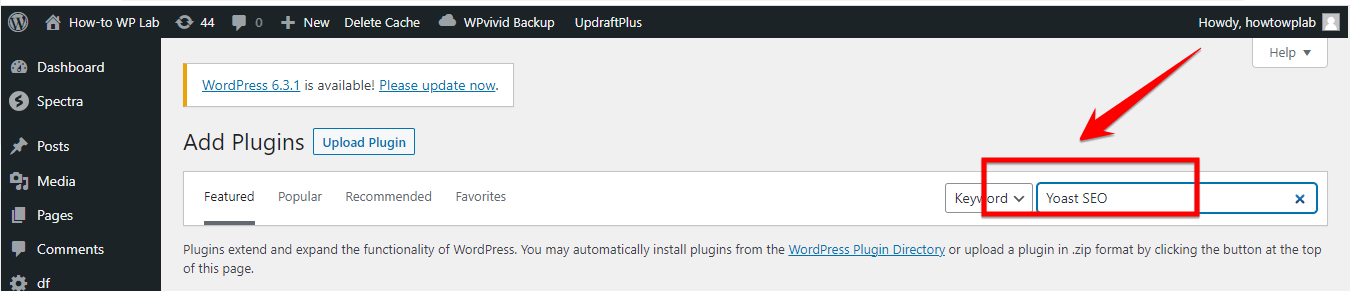
Note: Amidst the search results, watch out for the “Yoast SEO” plugin by ‘Team Yoast’. It’s a renowned SEO plugin that’s both user-friendly and effective.
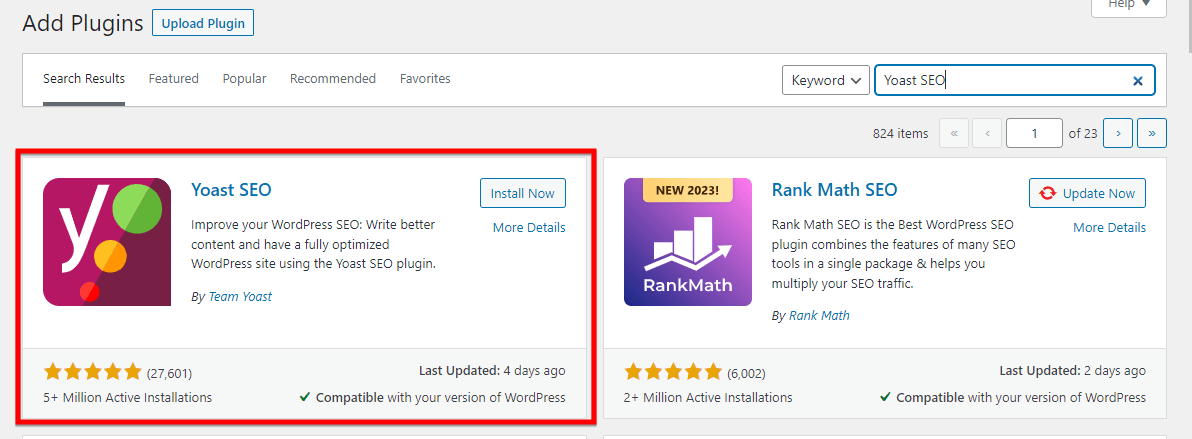
Step 7: Upon spotting the “Yoast SEO” plugin, hit the “Install Now” button beside it. WordPress will handle the rest, downloading and setting up the plugin.

Step 8: Post-installation, the button’s label will transform to “Activate.” Make sure to click it, turning the plugin on.

Note: Once live, you’ll spot an “SEO menu” within your WordPress dashboard, thanks to this plugin activation.
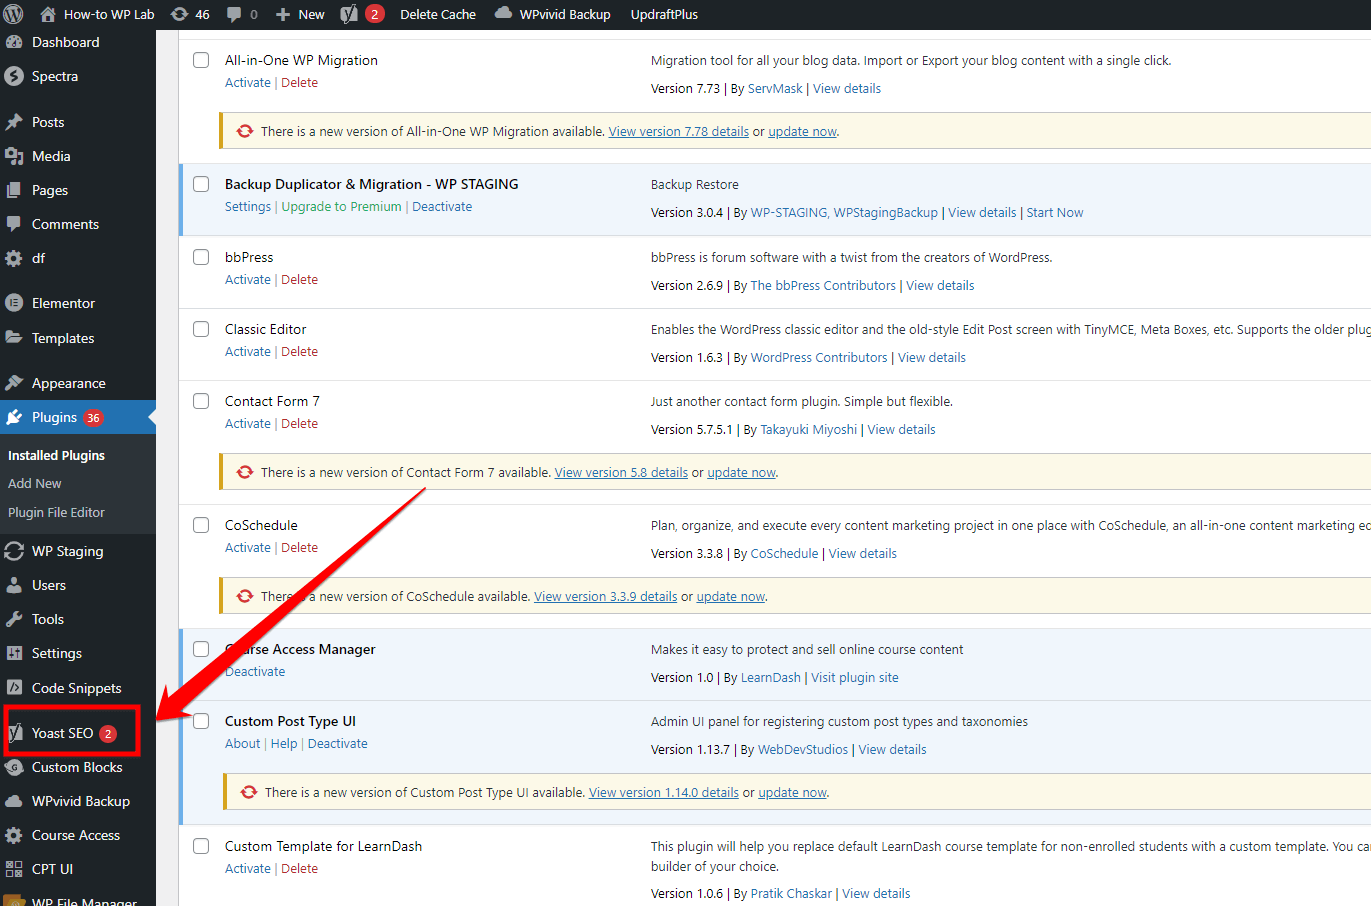
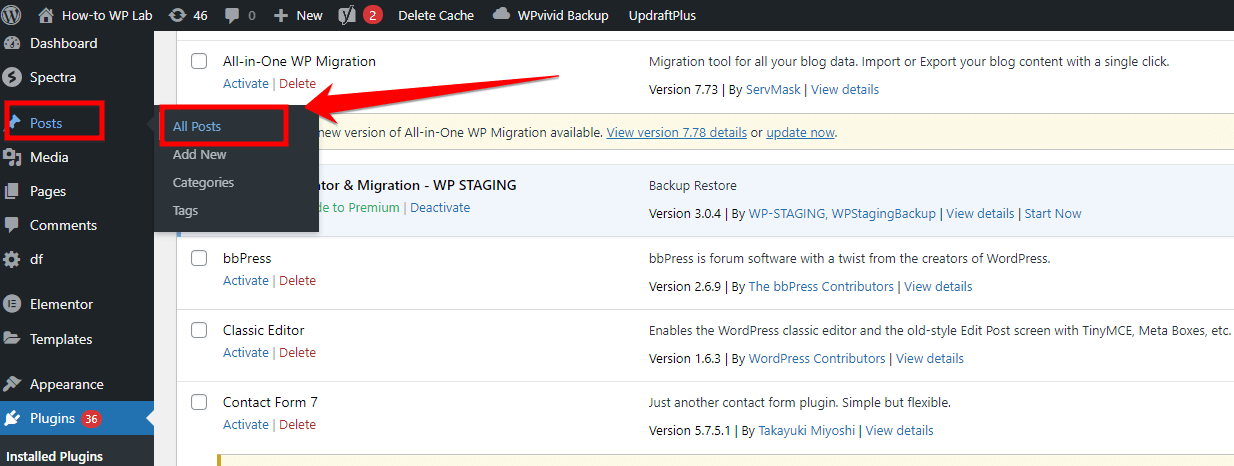
Step 9: Seek out the posts section within your dashboard and select “All Posts”. This hub is home to your range of posts, both published and in draft.
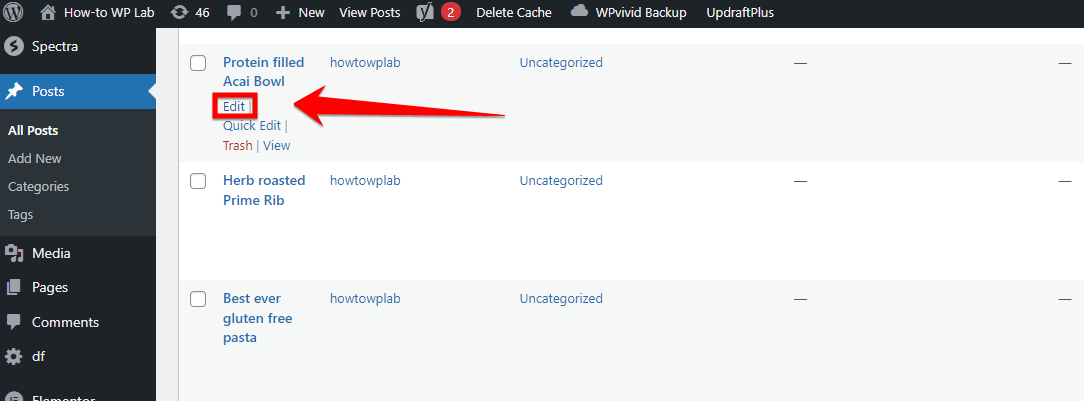
Step 10: Choose any post you’d like to tweak and select “Edit”.
Step 11: As you make edits, you’ll notice an additional settings box at the post’s end.
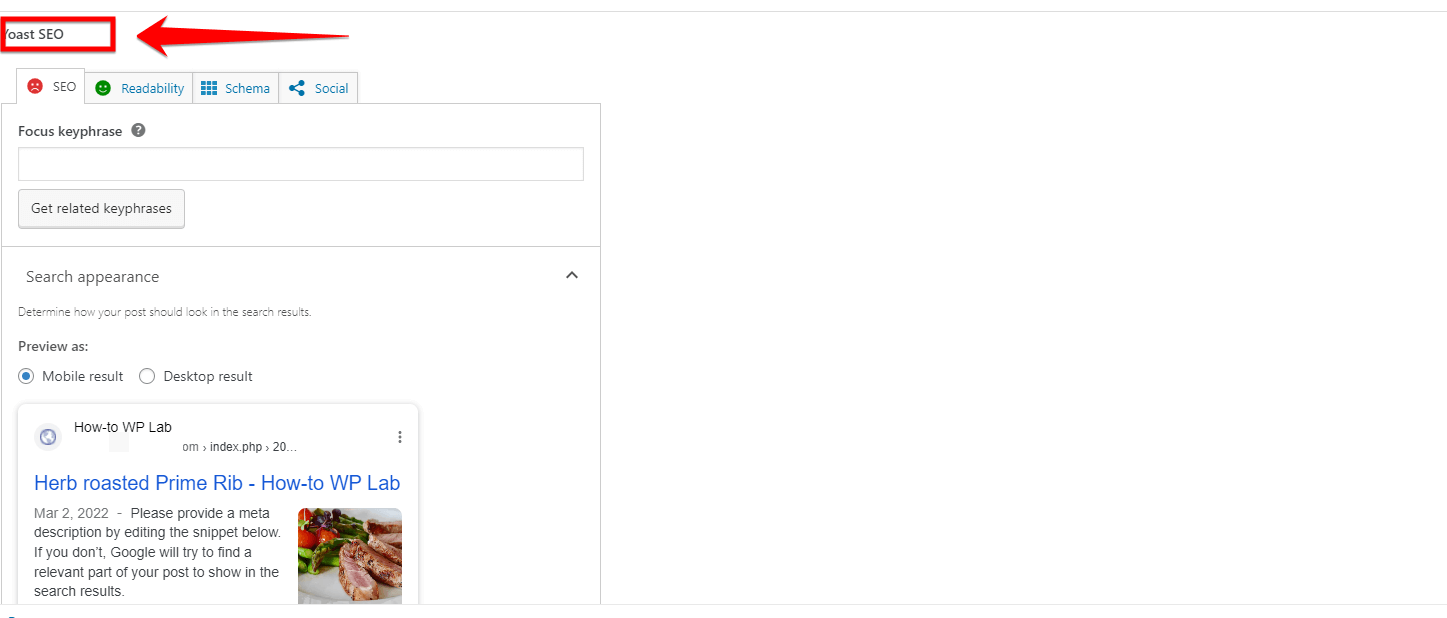
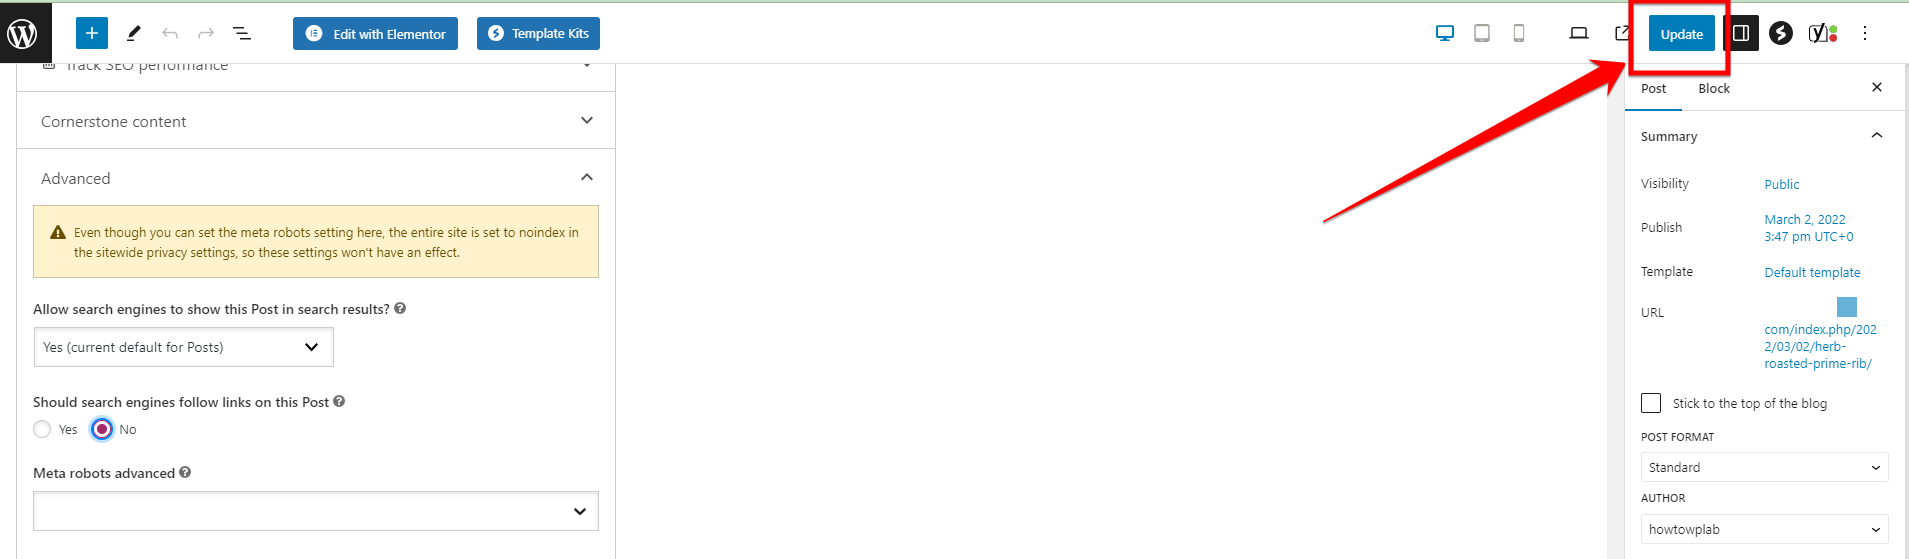
Step 12: Navigate to the section introduced by the new addition. From there, simply scroll down. You’ll eventually come across the ‘Advanced’ tab, which is what you’re looking for.
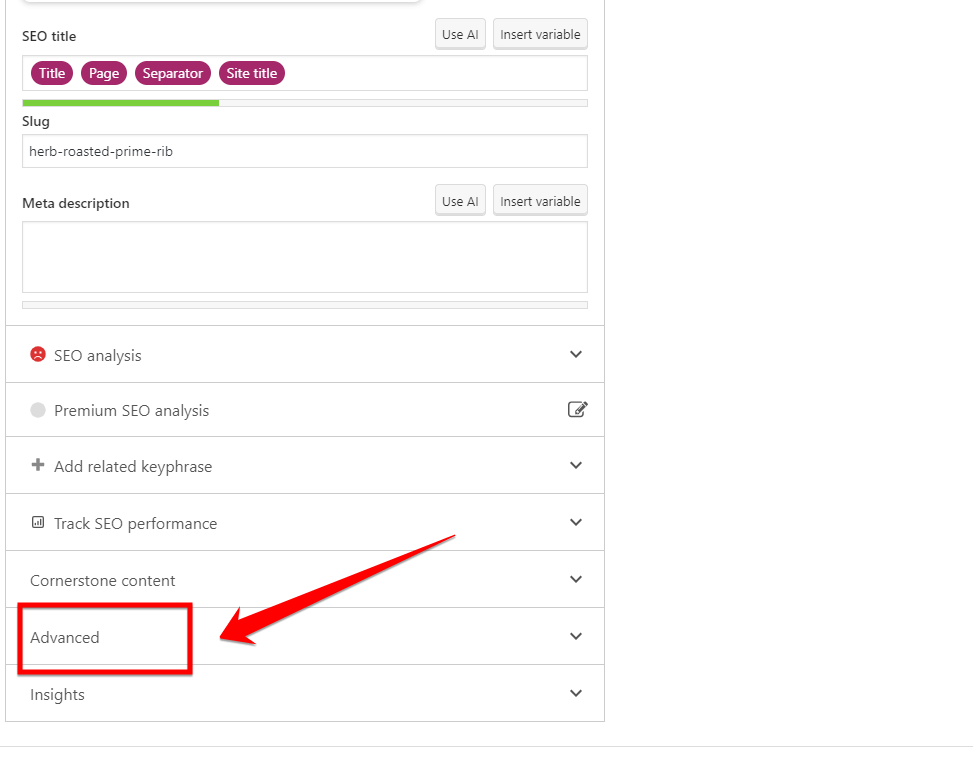
A Pro Tip: Here, a crucial setting awaits your attention. Specifically, you’ll want to observe the “Allow search engines to show this Page in search results” option.

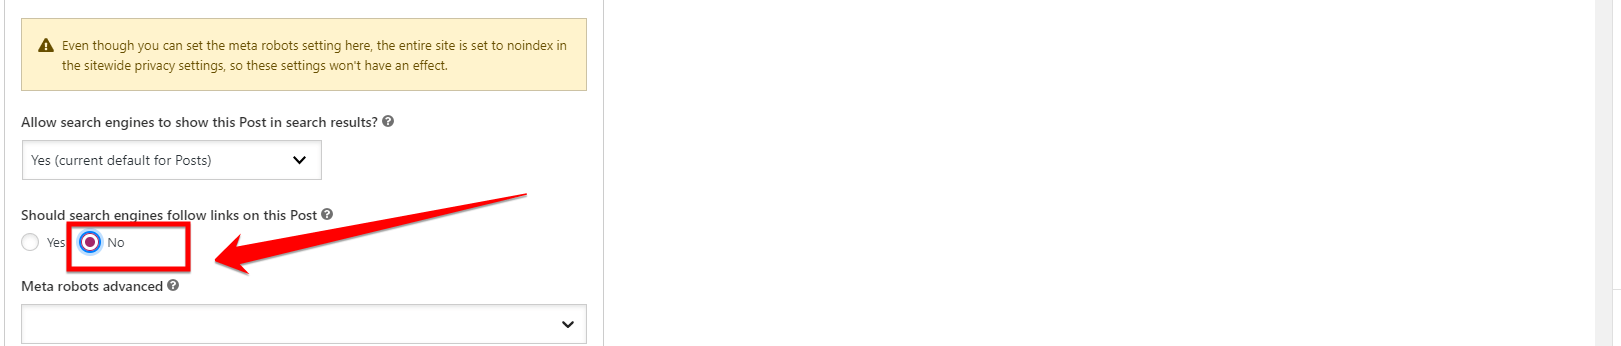
Step 13: This setting offers a dropdown with two choices: ‘Yes’ (the standard for all pages) and ‘No’ (to prevent search engines from indexing your page).
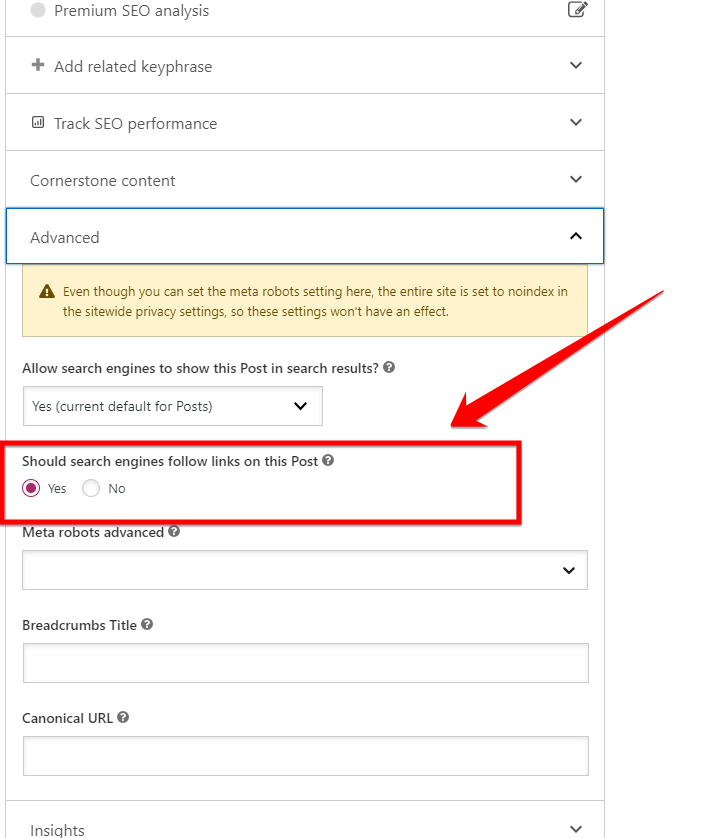
A Pro Tip: To effectively hide your WordPress page from search engine views, select “No”.
Step 14: Having made your adjustments, hit the “Update” button, saving the modifications in place.
Benefits:
- User-friendly Interface: Yoast SEO offers a clean and intuitive interface, making it simple even for beginners.
- Effective SEO Tool: Aside from hiding pages, Yoast provides robust SEO functionalities.
- Granular Control: You can decide which pages or posts to hide without affecting others.
- Reputable Plugin: Yoast SEO is a trusted name in the WordPress community, ensuring reliability.
- Regular Updates: The plugin receives regular updates, ensuring compatibility with the latest WordPress versions.
Drawbacks:
- Might be Overkill: If you only need to hide pages and don’t require SEO functionalities, Yoast might offer more than you need.
- Requires Additional Setup: For first-timers, setting up Yoast SEO might involve a slight learning curve.
Hiding pages on WordPress is a versatile task, with multiple methods catering to various needs. Whether you’re an SEO enthusiast, a privacy advocate, or just someone needing to keep certain content under wraps, there’s a way to do it.
Method 1, leveraging the Yoast SEO plugin, offers both the benefits of an SEO tool and the capability to hide specific pages. By following the outlined steps, you can ensure certain pages remain hidden from search engine results, allowing for greater control over your site’s visibility.
Method 2: Hide Pages in WordPress Using Your Robots.txt File
Robots.txt is a standard used by websites to direct web robots about which pages should not be processed or scanned. Unlike the Yoast SEO method, which primarily focuses on keeping a page from search engine visibility, using the “robots.txt” file provides more extensive control by preventing web crawlers from accessing designated sections of your website entirely.
If you’re someone with a basic understanding of your website’s backend or a website owner wanting a universal solution for various web crawlers, this method is your go-to. This method is particularly useful when you wish to hide multiple pages or entire sections of your website from being crawled.
Step 1: Start by finding your “robots.txt” file. An easy way to check if it exists is by entering “yourdomain.com/robots.txt” into your web browser’s address bar.
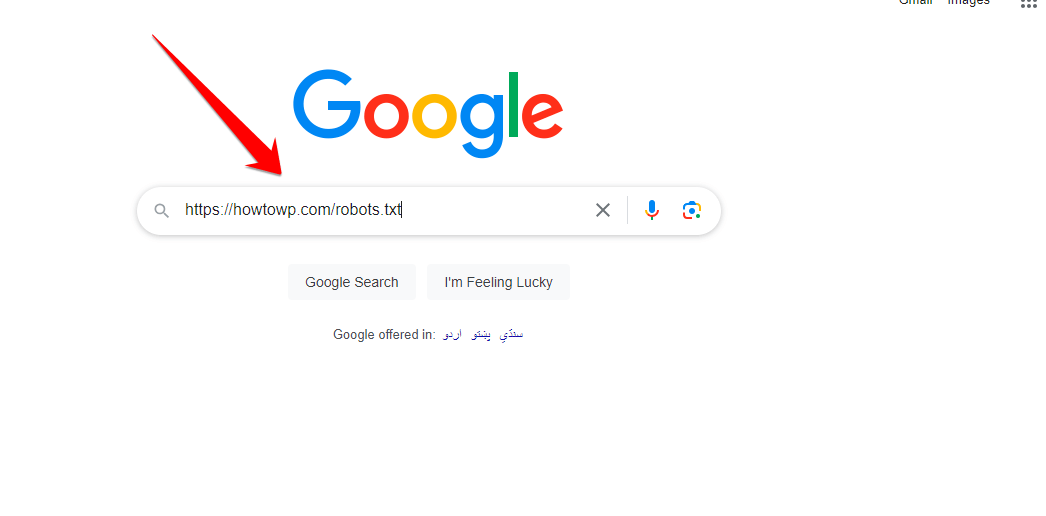
Step 2: If the “robots.txt” file displays, it confirms the existence of the file on your domain.

Let’s pause for a moment to understand the “robots.txt” file better.
Robots.txt files play a pivotal role in directing web-crawling software on which parts of your site they can or cannot scan. These instructions are set using “allow” or “disallow” directives for specific or all user agents.
For instance:
User-agent: *
Disallow: /
- “User-agent: *” followed by “Disallow: /” tells all user agents, including Googlebot, to refrain from accessing any part of the site.
- Conversely, “User-agent: Googlebot” followed by “Allow: /” grants Googlebot full access.
Your website might have its unique “robots.txt” instructions. Now, let’s dive into how to add specific pages to this file.
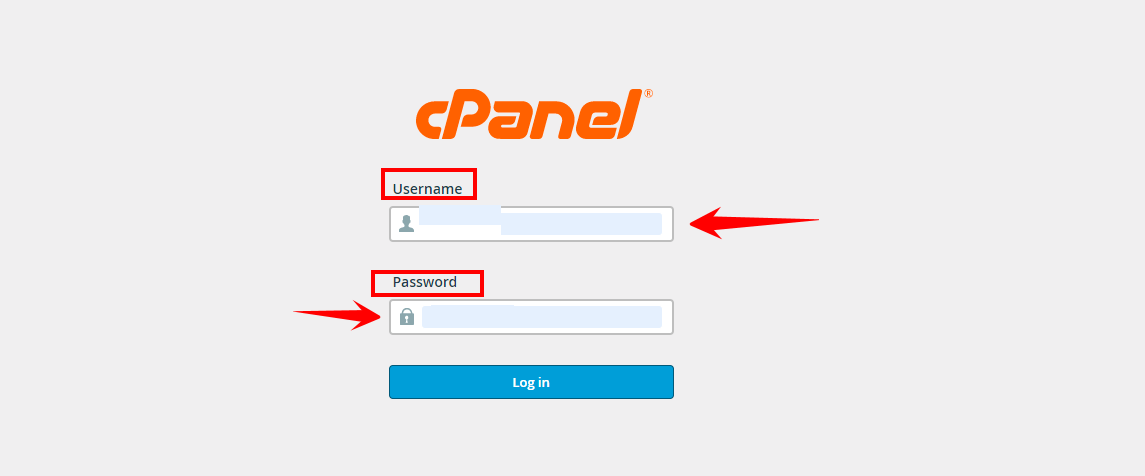
Step 3: Access your hosting cPanel by logging in with your credentials.
Step 4: After logging in, search for and click on “File Manager.”
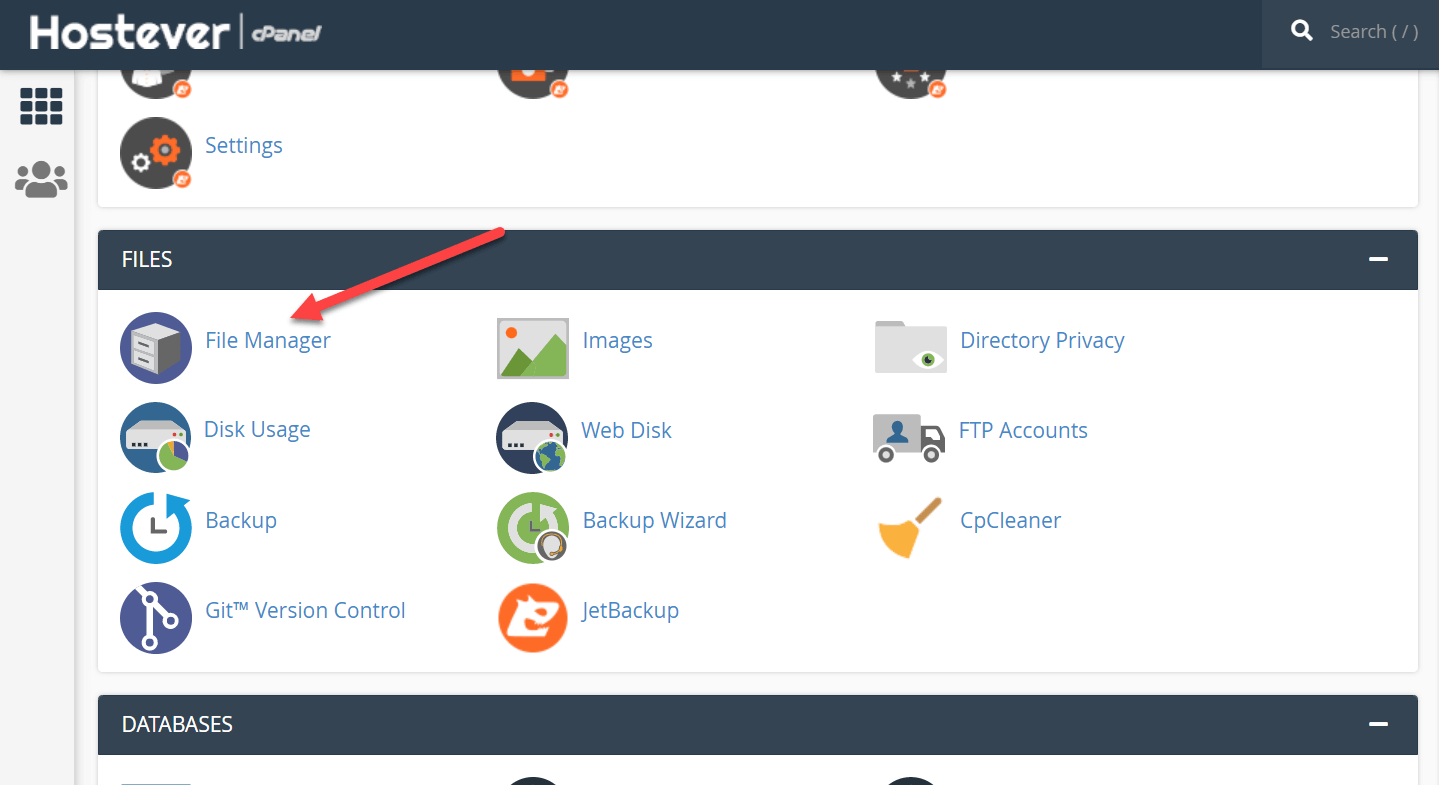
Note: If you’re familiar with FTP, you can also use it to access your files.
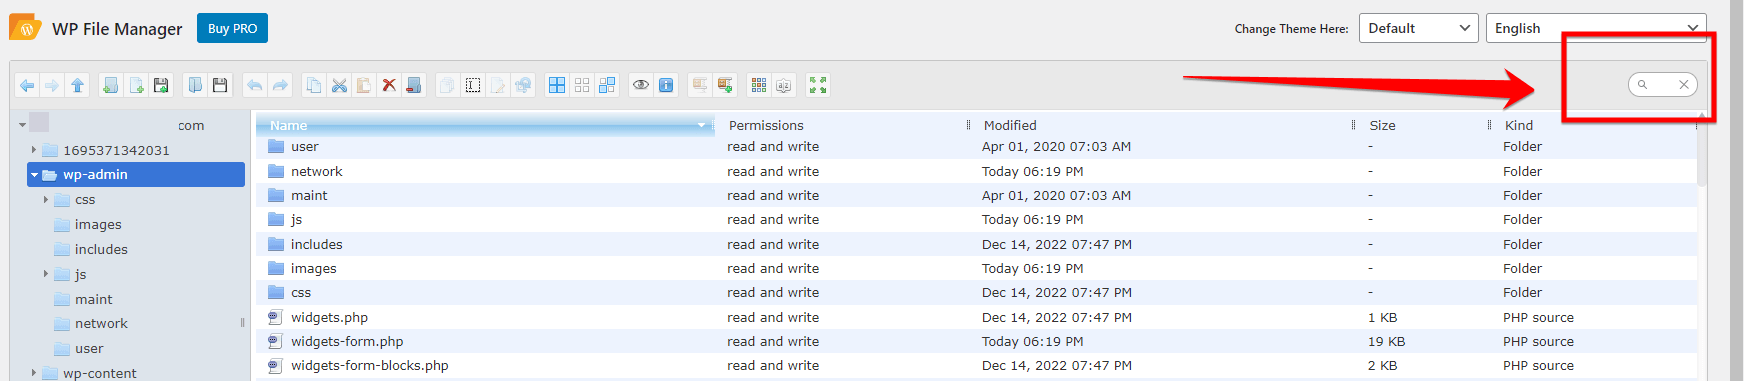
Step 5: Within “File Manager,” hunt for the “robots.txt” file.
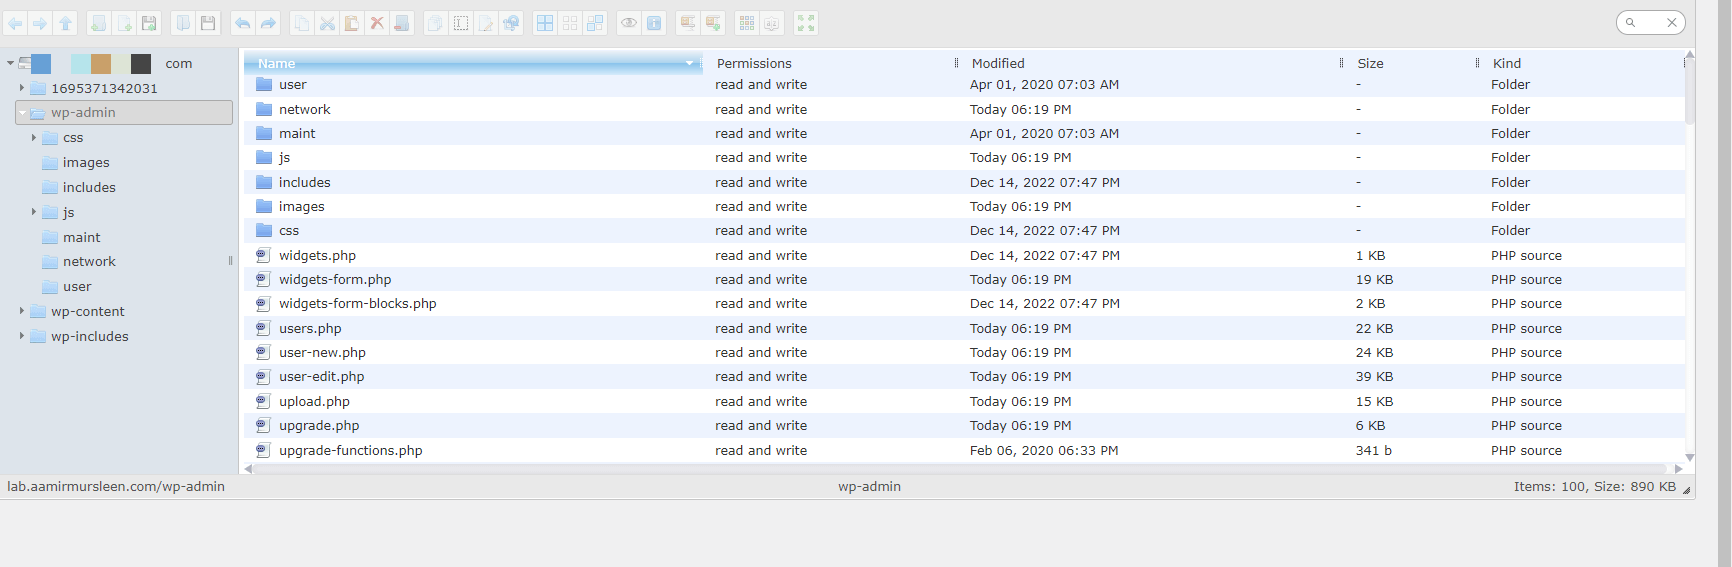
A Pro Tip: Utilize the search bar, usually at the top right, to quickly find files.
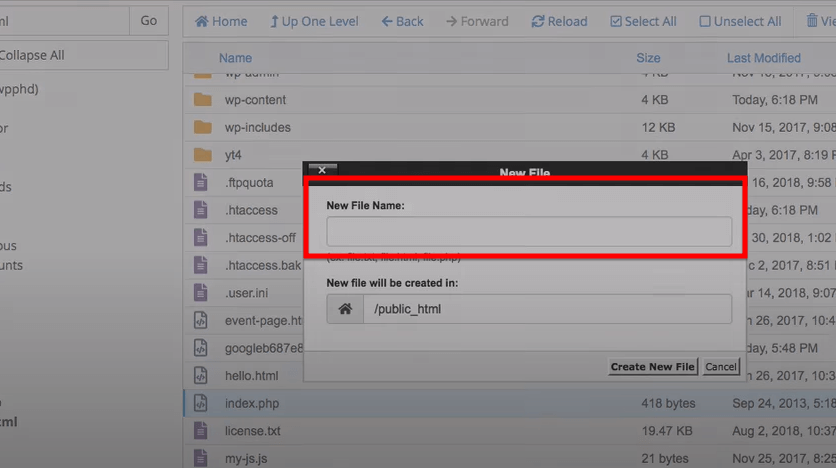
Step 6: If you can’t locate the “robots.txt” file (it happens sometimes!), you can create a new one. Click on “+ File”, typically located at the top left corner.

Note: A popup will appear, prompting for a file name. Simply enter “robots.txt” and proceed to create the new file.
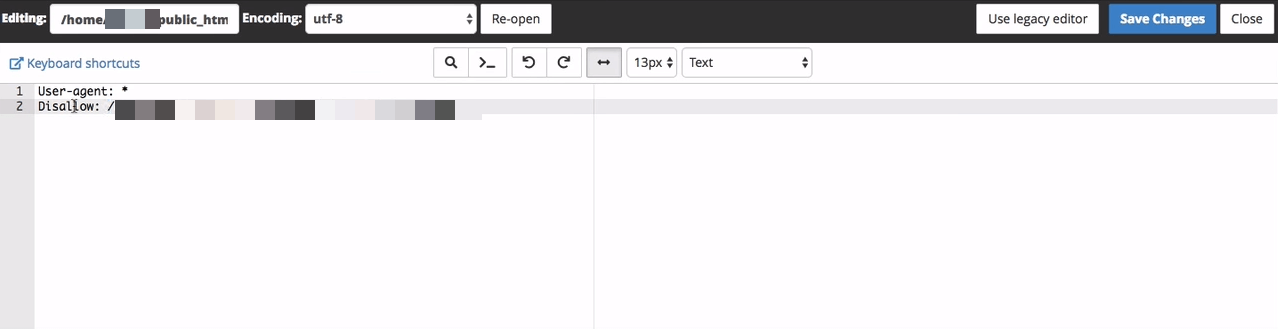
Step 7: Once you’ve either found or created the “robots.txt” file, select it and click on “Edit.”
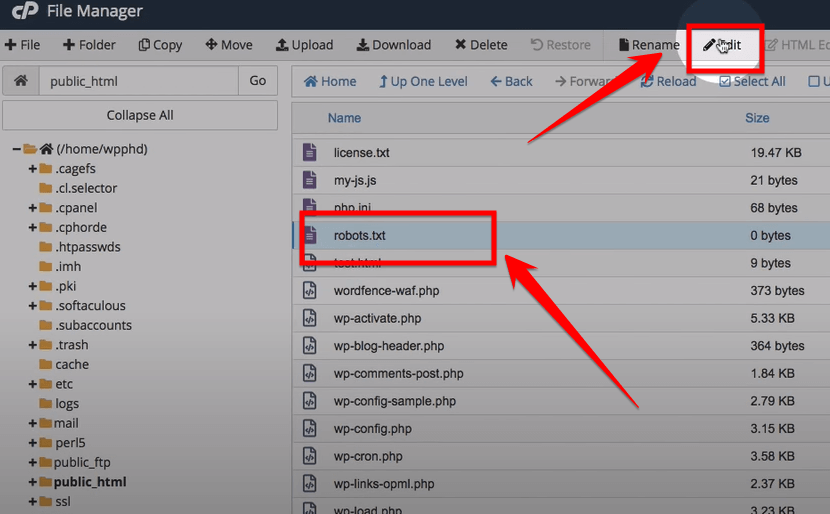
Note: For instance, if you wish to prevent web crawlers from accessing “http://example.com/my-page-url/”, you’d include:
User-agent: *
Disallow: /my-page-url/
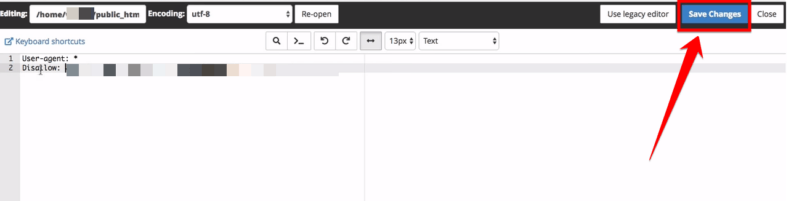
Step 8: After making your modifications, click on the “Save Changes” button. If you made these changes locally, ensure you also upload the modified file back to your server.
⚠️ Caution: While many search engines honor “robots.txt” directives, it’s worth noting that the file is public. This means anyone can see which sections of your site you’re opting to shield. Moreover, not all search engines might respect the disallowed directives.
Benefits:
- Universal Application: This method affects various web crawlers, not just search engines.
- Control Over Multiple Pages: Perfect for hiding multiple pages or sections at once.
- No Need for Plugins: Eliminates the need for additional plugins or tools.
- Quick Implementation: Changes reflect as soon as the file is saved and re-crawled.
- Extensive Flexibility: You can set directives for specific bots or all of them.
Drawbacks:
- Public File: Anyone can view your “robots.txt”, revealing the parts you’re trying to hide.
- Not Always Respected: Some crawlers might ignore the disallow directives.
Using the “robots.txt” file is a powerful method to exercise control over how web crawlers interact with your WordPress website. While it provides extensive flexibility and is universal in its application, it’s crucial to handle it with care, given its public nature and varying respect from different web crawlers.
Always double-check the directives you add, ensuring they align with your goals, and be aware of the inherent transparency this method offers.
Method 3: Hide a Page by Setting the Visibility to Private
Every WordPress user cherishes the platform’s innate flexibility. Among its myriad features, WordPress allows users to alter a page or post’s visibility. One such setting is the “Private” visibility option, which restricts content access to specific user roles, namely administrators and editors.
This method is ideal for users who wish to keep certain content restricted within their team or for personal references. For those not wanting to fiddle with plugins or backend files, adjusting the visibility directly from the WordPress dashboard is a straightforward solution.
Here is how to do it:
Step 1: First and foremost, access your WordPress dashboard by logging in. If you aren’t already logged in, do so now.
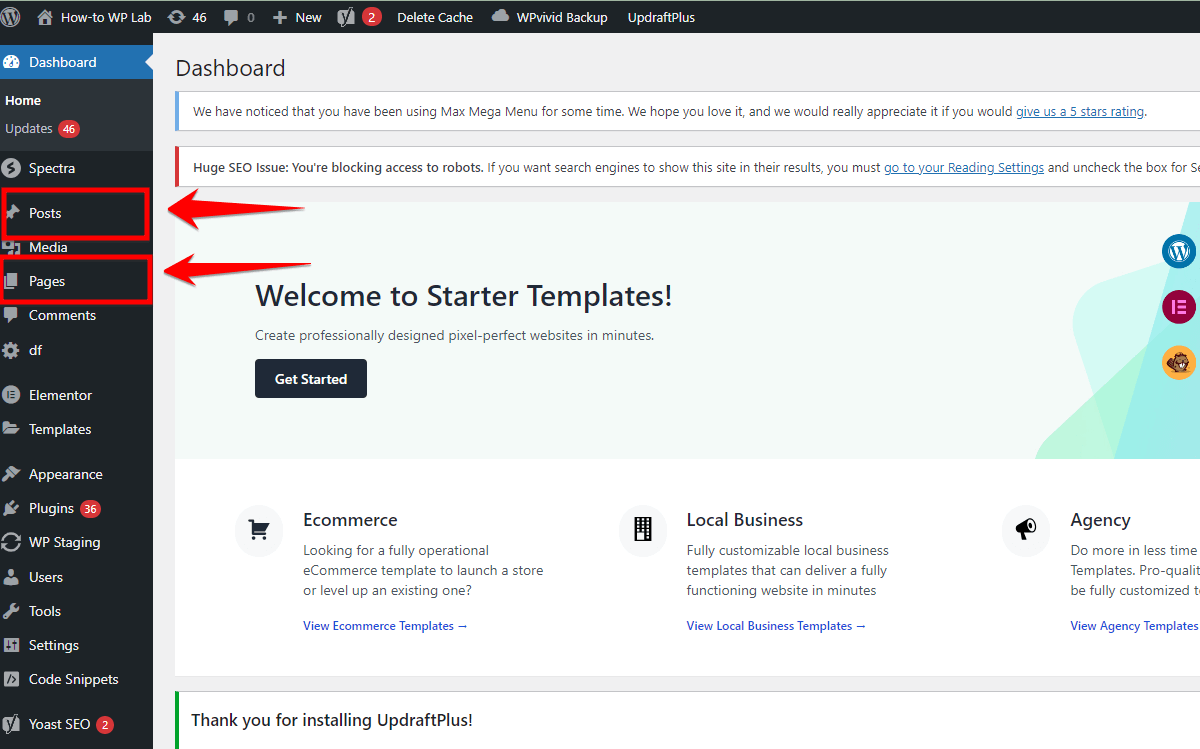
Step 2: Direct your attention to the “Posts” tab on the left sidebar. Click on it, then choose “All Posts” to view the list of your published content.
Step 3: Within the list, identify the post you’d like to adjust and select the “Edit” button associated with it.
Step 4: With the post editor open, locate the “Settings” icon—typically found in the upper right corner—and click on it to unveil the settings pane.
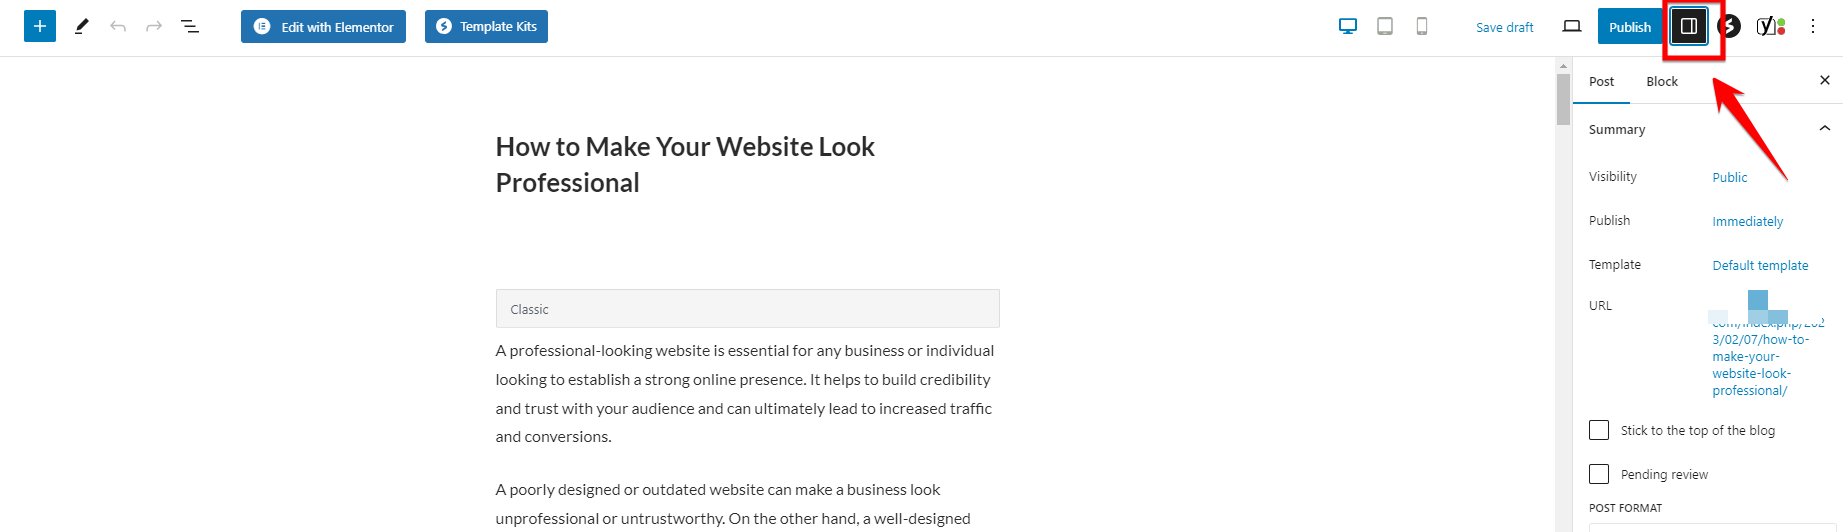
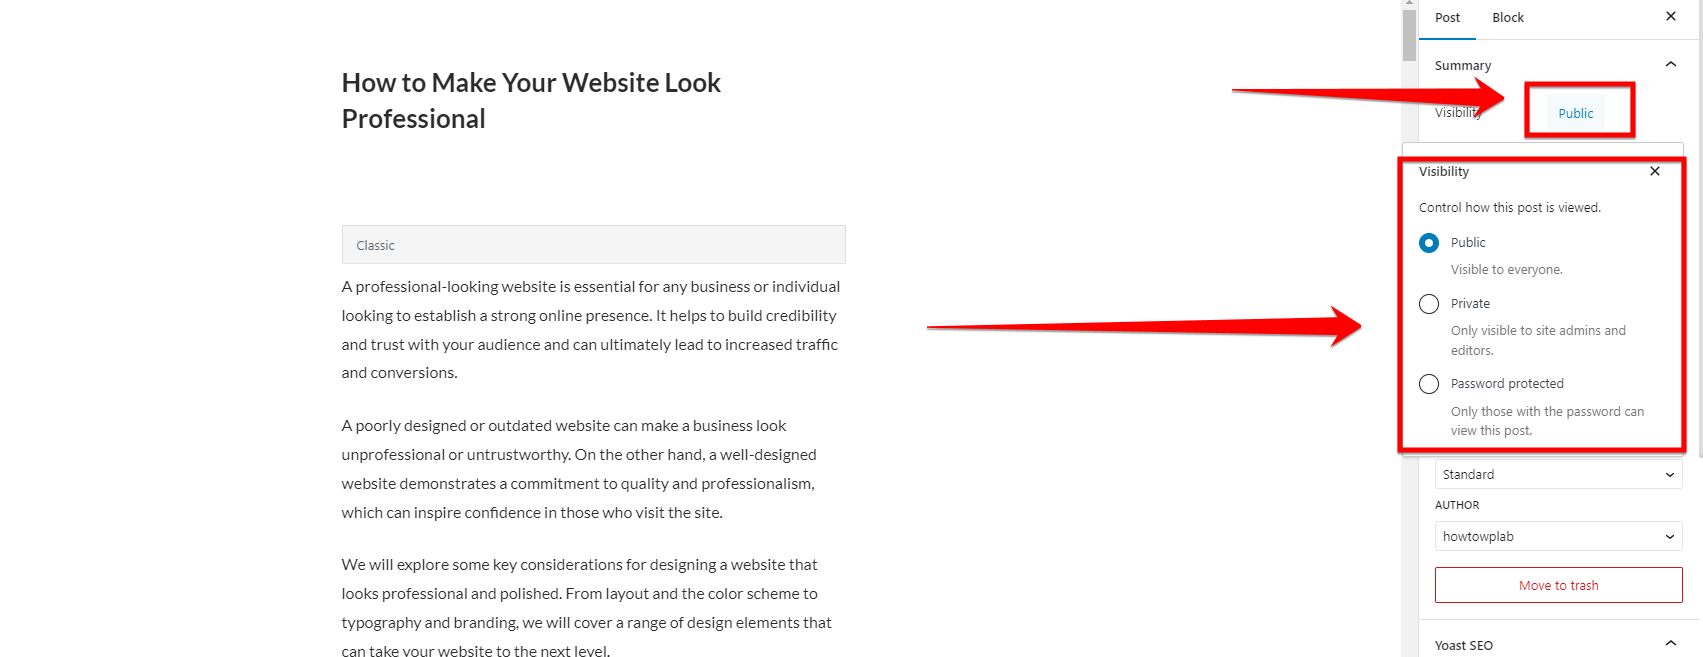
Step 5: The settings pane will present several options. Your target is the “Visibility” option. Navigate to it.
A Pro Tip: Familiarize yourself with the settings pane as it contains many useful post customization options.
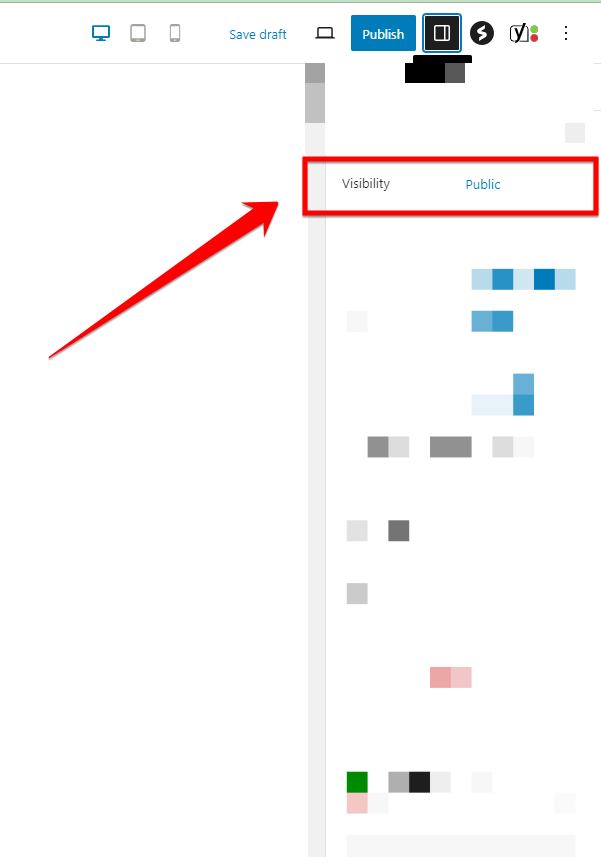
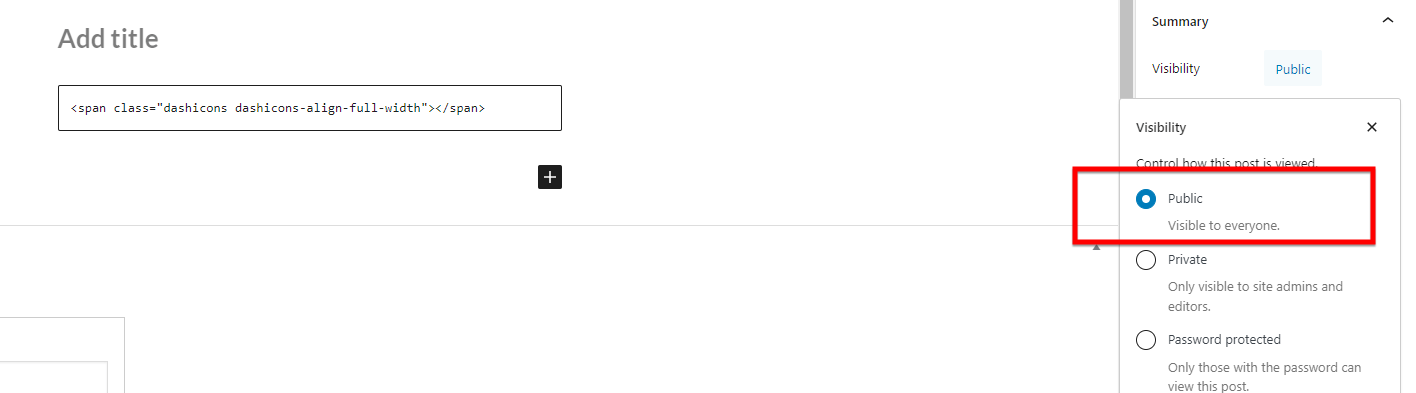
Step 6: Next to “Visibility,” the default setting will likely be “Public.” Click on it, and a dropdown will appear showcasing three distinct choices:
- Public: Visible to everyone.
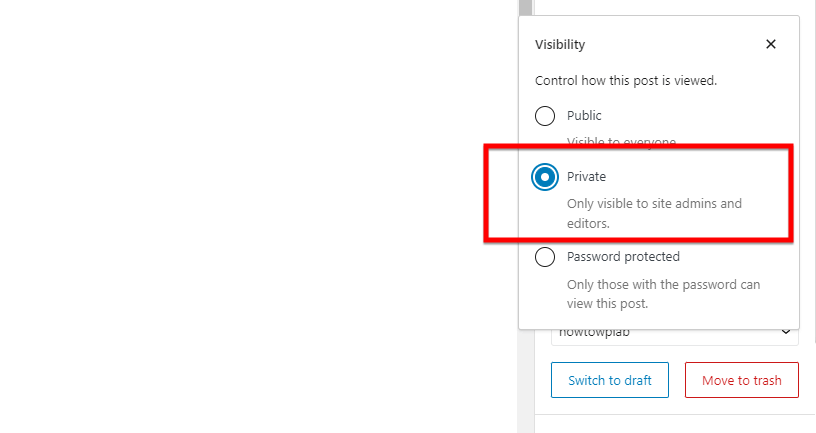
- Private: Only visible to site admins and editors.
- Password Protected: Only those with the password can view this post.
Note: The initial setting for most posts under “Visibility” is “Public.”
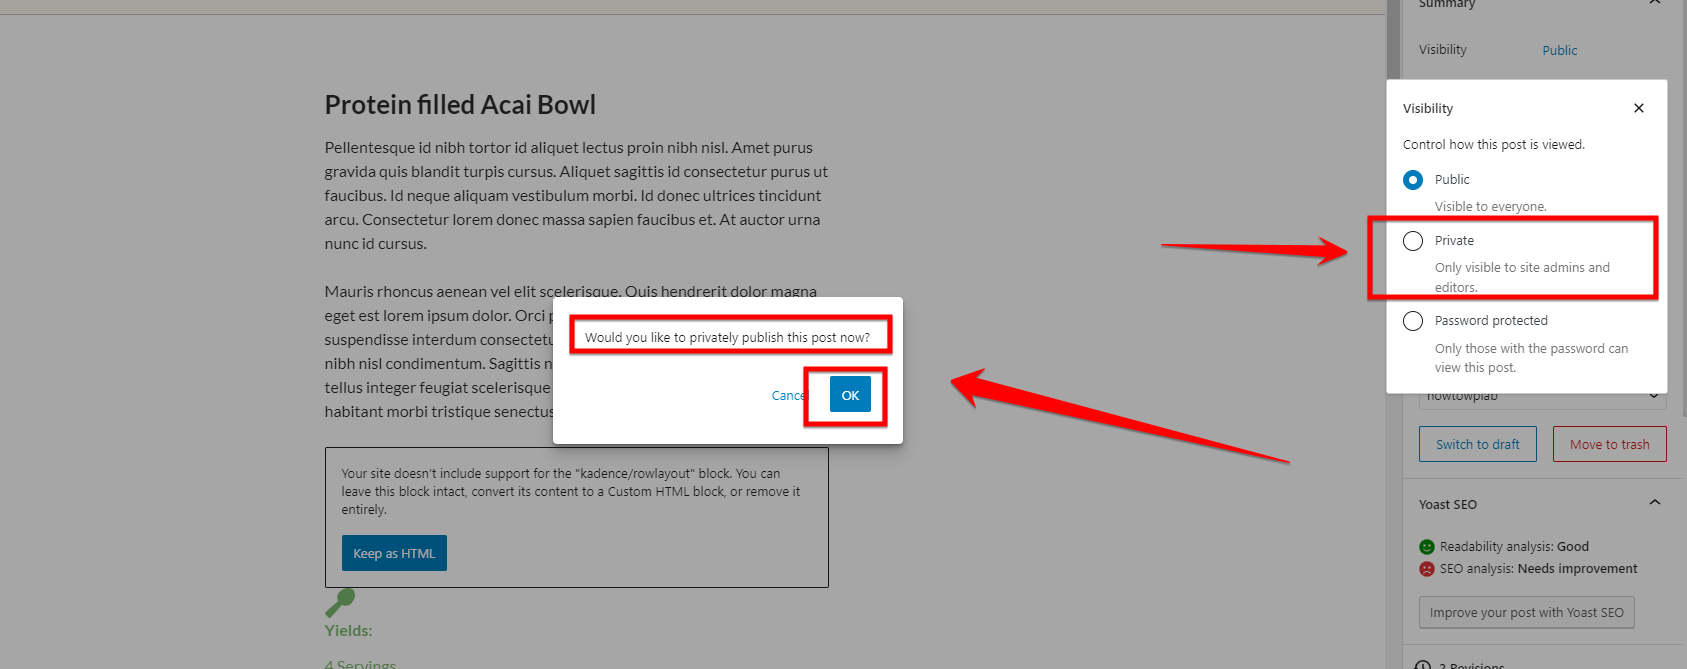
Step 7: With this method in mind, select the “Private” option for the visibility of your post or page.
Note: Upon choosing the “Private” setting, you’ll encounter a popup with a message like, “Would you like to privately publish this post now?” To confirm your choice, click on the “Ok” button.
⚠️ Caution: Remember, when setting a post to “Private,” any images or media within the post remain accessible to the public.
Step 8: After making your desired changes, finalize by hitting the “Update” button to ensure your post’s new settings are saved and applied.
Benefits:
- User-friendly: An intuitive method requiring no technical knowledge.
- Immediate Changes: The updates take effect instantly upon saving.
- Built-in Feature: No need for additional plugins or tools.
- Restricted Access: Ideal for internal content or drafts.
- Dashboard Access: Everything is managed from the WordPress dashboard for ease.
Drawbacks:
- Media Remains Public: Images or media within the post aren’t made private.
- Limited User Access: Only WordPress admins and editors can view the content, potentially excluding other team members.
Setting a WordPress page’s visibility to private is an efficient, user-friendly method to shield content from the general audience. It’s particularly beneficial when the content is under review, contains sensitive information, or is meant exclusively for internal access.
However, users should always be cautious and aware that the content’s embedded media remains public. Ensure that you thoroughly check any associated media or links to guarantee the desired level of privacy.
Method 4: Hide a Page in WordPress by Password Protecting It
When you have a page on WordPress that contains sensitive or exclusive information, one simple way to limit its visibility is by using a password. This allows you to share the content with only those who have the password, ensuring that it remains hidden from general visitors.
Anyone who wants to keep specific pages or posts private but still needs to share them with a select few will find this method useful. It’s perfect for sharing exclusive content or sensitive data.
Ready to protect your content? Let’s dive into the step-by-step instructions, complemented by visuals, to guide you through the process.
Step 1: First, as previously discussed, log into your WordPress dashboard, ensuring you have the right permissions to modify posts and pages.
Step 2: Head over to the “Posts” or “Pages” section, based on whether you’re working on a blog post or a webpage.
Step 3: Identify the post or page you wish to adjust and select its “Edit” button.
Step 4: In the editor, spot the “Settings” icon, typically in the upper right corner, and open it to access the settings pane.
Step 5: Within the settings, find the “Visibility” option, which we previously looked at.
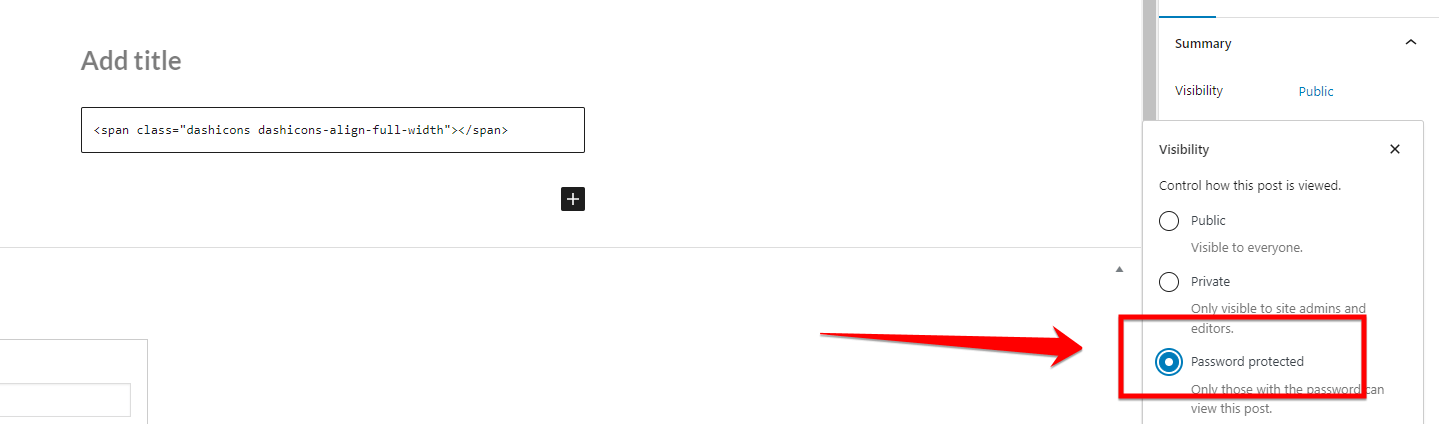
Step 6: Clicking on the “Visibility” setting, you’ll usually find it set to “Public” by default. Select this to reveal other visibility options.
Step 7: Differing from our earlier method where we chose “Private,” this time, opt for the “Password Protected” option.
Step 8: You’ll now be prompted to set a password. Input the “Password” you wish to use for this particular post or page.
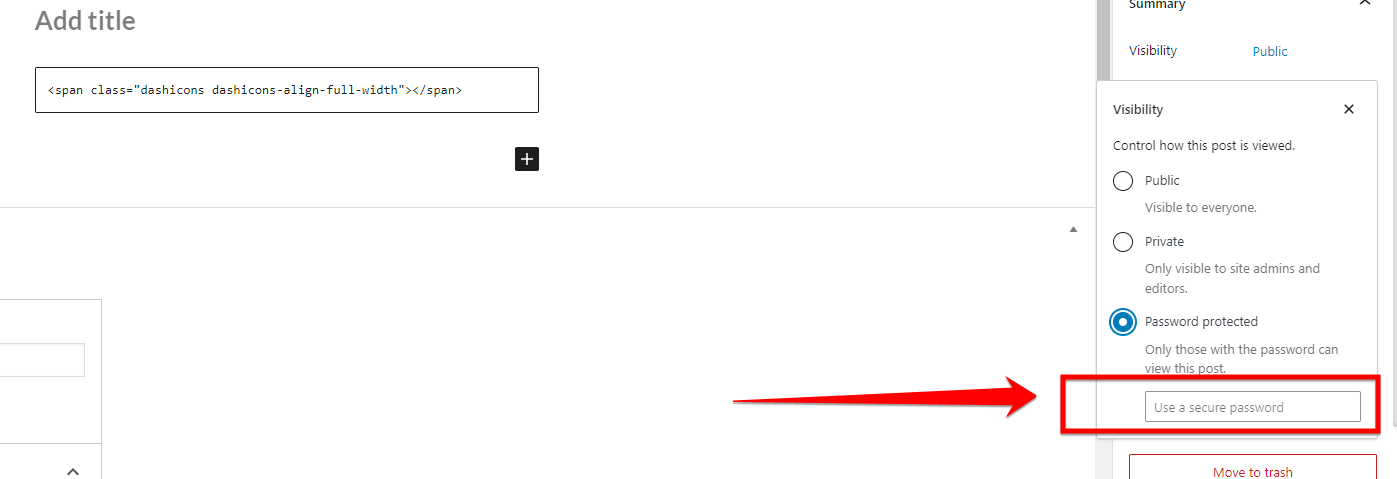
A Pro Tip: Always aim for a strong and unique combination when setting a password. Using a mix of upper and lowercase letters, numbers, and symbols can enhance password security. Avoid easily guessable words or sequences like “password123” or “abcdef.” Tools like password managers can assist in generating and storing complex passwords for added protection.
Step 9: After defining your password, always remember to click the “Update” button. This ensures your changes are saved and applied.
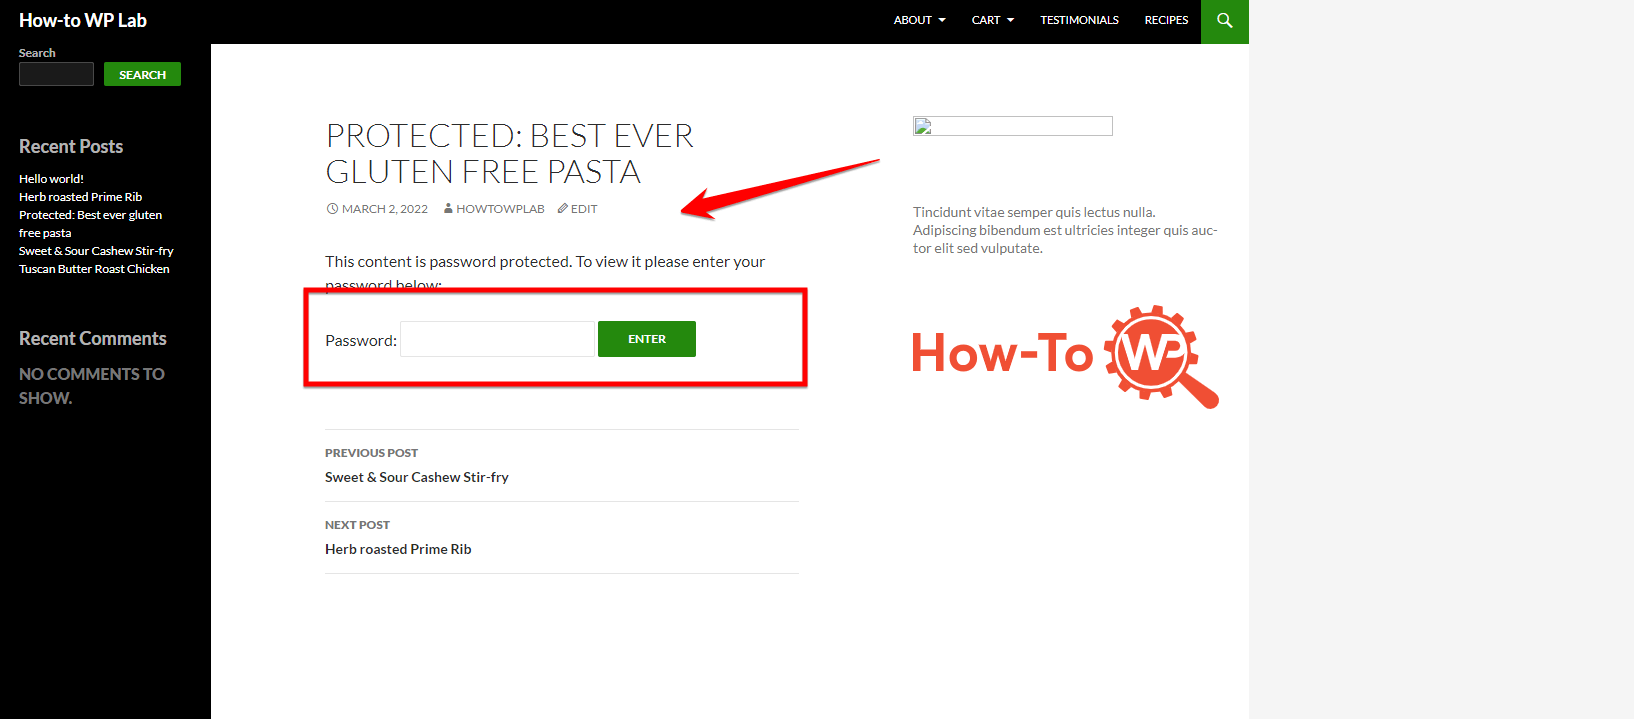
Step 10: After successfully updating or publishing your “Posts” or “Pages” with the new settings, any visitors trying to view the content will receive a prompt. They will need to key in the password you established to access the material.
They will be greeted with a message resembling: “This content is password protected. To view it, please enter the password.”
Benefits:
- Controlled Access: You decide who gets in. Only those with the password can see the content.
- Easy to Use: Setting a password is simple and quick.
- Flexibility: You can share the password with anyone, anytime.
- Safety: Keeps out unwanted visitors without making the content totally invisible.
- Personal Touch: Makes your audience feel special because they have access to something exclusive.
Drawbacks:
- Not Super Secure: If someone shares the password, others can get in.
- Can Be Forgotten: Your audience might forget the password and ask for it often.
Password protecting a page in WordPress is a straightforward and efficient way to limit its access. This method ensures that only individuals with the password can view the content, providing an extra layer of security.
It’s a valuable tool when you have information meant for specific eyes only. As you continue to build and manage your WordPress site, remember this useful feature—it could come in handy when you least expect it!
At times, while managing a WordPress website, you might want to keep a page live but remove its visibility from the primary navigation. This ensures the page remains accessible via direct link but isn’t prominently displayed on your menu.
This method is ideal for website managers or content creators who have pages with specific purposes. It could be a special offer page, a private event, or an internal resource that doesn’t need a spot in the main navigation. If you’re someone who wants a cleaner and more organized menu or wishes to control the visibility of certain pages, this approach is tailored for you.
Follow these easy steps, complemented by visuals, to master the art of hiding pages from the navigation menu.
Step 1: Log into your WordPress account to access your admin dashboard.
Note: Ensure you have admin privileges, as these are necessary to make appearance changes to the website.
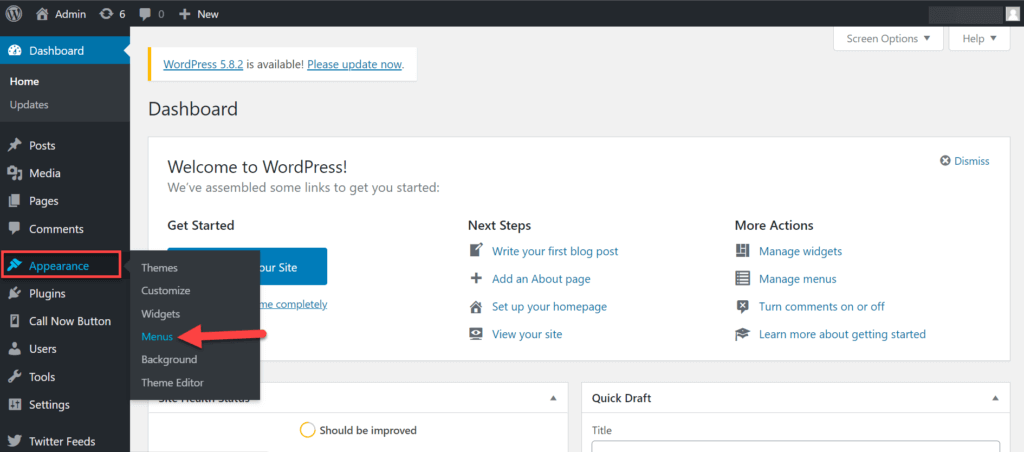
Step 2: Locate the “Appearance” tab on your dashboard on the left sidebar. Click on it and then choose “Menus” from the dropdown that appears.
Step 3: Once in the “Menus” section, you’ll be presented with an interface showing the ‘Menu Items’ of your selected menu. This list encompasses all the linked pages, posts, and custom links associated with this menu.
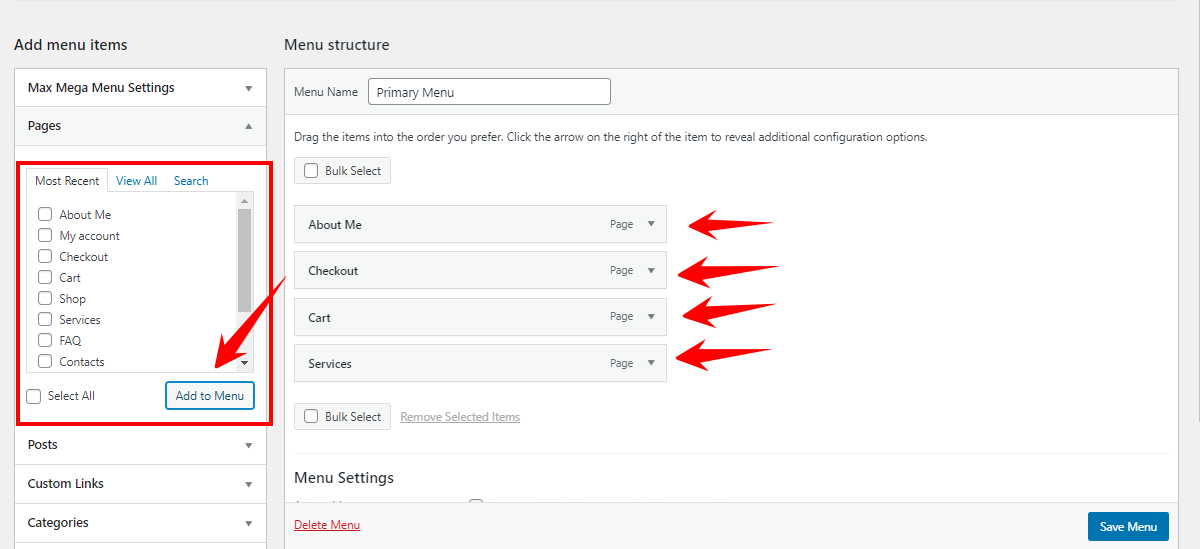
A Pro Tip: If your website has multiple menus, familiarize yourself with their names in advance to ensure you edit the correct one.
Step 4: Navigate through the list and identify the specific page you intend to hide. Click on the dropdown icon adjacent to its name.
Step 5: From the dropdown, opt for the “Remove” action. While this will remove the page from the menu, remember the actual page remains intact on your site.
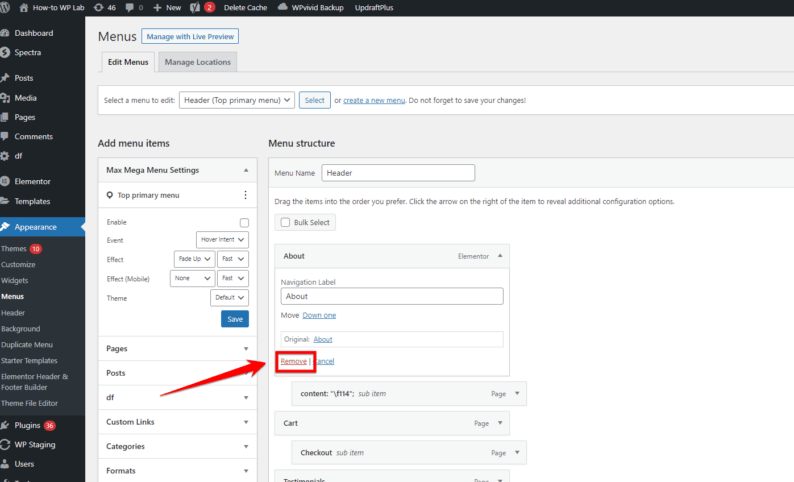
Note: This action only hides the page from the selected menu; it doesn’t delete the page from WordPress.
Step 6: Having made your changes, it’s crucial to hit “Save Menu” found at the base of the “Menus” interface.

A Pro Tip: It’s a good practice to preview your live website after making navigation changes, ensuring everything appears as expected.
Benefits:
- Clean Interface: Hiding unnecessary pages can help present a clean and uncluttered interface to visitors.
- Better User Experience: With fewer distractions, users can navigate to the primary pages quickly.
- Maintain Page Access: The hidden page remains accessible via a direct link, offering versatility in sharing.
- Organized Content: Helps in streamlining the content display, ensuring only the most relevant pages are visible.
- Flexibility: Offers flexibility to website managers in curating the user journey.
Drawbacks:
- Limited Visibility: Hidden pages might miss out on organic site traffic since they’re not immediately visible.
- Overlooking Updates: Since they’re out of sight, they might get overlooked during website updates or redesigns.
Hiding pages from the navigation menu is a handy feature when managing your website. By selectively choosing which pages to showcase and which to keep discreet, you gain control over your site’s user journey.
So the next time you have a page that doesn’t fit the main menu but still holds value, remember you can easily hide it while keeping it live. A clean menu is just a few clicks away!
Method 6: Hide a Page by Using a WordPress Plugin
When managing a WordPress website, there are multiple ways to control the visibility of your content. One efficient method to achieve this is by leveraging plugins. Using a plugin like “Unlist Page” allows you to hide specific pages or posts, ensuring they are not visible to the general public yet remain accessible if someone has the direct link.
Interested in controlling the visibility of specific posts or pages on your website? Perhaps you have temporary promotions, internal documents, or specific content that doesn’t need to be seen by a wide audience. If so, this method, employing a WordPress plugin to unlist pages, is perfect for you.
Let me guide you through this simple step-by-step guide with visuals and help you hide your WordPress page using the “Unlist Page” plugin effectively.
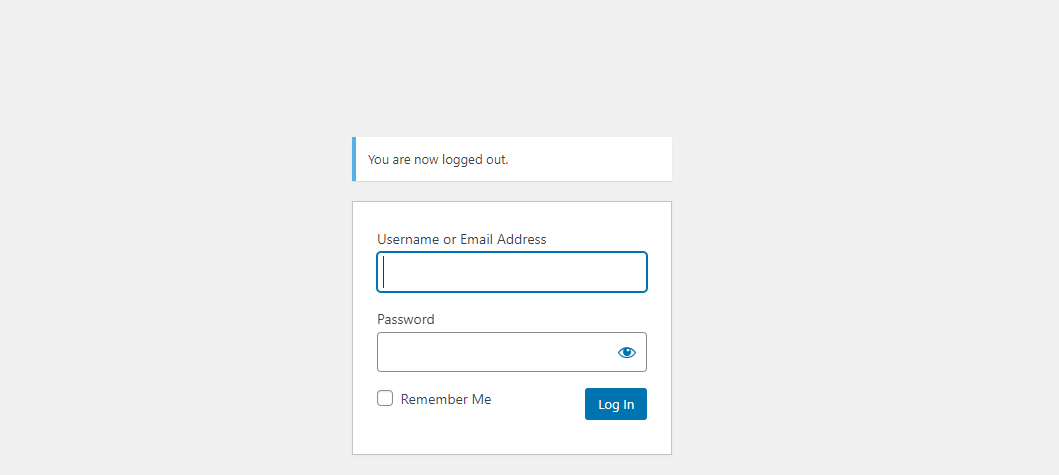
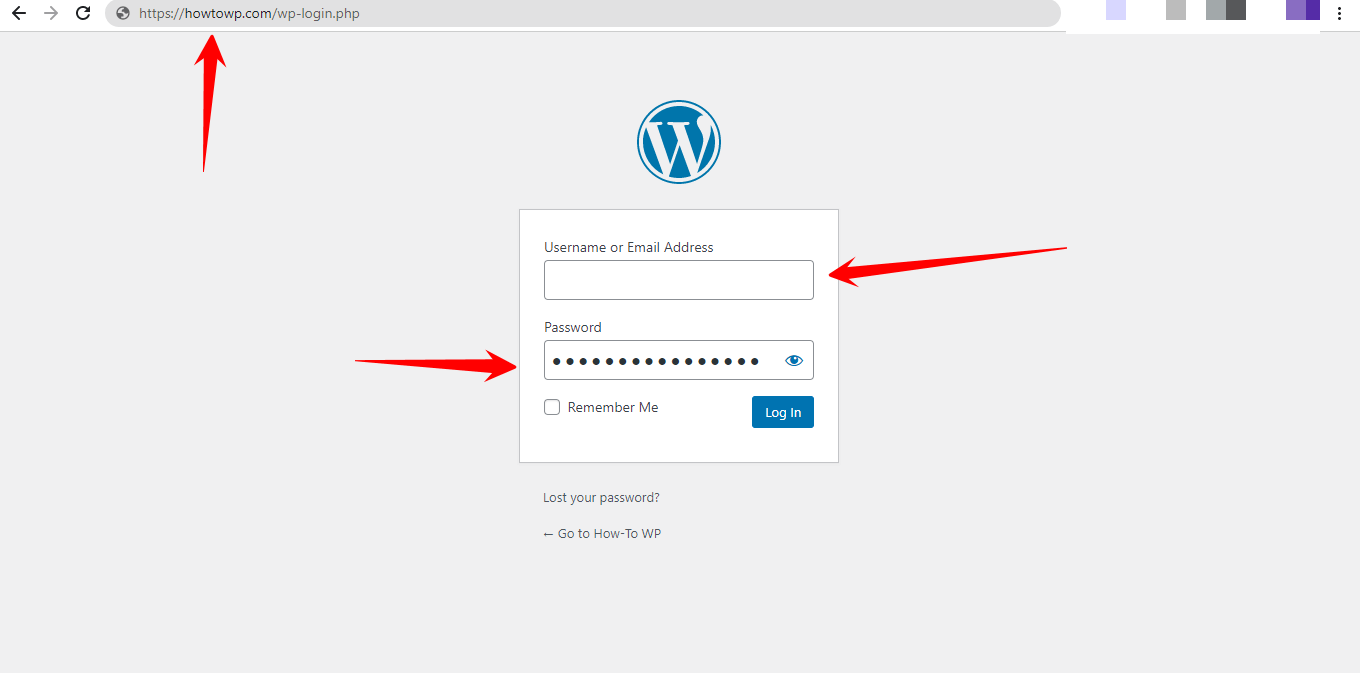
Step 1: Begin by accessing your WordPress dashboard. Enter your username and password, then click on the “Log In” button.
Step 2: Once inside the dashboard, find and click on the “Plugins” option located in the left sidebar.
Step 3: Within the “Plugins” section, you’ll notice an “Add New” button at the top. Click on it to start exploring available plugins.
Step 4: To your right, there’s a handy search bar. Use this to type in “Unlist Posts & Pages” and hit the ‘Enter’ key.
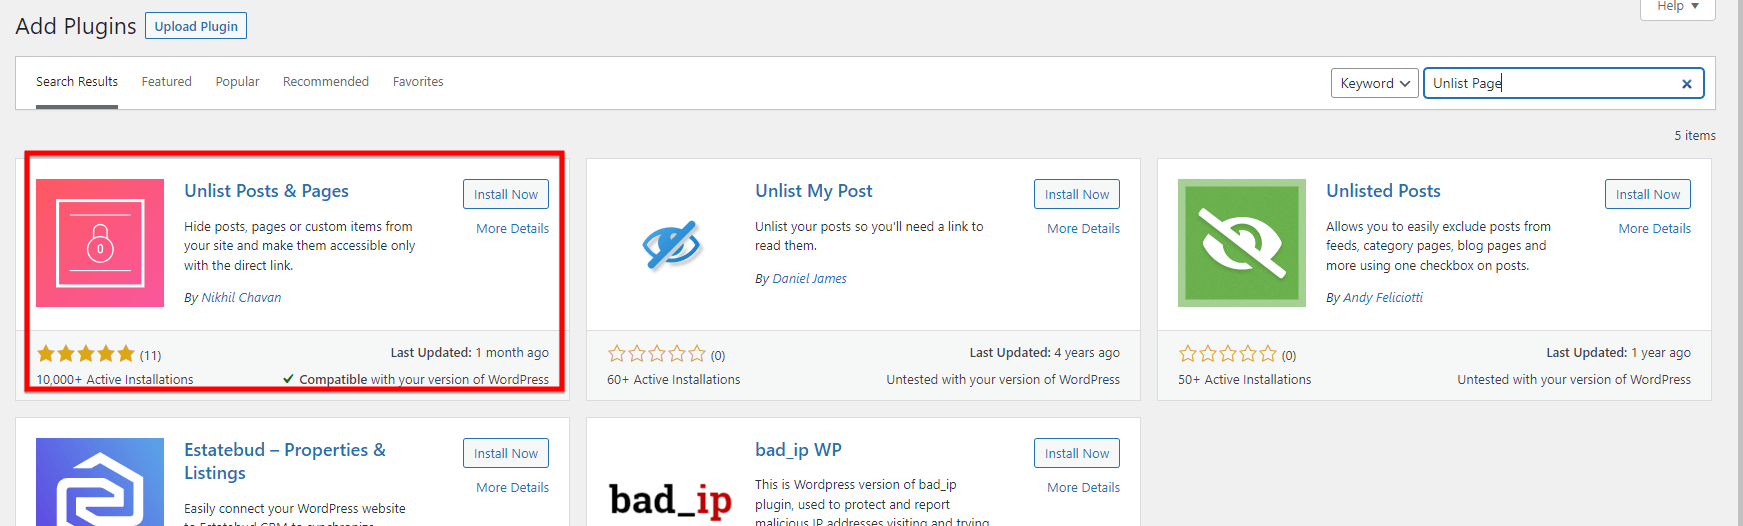
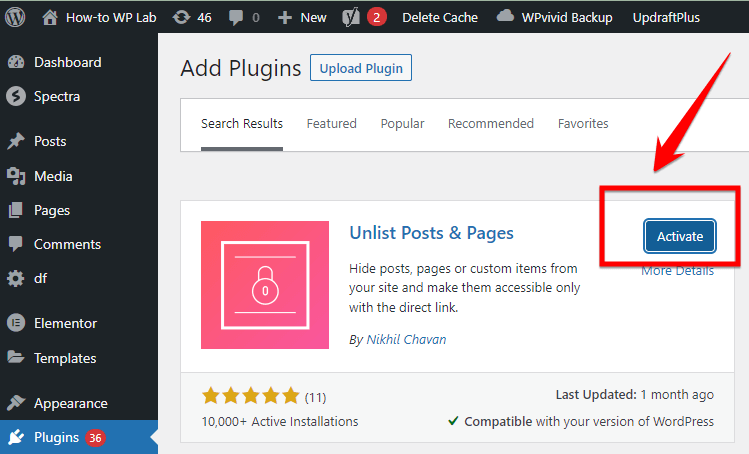
Step 5: Among the search results, you should find a plugin named “Unlist Page” (or something similar). To proceed, click on the “Install Now” button right next to it.
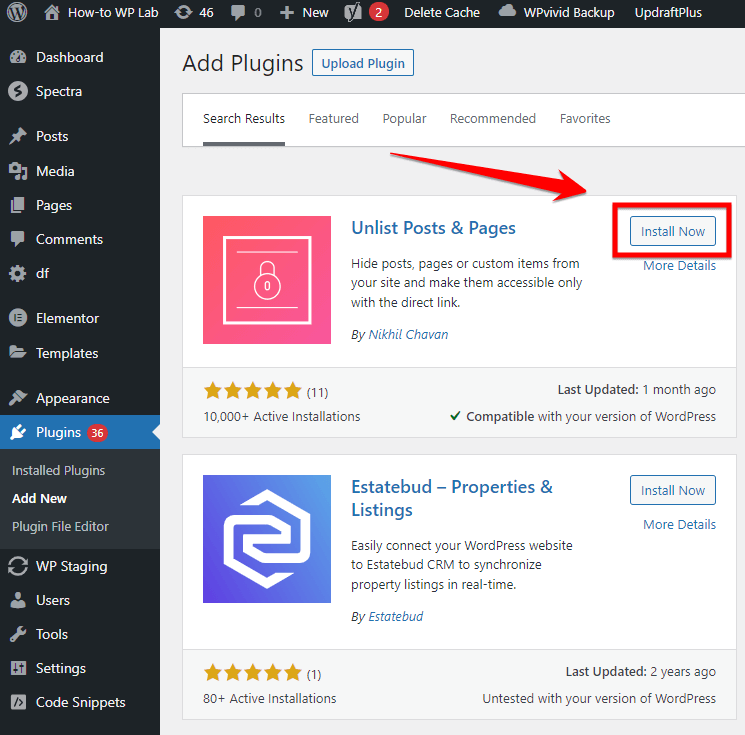
Step 6: After the plugin has been installed, an “Activate” button will appear in its place. Click on it to activate the plugin and integrate its features into your WordPress site.
Step 7: Now, turn your focus to the “Posts” tab in your dashboard’s left sidebar. Click on “All Posts” to view a list of all your published and drafted articles.
Step 8: Browse through your list of posts and click the “Edit” button on the specific post you want to unlist.
Step 9: Inside the post editor, navigate to the page settings. As you scroll, you should find an “Unlist Post” option. Check the box next to it to indicate you want to unlist this post.
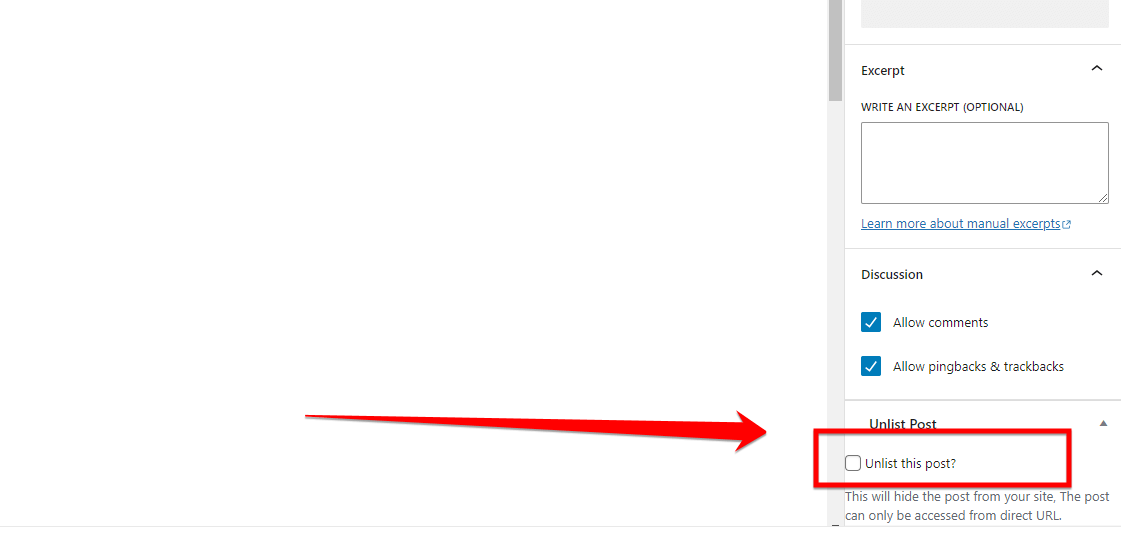
Step 10: After making the desired changes, it’s vital to click on the “Update” button. This ensures your changes take effect, and the selected post becomes unlisted.
Benefits:
- Efficiency: Quickly hide multiple pages without adjusting their core settings.
- Flexibility: The page remains live and can still be accessed via a direct link.
- Simplicity: User-friendly plugins like “Unlist Page” make the process straightforward.
- Control: Maintain better control over who sees specific content on your website.
Drawbacks:
- Dependency: Relying on third-party plugins can be risky if they’re not regularly updated.
- Overhead: Installing too many plugins can slow down your website.
Website owners can have seamless control over the visibility of their content with WordPress plugins like “Unlist Page”. By unlisting specific pages or posts, you can cater to niche audiences or keep some information private.
Dive into the world of plugins and tailor your site’s content visibility to your exact needs – the power is in your hands!
Quick Troubleshooting Tips for Hiding Pages in WordPress
When it comes to working with WordPress, especially when you’re trying to hide pages, you might bump into some common hiccups. You don’t need to worry – I’ve got you covered with some quick troubleshooting tips.
Problem 1: What if a Page is Still Visible After Setting it to “Private”
If you’ve just toggled a page to “Private” and it’s still showing up, first, clear your website’s cache. If you’re using a caching plugin like “WP Super Cache” or “W3 Total Cache”, purge all caches. Sometimes, your changes might not be visible immediately due to cached versions of your page.
Also, open an incognito window in your browser and check the page. This way, you’re viewing it without any saved cookies or cache, giving a more accurate representation.
Problem 2: Yoast SEO Plugin Not Preventing a Page from Being Indexed?
Yoast is a popular SEO plugin, but sometimes things might not work as you’d expect. If you’ve used Yoast to prevent a page from being indexed, but it’s still showing up in search results, navigate to the specific page editor. Look for the “Yoast SEO” meta box and ensure the “Allow search engines to show this Page in search results?” option is set to “No”.
It’s also wise to update your “robots.txt” file. Sometimes, even if Yoast has been set correctly, Google might have already indexed the page before. In this case, request a removal using Google’s “URL Removal Tool”.
Problem 3: Password-Protected Page Not Accepting the Password?
One common issue is setting a password for a page but then finding it’s not being accepted. First, double-check you’re entering the correct password. It might sound simple, but typos happen!
If that’s not the problem, again, clear your cache. Caching plugins can sometimes interfere with dynamic actions like password prompts.
Problem 4: Plugin Used for Hiding Pages is Causing Conflicts or Not Working?
Plugins are incredibly useful, but they can sometimes conflict with one another. If you’ve installed a plugin to hide pages and it’s not working or causing issues, deactivate other recent plugins one by one. Test the functionality after each deactivation to pinpoint the problem source.
Always ensure you’re using the latest version of the plugin and WordPress. Developers frequently release updates to address bugs and compatibility issues.
Problem 5: Robots.txt File Errors When Pages Aren’t Being De-indexed?
The “robots.txt” file is crucial when it comes to search engines indexing your pages. If you’ve made changes to prevent indexing but pages are still appearing in search results, check your “robots.txt” for errors.
Navigate to “www.yourwebsite.com/robots.txt” and ensure you’ve correctly specified which pages or directories should not be indexed. If you’re unsure about the syntax, there are several “robots.txt checker” tools available online to help validate your file.
Why Would You Want to Hide a Page in WordPress
There are numerous reasons why you might want to hide a page on your WordPress site. These reasons are more about the broader website management strategy than merely the technical how-tos.
I’ll dive into three of the most compelling reasons to help you understand the significance of this action in specific scenarios.
Reason 1: To Protect Sensitive Information
There are times when the data on your website, though essential for backend processes or for specific user groups, might be deemed sensitive. Consider situations where you’re about to launch a new product, and you have a page detailing the pricing, features, and other internal data. Before the official announcement, you’d prefer if this page remains hidden from the public.
Another instance could be unpublished content that’s still under review or not ready for the broader audience. Maybe it’s an article that’s not yet approved, a list of internal resources, or even personal notes that you’re using for a later project. In such cases, keeping the page hidden can safeguard the information and prevent any unintended leaks.
Reason 2: To Improve Your Website’s User Experience
A seamless browsing experience is paramount for any website. Imagine a visitor stumbling upon a half-completed page or a page filled with internal jargon. It can be confusing and might even deter them from exploring other sections of your site.
Hiding such pages can drastically enhance the user experience. It ensures that visitors only see finished, relevant content that caters to their needs or interests. In doing so, you’re not just protecting your site’s integrity but also respecting the user’s time and ensuring they have the best possible interaction with your content.
Reason 3: To Prevent Duplicate Content
SEO plays a crucial role in a website’s visibility. One of the challenges many website administrators face is the issue of duplicate content. Search engines, like Google, prioritize unique content. When there are multiple pages with similar or identical content, search engines may penalize your site, resulting in lower rankings.
You might wonder why anyone would have duplicate content in the first place. Well, sometimes it’s unintentional. Maybe there are staging pages, test pages, or older versions of updated articles that are still lingering on the site. By hiding these pages, you can prevent them from being indexed by search engines, thus safeguarding your site from potential SEO penalties.
Finally, hiding pages in WordPress is more than just a technical process. It’s a strategic move that can protect sensitive data, enhance user experience, and bolster your site’s SEO performance. Consider the broader picture when hiding or displaying pages to your audience.
Summary
In this guide on how to hide a page in WordPress, I’ve taken you through various methods to control your content’s visibility, from adjusting settings to utilizing plugins. It’s incredible to see the power and flexibility WordPress offers users like you and me.
Each method has its perks, and choosing the right one depends on our specific needs.
Thank you for joining me on this journey. Your dedication to understanding and improving your website is commendable.
Remember, with the right tools and knowledge, you hold the power to shape your online presence exactly the way you envision. Stay curious, and keep exploring!
FAQs
How do I hide a page in WordPress without deleting it?
You can hide a page in WordPress without deleting it by adjusting its visibility settings. Head to your WordPress dashboard and navigate to the “Pages” section. Locate the page you want to hide and click “Edit.” In the post editor, locate the “Visibility” option. Set it to “Private” or “Password Protected” depending on your preference. This will hide the page from public view without deleting it.
How do I hide a page in WordPress Elementor?
Elementor, a popular page builder for WordPress, has a feature to hide sections or widgets. However, to hide an entire page created with Elementor, you’ll still rely on WordPress’ core functionality. In the WordPress dashboard, under “Pages,” find the page you’ve built with Elementor. Click “Edit” and then set the “Visibility” to “Private” or “Password Protected.” Save your changes.
How to hide a published page in WordPress?
If you’ve already published a page and want to hide it from public view, go to your WordPress dashboard and navigate to “Pages.” Find the published page and click “Edit.” In the post editor, look for the “Visibility” option. You can set it to “Private” to hide it from public view or “Password Protected” to require a password for access. Once set, click “Update.”
How do I hide a private page/post?
Private pages or posts in WordPress are already hidden from the public and are only visible to administrators and editors. If you’ve set a page or post to “Private” and still want to hide it further (e.g., from certain admins or editors), you might need to rely on additional user role plugins or custom code to fine-tune permissions.
How do I hide a Page in AIOSEO?
AIOSEO, or All in One SEO, is a popular SEO plugin for WordPress. If you wish to prevent search engines from indexing a page (essentially hiding it from search results), you can do so using Aioseo. Navigate to the page or post you wish to hide. In the editor, find the Aioseo settings box. There should be an option to set the page’s “noindex” attribute. Checking this will instruct search engines not to index this particular page, keeping it hidden from search results.