How To Remove “Powered by WordPress” From the Footer

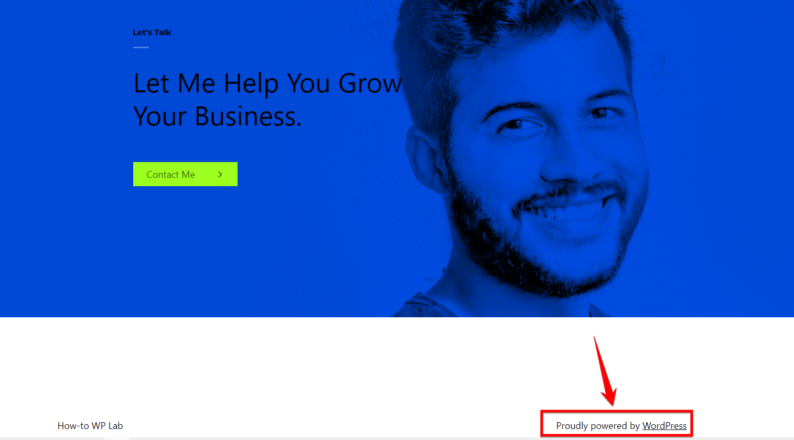
As a proud website owner, you want to showcase your unique brand and take control of every aspect of your online presence. However, if you’re using WordPress as your content management system (CMS), you may have noticed the default “Powered by WordPress” message displayed in the footer.
While WordPress provides a solid foundation for your site, you might prefer to give it a more personal touch by removing this display. Fortunately, customizing your website’s attribution is a relatively straightforward process that allows you to infuse your brand identity seamlessly.
In this article, I will show you:
- Are you allowed to remove the “Powered By WordPress” message
- Top 2 methods to remove the “Powered by WordPress” message
- Reasons for removing the “Powered By WordPress” message
Even if you’re a beginner, following these steps and screenshots can make your WordPress website more unique and professional.
Hey there, hold on for a moment. I can see you’re curious about something. 🤔😄 Don’t worry. You don’t need any coding skills – just a tiny investment of your time and determination.
Let’s dive in and learn whether you can remove this message.
Table of Contents
Are You Allowed to Remove the “Powered by WordPress” Message
The quick answer is YES. You have the freedom to remove the “Powered by WordPress” message. This means that you can make your website truly yours and establish a distinct brand identity that connects with your audience.
WordPress, being an open-source software, operates under the GNU General Public License (GPL). This gives you the flexibility to modify the software as per your preferences, including the removal of any visible attribution or branding. It empowers you to shape your website according to your vision and goals, allowing you to create an online presence that resonates with your audience.
While WordPress supports your ability to make changes, it’s necessaryto be mindful of the terms and conditions set by the developers of your chosen themes or plugins. They may have specific requirements or restrictions regarding removing certain credits or branding messages.
WordPress wants to connect with you and empower you to build a website that reflects your unique identity. However, remember to stay informed about the terms and conditions associated with the themes and plugins you use to maintain a harmonious relationship with theme developers and respect the values of the WordPress community.
Now that you understand that you can remove the “Powered by WordPress” message, let’s dive into the methods to eliminate it. By exploring these methods, you’ll learn how to customize your website and make it your own.
Top 2 Methods to “Powered by WordPress” Message
You’ve probably found your way here because you want to get rid of the annoying “Powered by WordPress” message on your website. Well, lucky for you, I’ve spent quite a bit of time digging into this topic and trying out different methods.
Now, before you brush this off as just another guide with the same old tips, let me assure you that the two methods I’m about to share have personally worked wonders for me.
I get it—there’s nothing worse than stumbling upon websites that promise solutions but end up wasting your time with unnecessary steps and confusing explanations. That’s why I’m here to keep it simple.
Instead of bombarding you with loads of information, I’ll give you just the two most effective techniques I’ve come across. With these straightforward steps, you can quickly make the necessary changes to get rid of that message and save yourself time.
Now, let’s solve this problem once and for all!
Method 1: Removing the Message Via WordPress Customizer
If you have a WordPress website and want to remove the “Powered by WordPress” text from your website’s footer, you can do so through the WordPress Customizer.
This method is ideal for website owners or administrators who want to customize the appearance of their site and remove any unwanted branding.
By following the step-by-step guide below, you can remove the text easily and without the need for coding knowledge.
Bonus Insights 💡
Before making changes to your CSS file in the Customizer, it is recommended to create a backup of the existing code. This backup will allow you to revert back to the original settings if needed. Follow these additional steps to create a backup:
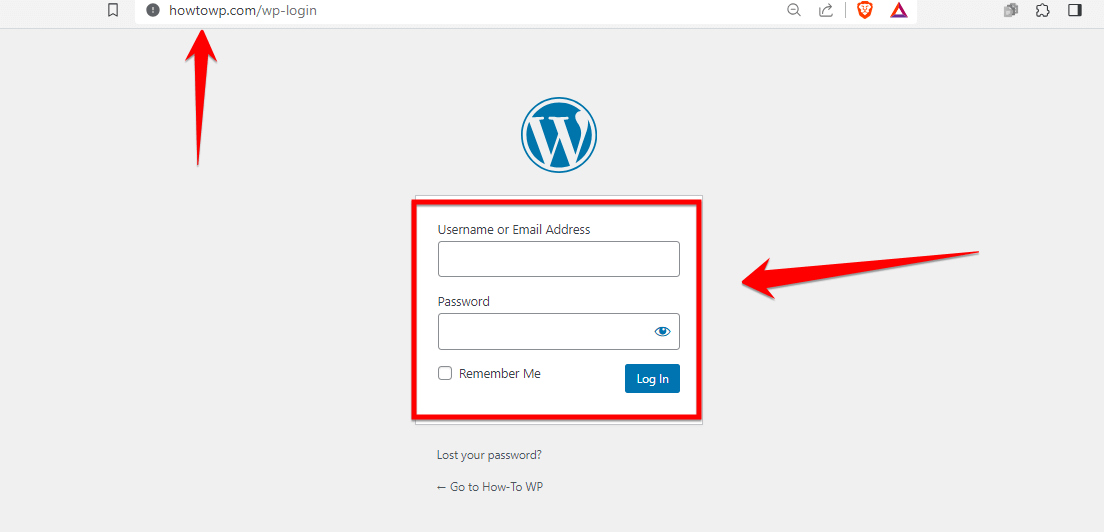
Step 1: Login to your WordPress admin dashboard by entering your username and password.
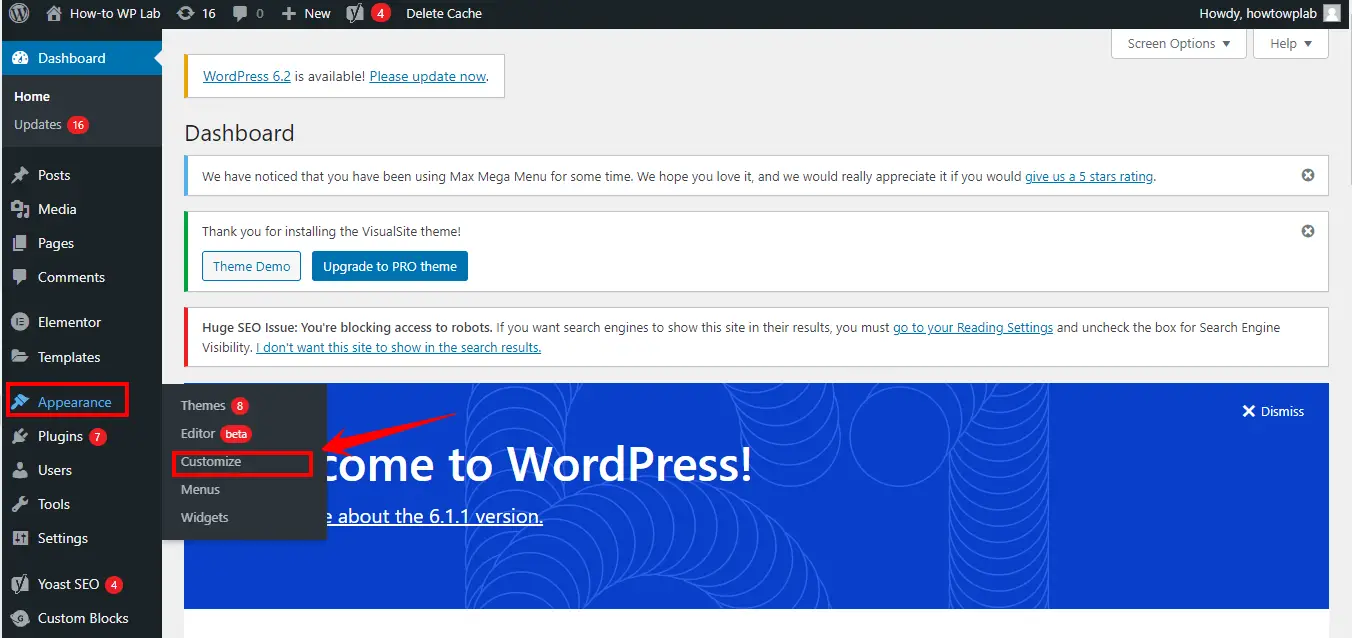
Step 2: Once logged in, click on “Appearance” in the sidebar menu and select “Customize.”
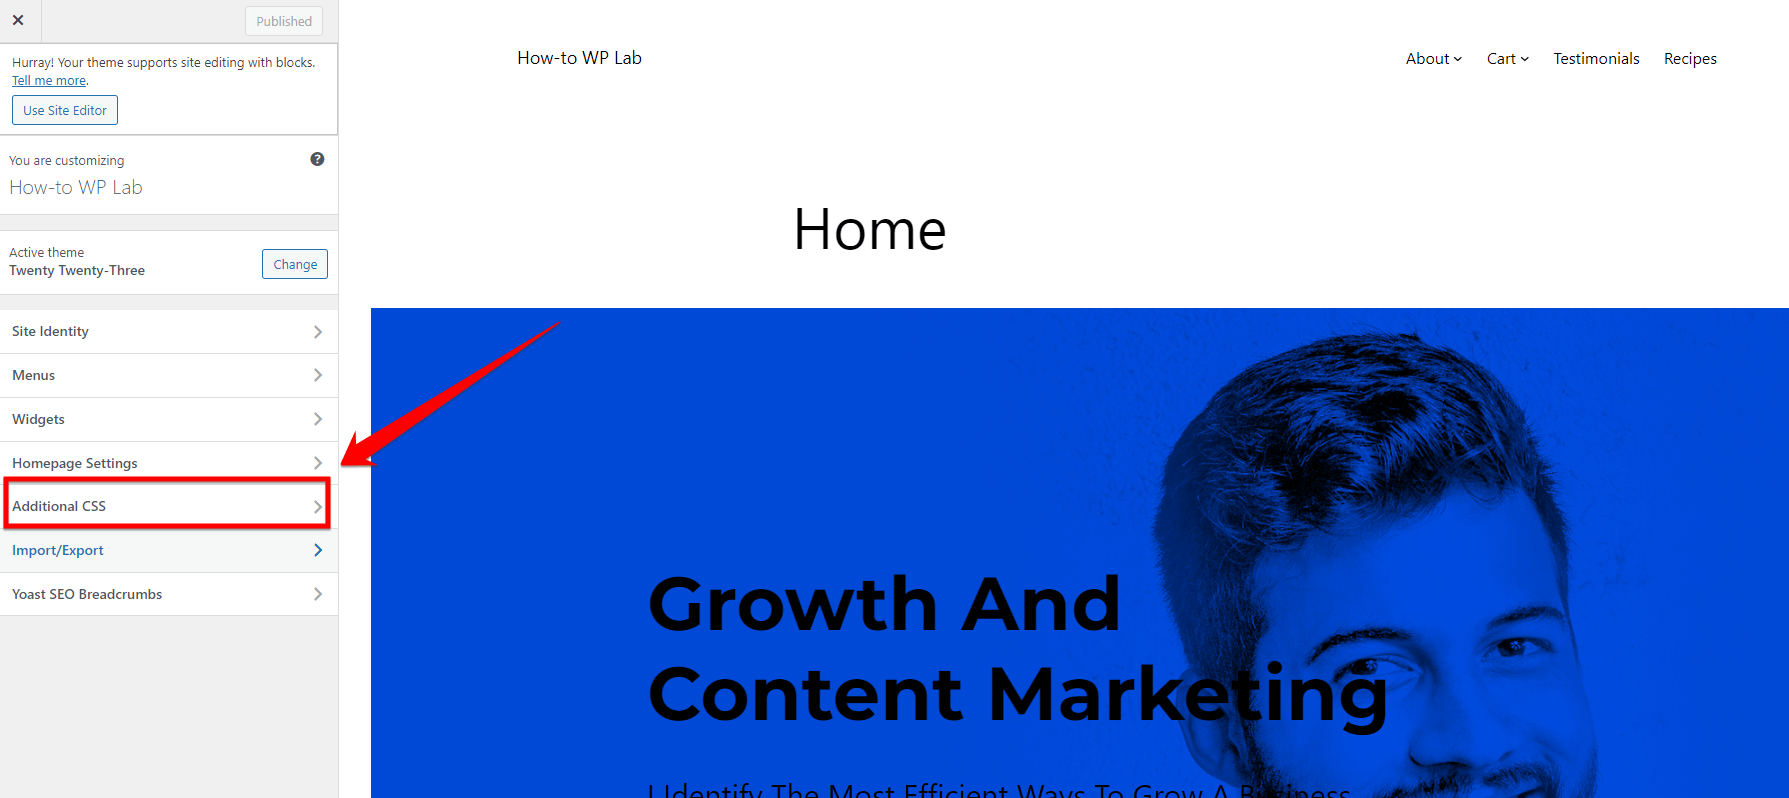
Step 3: Inside the Customizer interface, click on the “Additional CSS” section.
Step 4: Copy the entire CSS code already present in the field and paste it into a text editor or a separate document.

Step 5: Save the backup file with a descriptive name (e.g. “original-css-backup.txt”) and store it in a safe location on your computer or cloud storage.
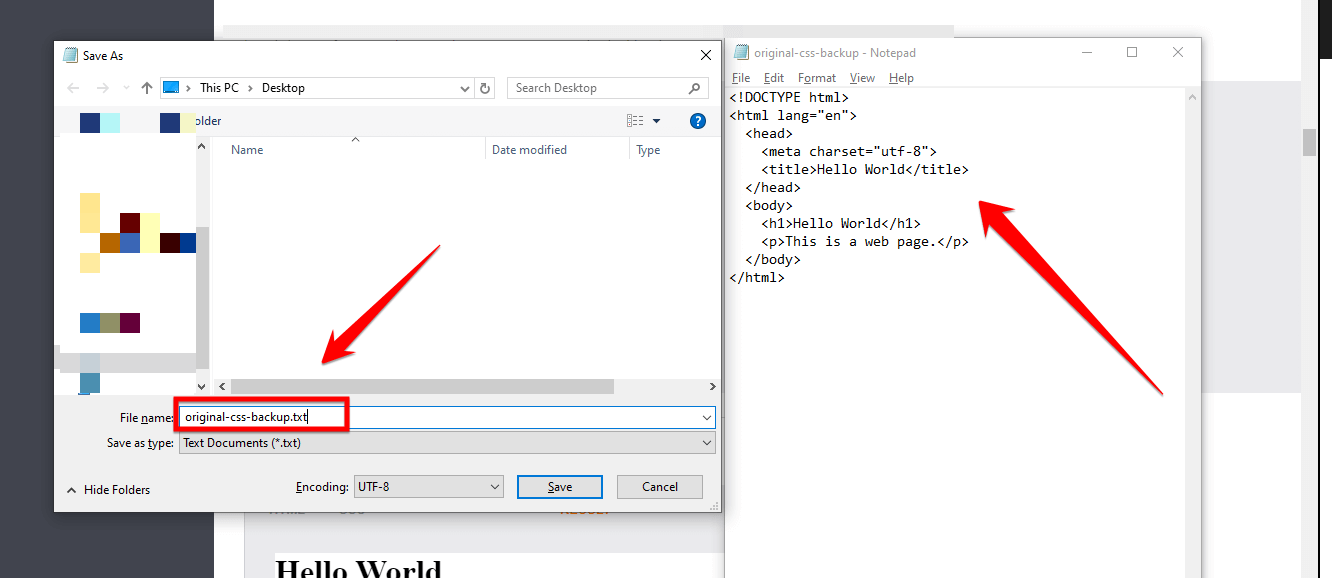
Note: Confirm that the backup file has been saved and can be accessed whenever needed.
Now, let’s focus on explaining the method we will be using.
Revised Note: We won’t be starting the process from the beginning. Instead, we will begin from the “Additional CSS” option. If you’re unsure how to find this option, please follow steps 1 through 3 for guidance.
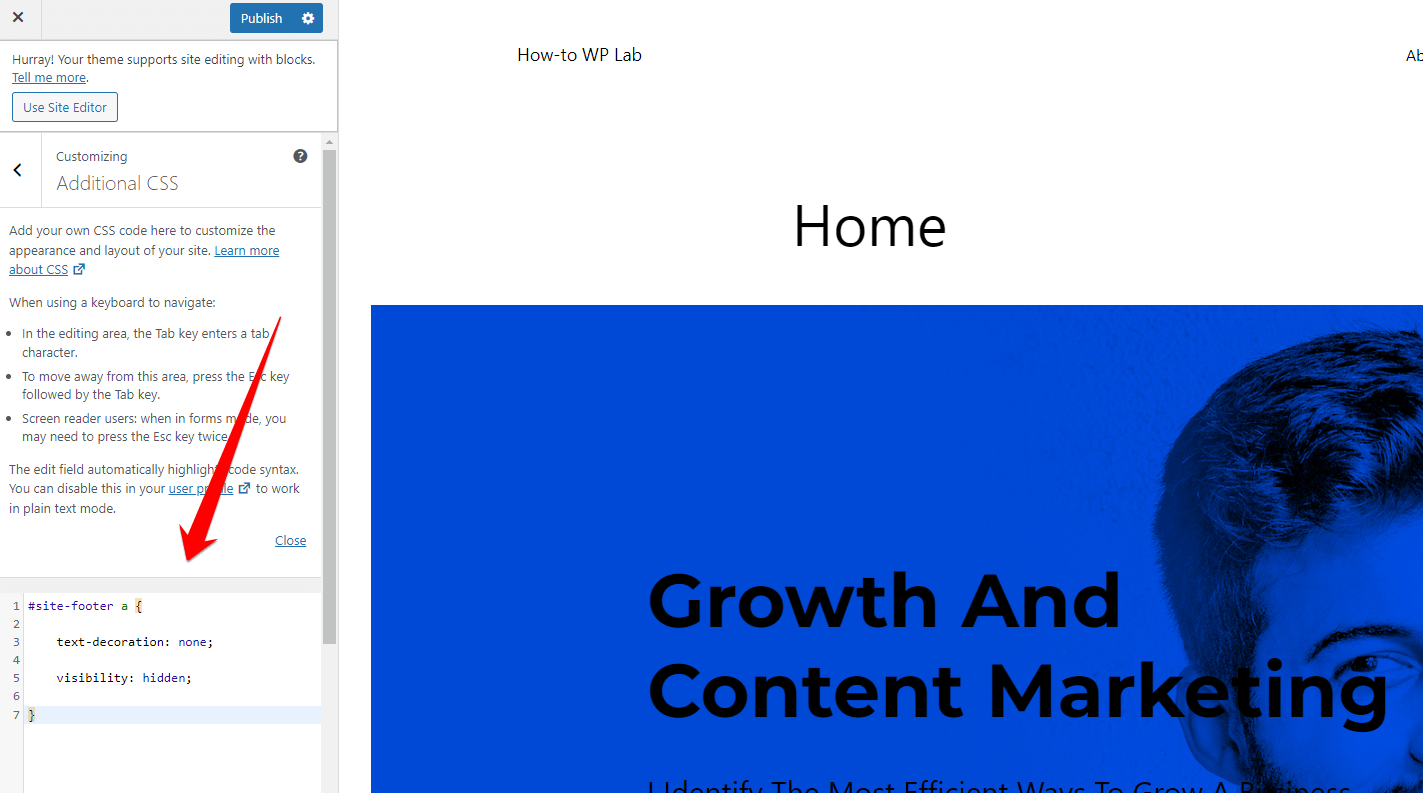
Step 6: In the Customizer interface, locate and click on the “Additional CSS” section.

Step 7: Insert the following CSS code into the provided field:
#site-footer a {

    text-decoration: none;

    visibility: hidden;

}
Step 8: Click the “Publish” button located at the top of the Customizer interface to save the changes.
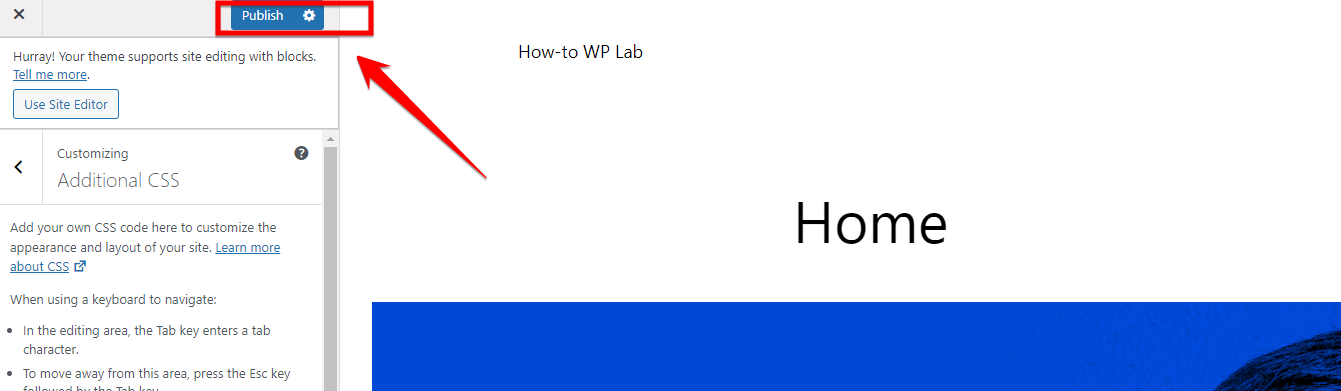
Step 9: Refresh your website to ensure that the “Powered by WordPress” message has been successfully removed.

Pros:
- Customization: The WordPress Customizer provides an easy and user-friendly way to personalize your website’s branding.
- Professional appearance: Removing the “Powered by WordPress” attribution can help give your website a more professional and polished look.
- Rebranding flexibility: This method allows users to rebrand their website without any remnants of the WordPress platform.
Cons:
- Prerequisite knowledge: Basic familiarity with the WordPress admin dashboard and the Customizer interface is required.
- Limitation to attribution: While this method removes the “Powered by WordPress” attribution, it does not remove or alter any other elements of the WordPress platform.
Method 2: Removing the “Powered by WordPress” Message Vis the Plugin
If you want to remove the “Powered by WordPress” text from your website’s footer but don’t want to modify the theme files directly, you can achieve this using a plugin.
This method is useful for individuals who have basic knowledge of WordPress and would like to remove the “Powered by WordPress” text from their website without editing the code directly. It is suitable for both beginners and experienced webmasters who prefer to handle this customization with plugins.
If you’re ready to make your site more unique, let’s start with this practical steps.
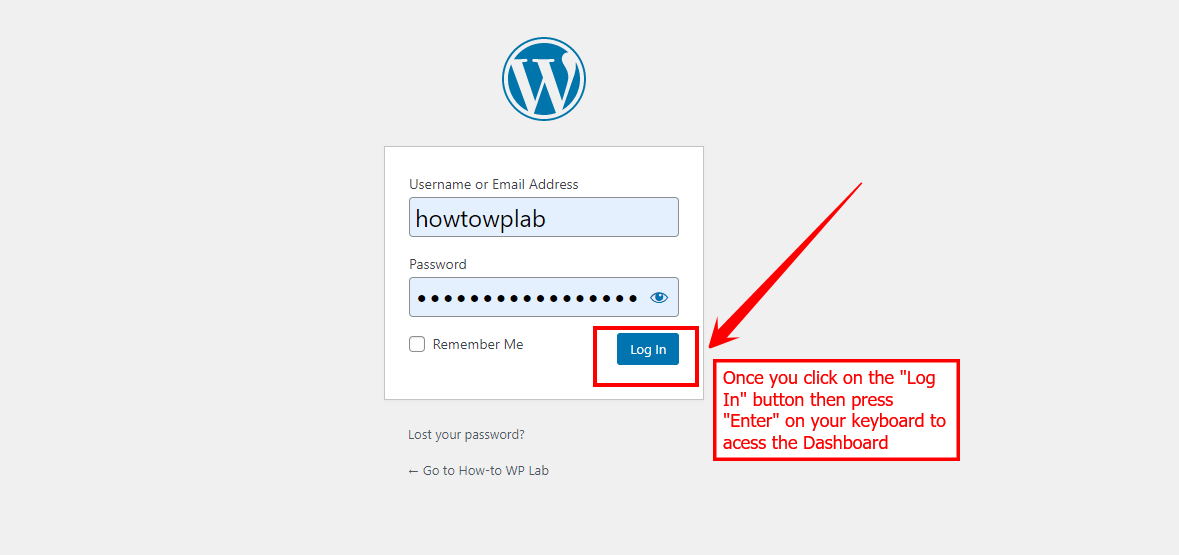
Step 1: Open your preferred web browser and go to your WordPress login page.

Step 2: Enter your username and password in the login form, then click the “Log In” button to access your WordPress dashboard.
Note: Once you are logged in, you will be redirected to the WordPress dashboard. This is the main control panel for managing your website.
Step 4: On the left-hand side of the dashboard, locate and click on the “Plugins” tab. This will display a submenu.
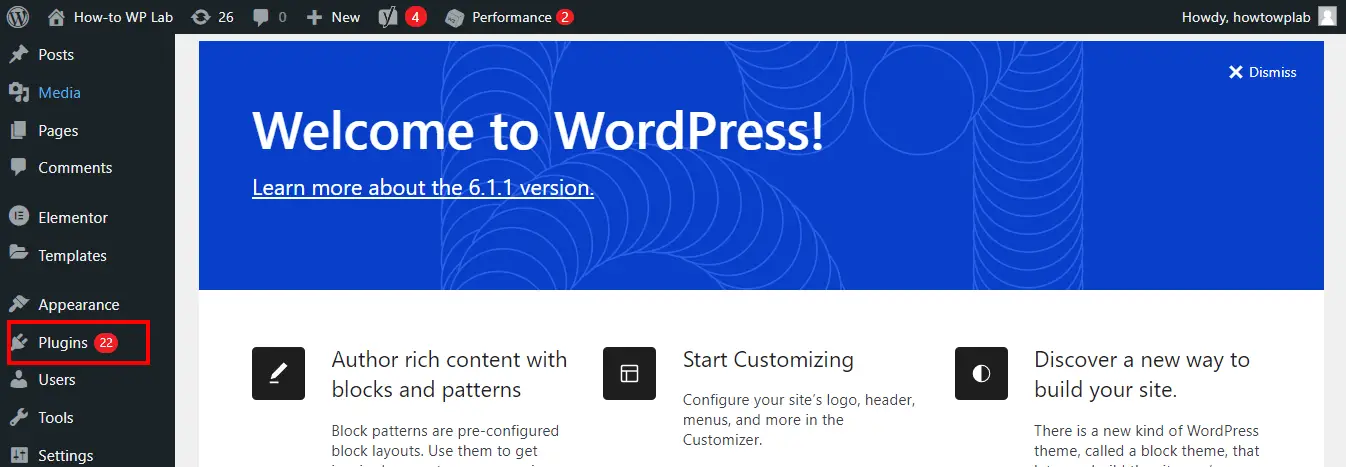
Step 5: To find a new plugin, just click on the “Add New” button. This will take you to a page where you can search for and install new plugins.

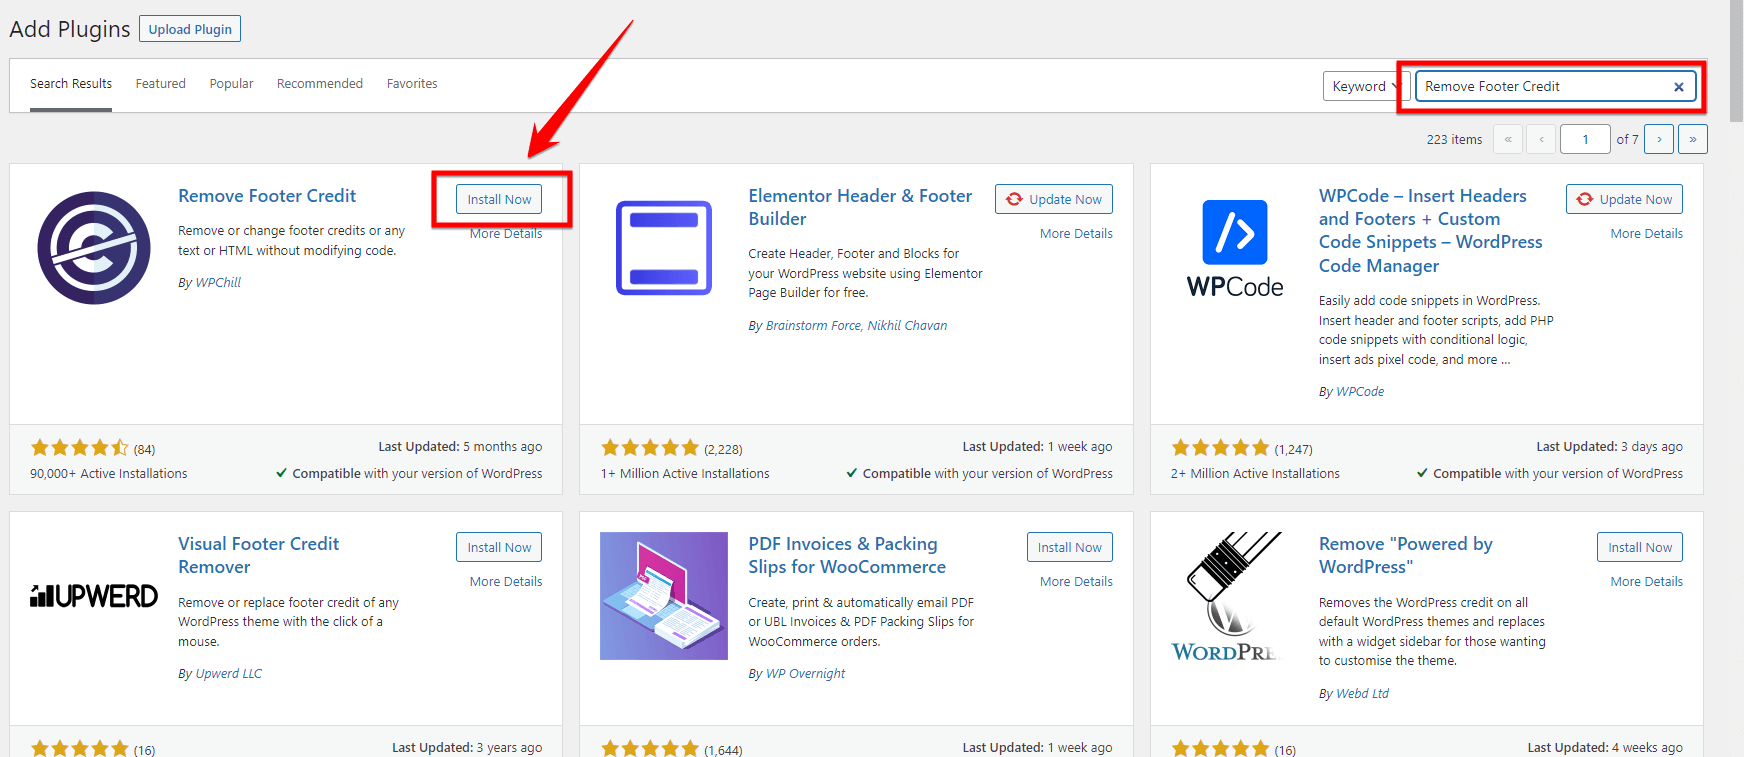
Step 6: Look for the “Remove Footer Credit” plugin in the search results and click on the “Install Now” button next to it.
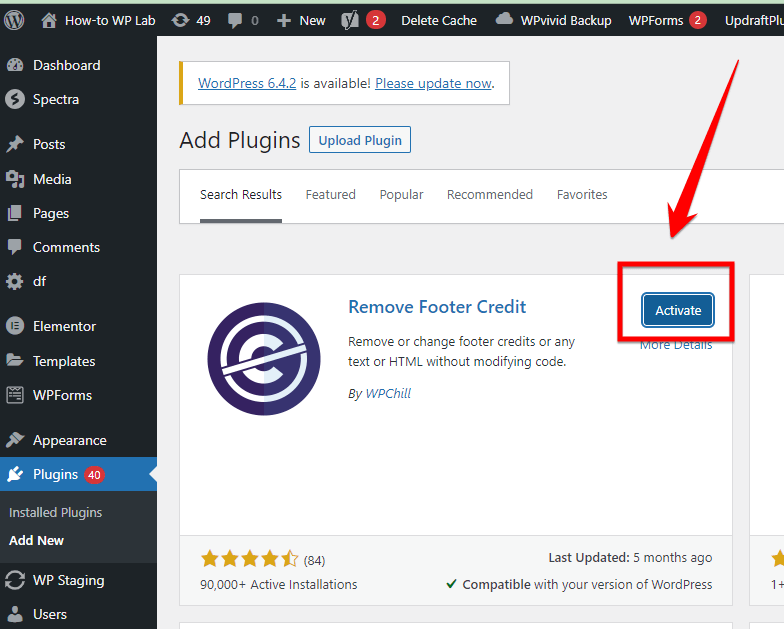
Step 7: Once the installation is complete, click on the “Activate” button to activate the plugin.
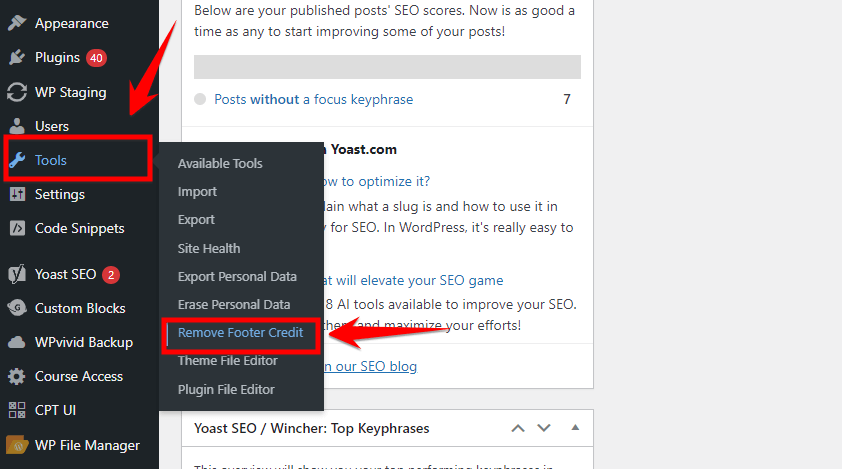
Step 8: Once you have activated the plugin, locate the “Tool” option on the left side and access the dropdown menu. From there, select the “Remove Footer Credit” option.
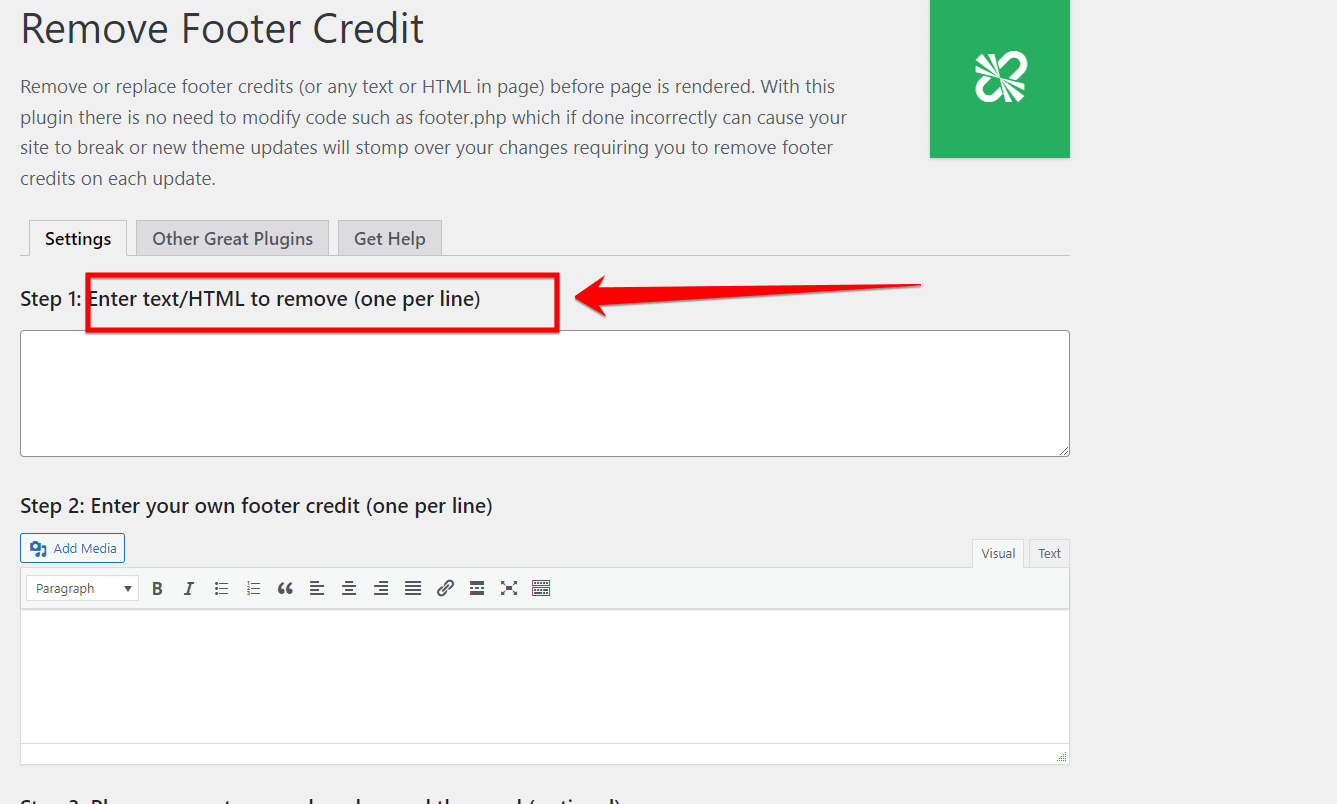
Step 7: Once you have opened the “Remove Footer Credit” option, It will take you to a page. From there, look for the text areas labeled “text/HTML”.
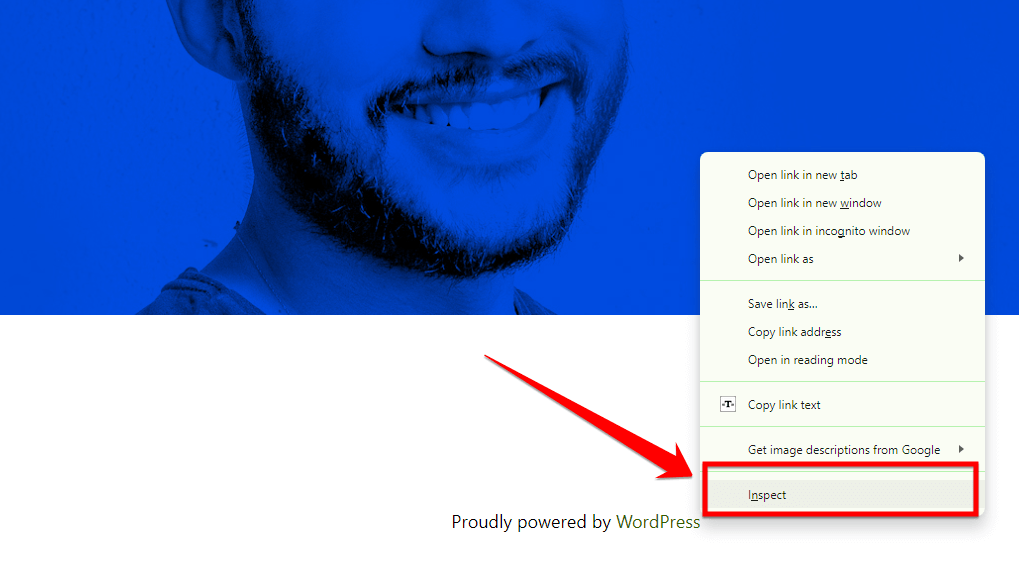
Step 8: Open any page on your website in your browser and inspect the code by right-clicking and selecting the “Inspect” option.
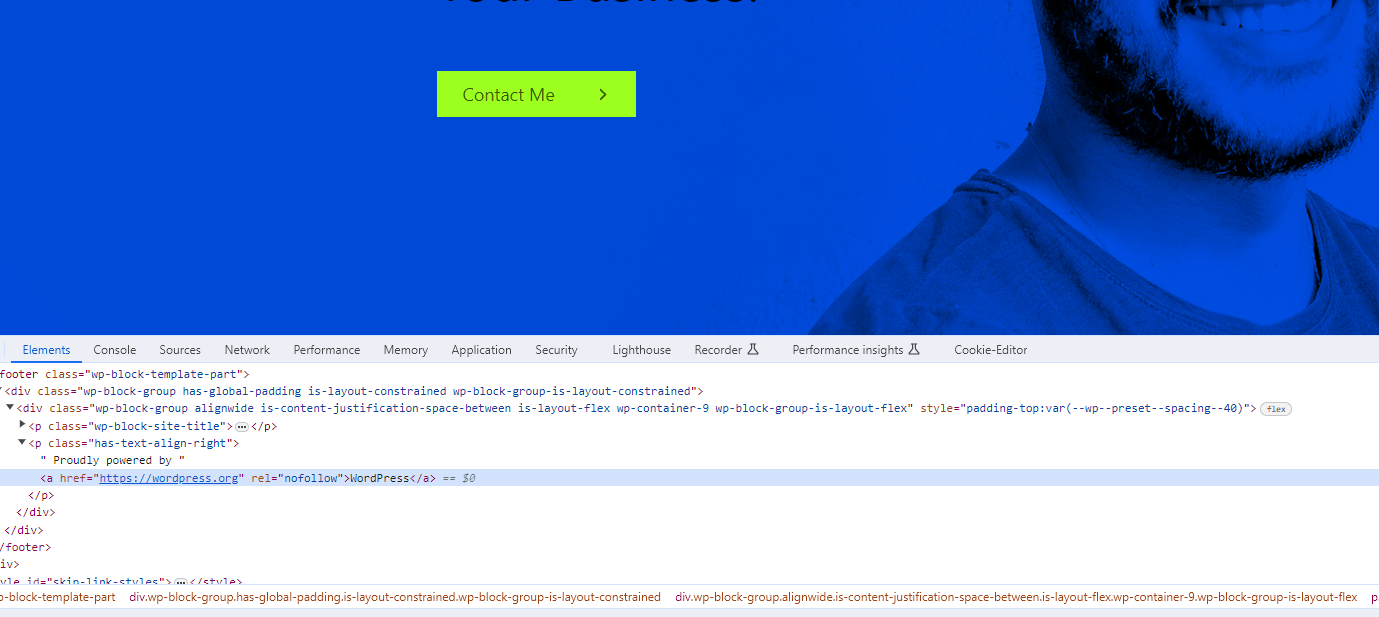
Step 9: Copy the entire line of HTML, including the link
Step 10: Paste the copied HTML, including the link, into the “text/HTML” field of the plugin.
<a href="https://wordpress.org" rel="nofollow">WordPress</a>

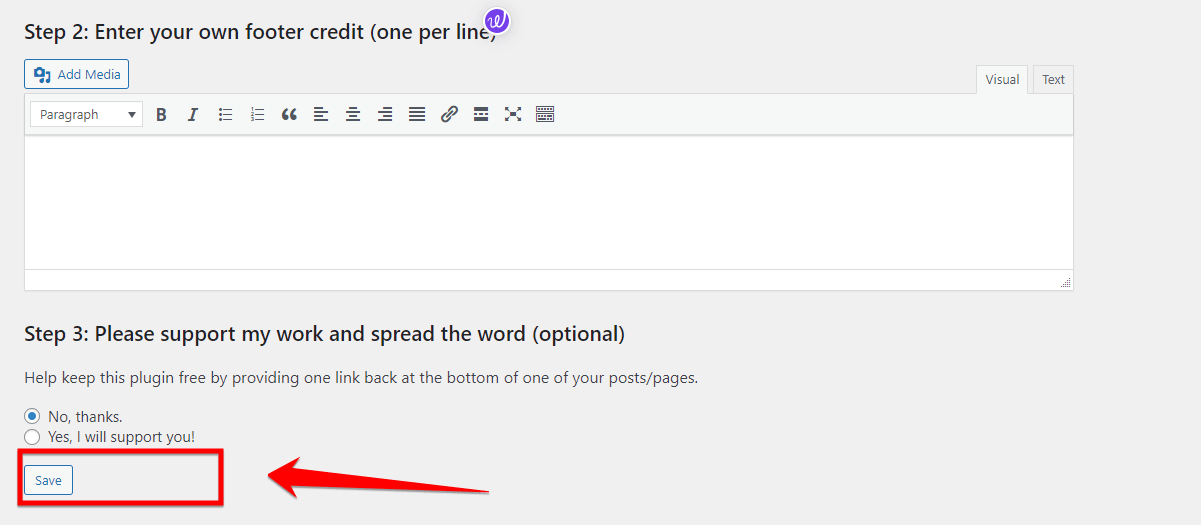
Step 11: After pasting the HTML code snippet into the “Text/Area 1” text area, simply navigate to the bottom of the settings page and select the “Save” button to ensure that any changes made to the plugin settings are saved.
Step 12: Make sure to reload your website to confirm that the footer credit for “WordPress” has been successfully removed.
Pros:
- User-friendly: The plugin provides a straightforward and simple method to remove the “Powered by WordPress” text without any coding knowledge required.
- Quick: This method is fast compared to manually editing the code, minimizing the chances of causing errors or breaking the site.
- Reversible: You can easily disable or remove the plugin if you decide to revert back to the original “Powered by WordPress” text in the future.
Cons:
- Dependency: The removal of the “Powered by WordPress” text relies on the functionality of the plugin. Disabling or uninstalling the plugin will restore the default text.
- Limited customization: While this method effectively removes the default text, it may not offer advanced customization options for the footer section. Manual code editing or using a different plugin might be necessary to achieve a more tailored design.
Reasons for Removing the “Powered by WordPress” Message
There are several reasons why website owners may choose to remove or modify the “Powered by WordPress” message displayed on their websites. These reasons include:
- Professionalism: Some website owners prefer to present a more personalized and professional image to their visitors. By removing the default “Powered by WordPress” message, they can create a custom brand experience and reinforce their identity.
- Aesthetics and Design: The “Powered by WordPress” message may not always align with a website’s design and visual style. Removing it allows for better integrating the website’s branding and design elements, resulting in a more cohesive and visually appealing user experience.
- Ownership and Control: Website owners may feel that prominently displaying the “Powered by WordPress” message gives the impression that their website solely relies on WordPress, which could be seen as a limitation. By removing it, they can emphasize their ownership and control over the content and functionality of their website.
- Security: Some website owners believe that removing the “Powered by WordPress” message helps improve security by reducing the visibility of the content management system (CMS) they are using. This makes it slightly harder for potential attackers to target vulnerabilities specific to WordPress.
- Client and Customer Perception: In some instances, website owners may remove the “Powered by WordPress” message to prevent clients or customers from perceiving their website as amateurish or less professional because it is built on a widely used CMS. By removing the message, they can create a perception of uniqueness and exclusivity.
- Search Engine Optimization (SEO): Some argue that the “Powered by WordPress” message can dilute a website’s strong branding and potentially affect SEO efforts. Website owners can prioritize more relevant keywords and information for search engine crawlers by customizing the footer content and removing the default message.
Overall, removing the “Powered by WordPress” message can contribute to a more aesthetically pleasing, professional, and personalized online presence while allowing for greater control and branding opportunities.
Summary
I’ve walked you through two techniques to remove the “Powered by WordPress” footer: the Customize method and the Plugin method. The Customize method is straightforward, utilizing the built-in WordPress theme customizer, while the Plugin method harnesses the power of WordPress plugins for more extended functionality.
Each approach serves different user needs and expertise levels. By choosing either method according to your comfort, you’re set to achieve a clutter-free and personalized WordPress website.
FAQs
To remove the Copyright footer in WordPress, you can follow these steps:
Access the WordPress Dashboard: Log in to your WordPress admin panel.
Go to Appearance: Click on “Appearance” on the left-hand side of the dashboard.
Edit the footer: Select “Editor” from the submenu under “Appearance.”
Locate the footer file: In the editor, you will typically find a file called “footer.php” listed on the right-hand side.
Remove copyright code: Find the code related to the copyright footer and delete or comment it out. This code is usually enclosed within <footer> tags or includes the term “copyright” or “credits.”
Save changes: After removing the code, click on the “Update File” button to save the changes.
Check your website: Visit your website to verify if the copyright footer has been successfully removed.
To remove the footer watermark in WordPress, you can try these steps:
Access the theme settings: Log in to your WordPress admin panel.
Visit the theme customizer: Go to “Appearance” and then click on “Customize.”
Find additional options: Look for options like “Footer” or “Watermark” within the customizer.
Disable the footer watermark: Disable or toggle off the setting related to the footer watermark.
Save and publish: Click on the “Save” or “Publish” button to apply the changes.
Preview the website: Visit your website to ensure the footer watermark has been removed.
To remove the footer credit plugin from WordPress, you can follow these steps:
Access the WordPress dashboard: Log in to the WordPress admin area.
Navigate to the Plugins section: From the left-hand menu, go to “Plugins.”
Disable or remove the footer credit plugin: Locate the plugin responsible for the footer credit and either disable it or click on “Deactivate” to turn off the functionality. If you want to completely remove the plugin, click on “Delete” after deactivating it.
Save changes: After disabling or removing the plugin, save any changes made to the plugin’s status.
Note: Depending on your WordPress theme and the specific plugins you have installed, the exact steps may vary slightly.