How to Implement Server-Side Caching in WordPress

As websites grow in size and complexity, server load and response times can become major issues. This is where server-side caching can be incredibly useful.
By caching frequently accessed content and delivering it quickly to users, server-side caching can improve website performance, reduce server load, and enhance the user experience.
In this blog post, you will learn
- Server-side caching in WordPress: Auto and manual configuration
- Pros and cons of server-side caching
- Best practices for server-side caching in WordPress
Whether you’re a website owner or developer, this guide will help you take your website’s performance to the next level.
Table of Contents
- Understanding Server-Side Caching
- How to Configure Auto Server-Side Caching in WordPress
- How to Configure Manual Server-Side Caching in WordPress
- Advantages Of Server-Side Caching
- Disadvantages of Server-Side Caching
- Troubleshooting Common Cache Issues
- Best Practices for Server-Side Caching in WordPress
- Final Thoughts
- Frequently Asked Questions
Understanding Server-Side Caching
Before we dive into the specifics of implementing server-side caching in WordPress, let’s take a moment to define what server-side caching is and how it works.
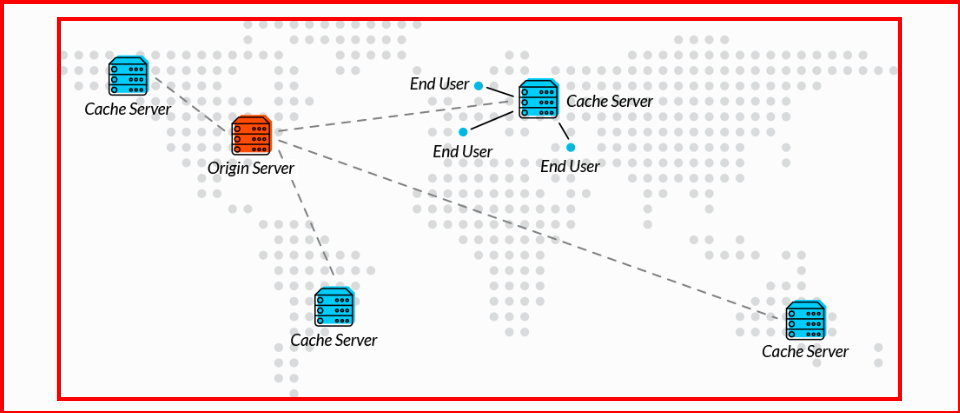
Server-side caching is a technique used to speed up website performance by storing frequently accessed data in memory. When a user requests a page or resource from a website, the server checks if it already has a cached copy of that data. If it does, the server can serve that data directly to the user, bypassing the need to generate the page or resource from scratch.
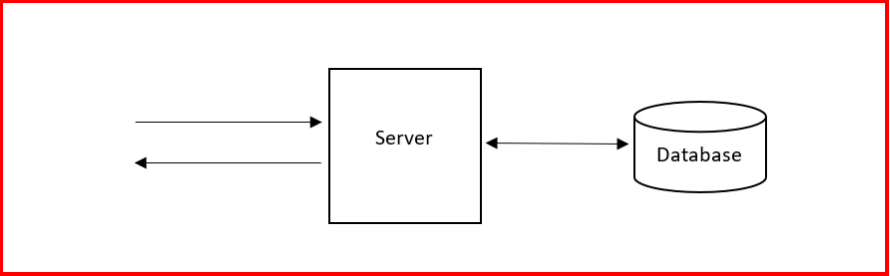
This can significantly reduce the time it takes to load the page or resource and improve overall website performance.
Types of Server-Side Caching
There are three main types of server-side caching: object caching, opcode caching, and CDN caching.
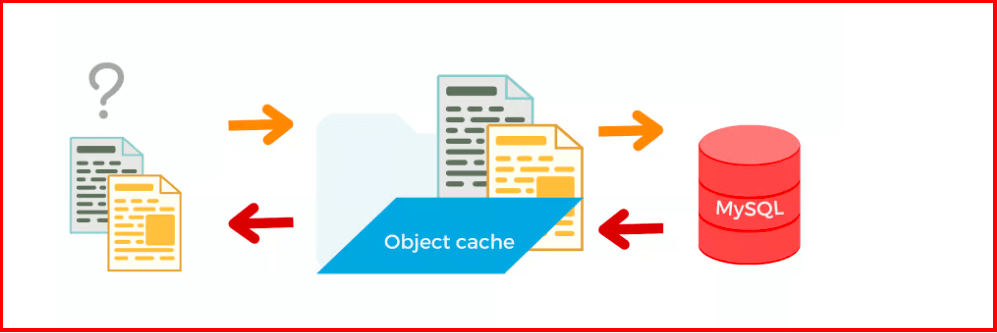
- Object caching: This type of caching stores repeatedly accessed data objects in memory, such as database queries or API responses. Object caching is particularly useful for websites that rely heavily on dynamic content, as it can reduce the time it takes to generate pages or resources that require multiple database queries or API requests.
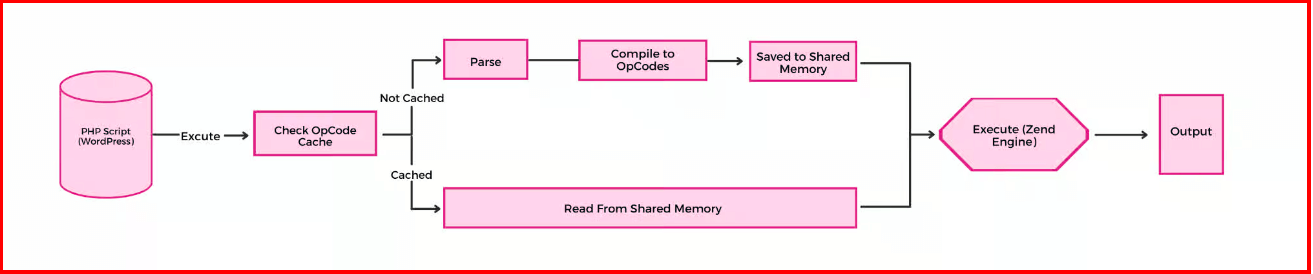
- Opcode caching: This type of caching stores compiled PHP code in memory, which can reduce the time it takes to execute PHP scripts and generate pages or resources. Opcode caching is particularly useful for websites that use custom PHP code or plugins, as it can significantly improve the performance of those scripts.
- CDN caching: This type of caching stores frequently accessed static resources, such as images or CSS files, on a content delivery network (CDN). When a user requests help, the CDN serves it from the server closest to the user, which can reduce the time it takes to load the resource and improve overall website performance.
How to Configure Auto Server-Side Caching in WordPress
One of the easiest ways to implement server-side caching in WordPress is through a hosting control panel such as Cpanel.
Many web hosts offer automatic caching configuration options within their Cpanel interface, which can make it simple to enable caching without having to configure settings manually.
Enabling server-side caching for a WordPress website is a quick and easy process that can be done in just a few clicks through the hosting Control Panel.
Here is a step-by-step guide on how to enable server-side caching for your WordPress site:
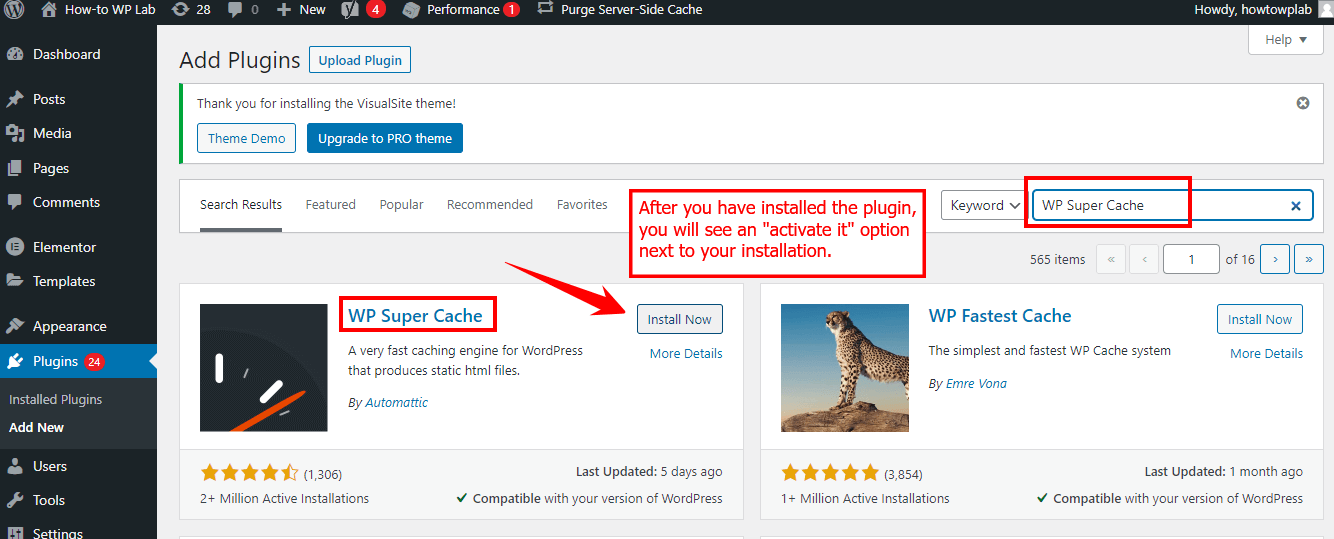
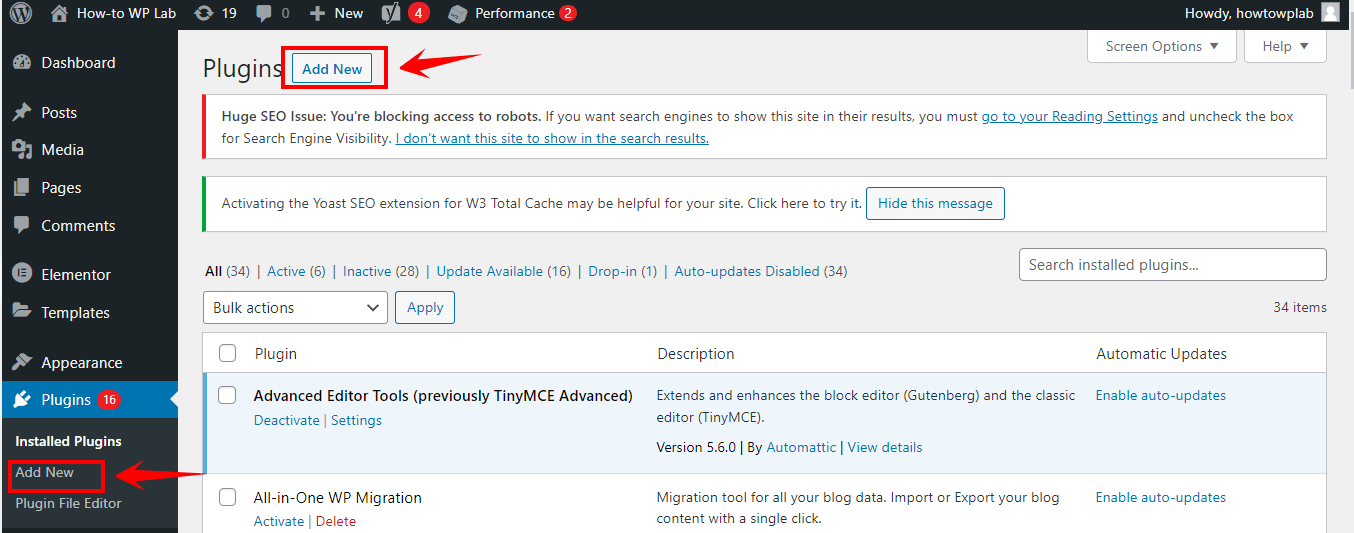
- Log in to your WordPress dashboard and navigate to “Plugins” > “Add New.”
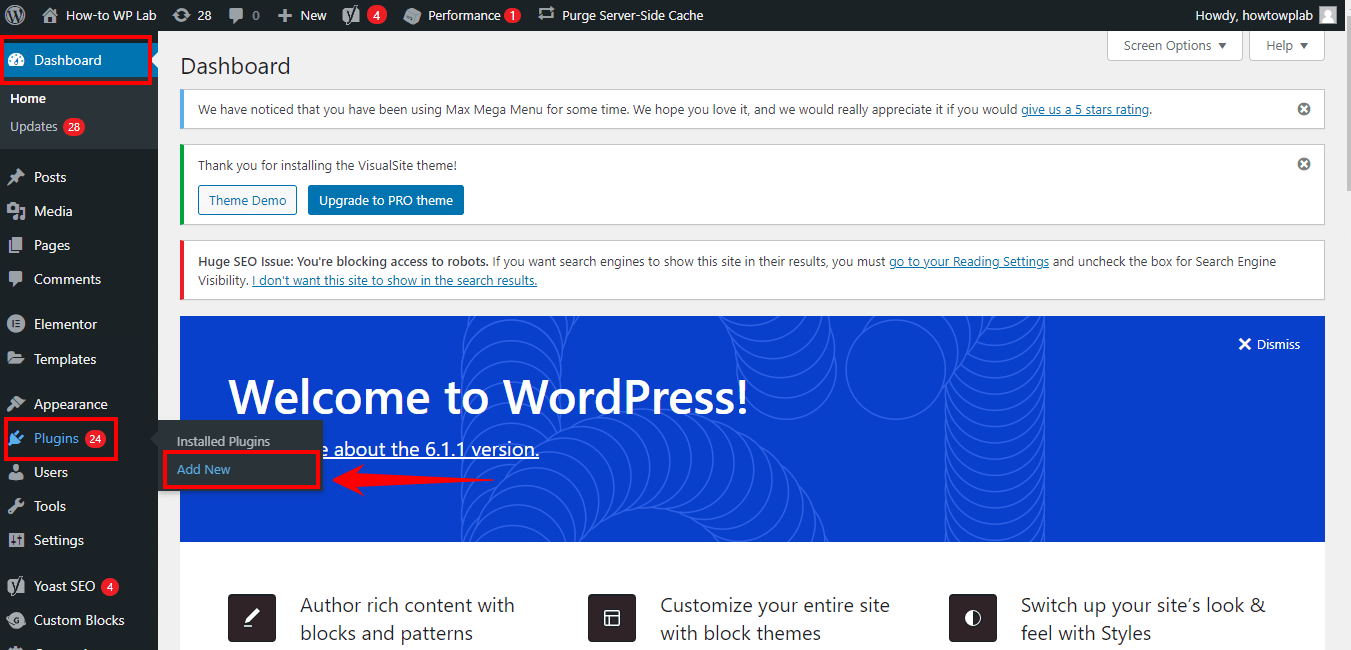
- Search for “WP Super Cache” in the search bar, click “Install Now,” and activate the plugin.
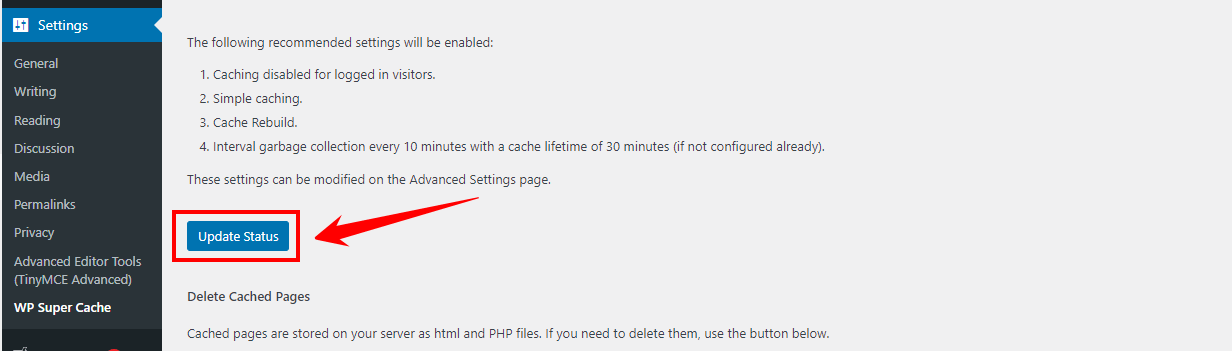
- Go to “Settings” > “WP Super Cache,” and under the “Easy” tab, select “Caching On (Recommended).”
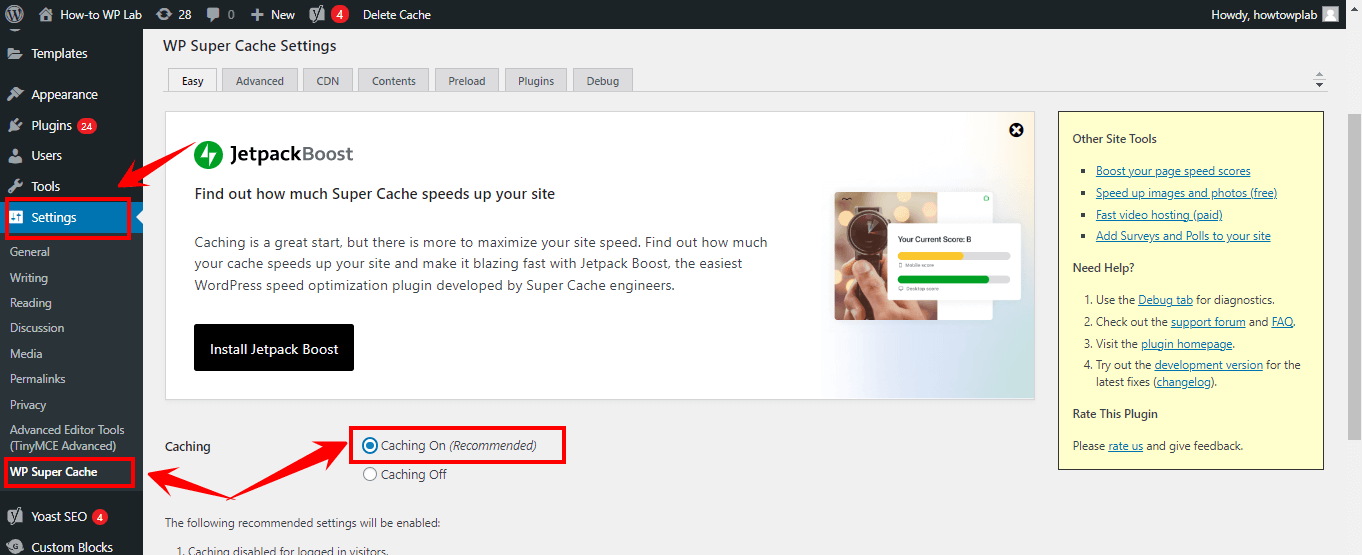
- Click “Update Status” to save the changes and navigate to the “Advanced” tab in the WP Super Cache settings.
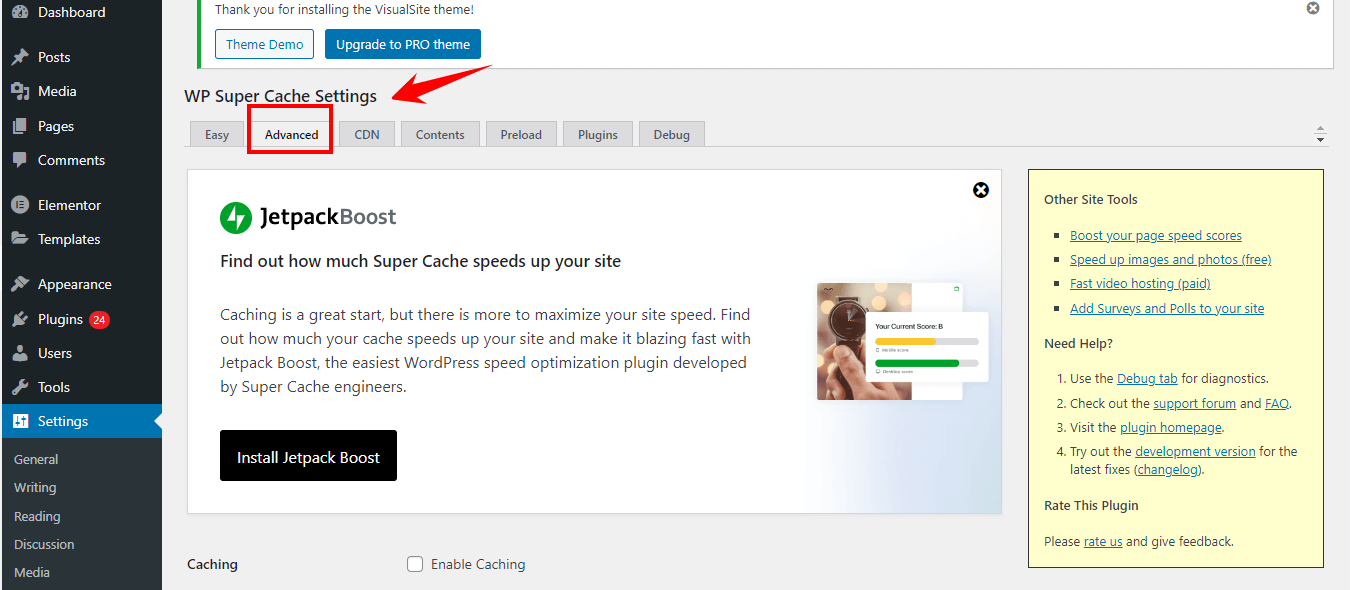
- Navigate to the “Advanced” tab in the WP Super Cache settings for more configuration options.
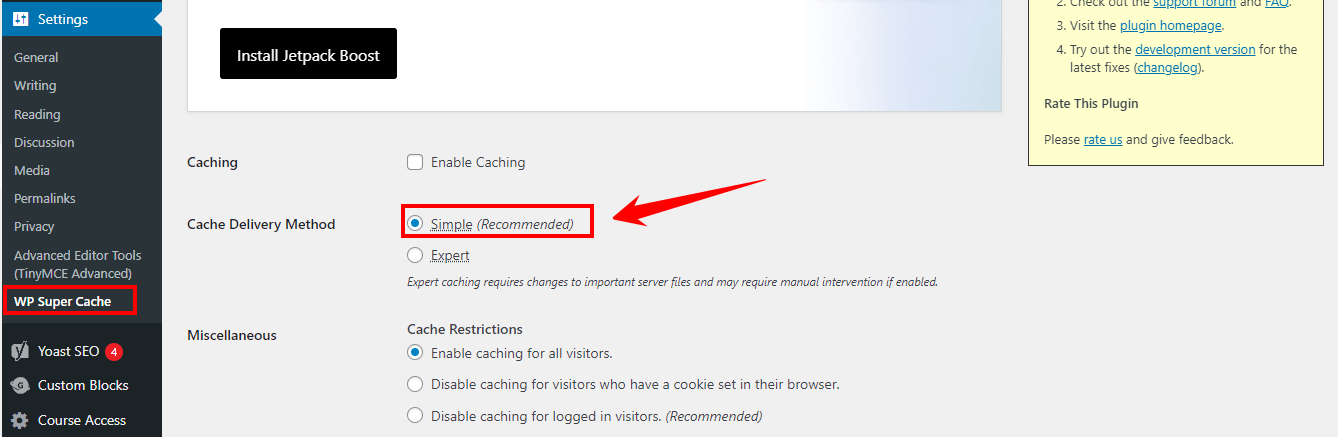
- Choose “Simple” as your preferred caching method.
- Enable “Compress pages” to reduce the size of files sent from your server.
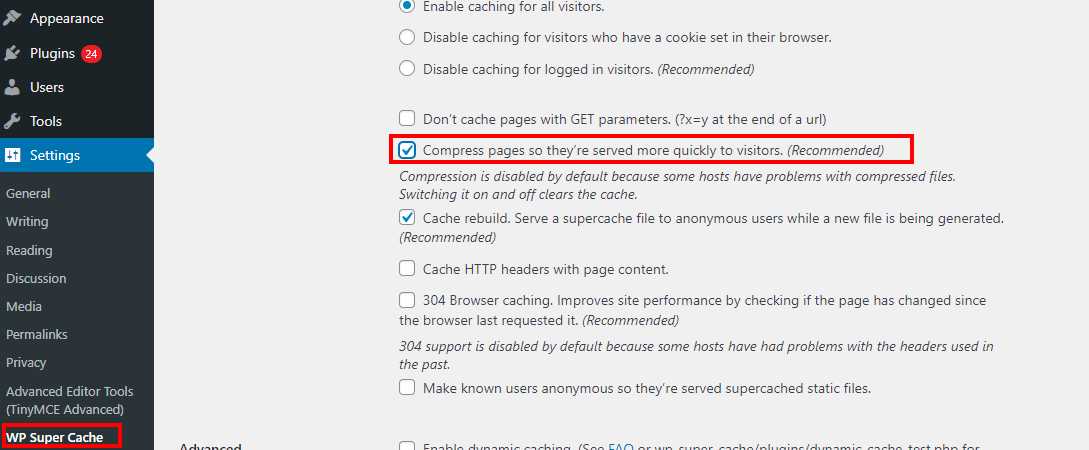
- The next step is to look for the “Cache Restrictions” section. Make sure the “Disable caching for logged-in visitors” checkbox is ticked.
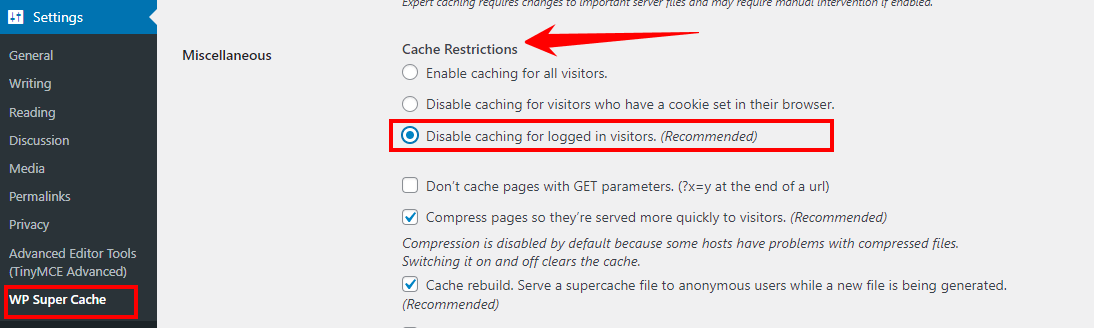
Note:
This option ensures that logged-in users will see the most up-to-date content, while anonymous visitors will receive cached versions of the pages.
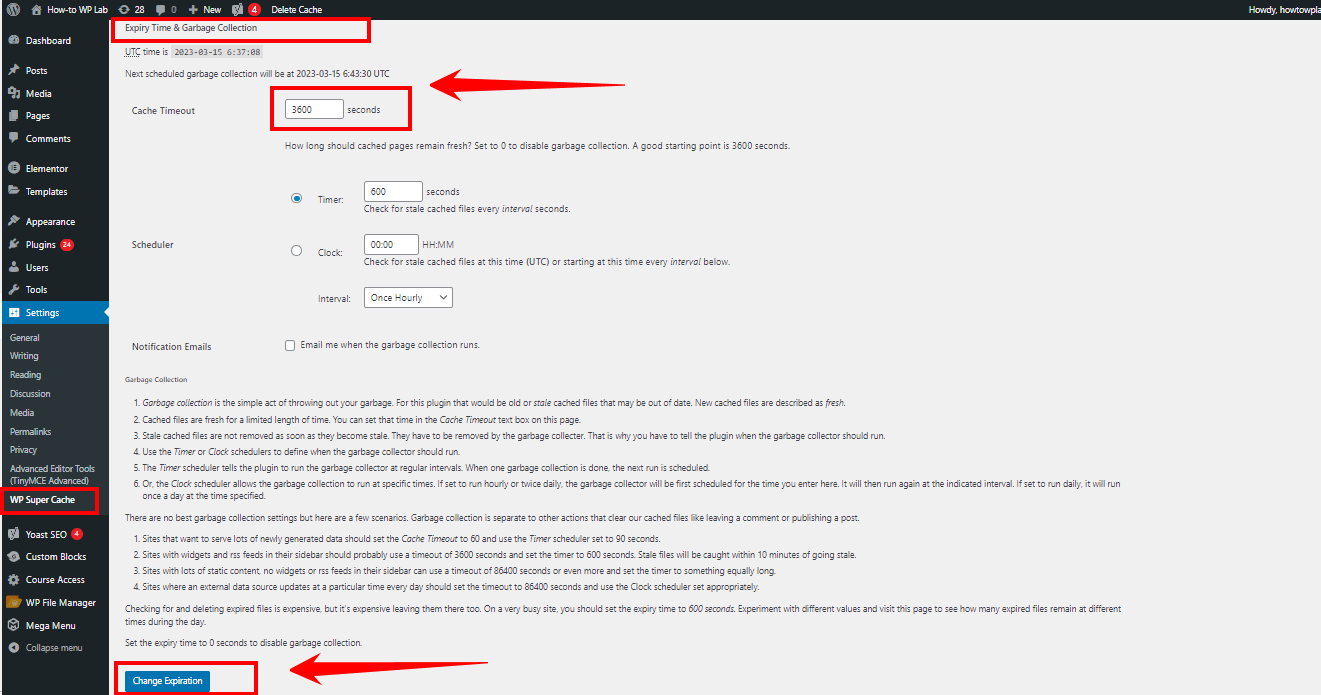
- In the “Advanced” tab, set the “Cache Timeout” in the “Expiry Time & Garbage Collection” section (e.g., 3600 seconds or 1 hour) and click “Change Expiration.”
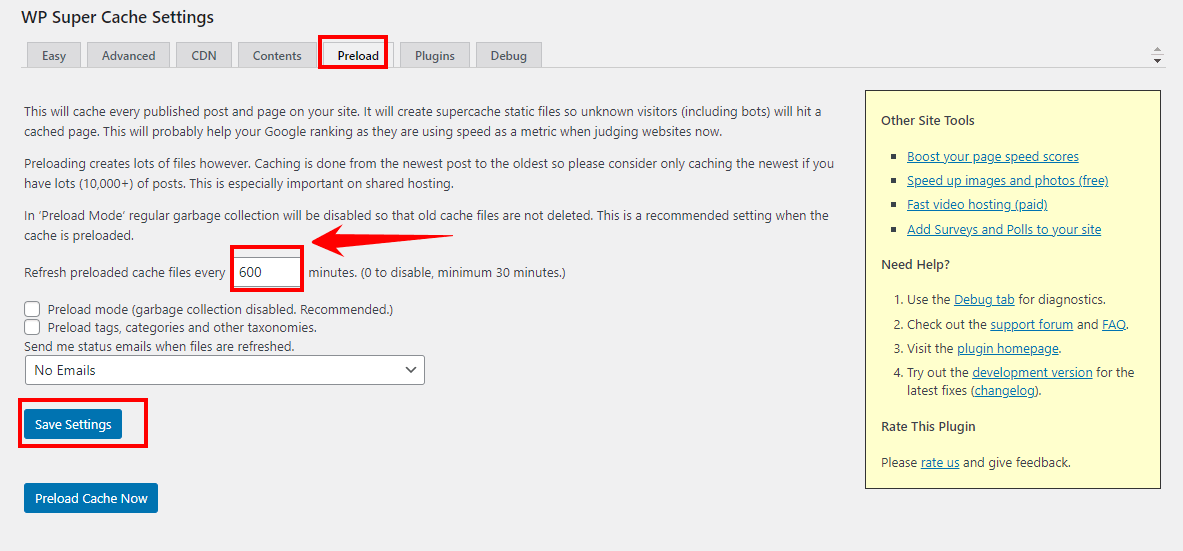
- Go to the “Preload” tab, enable “Preload mode,” set the “Preload interval” (e.g., 600 minutes), and click “Update Settings.”
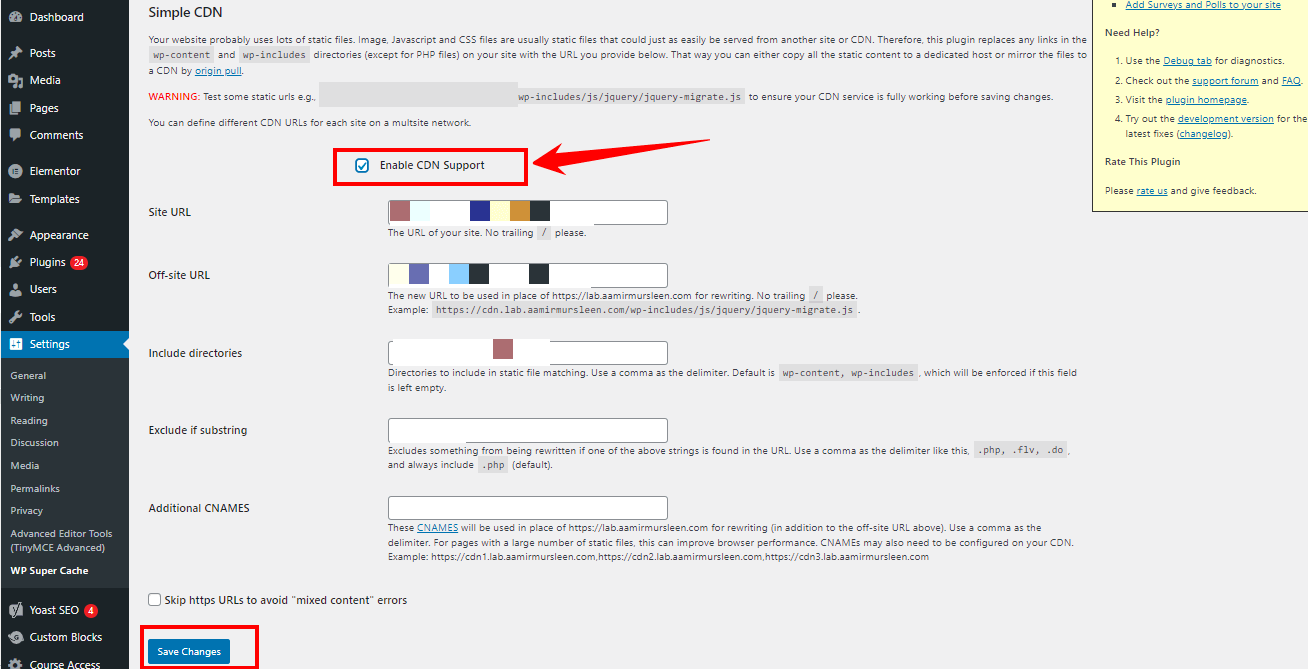
- If using a CDN, go to the “CDN” tab, enable “CDN Support,” enter your CDN details, and click “Save Changes.”
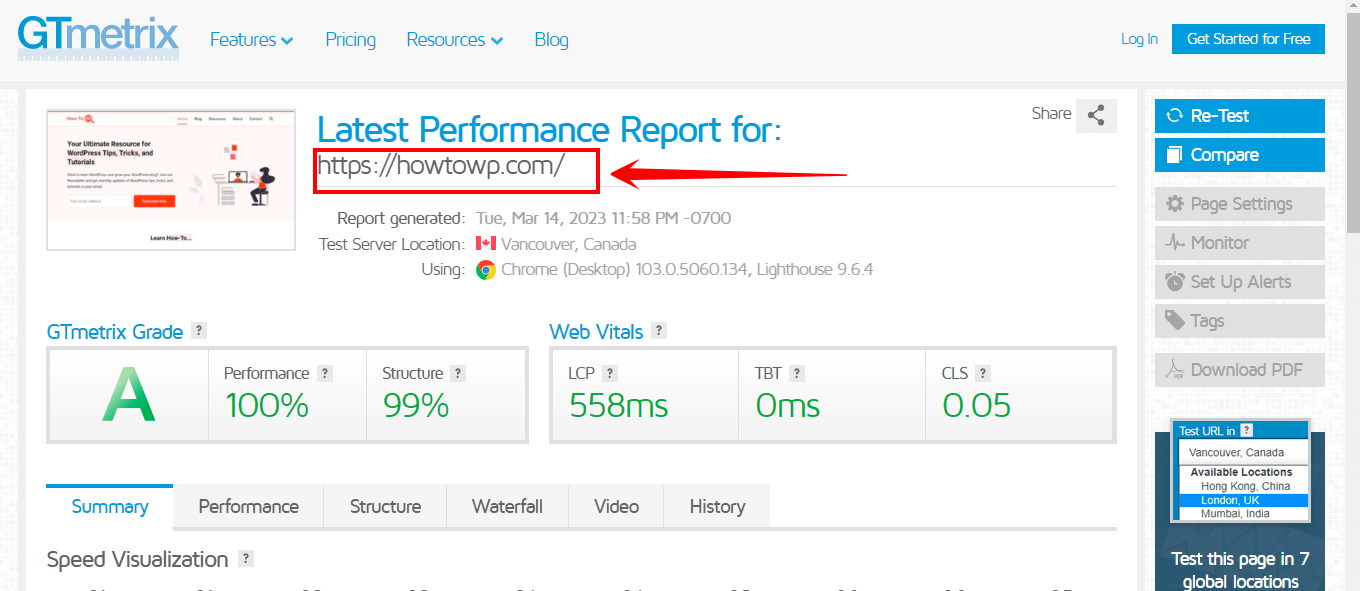
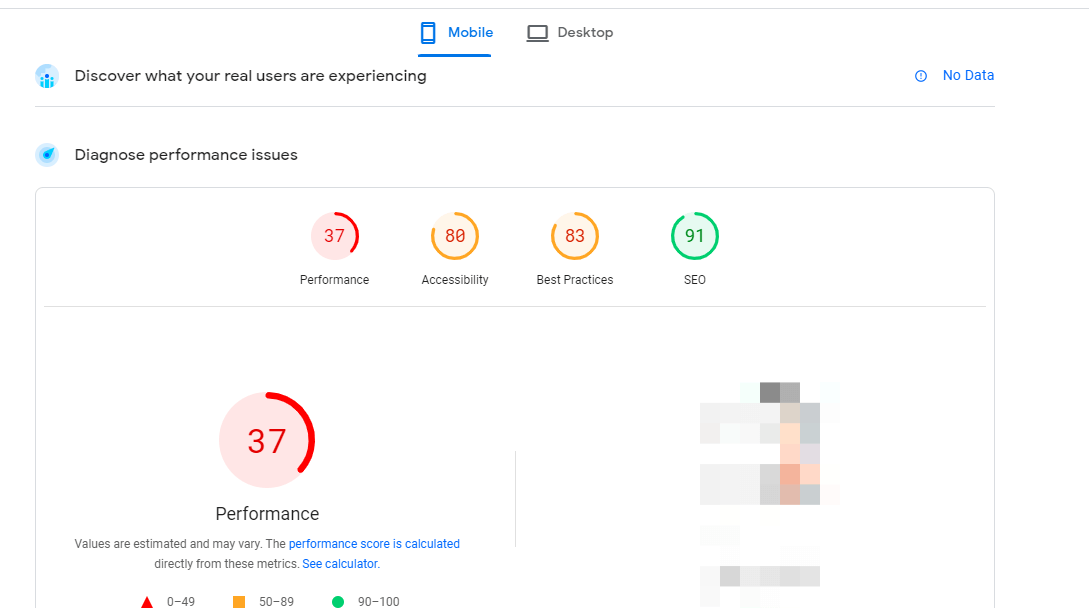
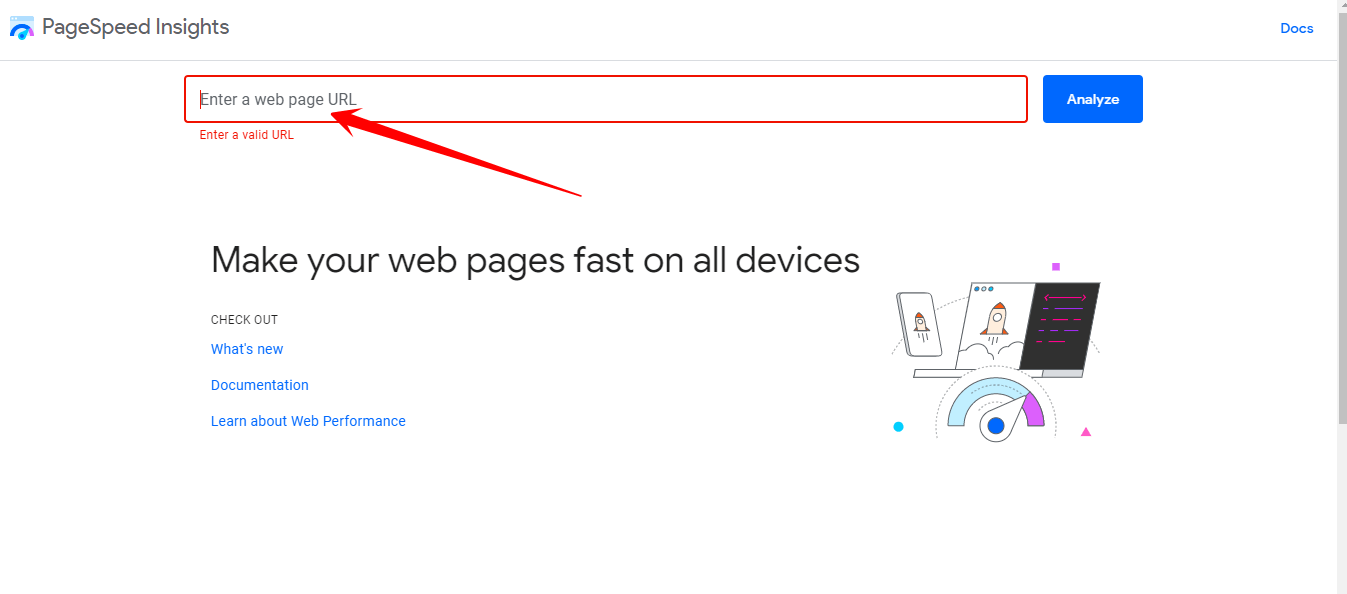
- Test your website’s performance in an incognito browser window using tools like Google PageSpeed Insights, GTmetrix, or Pingdom to ensure the caching is working correctly.
How to Configure Manual Server-Side Caching in WordPress
Manual server-side caching is configuring caching settings for your WordPress website manually without relying on the hosting Control Panel.
This approach provides greater flexibility and control over your website’s caching settings and can be particularly useful for advanced users who want to optimize their website’s performance even further.
There are two methods you can follow to perform manual server-side caching configuration in WordPress:
Method 1: Configuring WordPress Content Cache
WordPress offers several different caching options that allow you to cache specific types of content on your website. This can be particularly useful for improving the performance of frequently accessed content, such as posts or pages.
Here is a step-by-step guide on how to configure WordPress to cache content:
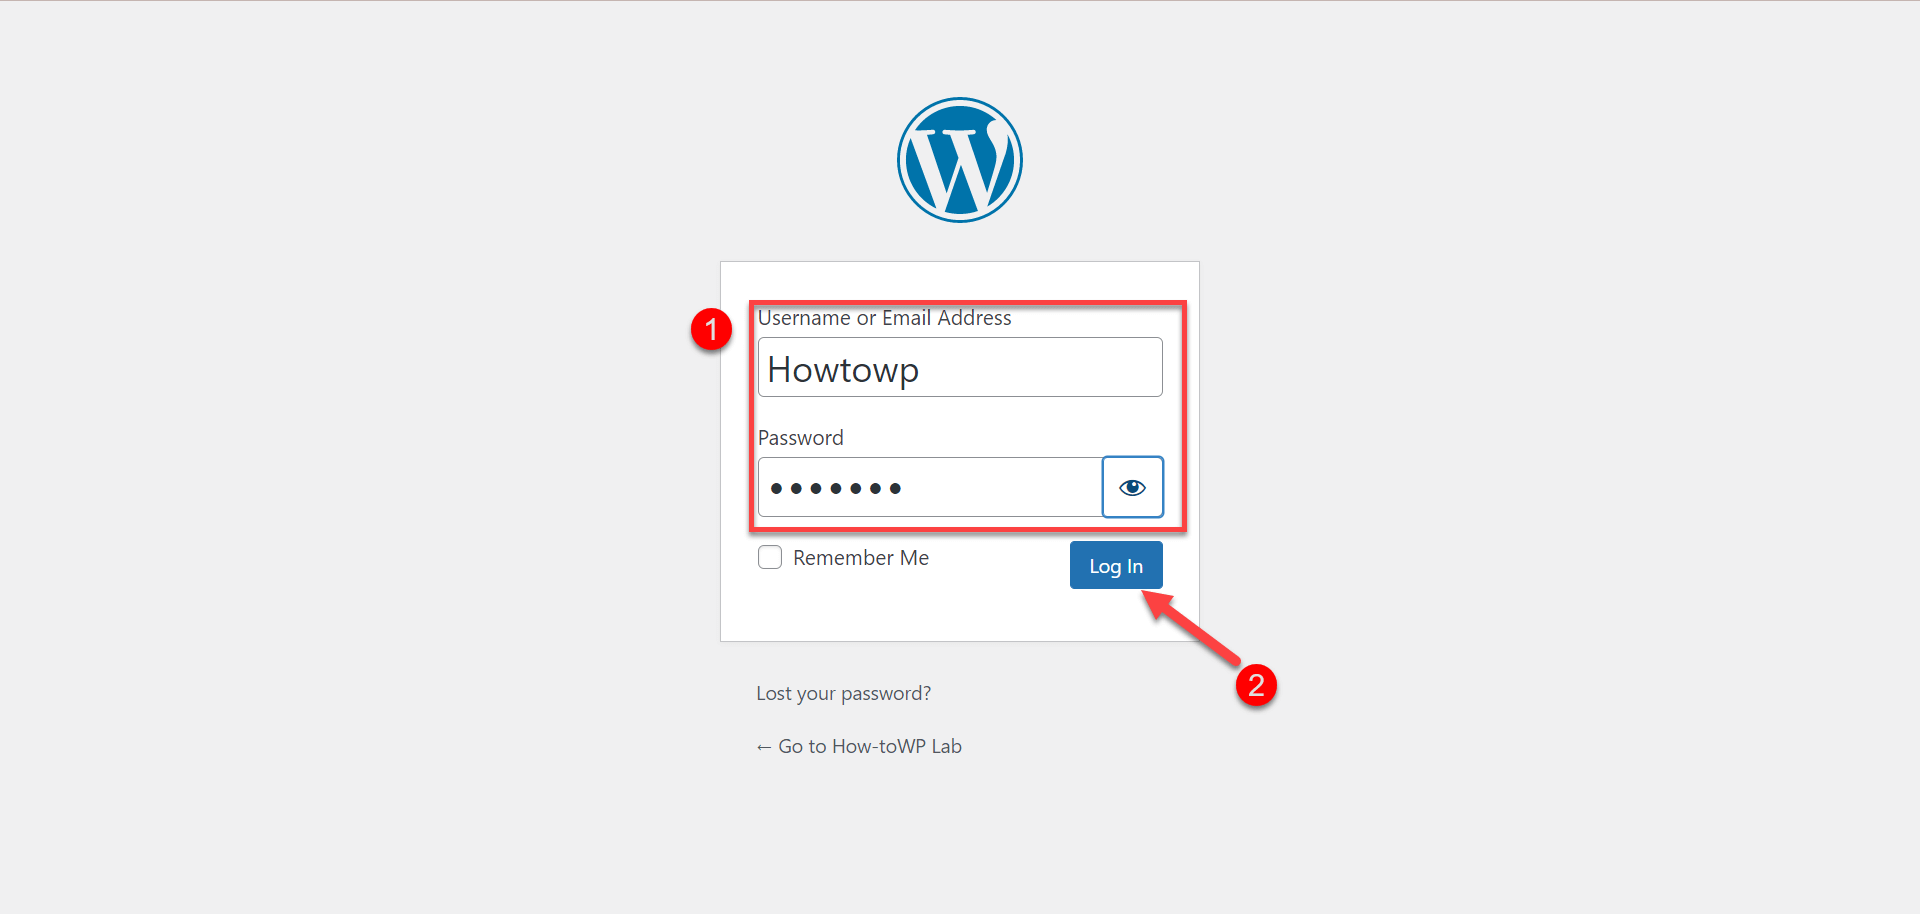
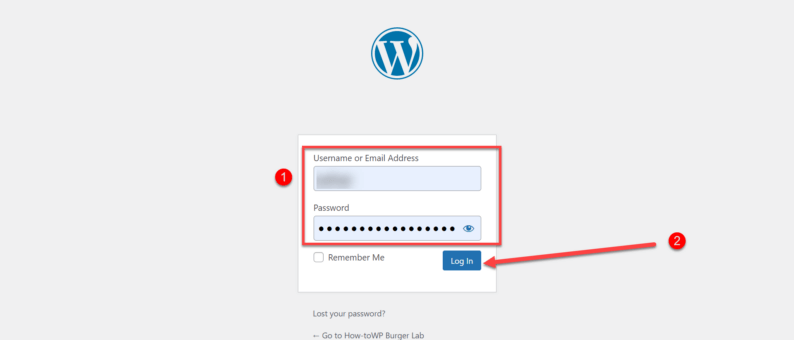
- Login to your WordPress website using your login credentials (username and password).
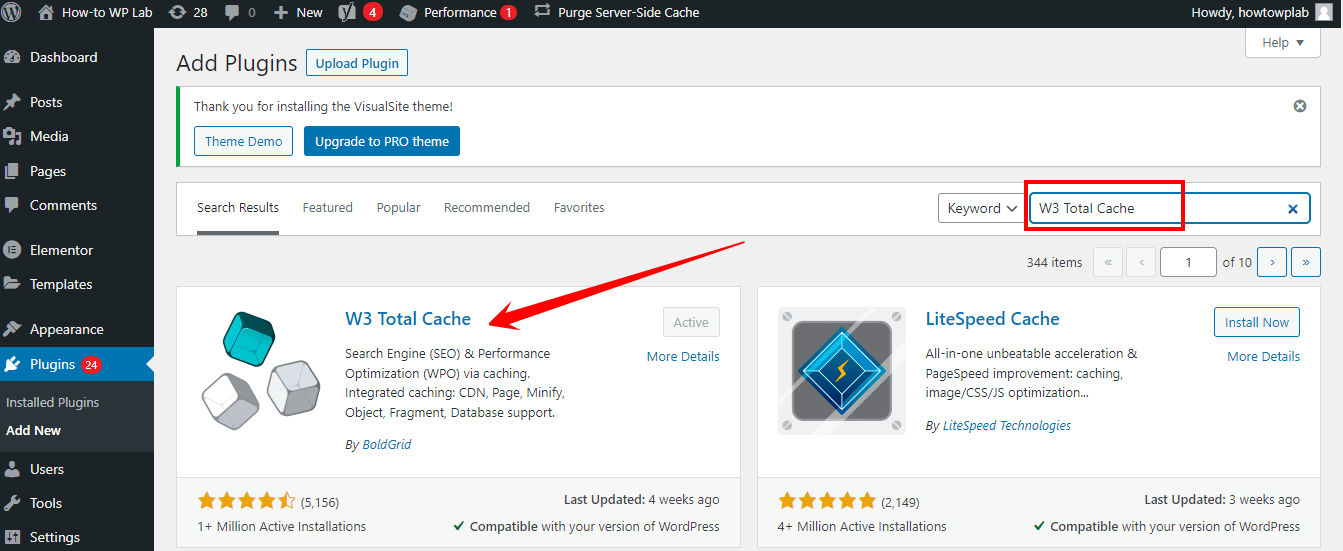
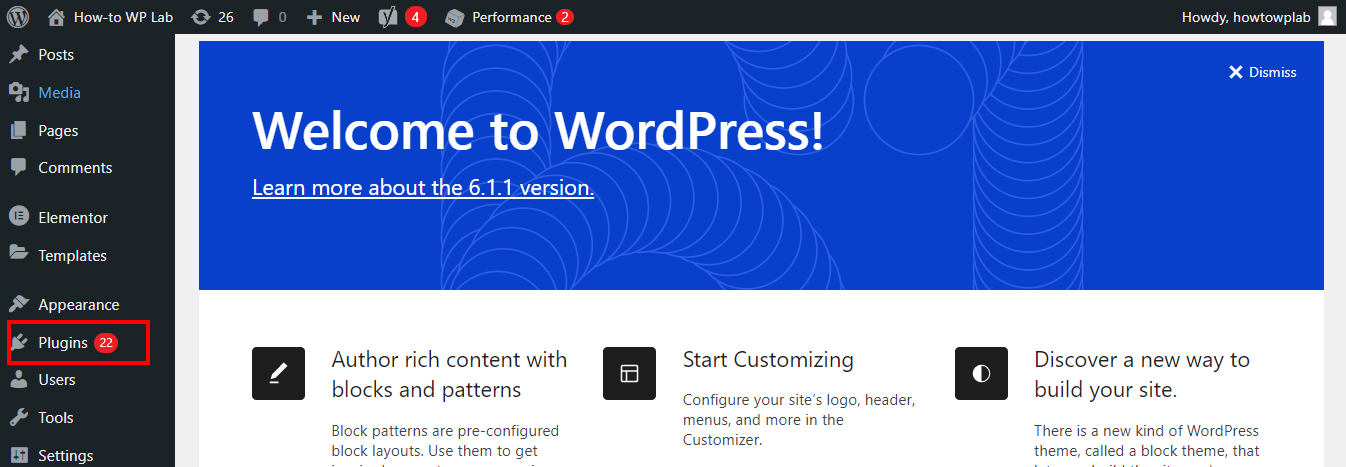
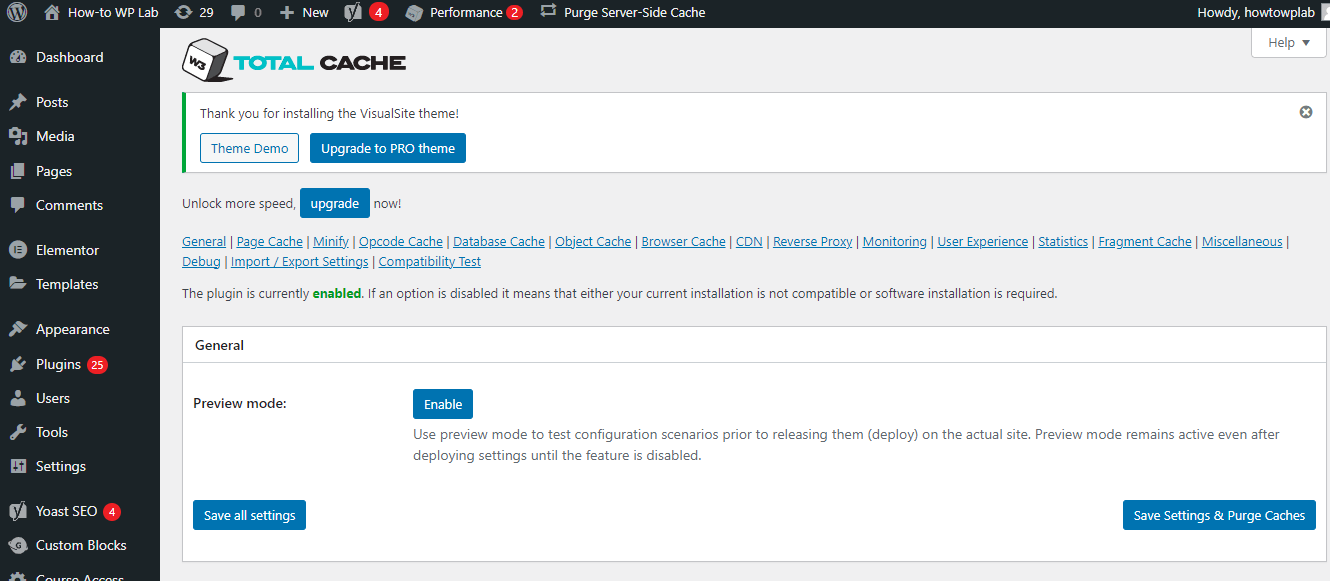
- Install and activate the W3 Total Cache plugin. You can do this by going to the “Plugins” section on the left-hand side of the dashboard, then clicking “Add New.” Search for “W3 Total Cache,” install and activate it.
- Once the plugin is activated, you’ll see a new “Performance” section on the left-hand side of the dashboard. Click on it to access the W3 Total Cache settings.
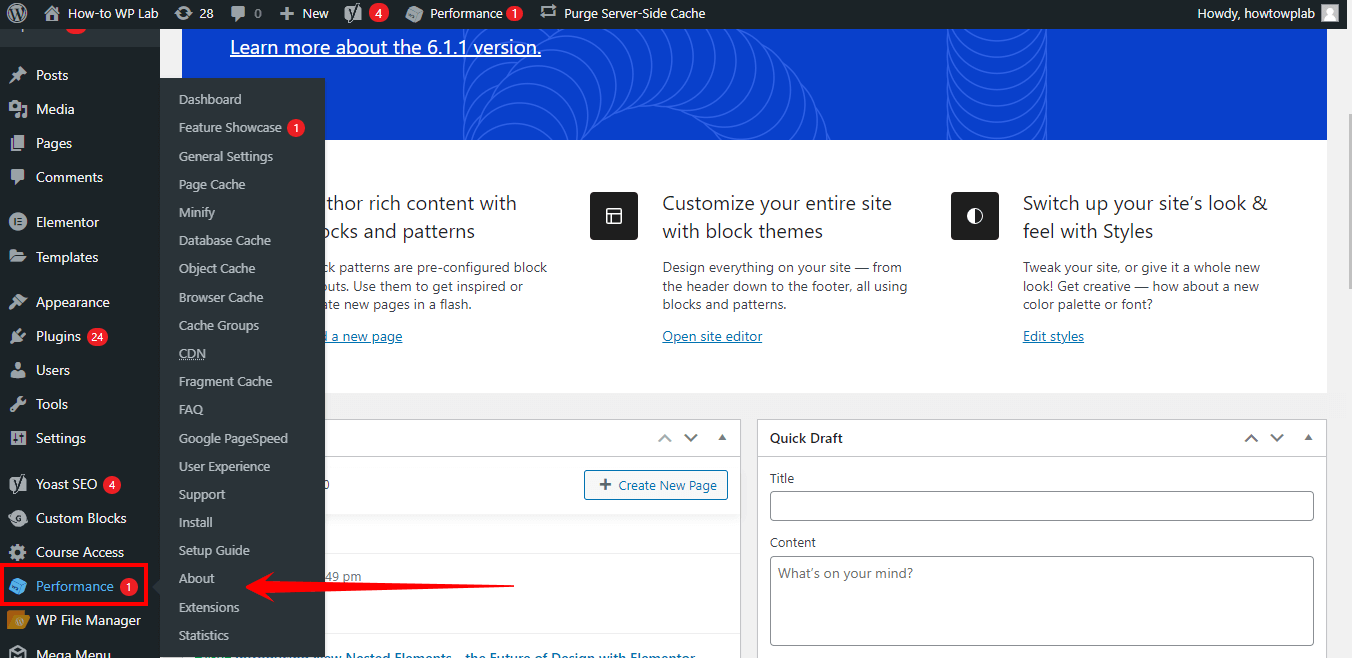
- The first thing you’ll want to do is enable caching. Click on the “General Settings” tab, scroll down to the “Page Cache” section, and select “Enable.” Make sure to save your changes.

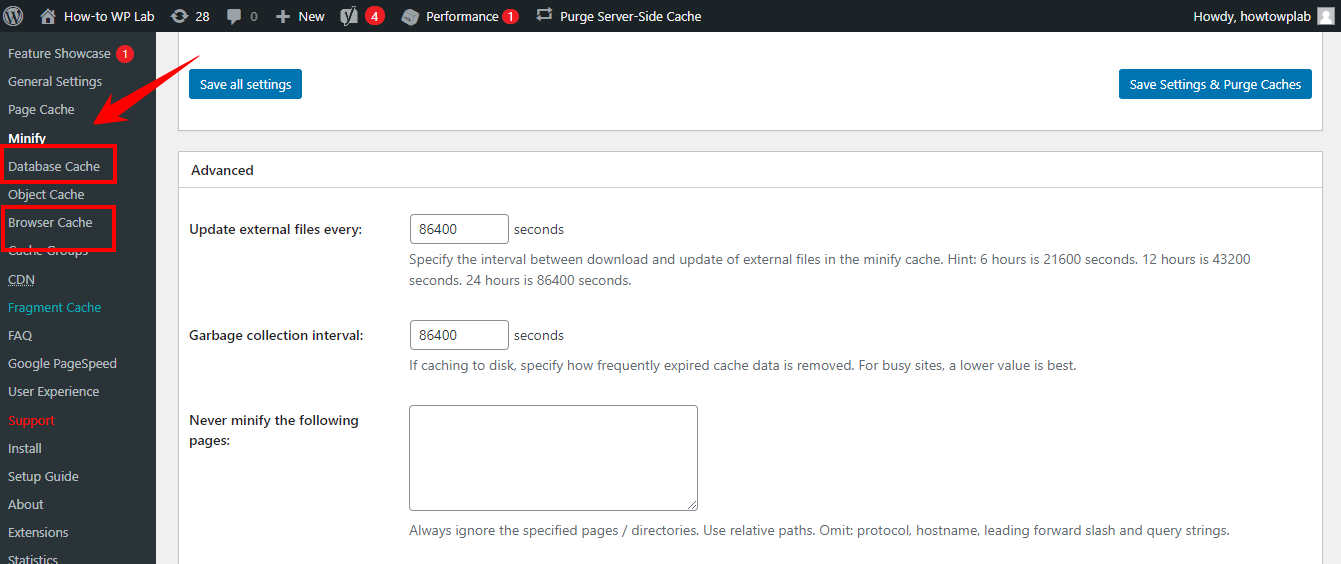
- Next, you can configure the other caching options, such as minification, browser caching, and database caching. These options can be found in the “Minify,” “Browser Cache,” and “Database Cache” tabs.
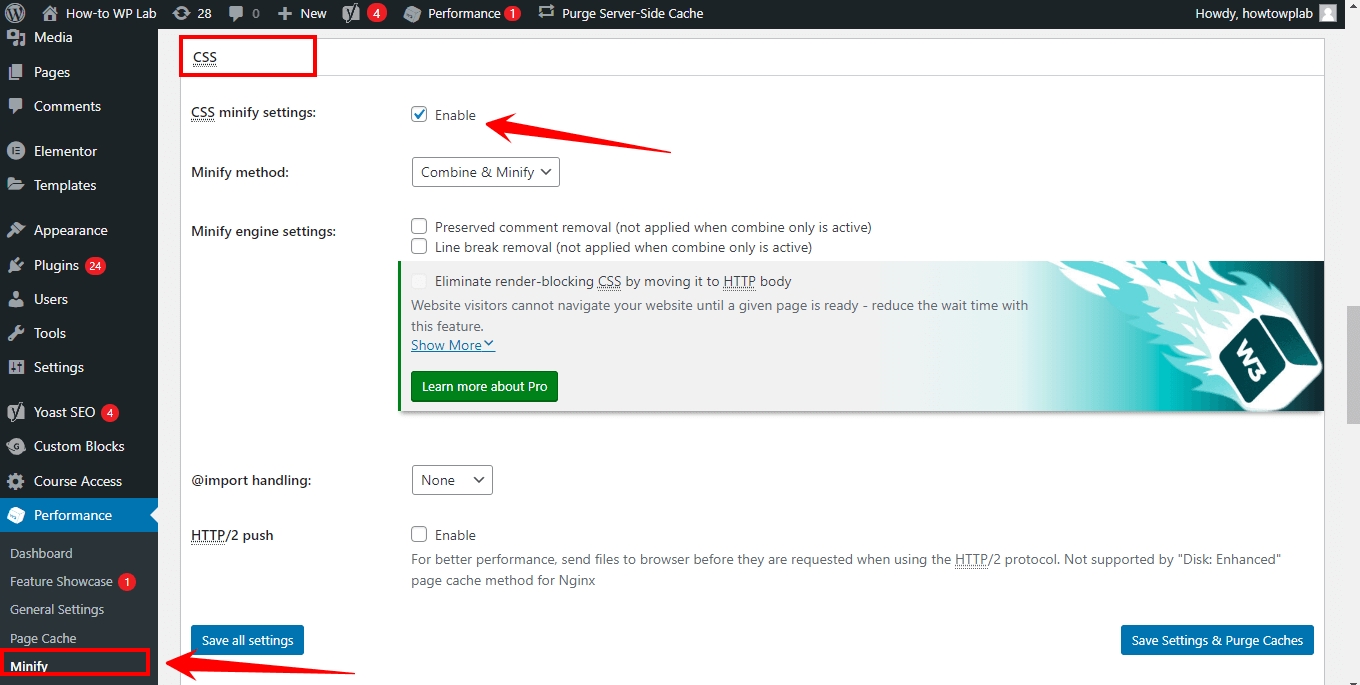
- In the “Minify” tab, you can enable minification of CSS, JavaScript, and HTML files, which can help to reduce their size and improve page loading times.
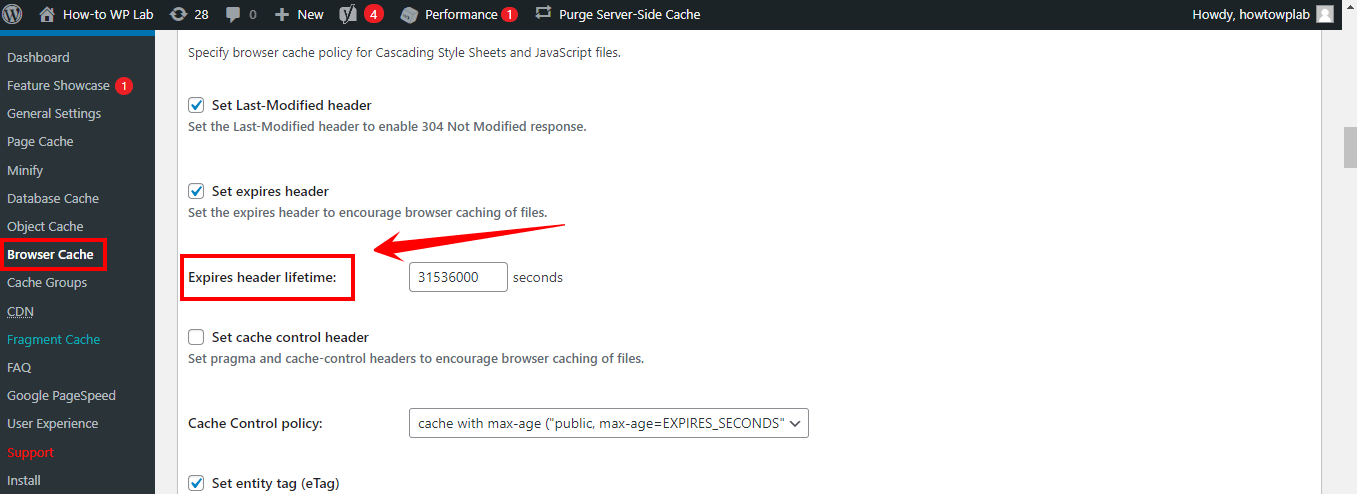
- In the “Browser Cache” tab, enable browser caching by selecting “Enable” under “General” and select a time period under “Expires header lifetime.” This allows visitors’ browsers to store specific files (such as images and CSS) on their local devices for faster access.
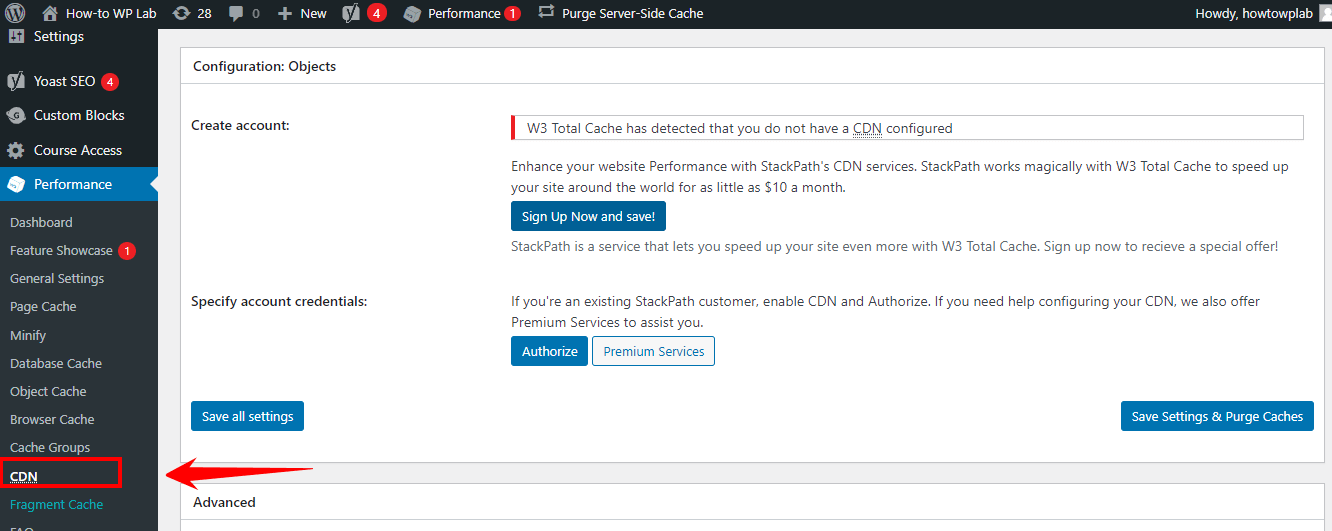
- In the “CDN” tab, you can set up a content delivery network (CDN) to further improve your site’s speed and performance. This involves connecting your site to a network of servers worldwide so that visitors can access your content from a server closer to them. You can use one of the supported CDNs or set up a custom one.
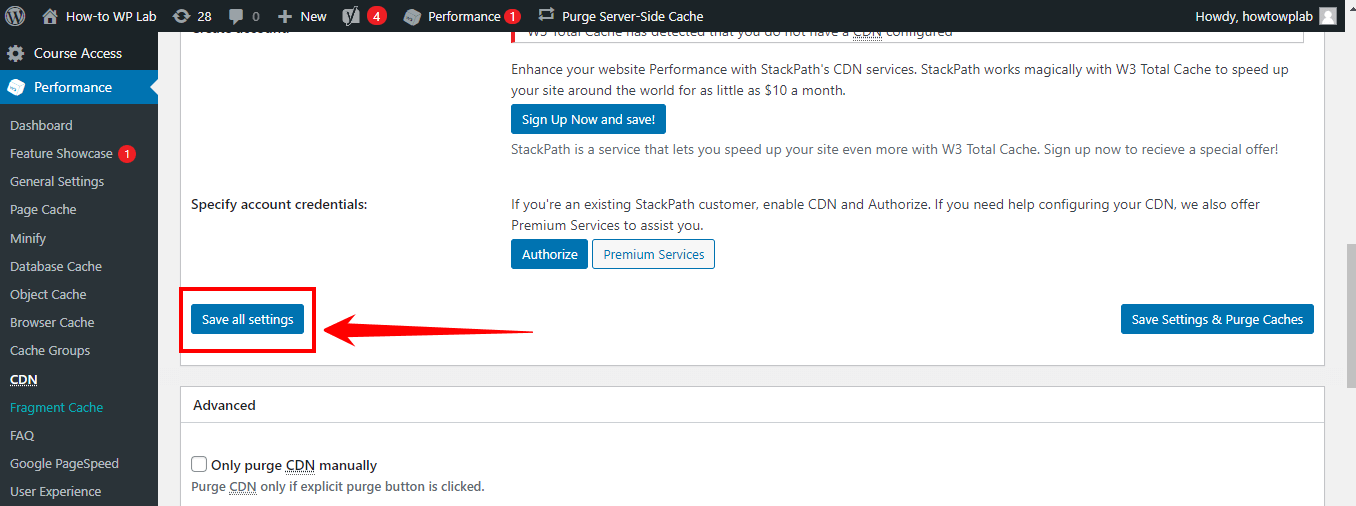
- After making changes to your caching settings, click “Save All Settings” to ensure that your changes take effect.
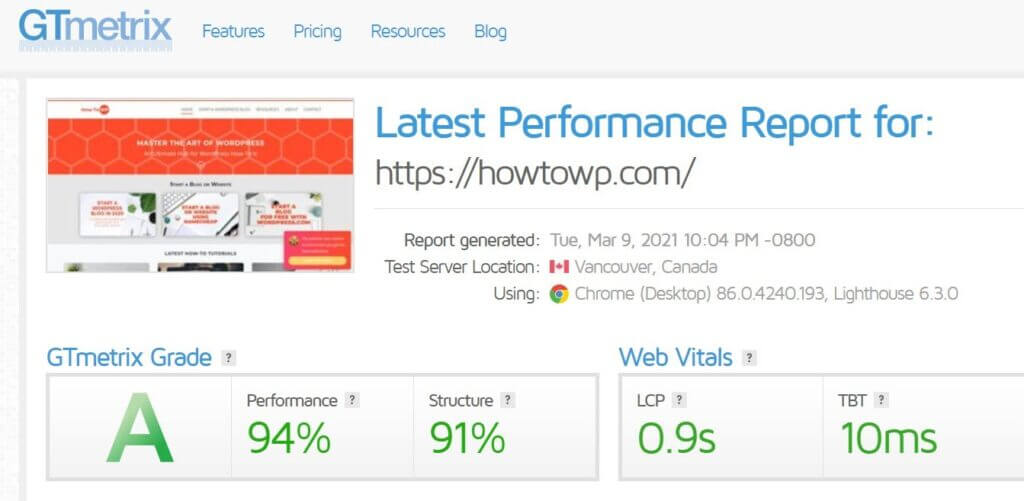
Pro Tip: Finally, you can test your site’s speed and performance using tools like Google PageSpeed Insights or GTmetrix. These tools will give you suggestions for further optimizations, such as optimizing images or implementing lazy loading.
Method 2: Clearing the Cache in WordPress
Clearing the cache in WordPress is an essential maintenance task that can help ensure your website runs at peak performance.
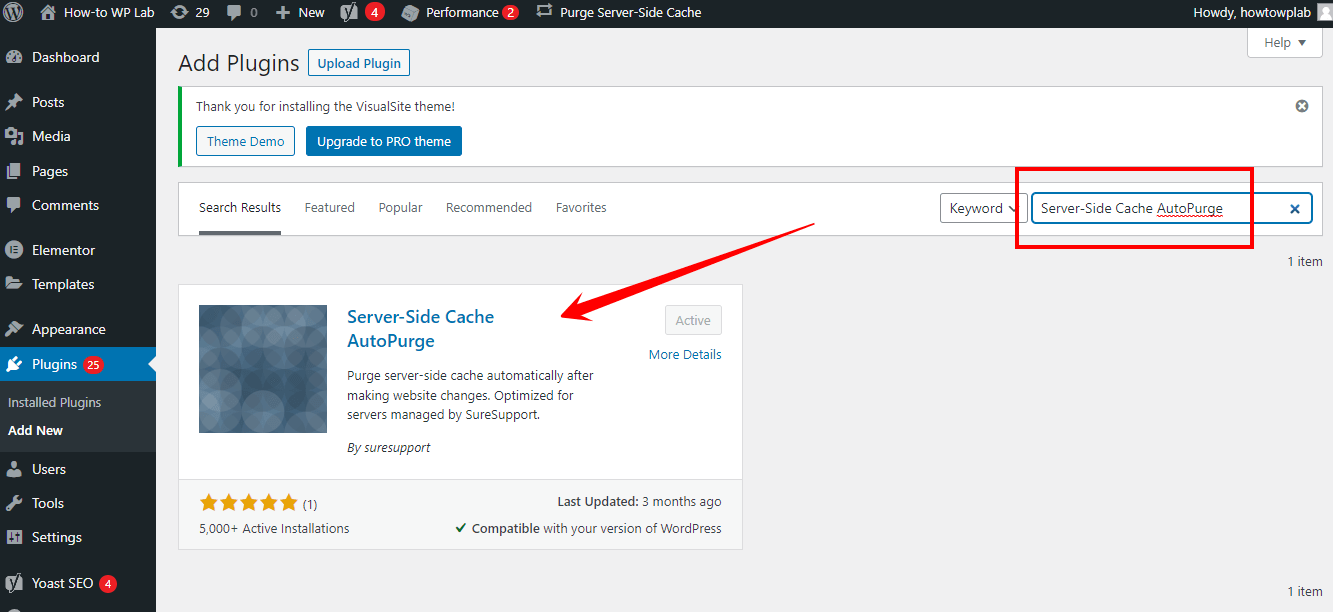
One popular plugin that can help with this is the Server-Side Cache AutoPurge Plugin.
Here’s a step-by-step guide on how to install and activate the Server-Side Cache AutoPurge Plugin:
- Login to your WordPress Dashboard, you will need to enter your username and password. You can usually find the login page by adding “/wp-admin” to the end of your website’s URL.
- Click on the “Plugins” section in the left-hand menu.
- Click on the “Add New” button at the top of the page.
- Type “Server-Side Cache AutoPurge” in the search box and press Enter.
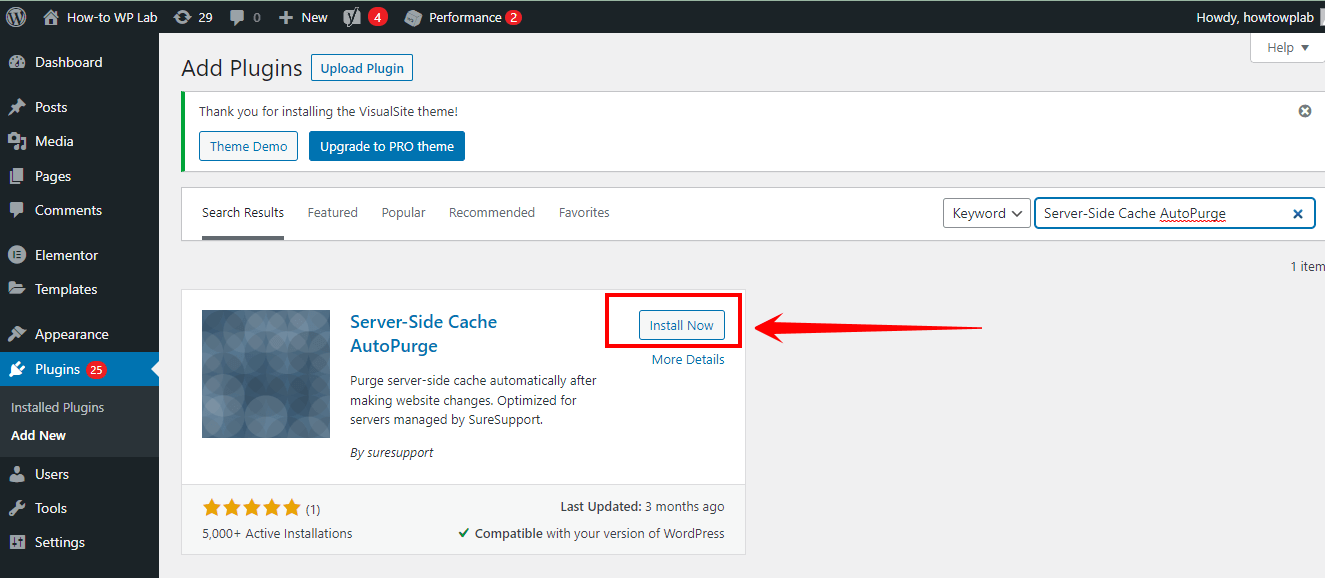
- Locate the “Server-Side Cache AutoPurge” plugin and click the “Install Now” button.
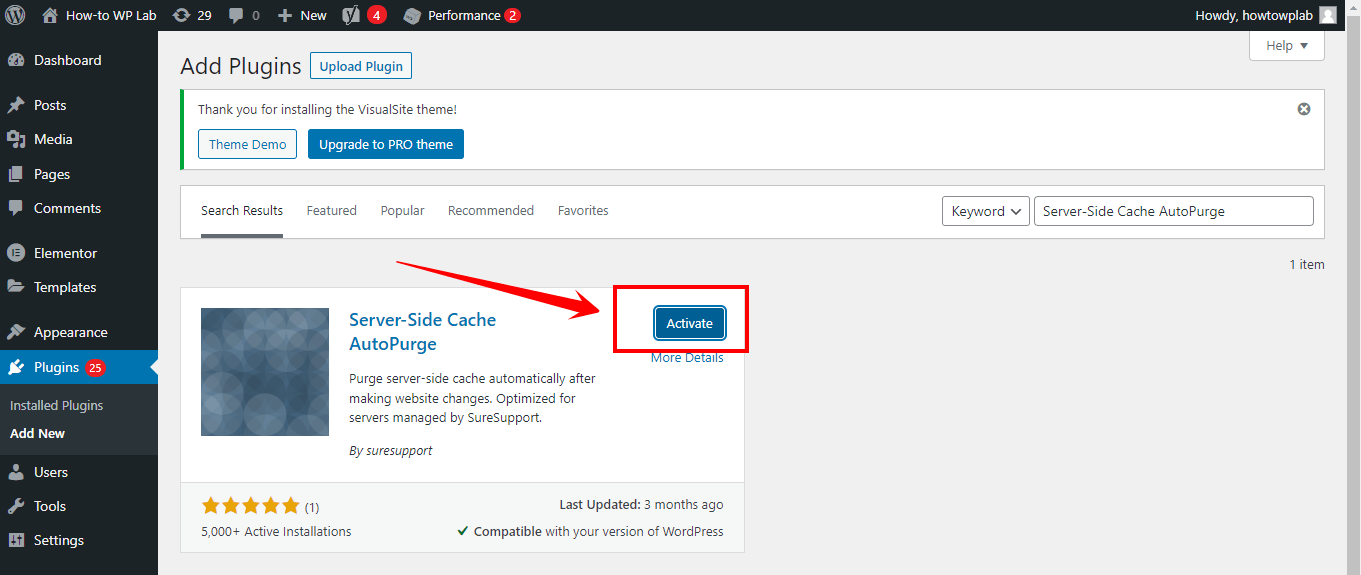
- Once the installation is complete, click the “Activate” button to activate the plugin.
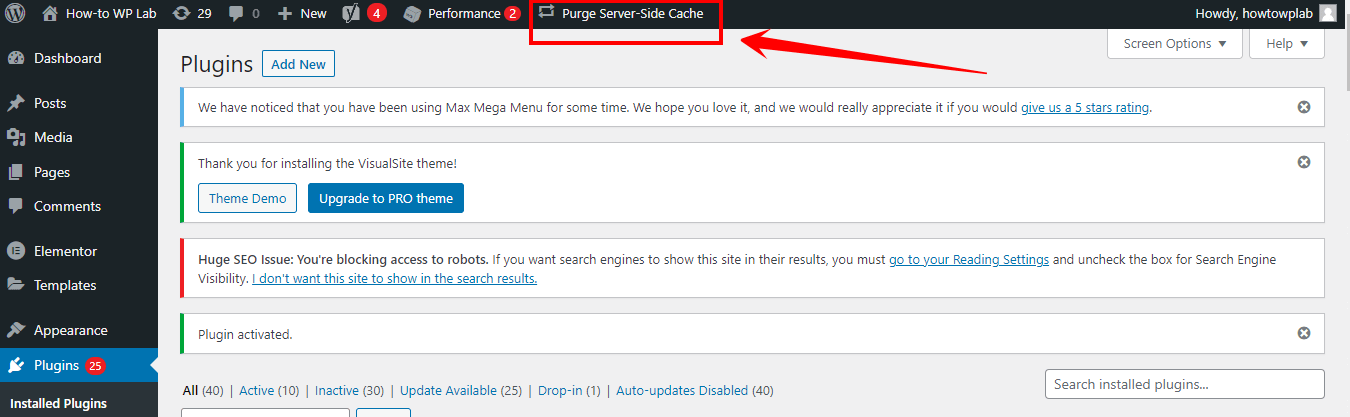
- After activation, you will see a “Purge Server-Side Cache” button at the top left side of the WordPress Dashboard. Click on the button to clear the cache.
Pro Tip: You can also configure the plugin to clear the cache automatically on a schedule or when specific events occur, such as when you publish a new post.
Using these simple steps, you can install and activate the Server-Side Cache AutoPurge Plugin in WordPress to clear your website’s cache and improve its performance.
Advantages Of Server-Side Caching
Despite the potential problems with server-side caching, this technique has many benefits to improving your website’s performance. Some of the advantages of server-side caching include the following:
- Improved website speed: By caching frequently accessed content, server-side caching can reduce page load times and improve website speed.

- Reduced server load: By caching content, server-side caching can reduce the server resources required to serve content to users.
- Better user experience: By improving website speed and reducing server load, server-side caching can help to provide a better overall user experience for your visitors.

Disadvantages of Server-Side Caching
While server-side caching can be an effective way to improve the performance of your WordPress website, it is not without its drawbacks. Some of the potential problems with server-side caching include the following:
- Increased complexity: Implementing server-side caching can add complexity to a website or application, especially if it requires custom code or third-party libraries. This can make it harder to maintain and troubleshoot the system.
- Resource usage: Caching requires additional resources, such as memory or disk space, to store cached data. This can impact server performance if the cache is not managed correctly, leading to slower response times or crashes.
- Increased server load: Enabling server-side caching can increase server load, negatively impacting website performance if not properly managed.
Troubleshooting Common Cache Issues
To ensure that your server-side caching is working correctly, monitoring your website for common cache issues and resolving them as quickly as possible is important. Some common cache issues include:
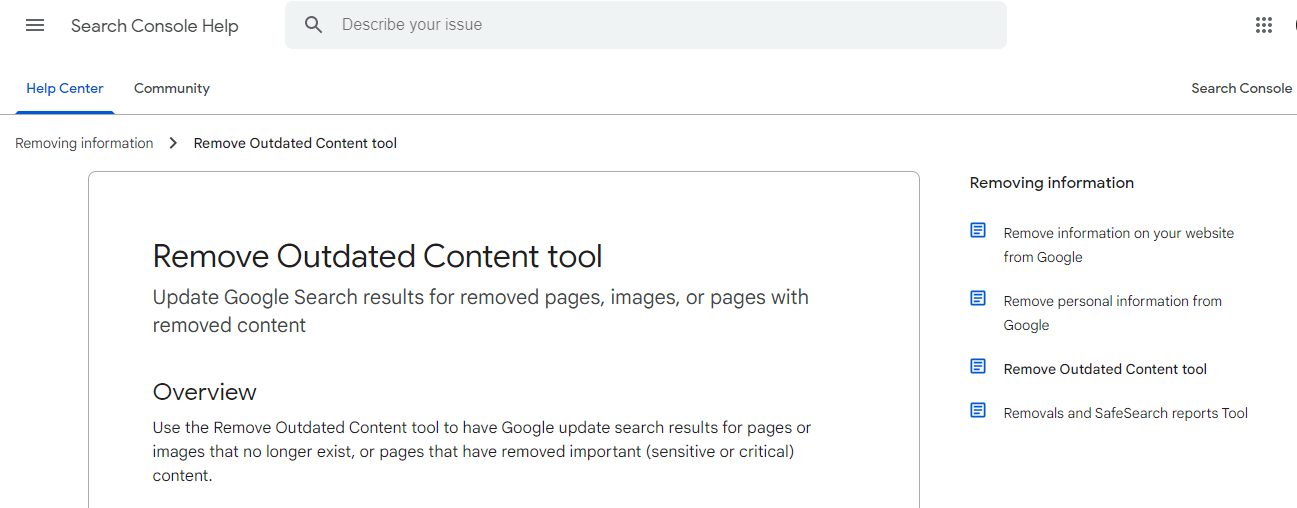
- Outdated content: If your website displays outdated content, it could be caused by caching settings that need to be adjusted. You can also utilize the Remove Outdated Content tool to eliminate any outdated content.
- Inconsistent content: Inconsistent content can occur when the cached content is not updated frequently enough or when server-side caching interferes with dynamic content.
- Cache conflicts: Cache conflicts can occur when server-side caching interferes with other plugins or features on your website.
To troubleshoot common cache issues, you can:
- Clear your cache: Clearing your cache is a simple way to resolve outdated or inconsistent content issues. To clear your cache, go to the caching plugin settings and click on the “Clear Cache” button. If you use a plugin that doesn’t have a “Clear Cache” button, you can try clearing your browser cache instead.
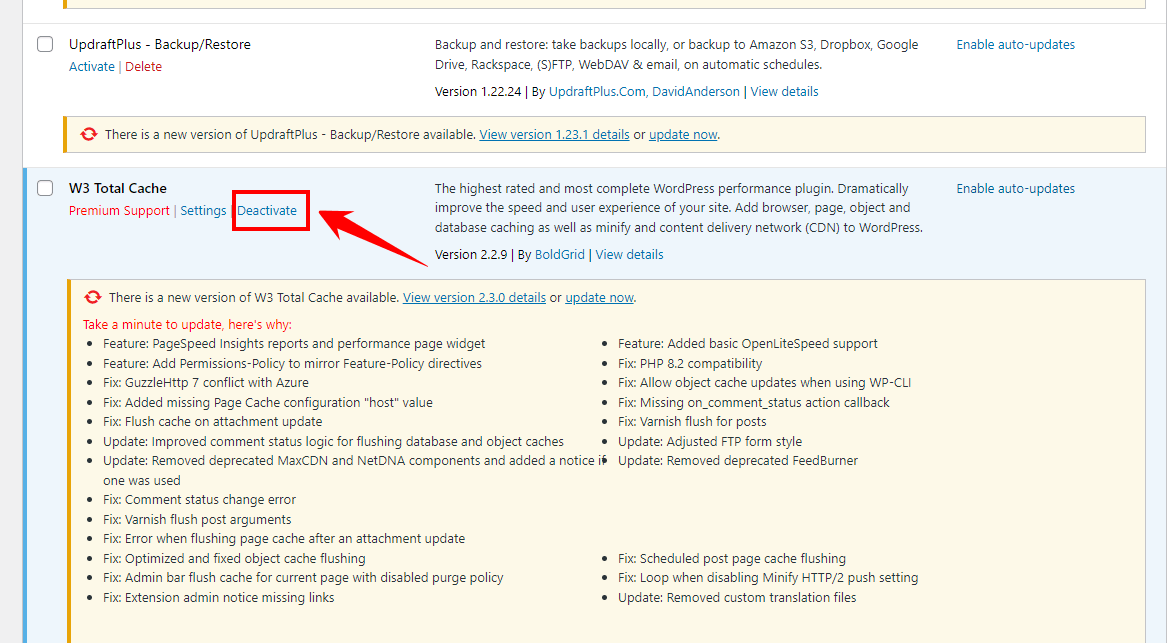
- Disable your caching plugin: If you are experiencing issues with cache conflicts, temporarily disabling your caching plugin can help identify the problem’s source. To disable your caching plugin, go to the “Plugins” section in the left-hand menu of your WordPress Dashboard, locate the caching plugin, and click on the “Deactivate” button.
- Check your caching settings: If you are experiencing issues with inconsistent or outdated content, it may be due to a problem with your caching settings. Double-check your caching settings to ensure that they are properly configured.
- Test your website on different devices: If you are experiencing issues with inconsistent content, it may be due to differences in caching behavior on other devices. Test your website on different devices to see if the problem persists.

Pro Tip: Regularly monitoring your website for cache issues can help to identify and resolve problems quickly. Monitor your website’s performance and user experience, and adjust your caching settings as needed.
It’s also important to regularly clean and update your cache to ensure your website runs at peak performance.
Best Practices for Server-Side Caching in WordPress
To get the most out of server-side caching in WordPress, it’s essential to follow some best practices, including:
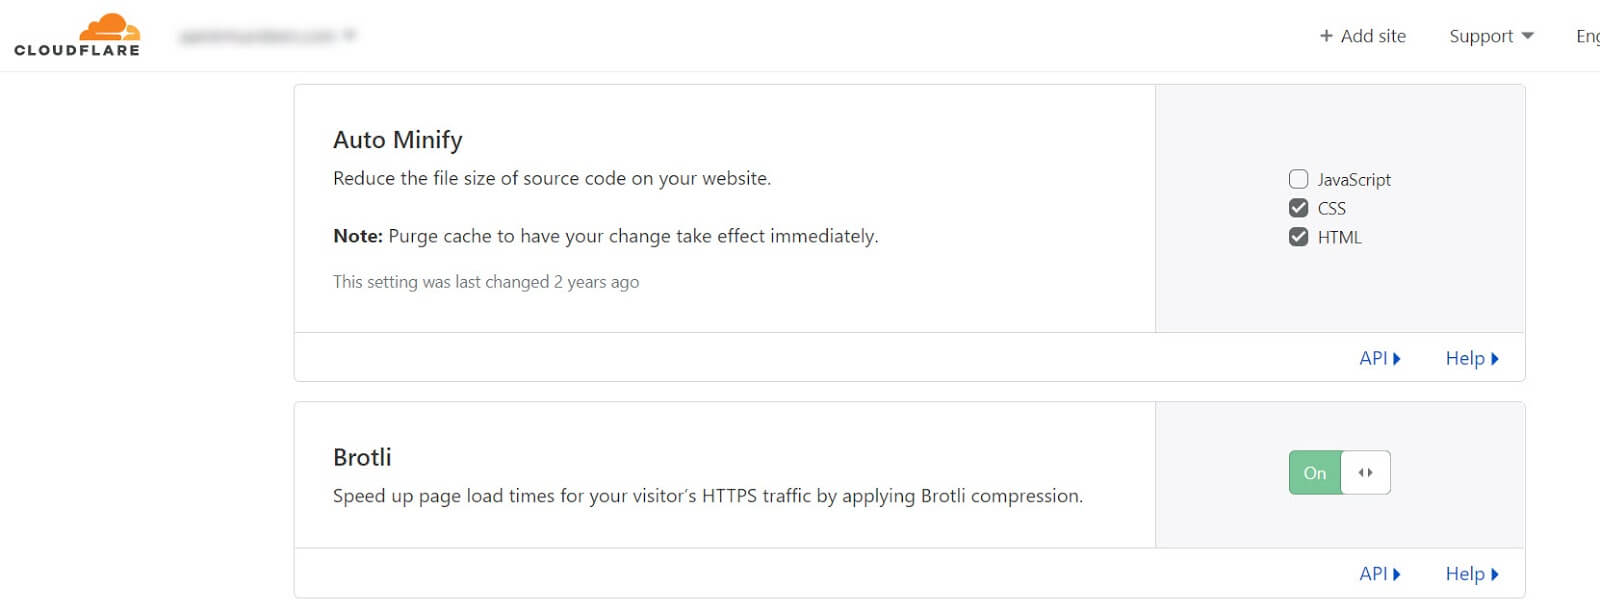
- Use a content delivery network (CDN): A CDN can help to distribute cached content across multiple servers, reducing the load on your web server and improving website speed. One popular CDN is Cloudflare, which offers a range of caching and optimization features. To use Cloudflare with WordPress, you can install the Cloudflare plugin and follow the setup instructions.
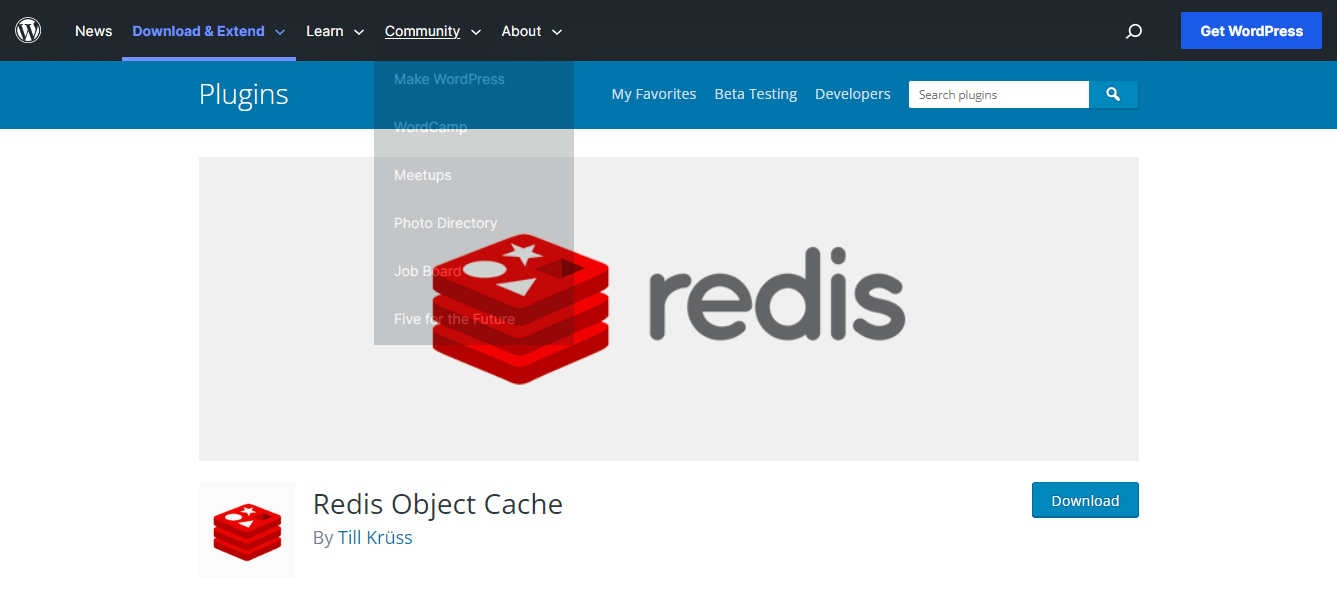
- Use object caching: Object caching can help to improve database performance by caching frequently accessed data objects. To implement object caching in WordPress, you can use a caching plugin that supports this feature, such as Redis Object Cache or Memcached.
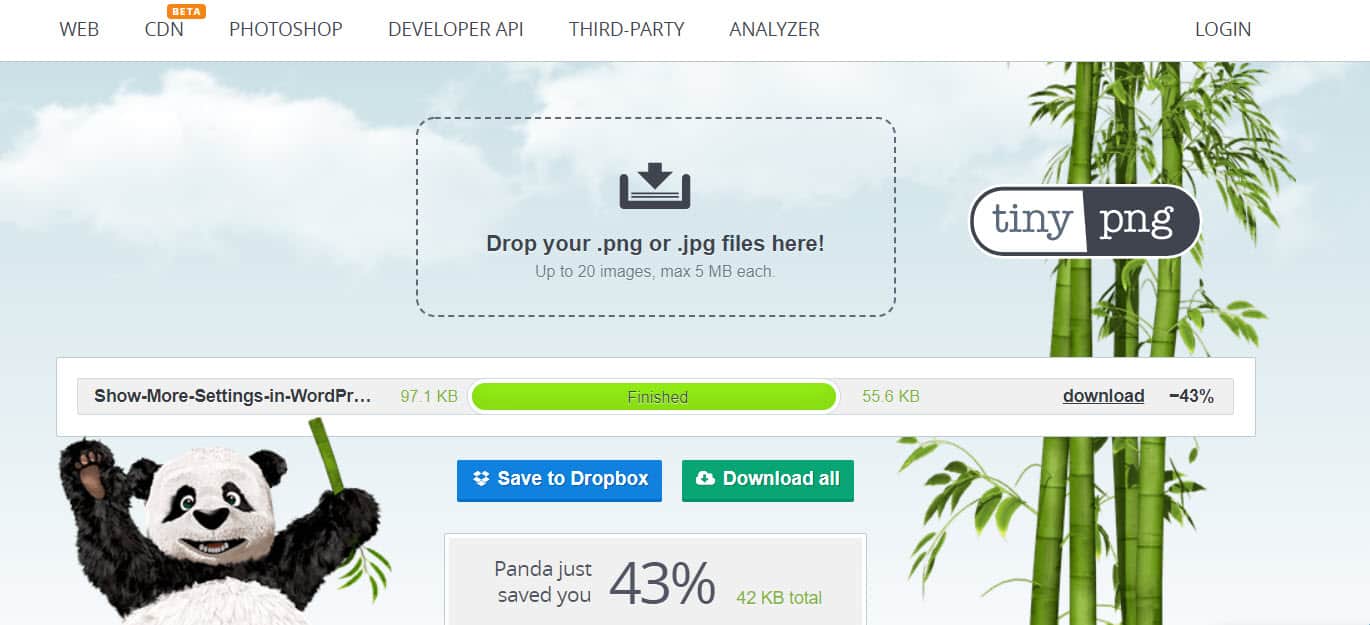
- Optimize your images: Optimizing your images can help reduce file size and improve website speed, improving caching performance. One tool that can help with image optimization is TinyPNG, which uses lossy compression to reduce image file sizes without sacrificing quality.
- Monitor your cache hit rate: Monitoring your cache hit rate can help identify areas of your website that are not being cached properly, allowing you to adjust your caching settings. To monitor your cache hit rate, you can use a caching plugin that offers this feature, such as WP Rocket.
- Test your website regularly: Regularly testing your website can help to identify caching issues and other performance problems, allowing you to address them quickly and efficiently. You can use tools such as Google PageSpeed Insights or Pingdom to test your website’s performance and identify areas for improvement.
With these additional best practices, you can optimize your WordPress server-side caching and make sure it runs efficiently.
Final Thoughts
In today’s fast-paced online world, speed is everything. By implementing server-side caching in WordPress, you can give your website the boost it needs to stand out from the competition.
With faster load times, improved SEO rankings, and a better user experience, your website will be more engaging and successful.
Don’t let slow load times hold you back. Enjoy server-side caching today and watch your website soar to new heights!
Frequently Asked Questions
How do I enable server-side caching in WordPress?
A: Server-side caching in WordPress can be enabled through a caching plugin, such as Server-Side Cache AutoPurge – Plugins. This plugin allows you to configure settings for server-side caching, such as how long to store cached pages, which pages to cache, and how to handle dynamic content.
This plugin also includes a feature for auto-purging the cache when content is updated, ensuring that users see the latest version of your website. Once the plugin is installed and activated, the caching settings can be configured in the plugin settings dashboard.
How do I create a cache in WordPress?
You can create a cache in WordPress by installing and configuring a caching plugin, such as WP Super Cache or W3 Total Cache. These plugins generate static HTML files of your WordPress pages and store them in the cache.
When a user requests a page, the cached version is served, which improves page load times and reduces server load. Additionally, you can configure settings to invalidate the cache when new content is published or updated.
Does WordPress have built-in caching?
WordPress does not have built-in caching by default. However, WordPress provides an API for caching data in memory using the WP_Object_Cache class. This allows developers to cache frequently accessed data, such as database queries, to reduce the number of queries executed on each page load.
How can you explain server-side caching with web pages?
Server-side caching is a technique used to store frequently accessed web pages in memory to serve users more quickly. When a user requests a web page, the server checks if the page is in the cache. If it is, the cached version is served much faster than generating the page from scratch. Server-side caching can improve website performance, reduce server load, and improve the user experience.