How to Create Custom Gutenberg Blocks in WordPress

Are you a WordPress user who wants to take advantage of the full capability of the Gutenberg block editor? Then you’ll be happy to know that it’s possible to create custom blocks for many design and functionality purposes.
Gutenberg is the block editor introduced in WordPress 5.0 that allows users to create custom blocks for their websites. You can create custom blocks to display content in unique and creative ways, such as columns, buttons, testimonials, and more.
In this guide, you will learn
- Different steps to create a custom block in WordPress
- Benefits of Using Gutenberg to Create Custom Blocks
- The need for creating custom blocks in WordPress
- Tips for Creating Custom Blocks
Whether you want additional elements to break up long blog posts or want to add forms and other interactive features with innovative solutions like Gutenberg Blocks, anything is possible!
Table of Contents
Creating Custom Blocks in WordPress
Creating custom blocks for your WordPress website is a great way to extend the functionality of the Gutenberg editor. With custom blocks, you can create complex web pages with more control over spacing and formatting.
Step 1: Using Genesis Custom Blocks Plugin
Creating custom blocks in WordPress is easy with the Genesis Custom Blocks plugin. Here’s an easy step-by-step guide to getting you set up quickly and effortlessly:
- Log into your “WordPress dashboard” for complete control of your website.
- Access the “Plugins” menu from the left sidebar and click “Add New” to open the plugin directory.
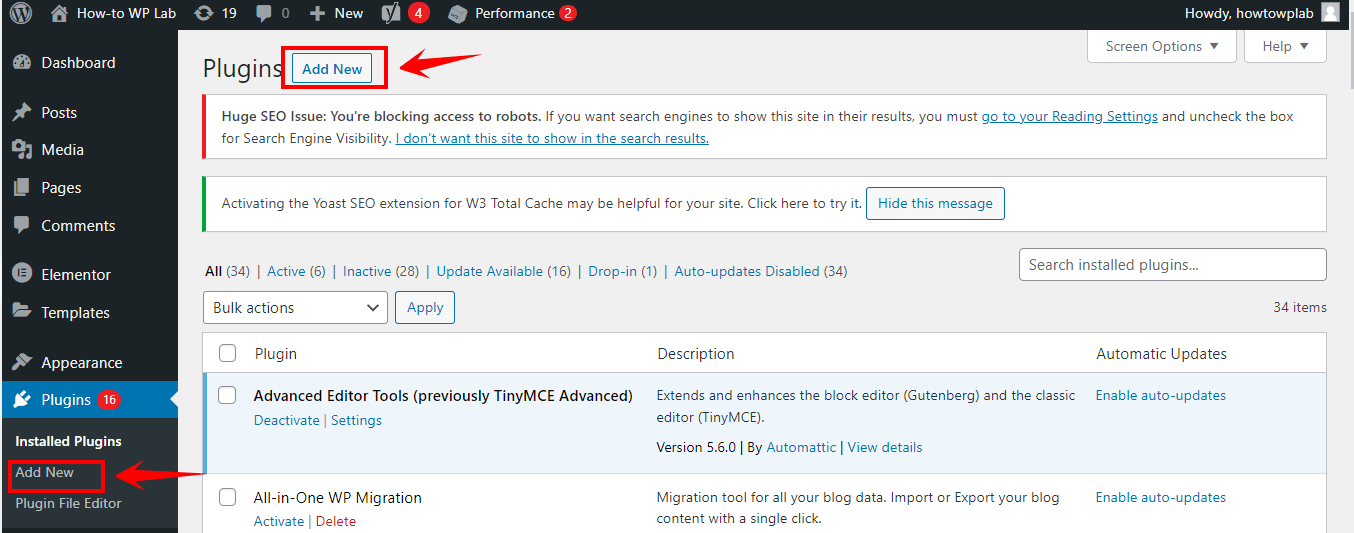
- Use the search bar to find the free “Genesis Custom Blocks” plugin, and once it appears in your search results, click the “Install Now” button to download it automatically onto your website.

- Activate the plugin with a single click of the “Activate” button, and you’re ready to go!

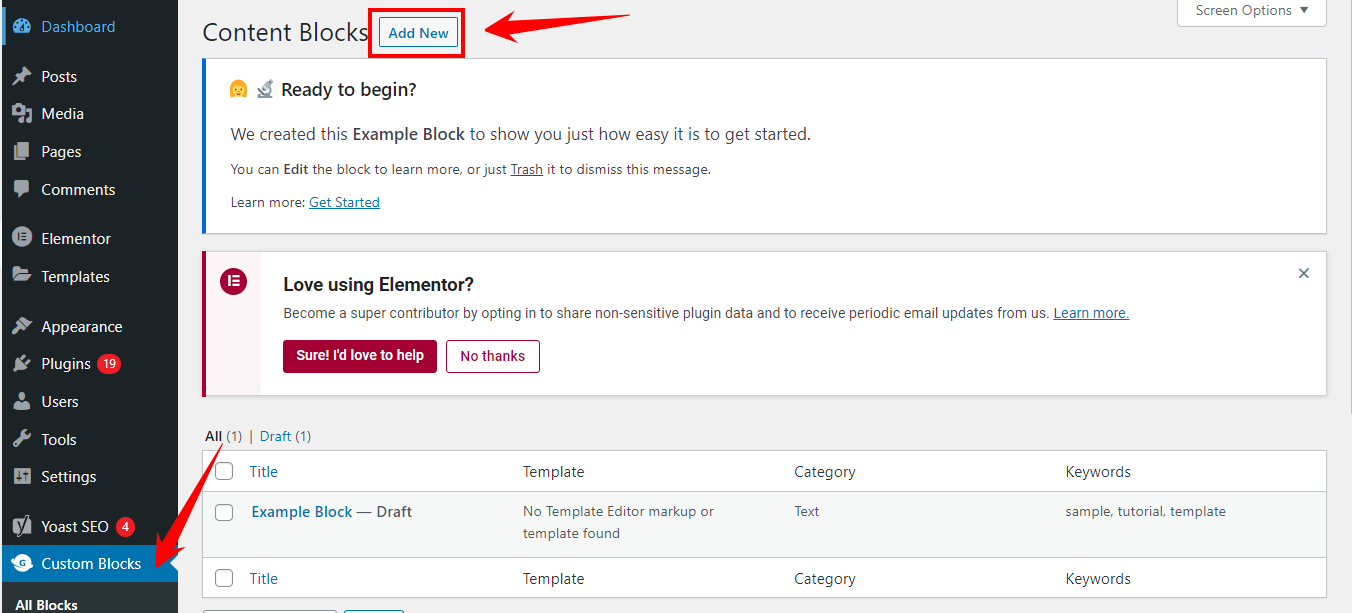
- Click on “Custom Blocks” in the left-side menu to access all available blocks.
- Click on the “Add New” button at the top of the screen to create a new custom block.
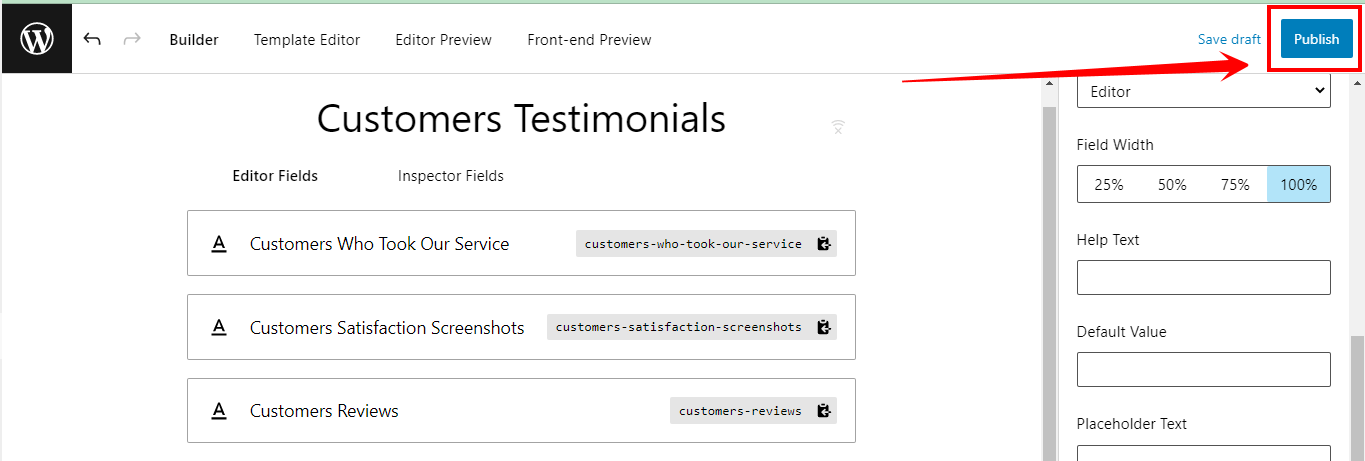
- Give a name to your custom block by filling out the “Block Name” field to easily find it later. Let’s say we used “Customer Testimonials” as a block name.
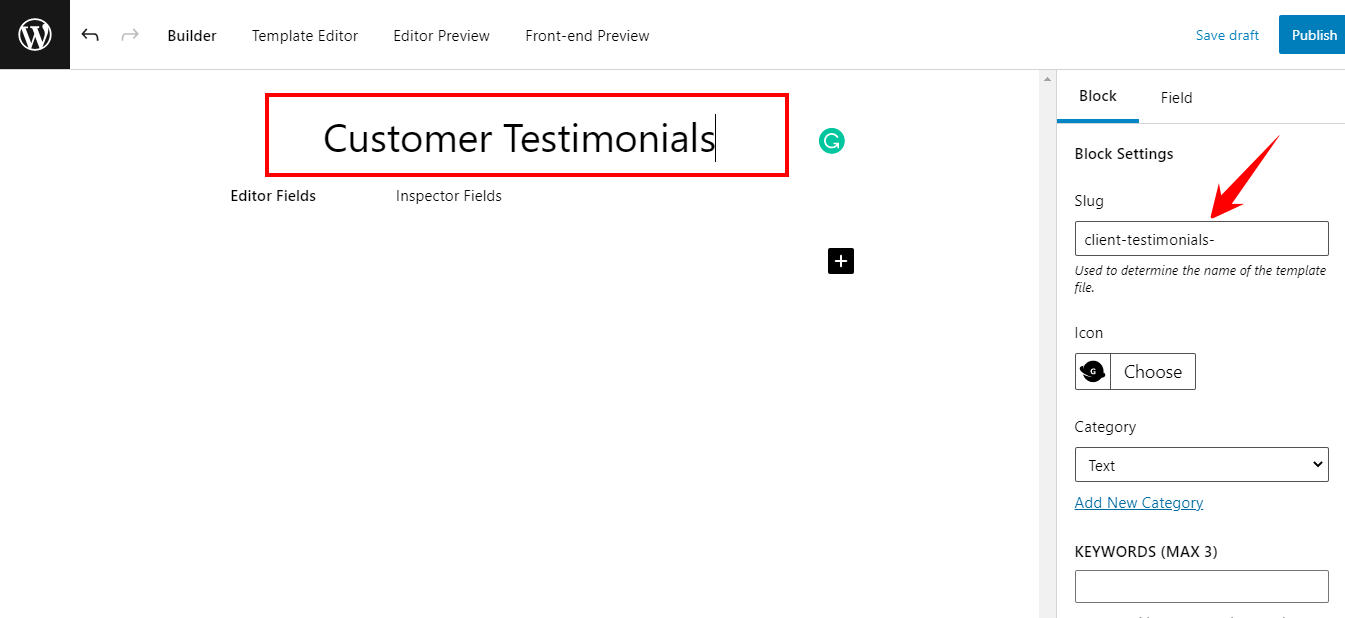
- You’ll find the “block settings” on the right side of the page. Here, you can choose an icon and add a category and keywords to make it easy to find your custom block in the future.
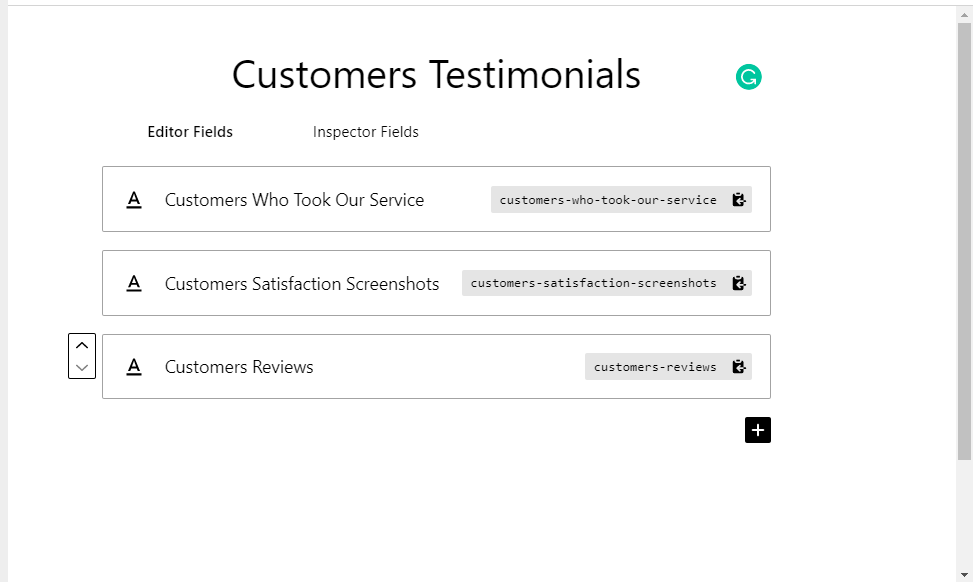
- Add fields to your custom block by clicking on the “Add Field” button with options such as text, numbers, email addresses, URLs, colors, images, and more available for selection.

- Customizing each field for better understanding when using custom fields in future instances is essential. Start by “choosing its label,” name, type location, and help text. For example, consider the following custom fields:
- Customers Who Took Our Service
- Customers Satisfaction Screenshots
- Customers Reviews
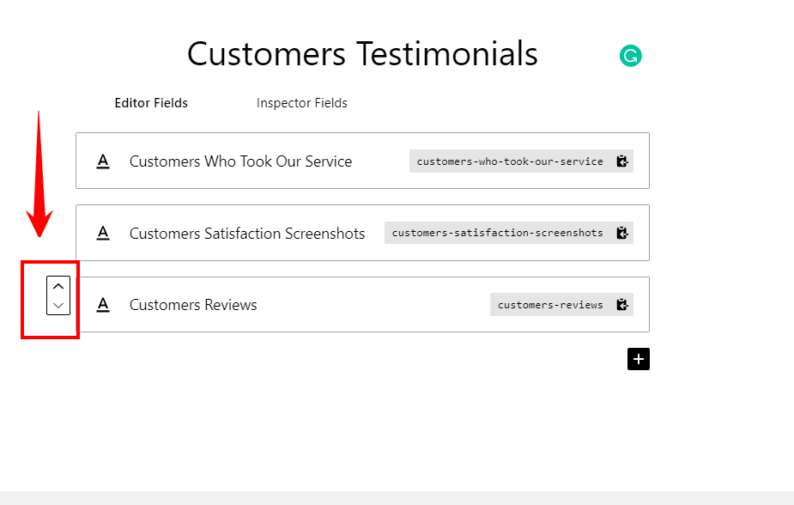
- Reorder existing fields by dragging and dropping “using the handle” on the left side of each field label if needed or desired.
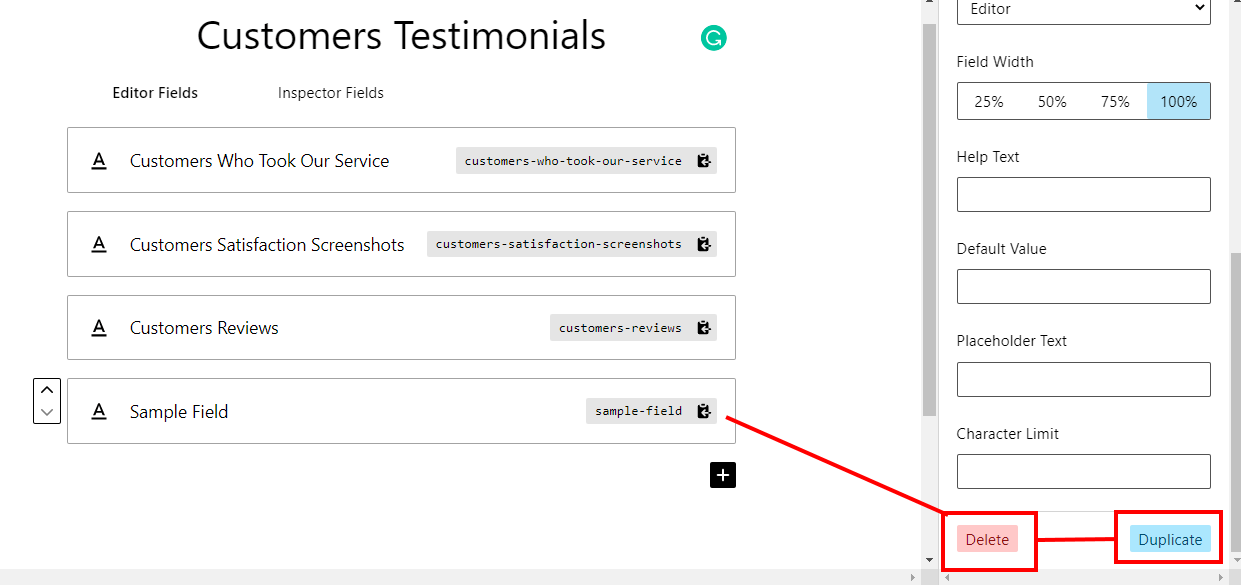
- To “edit or delete” a particular field by clicking on its label and making necessary changes according to individual preference in the subsequent right column window is possible and allows for user convenience. You can also click on the duplicate button to duplicate the field.
- Finally, when all is set, click on the “Publish button” to save your custom block with all these modifications, preserve them for future use, and share them with others if required.
Step 2: Create a Custom Block Template
The next step is to create a custom block template, which is the starting point for all custom blocks you create in WordPress. There are two methods for creating custom block templates: using the built-in template editor or manually uploading custom block templates.
Method 1: Utilizing the Built-in Template Editor
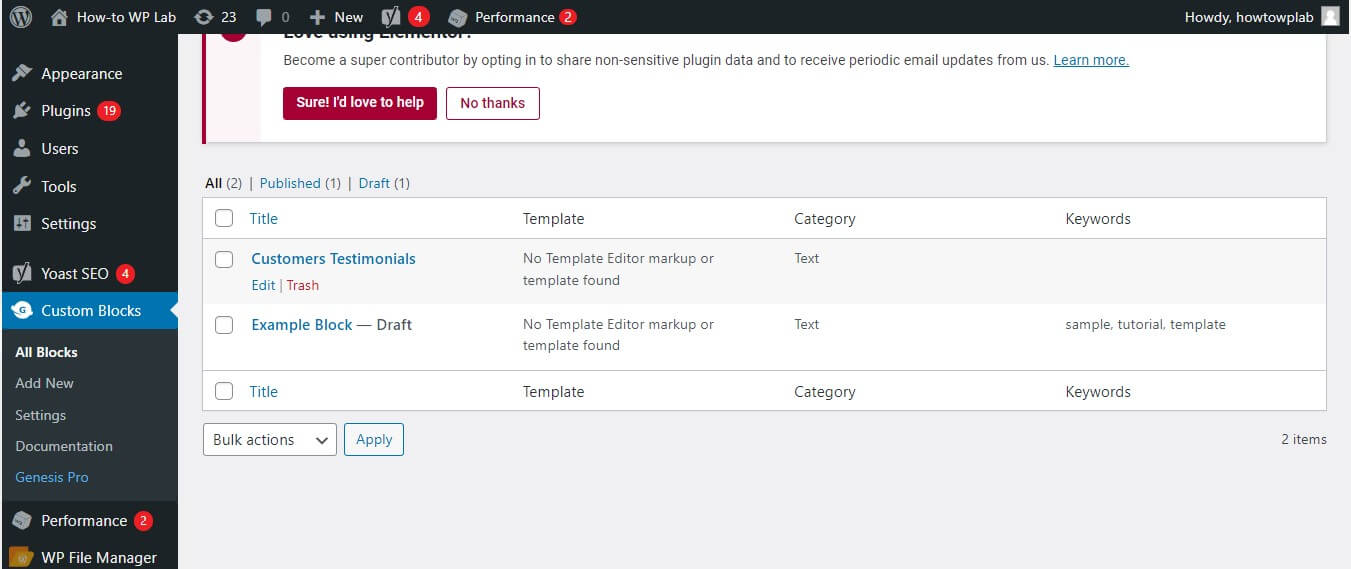
- Access the left sidebar of your admin panel and go to “Custom Blocks » All Custom Blocks page”.
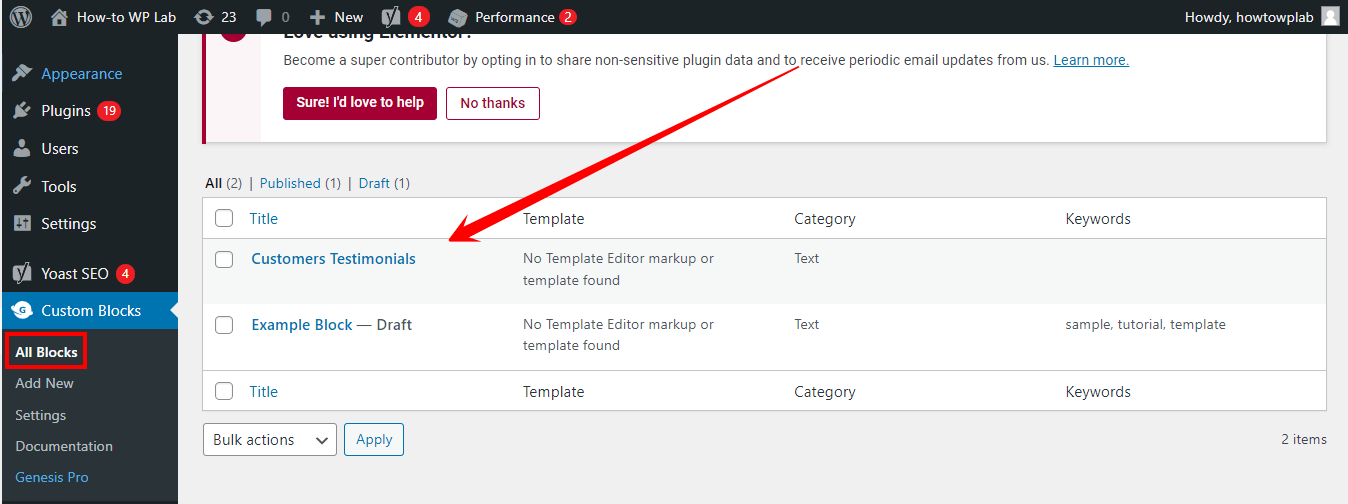
- Find your custom block and click on the “Edit link.”
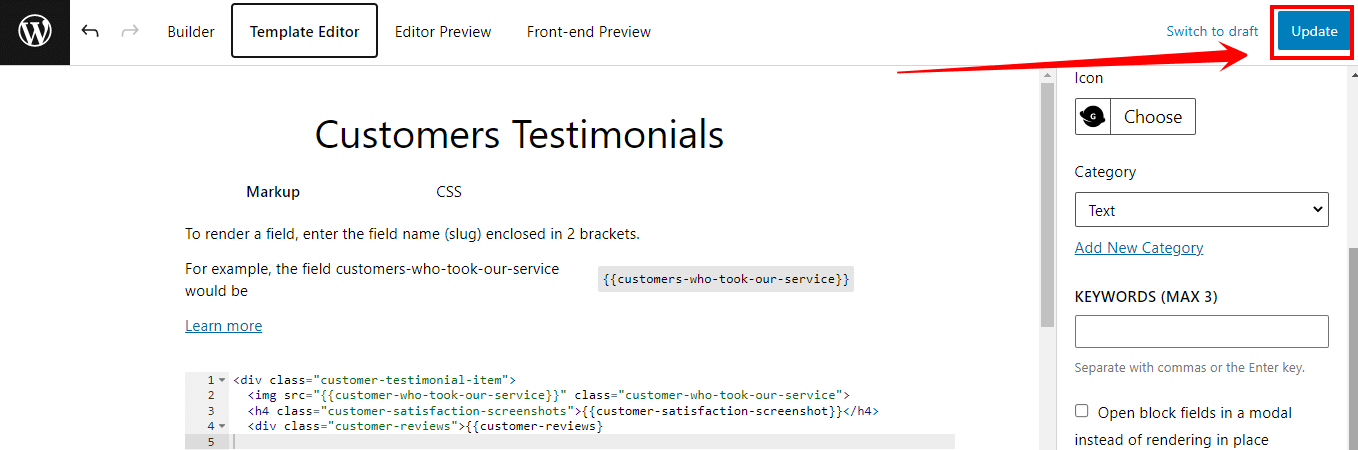
- Scroll down to the Template section and click on the Edit Template button. Or you can go to the right top. And press the “Template Editor” option.
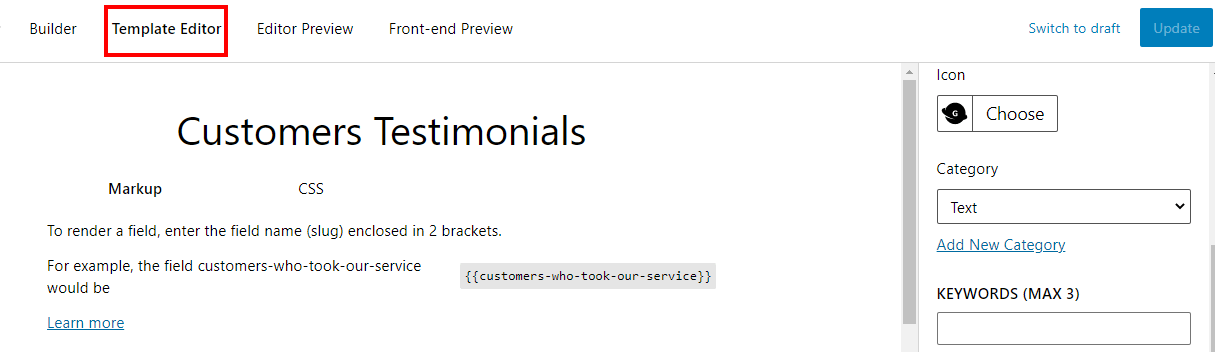
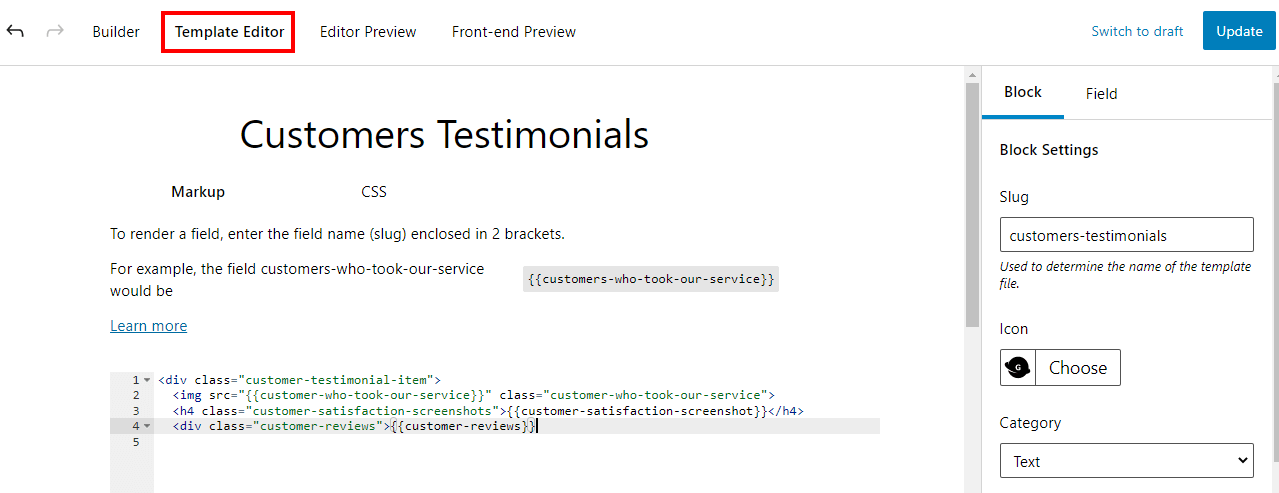
- Enter your “HTML code” in the markup tab and use double curly brackets to insert block field values.
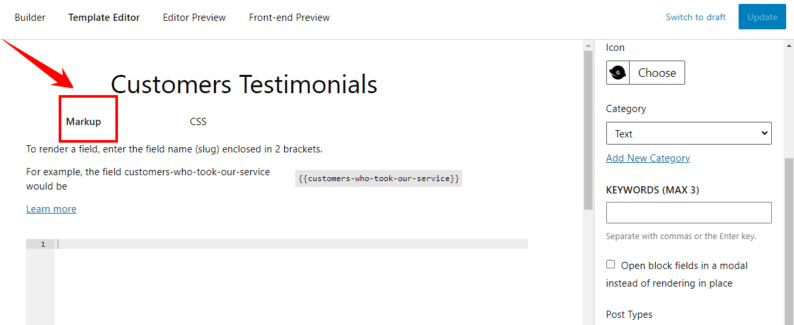
- For example, the following HTML can be used for a “customer testimonial block”:
<div class="customer-testimonial-item">
  <img src="{{customer-who-took-our-service}}" class="customer-who-took-our-service">
  <h4 class="customer-satisfaction-screenshots">{{customer-satisfaction-screenshot}}</h4>
  <div class="customer-reviews">{{customer-reviews}}
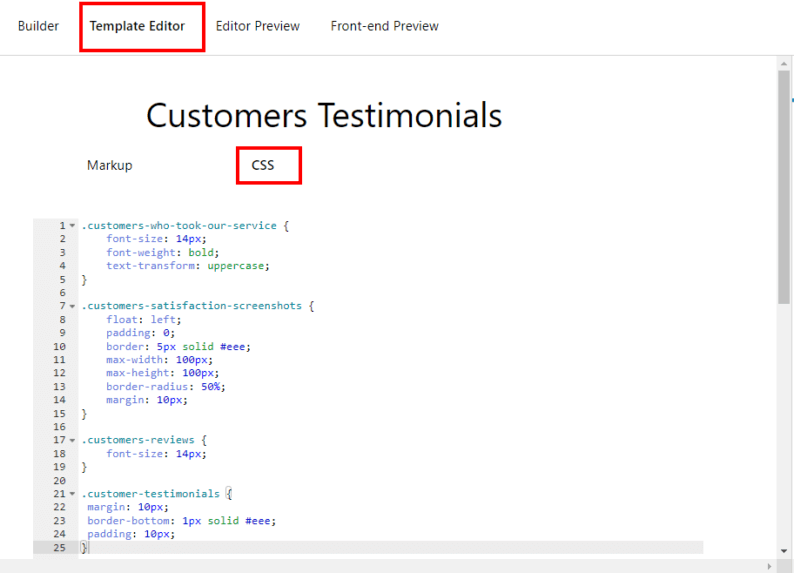
- Move to the CSS tab to style the outputted block markup. For example, the following CSS can be used for the testimonial block:
.customers-who-took-our-service {
    font-size: 14px;
    font-weight: bold;
    text-transform: uppercase;
}

.customers-satisfaction-screenshots {
    float: left;
    padding: 0;
    border: 5px solid #eee;
    max-width: 100px;
    max-height: 100px;
    border-radius: 50%;
    margin: 10px;
}

.customers-reviews {
    font-size: 14px;
}

.customer-testimonials {
 margin: 10px;
 border-bottom: 1px solid #eee;
 padding: 10px;
}
Method 2: Manually Uploading the Custom Block Templates
- Create a folder on your computer with the same name as your custom block’s name, for example, “customertestimonials” for a testimonial block.

- Create a file in the folder called “block.php” using a text editor.
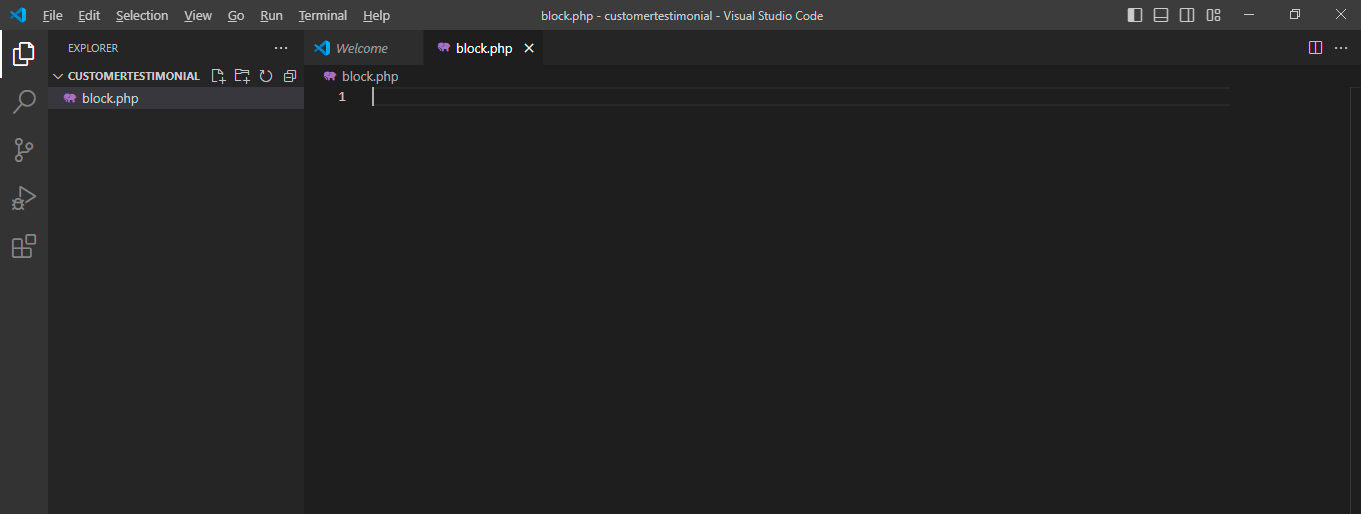
- Once you create a new PHP file, insert the HTML/PHP part of your block template. For example:
<div class="customer-testimonials <?php echo block_field('className'); ?>">
  <img class="customer-photo" src="<?php echo block_field('customer-photo'); ?>" alt="<?php echo block_field('reviewer-name'); ?>" />
  <h4 class="customer-name">
    <?php echo block_field('reviewer-name'); ?>
  </h4>
  <div class="customer-testimonial">
    <?php echo block_field('customer-testimonial'); ?>
  </div>
</div>

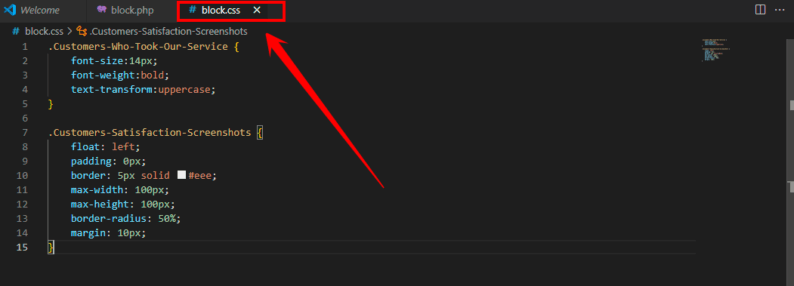
- Create another file called “block.css” in the same folder and add CSS to style the block. For example:
.Customers-Who-Took-Our-Service {
    font-size:14px;
    font-weight:bold;
    text-transform:uppercase;
}

.Customers-Satisfaction-Screenshots {
    float: left;
    padding: 0px;
    border: 5px solid #eee;
    max-width: 100px;
    max-height: 100px;
    border-radius: 50%;
    margin: 10px;
}
Congratulations! You now have two new template files in your block template folder. They provide a great starting point for building custom blocks for WordPress with reusable code and components. Use them to quickly create new blocks, modify existing ones, and even test out new ideas without having to rebuild the entire page or site.
- Once you have finished the process, upload your block folder to your website using an FTP client, the File Manager feature in your WordPress hosting account’s control panel, or the “Wp File Manager” plugin if you don’t have access to your hosting.
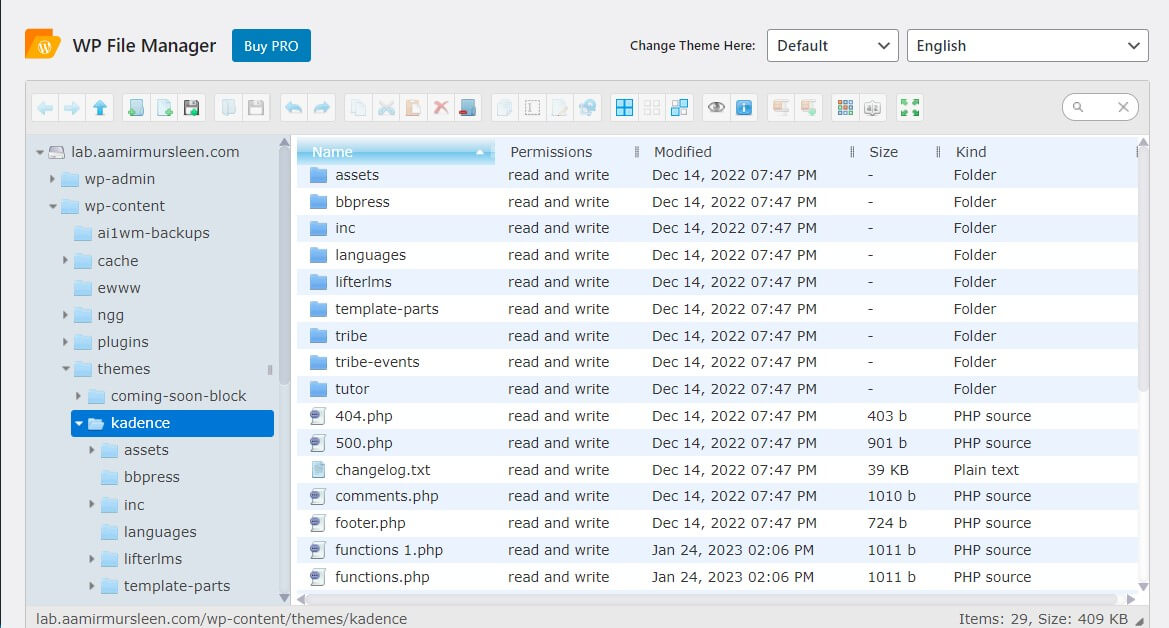
- After connecting with the WordPress file manager plugin, navigate to the
/wp-content/themes/your-current-theme/folder.
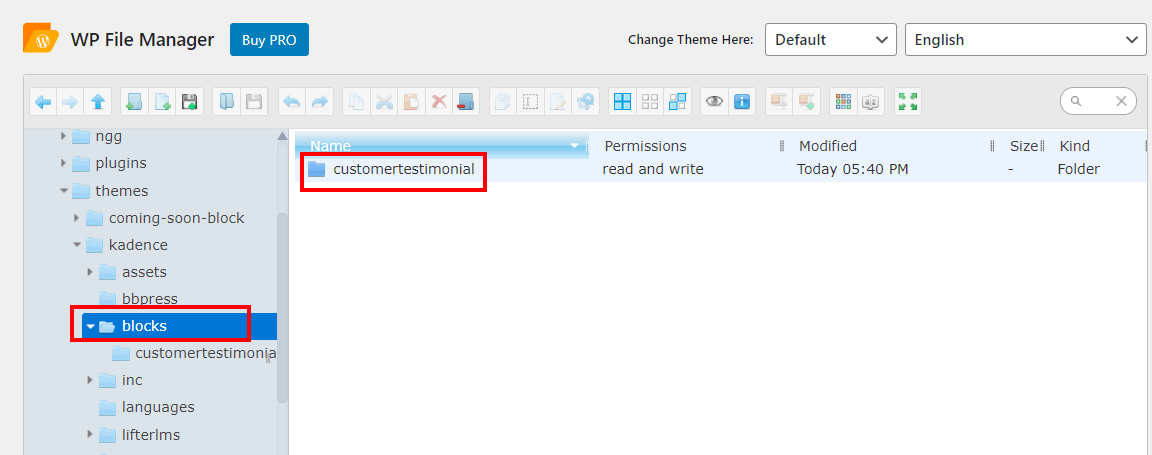
- If your theme doesn’t include a blocks folder, then feel free to create one. For example, if you use the Kadence theme, you won’t find this folder in the leading theme directory. However, once you create and add your blocks, you’ll be able to customize them according to your needs.
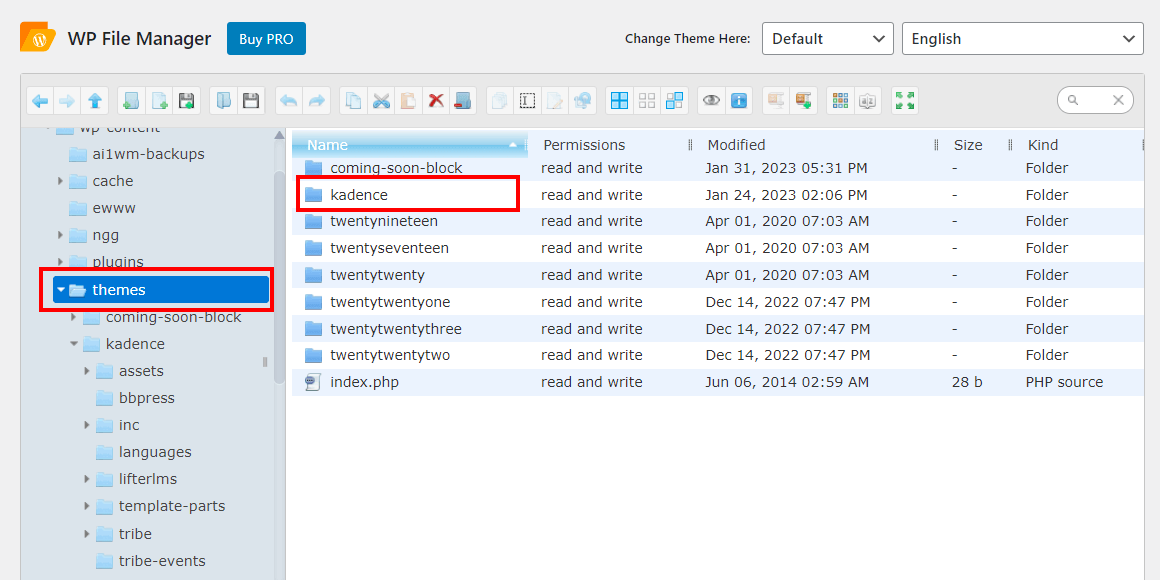
- To create a folder called ‘blocks’ inside your theme’s directory, you’ll need to use an FTP client or the File Manager app in your WordPress hosting account’s control panel. Once you have accessed the directory, right-click and select “Create Folder.” Enter ‘blocks’ as the name of the new folder, and it will appear in the list of folders.
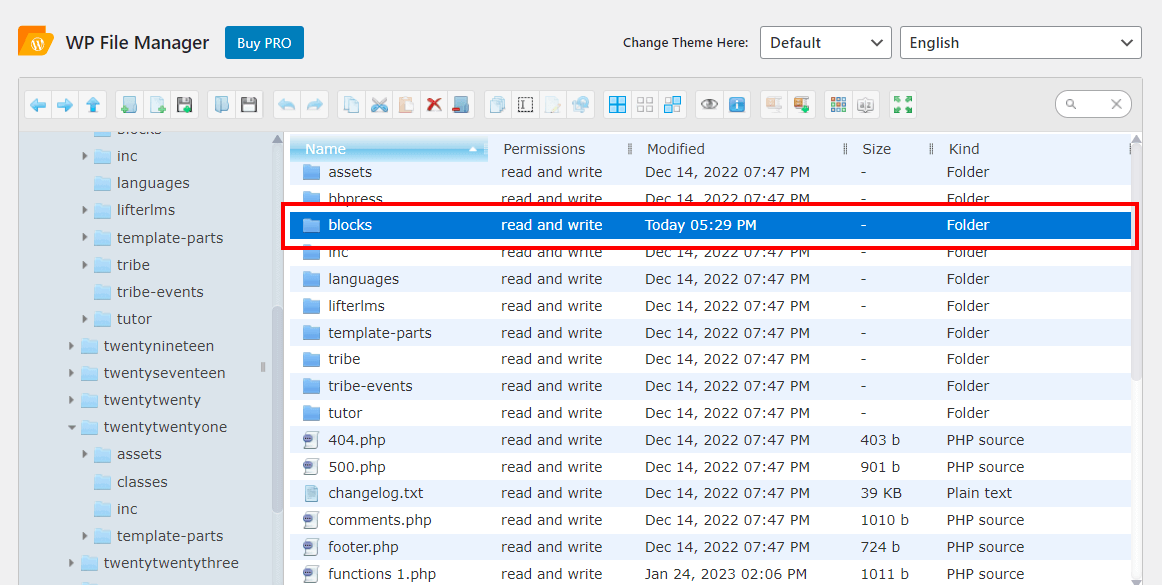
- The next thing to do is, just go to the theme area and open the
blocksfolder. Inside this folder, upload the folder you created on your computer called “customerstestinonials”. This is essential for ensuring the customer testimonials are displayed properly on the website.
Congratulations! You have successfully created manual template files for your custom block.
Pro Tip: When setting up the template files, consider the structure of your code and include all relevant information you might need for future references. Additionally, consider any special requirements your custom block may have — such as accessibility or localization. Finally, double-check your work and ensure everything is properly set before proceeding with deployment.
Step 3: See a Preview of Your Custom Block
- Switch over to the Front-end Preview tab to see how your block appears to the public on your WordPress website.
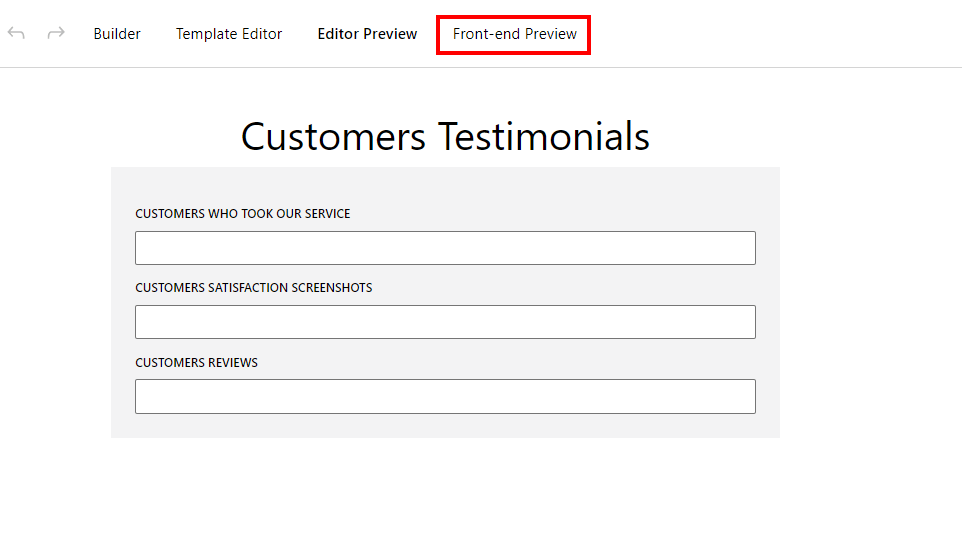
- Once you’re satisfied with how it looks, don’t forget to click Update to save any changes you’ve made.
Note: Keep in mind that if you make any edits while viewing your block in the Front-end Preview tab, they won’t be saved unless you click Update.
Benefits of Using Gutenberg to Create Custom Blocks
Gutenberg is the default editor for WordPress, a popular Content Management System (CMS) used to create websites. One of its key features is the ability to create custom blocks, pre-designed elements that can be added to the Content of a page or post. Custom blocks provide several benefits for creating and managing Content:
- Increased Flexibility: Custom blocks allow for more design and layout options, allowing users to create unique and visually appealing Content without writing custom HTML and CSS code.
- Improved User Experience: Custom blocks make the editing process more accessible and intuitive for users, especially those without technical expertise. They provide a more visual interface and eliminate the need for manual coding.
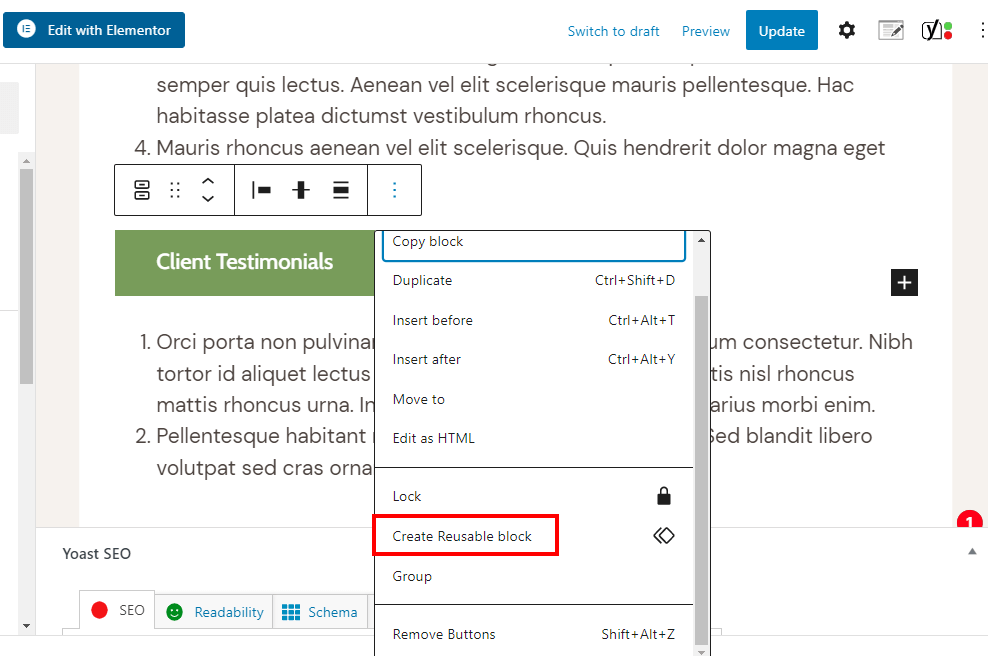
- Reusability: Custom blocks can be saved and reused on different pages and posts, reducing the time and effort required to create new Content. This also helps maintain consistency in terms of design and layout.
- Easier Content Updating: With custom blocks, it is easier to make changes to multiple pages and posts at once, reducing the time required to update Content and ensuring that the website always looks its best.
- Enhanced Performance: Custom blocks are optimized for performance, which means they load quickly and smoothly, providing a better user experience for visitors to the website.
Overall, Gutenberg provides an array of features that make creating custom blocks quick and painless for any user, regardless of their experience level with coding or WordPress customization. Its versatile set of tools gives users the flexibility they need when designing web pages or posts for their websites. At the same time, its easy-to-use interface ensures everyone can get up and running quickly with no prior knowledge required.
The Need for Creating Custom Blocks in WordPress
WordPress is one of the most popular content management systems (CMS) available, and its versatile nature allows users to create custom content blocks. These blocks can expand the functionality of a website, making it easier to display different types of content, such as columns, pictures, quotes, and more. Custom blocks also make it easier for users to update their websites without manually inputting code.
Using custom blocks in WordPress is especially helpful when creating pages with complex layouts or adding interactive elements to a website. A page can be divided into sections that are each displayed using a block; this makes editing much faster and more efficient than manually adding code for each change.
Additionally, certain custom blocks enable users to add dynamic features such as sliders or galleries onto a page with just a few clicks – perfect if the user doesn’t have the coding knowledge necessary to create these elements independently.
Custom blocks also allow users to design unique web pages that match their brand’s style and aesthetic. From color choices to font types and line spacing adjustments, custom blocks provide an array of customization options that help set each page apart.
As well as being visually appealing, these elements help pages rank higher in search engine rankings as they appear more professional and inviting than sites with basic designs.
An understanding of WordPress development is required that not all users may possess. However, if you have coding knowledge, plenty of tools out there make creating custom blocks easier than ever!
Using custom blocks on your WordPress site provides many benefits, from improved efficiency when making changes or updating to enhanced visual appeal and improved search engine presence.
Tips for Creating Custom Blocks
Creating custom blocks can be a great way to add unique design elements and functionality to your website or application. Here are some tips to keep in mind when creating custom blocks:
- Understand Your Goal: Before you start creating, take the time to consider what you want to achieve and how you want your block to look or behave.
- Take Advantage of Existing Solutions: Several tools can help simplify the process of creating custom blocks with pre-existing components. This can help speed up the development process and reduce complexity, so it’s worth investigating these options first.
- Plan for Modularity: Think about how you can make your block more modular, allowing you to reuse code and easily tweak settings or features later.
- Test Each Step: Don’t rush into coding before testing each step – this could save you a lot of time in the long run! Ensure each element within your block functions as expected before continuing to the next one.
- Optimize Performance & Accessibility: Optimize performance by ensuring that your code is efficient and free from unnecessary scripts and excess divs while making sure it’s accessible to all users by including support for assistive technologies such as screen readers.
Final Thoughts
While Gutenberg blocks are a fantastic way to add content and style to your website, they can be time-consuming to create. However, following the steps outlined in this article, you can easily create custom blocks that save you time and effort in the long run.
You can design unique blocks that fit your specific needs with just a little bit of code. So what are you waiting for? Start creating custom Gutenberg blocks today!
Frequently Asked Questions
How do I create a custom Gutenberg block in WordPress without plugin?
Creating a custom Gutenberg block in WordPress can be simple if you know HTML, CSS, and JavaScript. Start by creating a directory in your theme or plugin folder that holds the files needed to register your block with Gutenberg.
Add code to define the block’s attributes and settings in index.js and styles for the front-end or admin area in style.css and editor.css, respectively.
Run npm install to include plugins within the build process, then use npx @WordPress/create-block my-block-name –title=”My Block Name” to generate all necessary files to register your block with WordPress.
How do you code a Gutenberg block?
Coding a Gutenberg block is easy. All it takes is some basic HTML and CSS skills. To start off, create the .html file for your block. Next, register your block using the registerBlockType function from the WordPress API to make sure it works properly.
After that, add the styles for your block to your own style sheet and then enqueue it into WordPress. Finally, use render_callback to output the HTML code of your league. And you’re done!
How do I create a simple block in WordPress?
To create a block in WordPress, follow these steps:
1. Install the Gutenberg plugin if you still need to install it.
2. Go to “Plugins” and click “Add New.”
3. Search for “Gutenberg” and install the plugin.
4. Go to “Posts” or “Pages” and click “Add New.”
5. Click the “+” symbol to add a new block.
6. Select the type of block you want to add (e.g., Paragraph, Image, etc.).
7. Add content to the block and format it as desired.
8. Repeat steps 5-7 for each additional block needed.
9. Publish or save the page/post.
Note: These steps are for the Gutenberg block editor, the default editor in WordPress 5.0 and later.
How do I add a block in WordPress?
Adding a block in WordPress is simple and quick. Begin by navigating to the page or post where you want to add the block. Look for the “Add Block” plus icon and click it to view the list of available blocks.
Choose the block you need from the selection, and it will appear on the page or post. To customize your chosen block, look for additional settings like color, font size, alignment, and other options depending on the block type.
Once done customizing, don’t forget to hit “Publish/Update” to save your changes.


