How to Fix There Has Been a Critical Error on This Website

You’re working on your WordPress site, making changes or adding some features, when everything suddenly dark. You see a message that says, “There has been a critical error on this website.” You feel a surge of panic and confusion. What does this mean? What did you do wrong? How can you fix it? 😱
An owner of a WordPress site might find themselves faced with this error. It can ruin your site’s functionality, security, and performance, as well as your visitors’ satisfaction and loyalty. It can also hurt your income if you depend on your site for business. 💸
But don’t worry. This error is not the end of your site. There are ways to fix it and prevent it from happening again.
In this post, you’ll learn:
- What is the WordPress critical error on this website, and what triggers it
- How to prepare to troubleshoot a critical error in WordPress
- Different ways to fix a WordPress critical error using various methods
I’ll also give you some proven tips and best practices to help you avoid this error in the future and keep your site running smoothly. 👍
So if you’re dealing with this problem, don’t give up! With some help and guidance, you can quickly get your site back online. 💯
Table of Contents
- What Does “There Has Been a Critical Error on Your Website” Mean
- 10 Different Ways to Fix a WordPress Critical Error
- Way 1: Analyzing Error Logs
- Way 2: Enabling Debugging Mode in WordPress
- Way 3: Restore Your Website Using A Backup
- Way 4: Switch to a Default Theme
- Way 5: Deactivate All the Plugins
- Way 6: Increasing PHP Memory Limit
- Way 7: Increase the Max Upload File Size and Text Processing Functions
- Way 8: Clear Your Website’s Cache
- Way 9: Upgrade Your PHP Version
- Way 10: Check for Malware
- What Causes the “There Has Been a Critical Error on Your Website” Error?
- Tips for Preventing Future “Critical Error WordPress” Issues
- Where to Get WordPress Support If All Else Fails
- Wrapping Up
What Does “There Has Been a Critical Error on Your Website” Mean
If you’ve ever faced an abrupt halt on your WordPress website and been greeted with the alarming message, “There has been a critical error on your website,” you’re not alone. This is WordPress’s way of waving a red flag, indicating that a significant, usually PHP-related, issue is disrupting your site’s functionality.
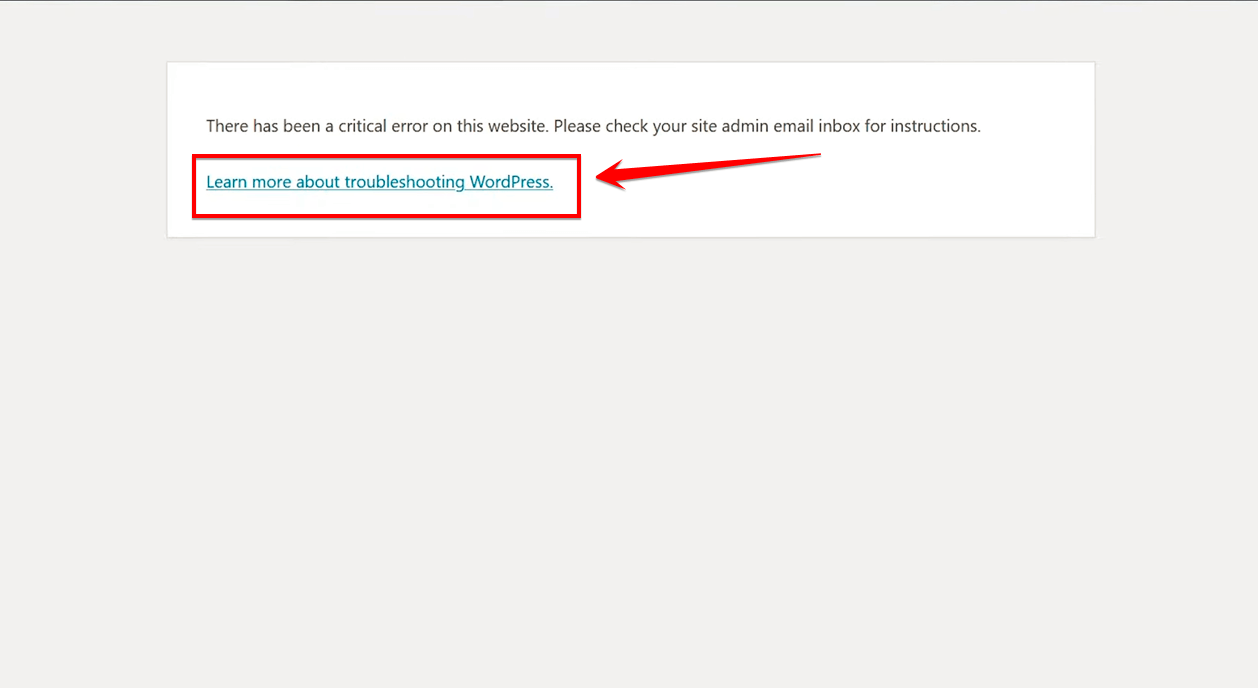
Simply put, when you see this message, it’s a sign that a specific PHP process couldn’t finish because of an unexpected error. Think of it as a computer freezing mid-task; it’s an indicator that something went awry and halted the progress.
Thankfully, WordPress, always geared towards aiding its community, doesn’t leave you stranded. Recognizing such hiccups, it actively takes a step to pinpoint the troublemaker – be it a theme or a plugin – and promptly sends an alert to the associated admin email.
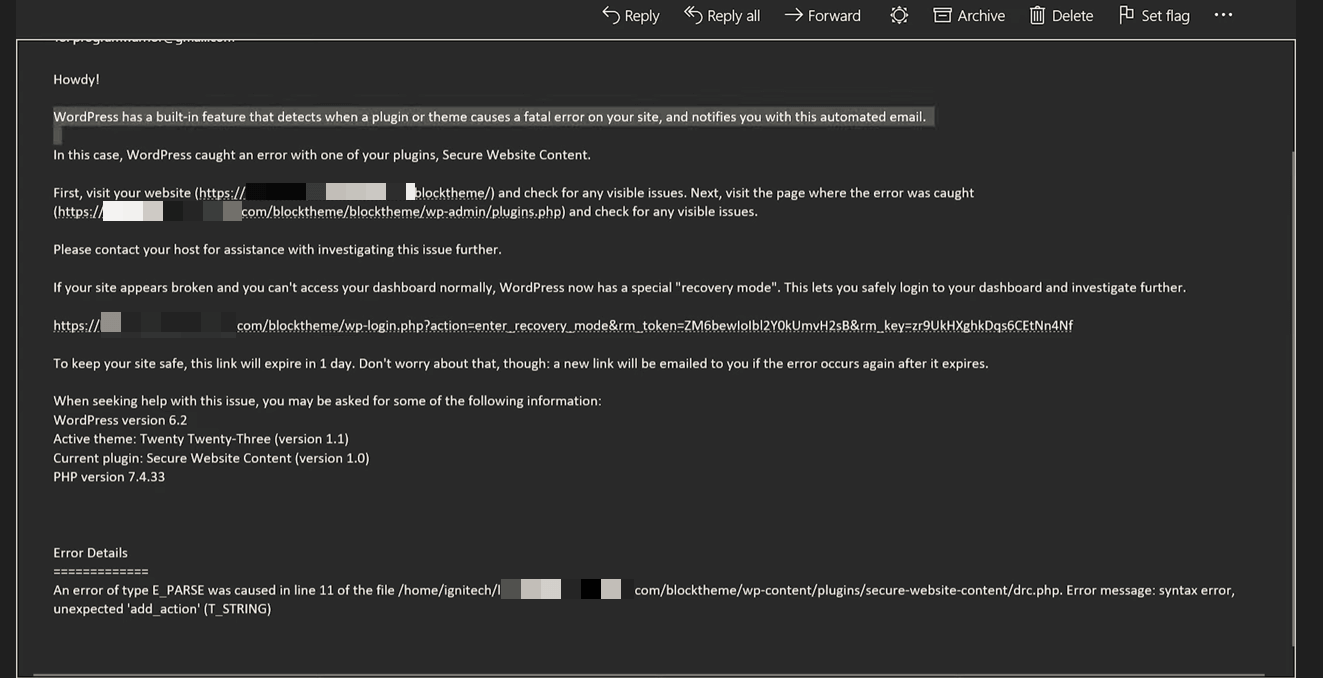
If you’ve handed over the right email to WordPress, expect a detailed diagnostic email. This email is more than just an alert:
- Insight into the Problem: WordPress typically pinpoints the potential culprit, be it a plugin or theme, making your troubleshooting job a tad easier.
- Recovery Mode Access: Embedded within this email is a golden link—a URL that allows you to enter the website in a ‘recovery mode.’ By following this, you can bypass the error and gain access to your WordPress dashboard, putting you in a position to rectify the situation.
However, a quick heads-up: if this email goes MIA, it might be lounging in your spam folder. But, sometimes, even when diligently checking, you might not find the email. If this is the case, brace yourself for a bit of manual error hunting.
10 Different Ways to Fix a WordPress Critical Error
Encountering a “Critical Error” on your WordPress site can feel overwhelming, but don’t stress. I’ve got your back! Let’s dive into ten easy-to-follow solutions to get your website up and running smoothly again.
Even if you didn’t get any specific details about the error, these steps are designed to help you troubleshoot and find the root of the problem.
Ready? Let’s get started!
Way 1: Analyzing Error Logs
One of the most effective methods to identify the root cause of a “Critical Error” in WordPress is by delving into the PHP error logs. These logs serve as a chronicle of activities, particularly when things go awry.
By examining the logs, you can get a clearer picture of which plugins, themes, or other components might be causing the disturbance.
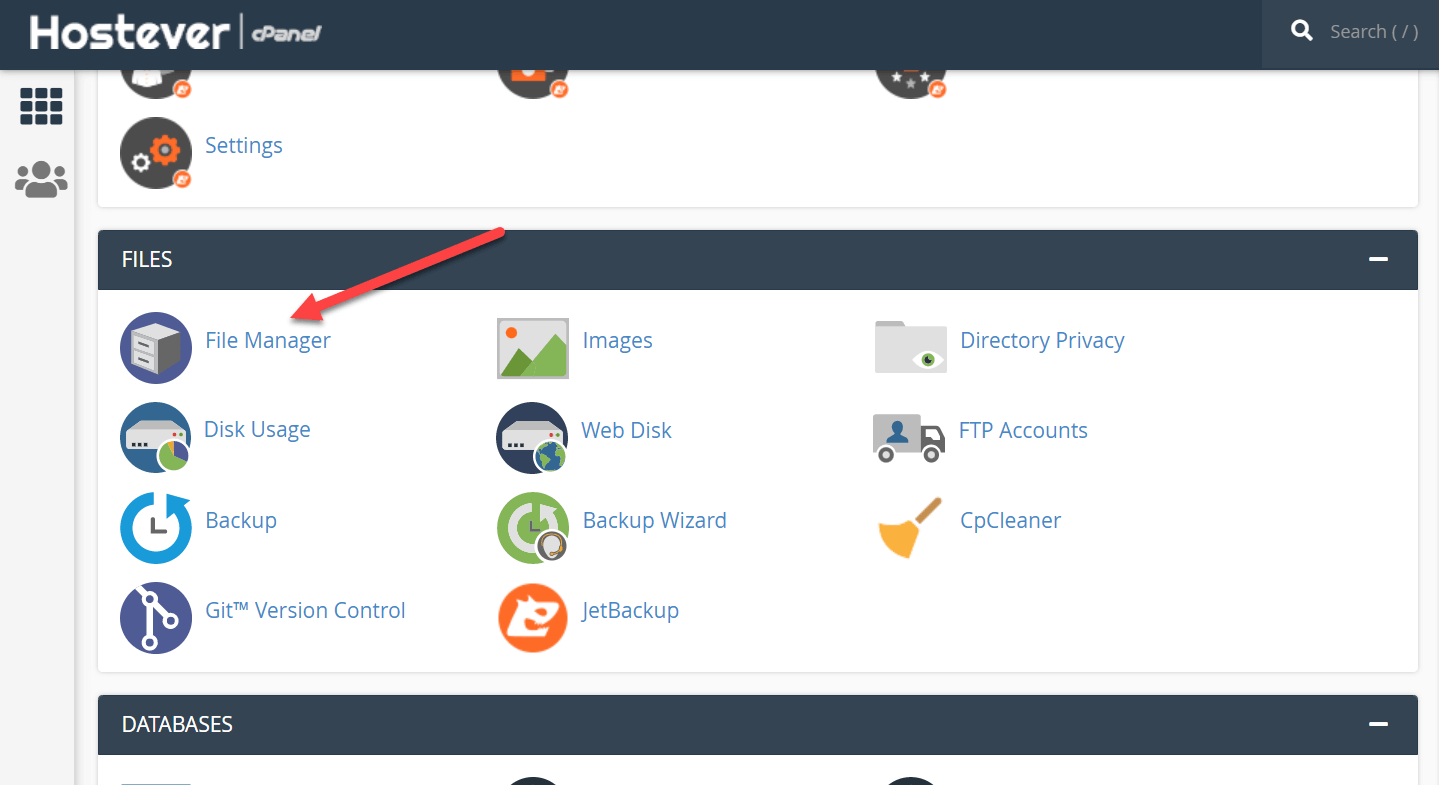
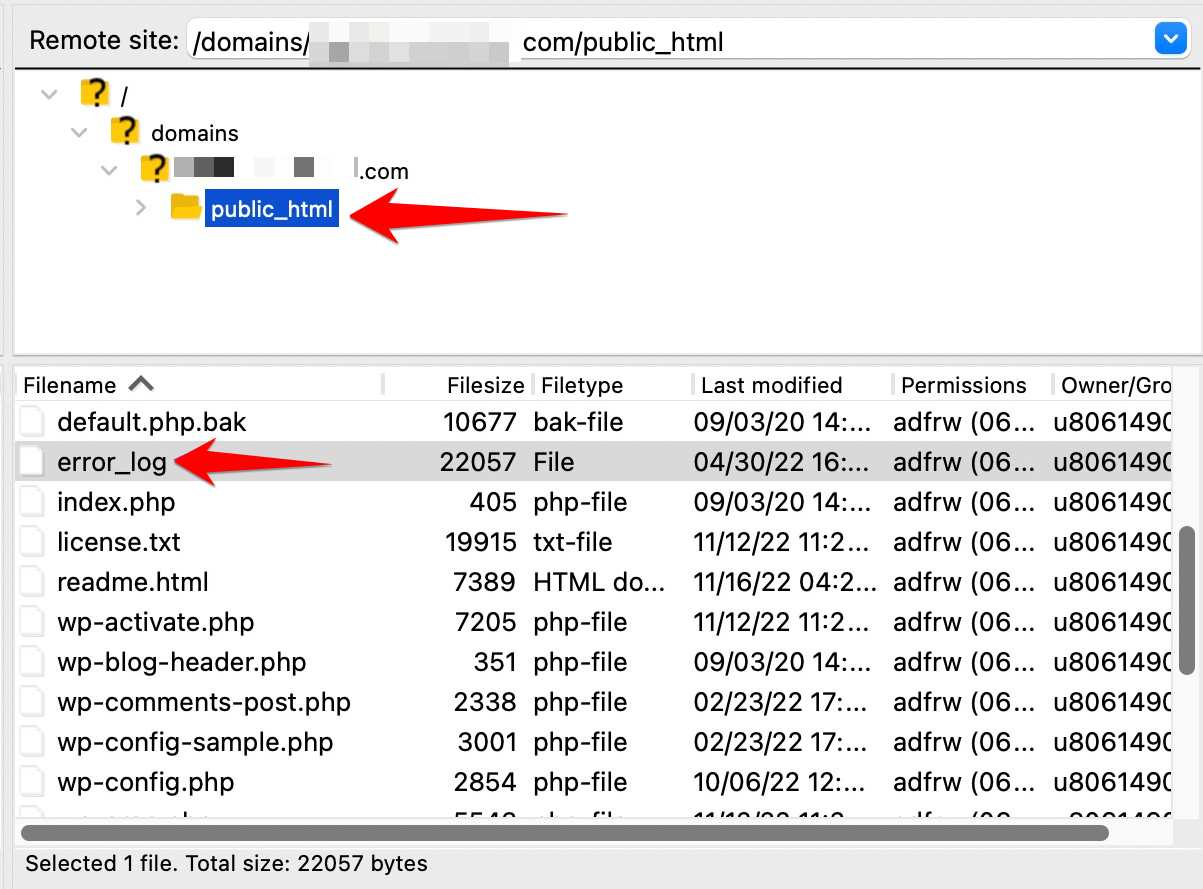
- Step 1: Access your “hosting dashboard” and make your way to the “File Manager”. If you prefer using an FTP client, connect to your server accordingly.
- Step 2: Journey to the directory that holds your error logs. Typically, it’s located in home/[your-username]/logs/. Look for a file named something like error_log_[your-domain].
Note: The directory structure might slightly differ depending on your hosting provider.
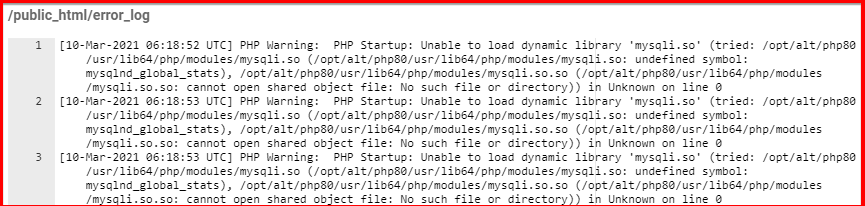
- Step 3: Upon opening the error_log file, you’ll notice different types of PHP errors, such as warnings, notices, parses, and the dreaded fatal errors. At the start of each record, the nature of the error will be evident. Keep a keen eye out for parse and fatal errors – these usually signal something that needs immediate attention.
![Illustration depicting the contents of the error_log file]
- Step 4: In the scenario where the error_log file eludes you, reach out to your hosting support. They often have tools or direct methods to help you access these logs.
Pro Tip: To benefit from the error_log file, ensure that PHP error logging is activated on your site. If it’s not, toggle it on via the PHP settings in your hosting dashboard. This adjustment ensures that all discrepancies get logged for future reference.
Way 2: Enabling Debugging Mode in WordPress
Debug Mode in WordPress acts as your eyes, revealing PHP errors that might be silently affecting your website’s performance. Especially when your dashboard is out of reach, this mode becomes indispensable. The best part? All these errors get documented, making it easier to troubleshoot.
Before diving deep, ensure you have an FTP client ready. If you’re unsure which one to use, tools like FileZilla or Cyberduck come highly recommended.
- Step 1: Using your chosen “FTP client”, establish a connection to your website.
- Step 2: Navigate to the root directory and search for the “wp-config.php” file. Once found, open it using your preferred text editor or an Integrated Development Environment (IDE).
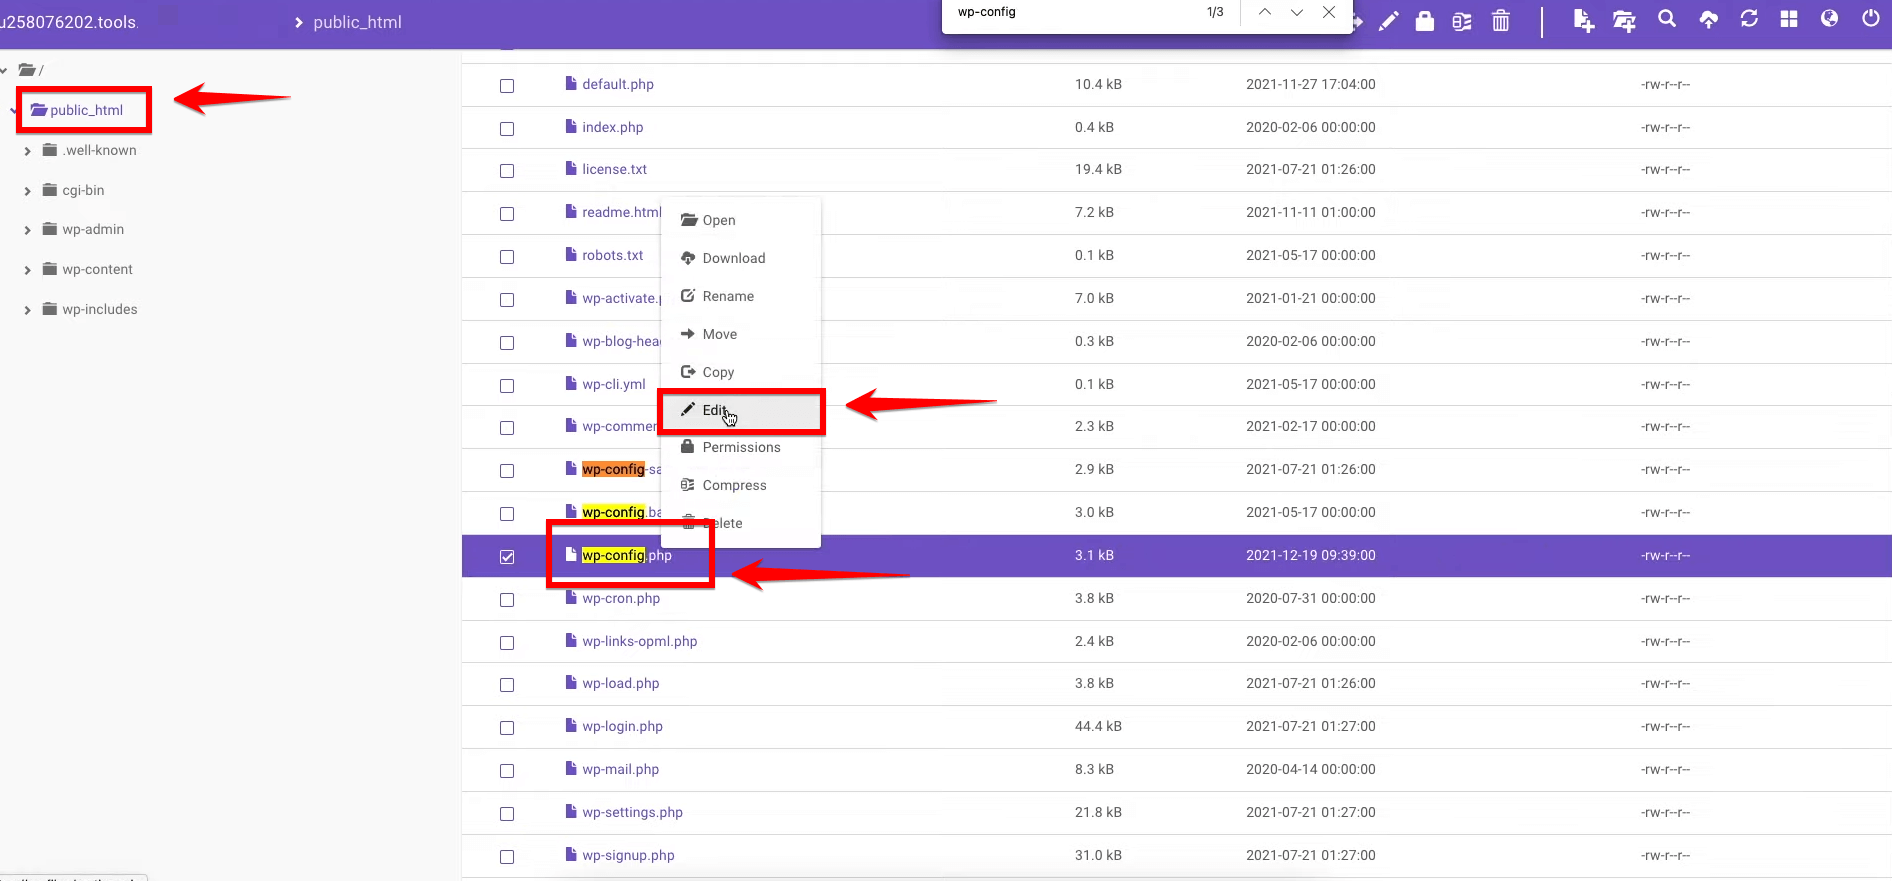
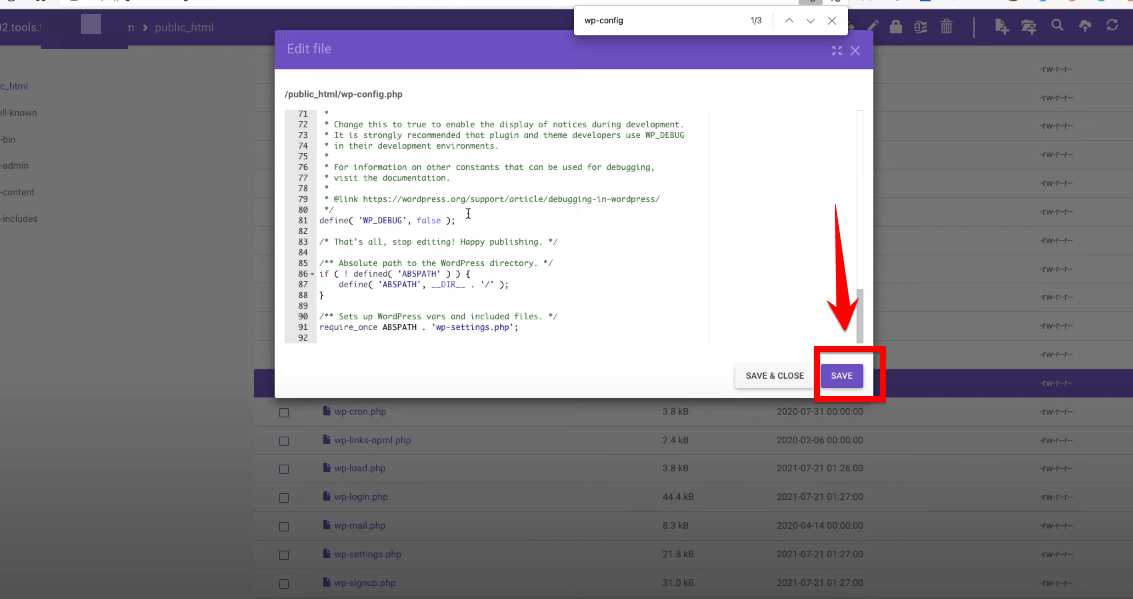
- Step 3: Scroll to the bottom of this file, and right before the concluding line, input the subsequent code:

define( 'WP_DEBUG', true );
define( 'WP_DEBUG_DISPLAY', false );
define( 'WP_DEBUG_LOG', true );
Note: This set of codes enables the “debug mode”, conceals the errors from being displayed on the front end, and logs them for future reference.
- Step 4: Save your modifications and “close the file”.
Visual Cue: If done correctly, a new “debug.log” file should manifest inside the “wp-content” directory of your website.
Step 5: Review the “debug.log” periodically. Any errors? They’ll be there. Scan for mentions of specific themes or plugins, as they often are the culprits behind many issues.

Pro Tip: Remember, while the debug mode is your friend during troubleshooting, it’s not meant to be a permanent fixture. Once you’re done with the diagnosis, revisit the wp-config.php and remove or comment on the debug lines you added.
Way 3: Restore Your Website Using A Backup
You might be wondering, “Why discuss backup methods now?” Well, believe it or not, having an efficient backup strategy is your best ally against sudden WordPress errors.
And while it’s true that you might have taken a backup using your hosting, there’s more to consider. Let’s understand the reasoning behind each approach.
SiteGround provides a formidable option for those who’ve chosen it as their hosting platform. They ensure that your site’s data remains safe and accessible.
- Step 1: First, log into your “SiteGround Hosting Dashboard.”
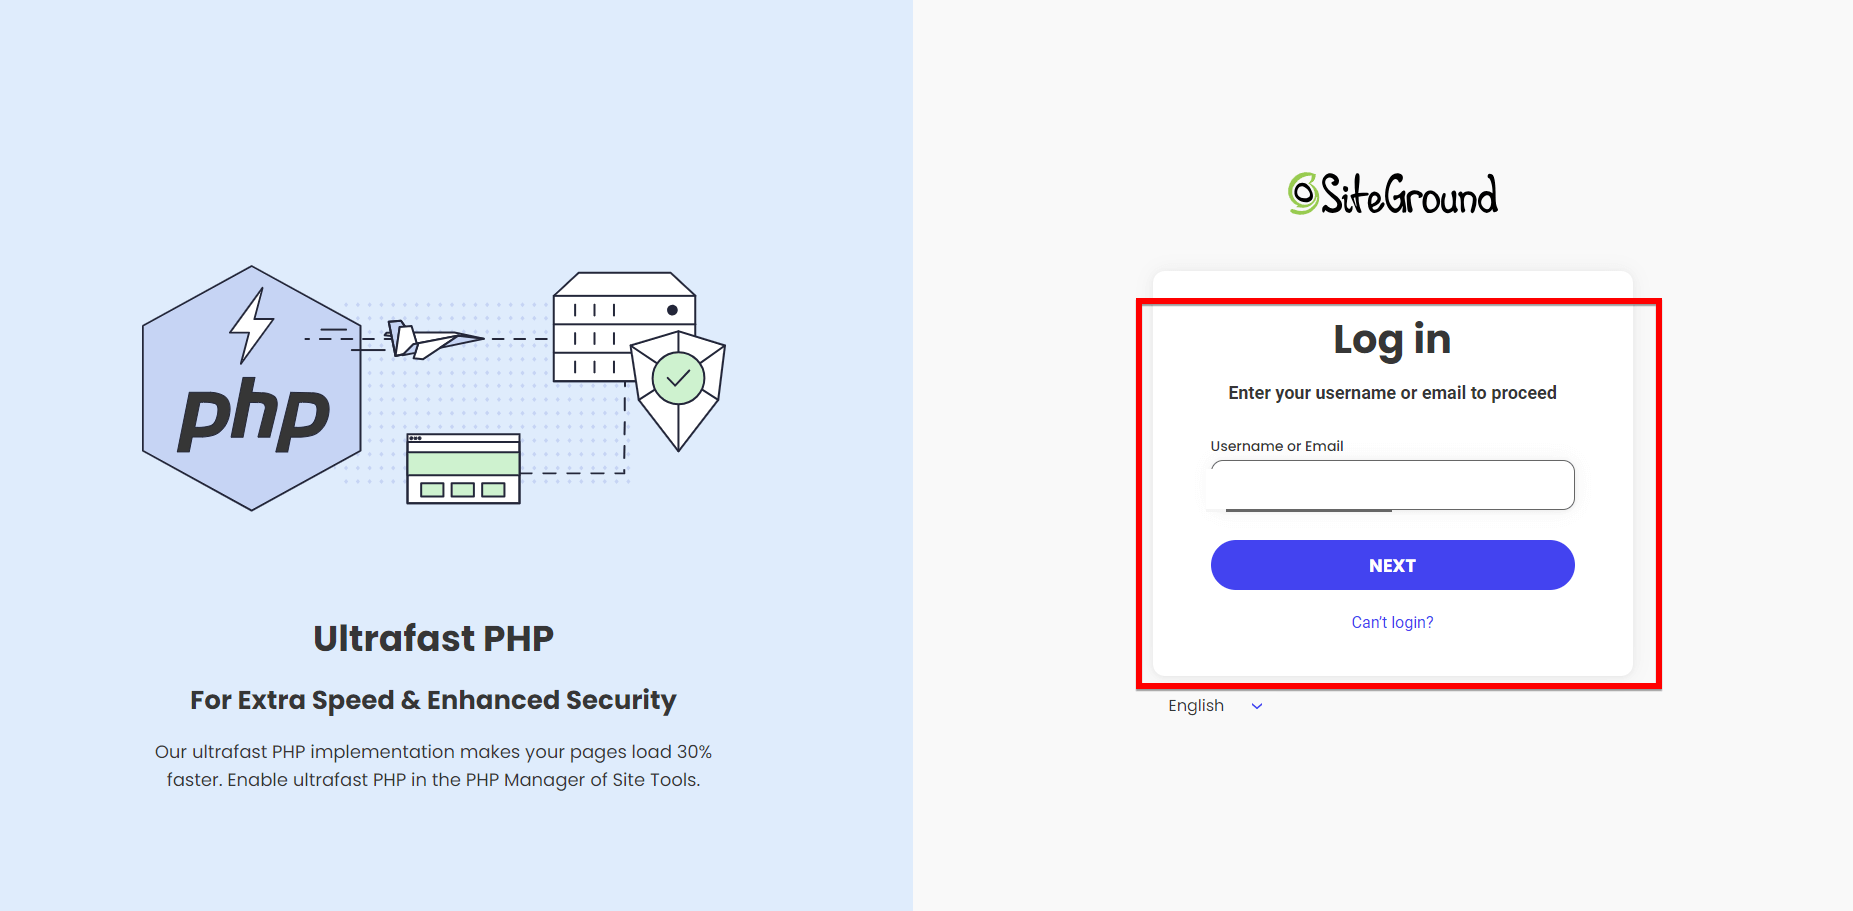
- Step 2: In the interface, look out for an option labeled “Backups”. This is where all your saved data resides.
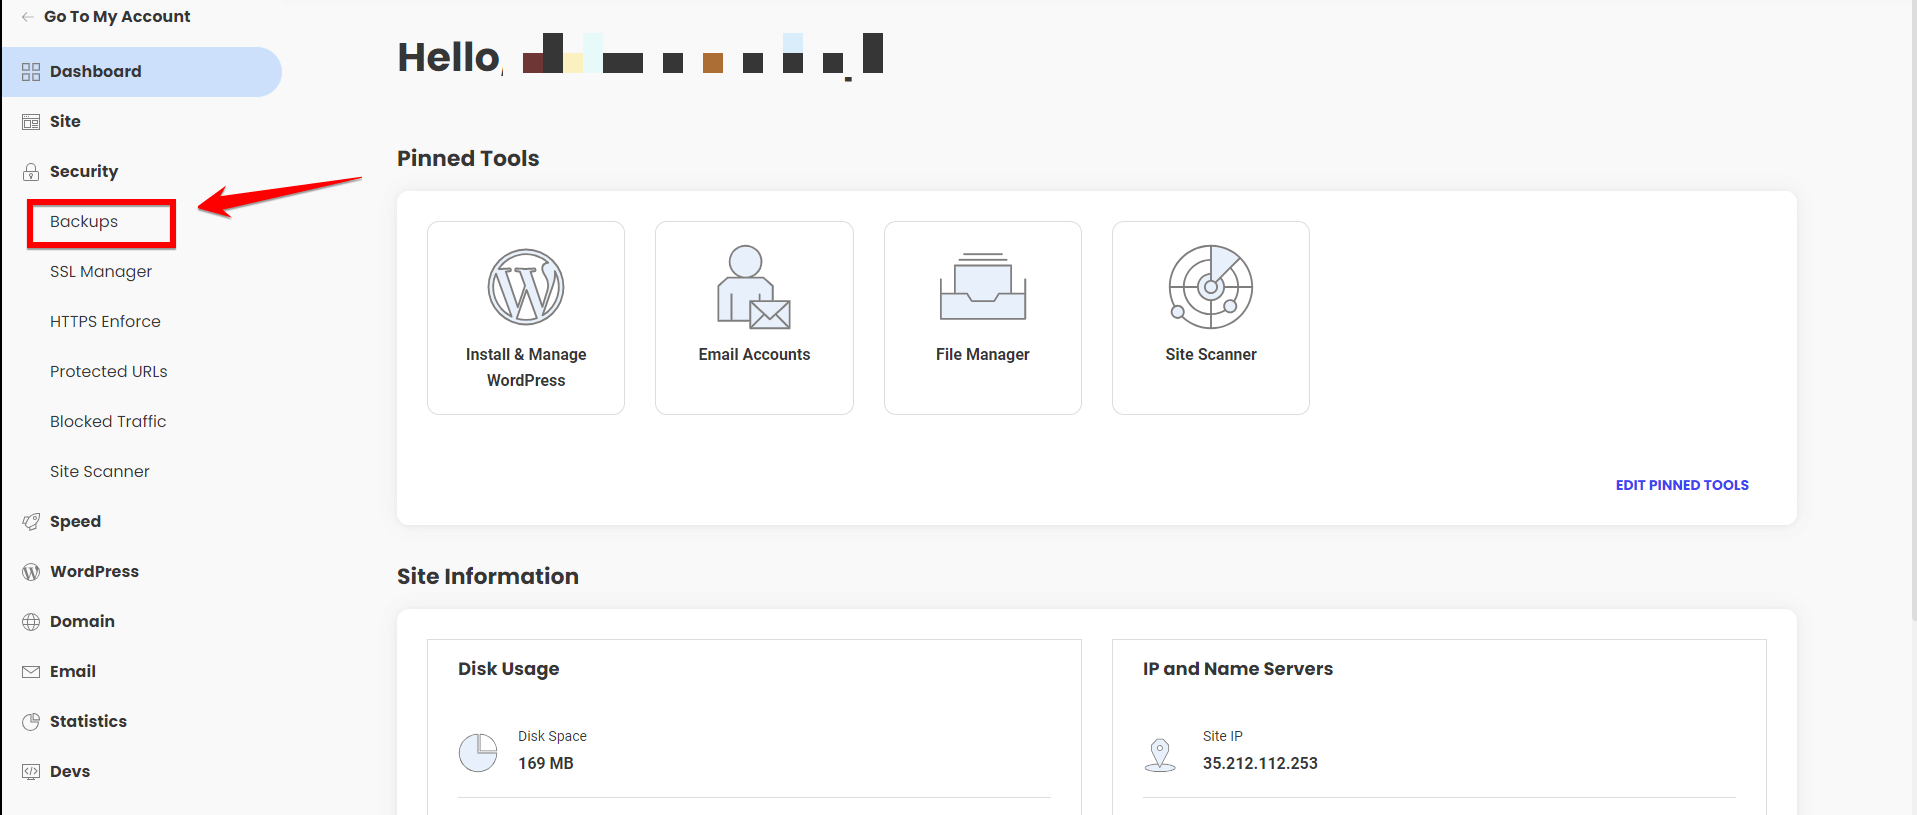
- Step 3: Opt for the most recent backup, hover over it, and you should spot an option to “Restore All Files and Databases”. Engage this, and SiteGround will restore your website to its prior state.
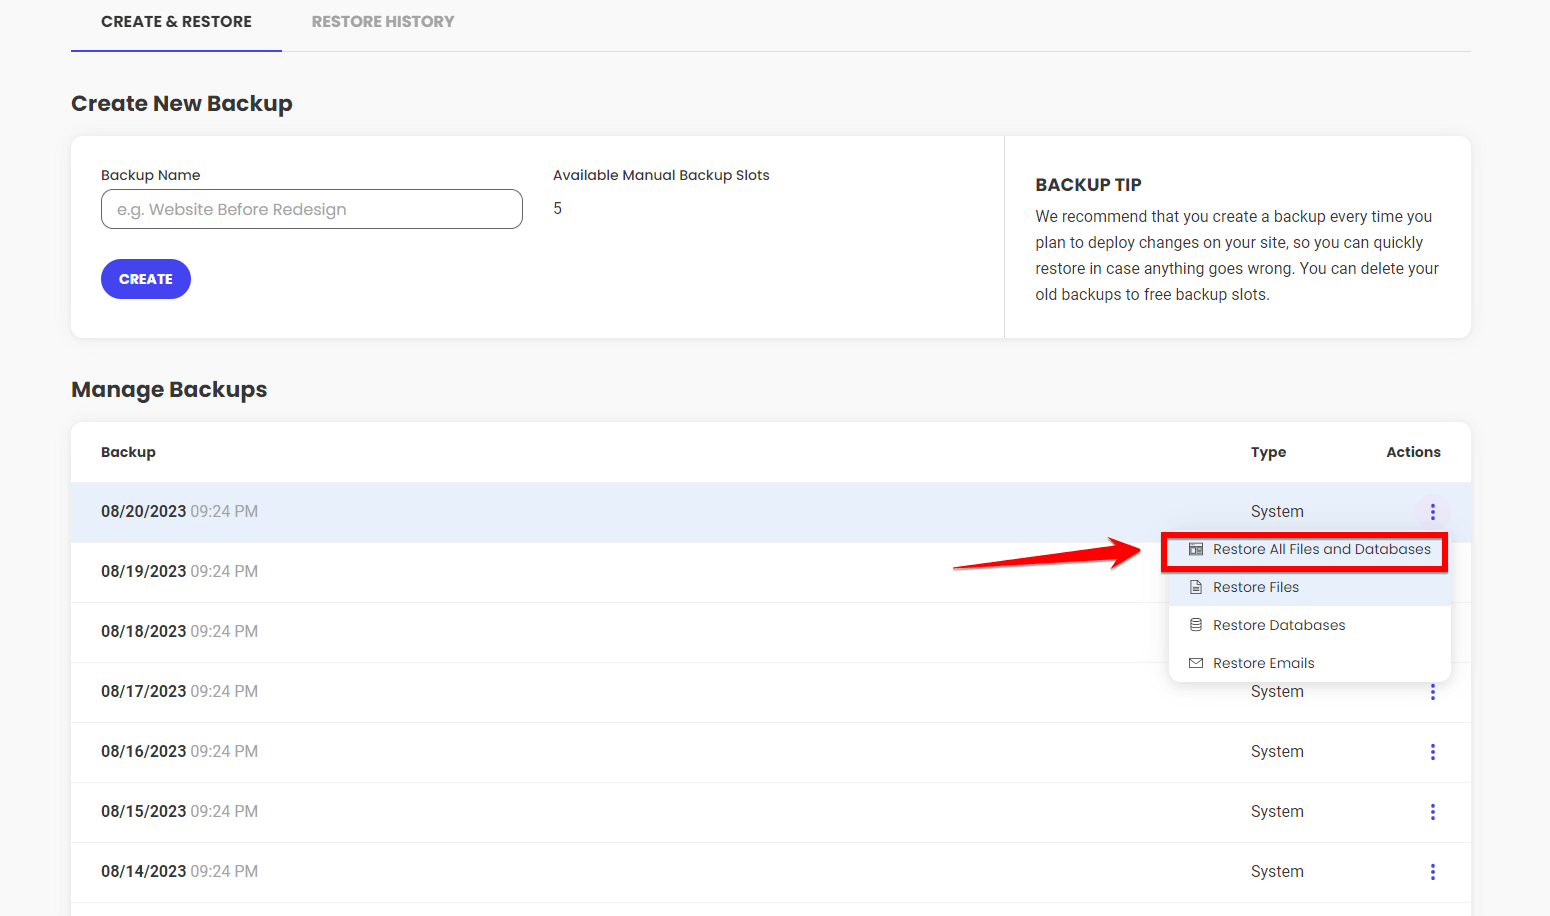
Note: Hosting backups are like a safety net, ensuring your data is safe even if you didn’t remember to manually save it.
Now, some might ponder, Why use a plugin if my hosting already offers backup options? The answer lies in flexibility. Plugins offer more control, scheduling options, and often, easy migration solutions. Let’s see how All-in-One Migration serves this purpose:
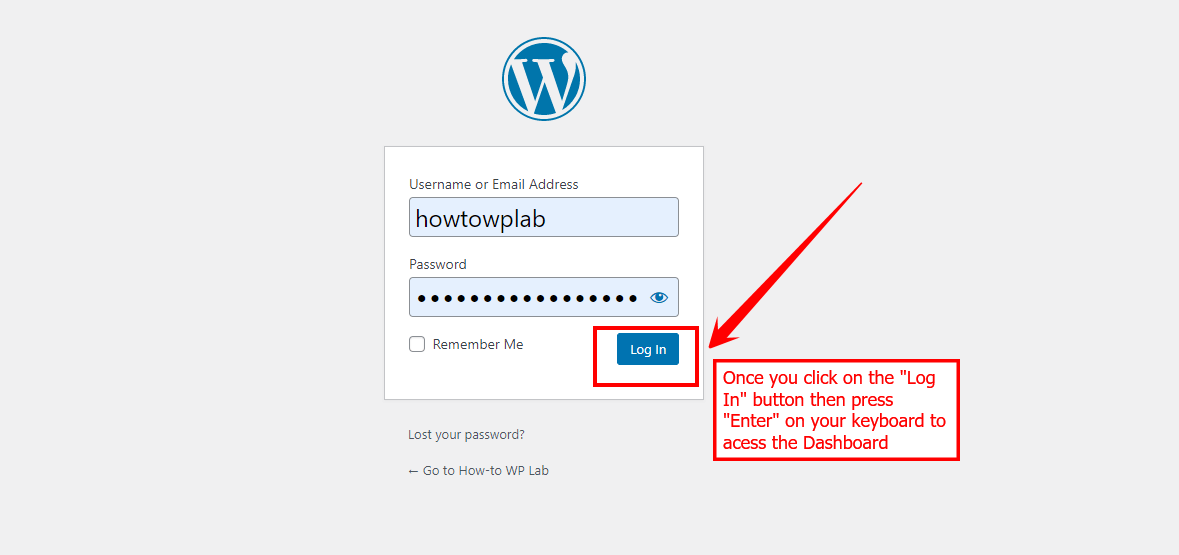
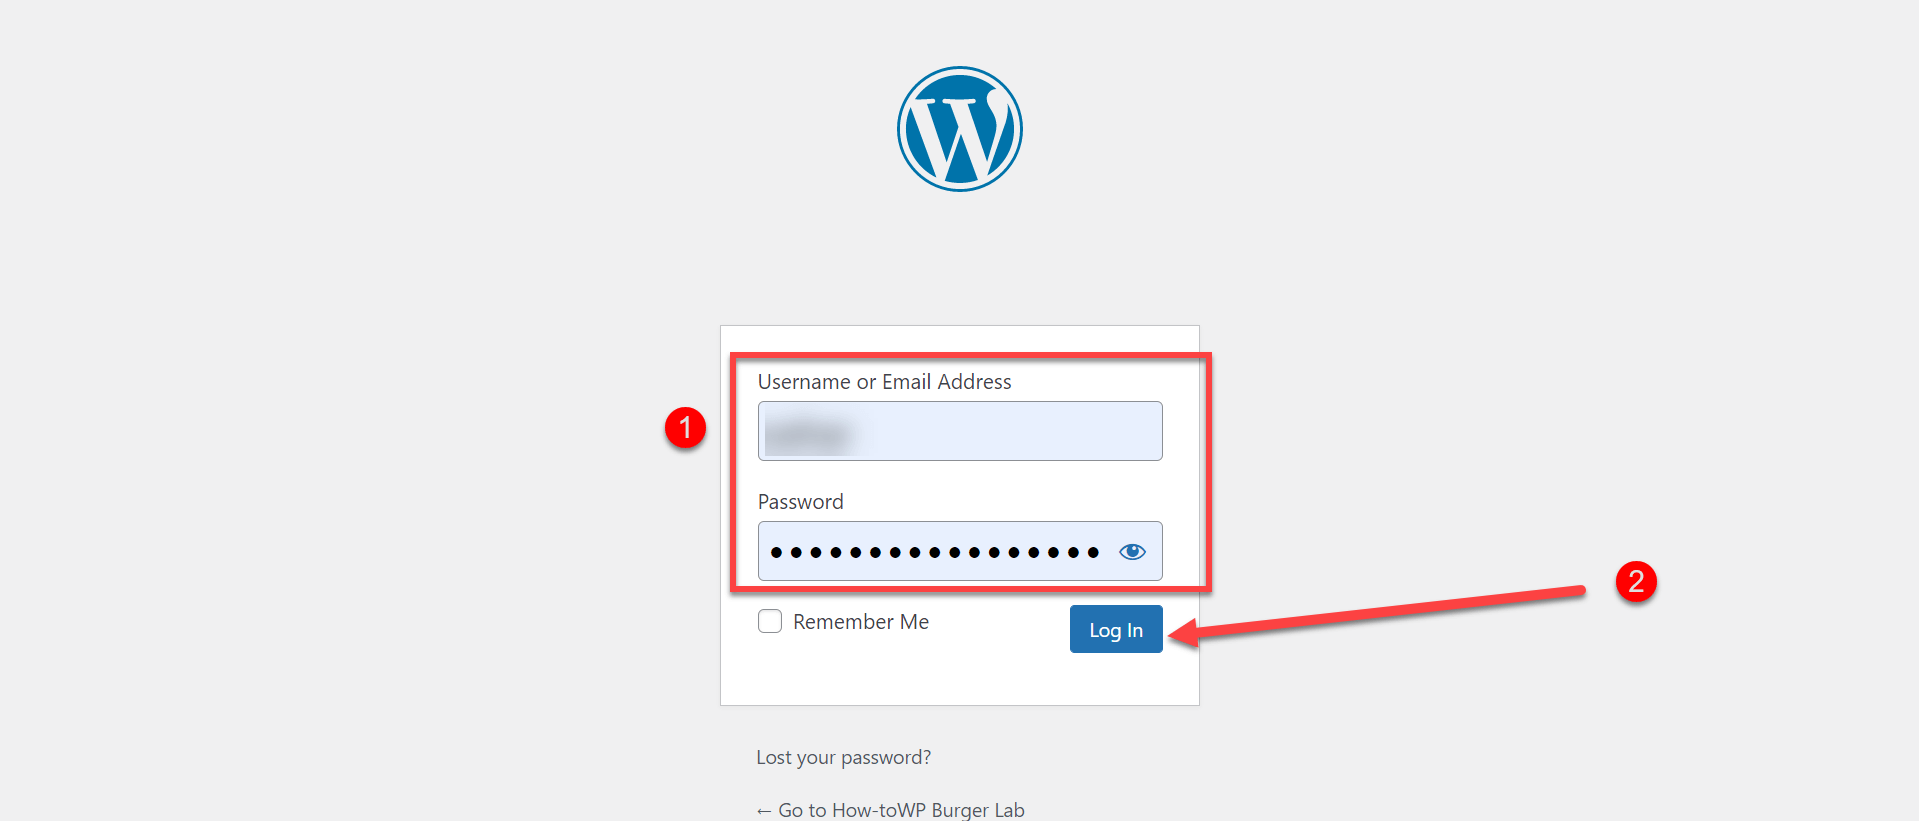
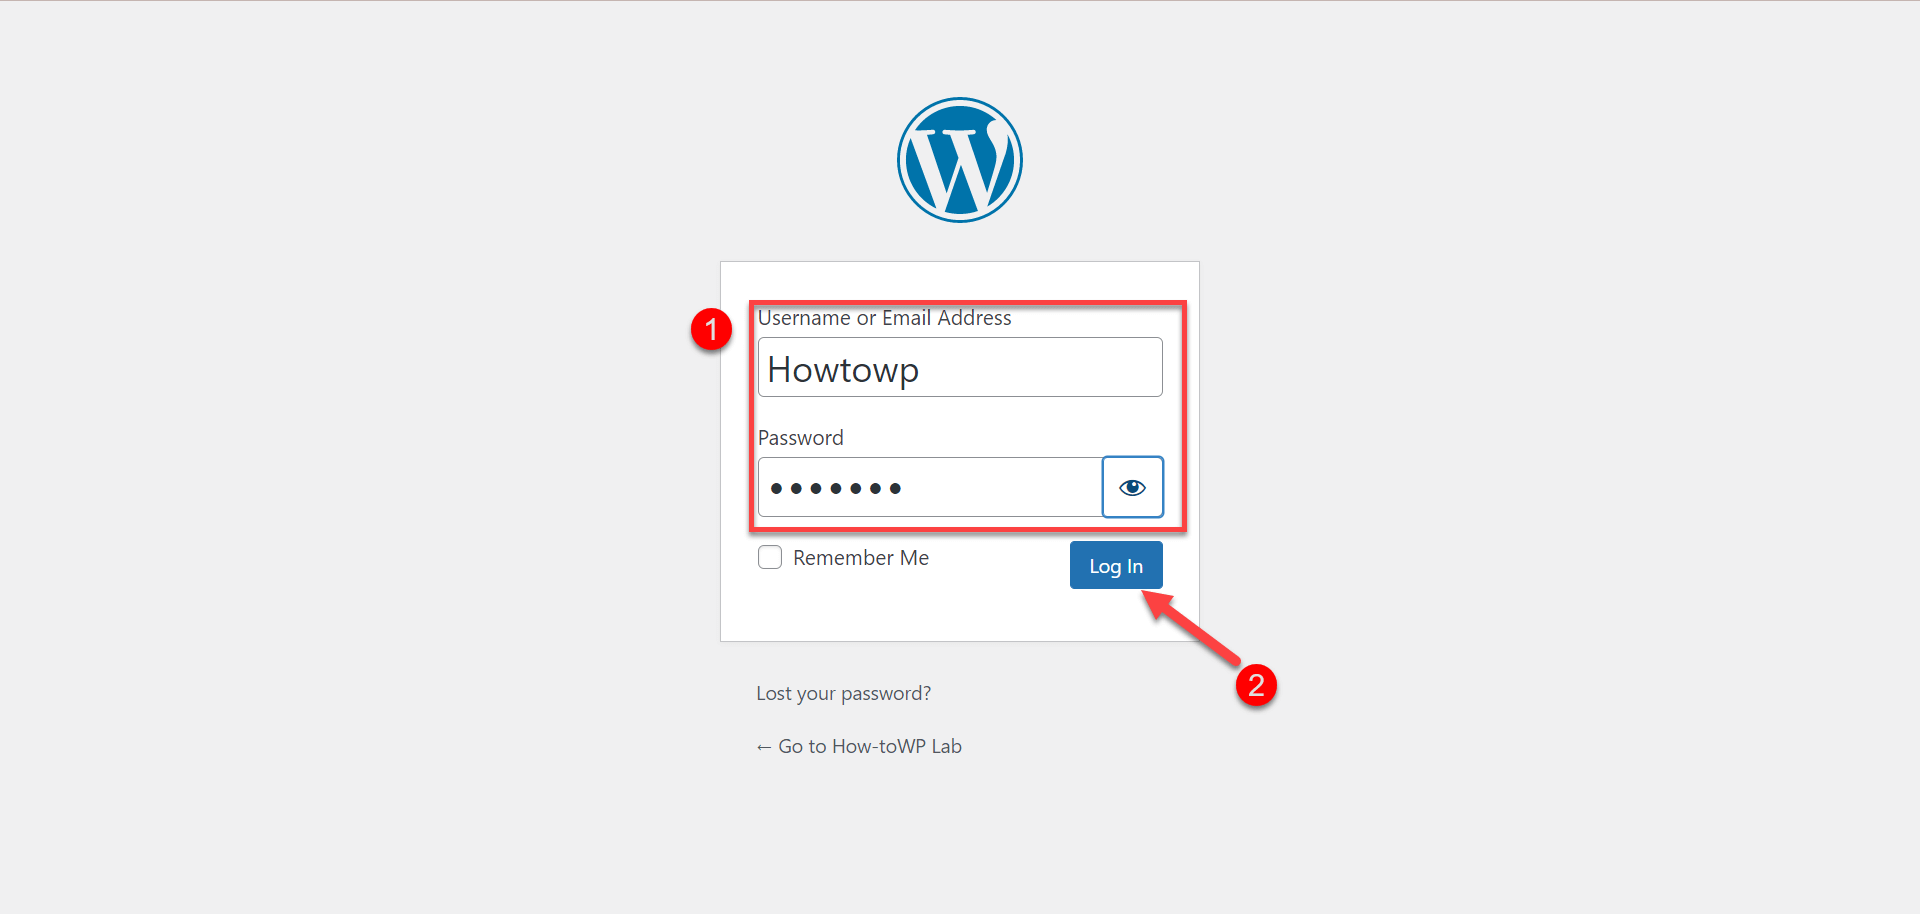
- Step 1: Open your WordPress website and log in to the “WordPress dashboard” using your credentials.
- Step 2: Access the “Plugins” menu from the left sidebar and select “Add New” to open the plugin directory
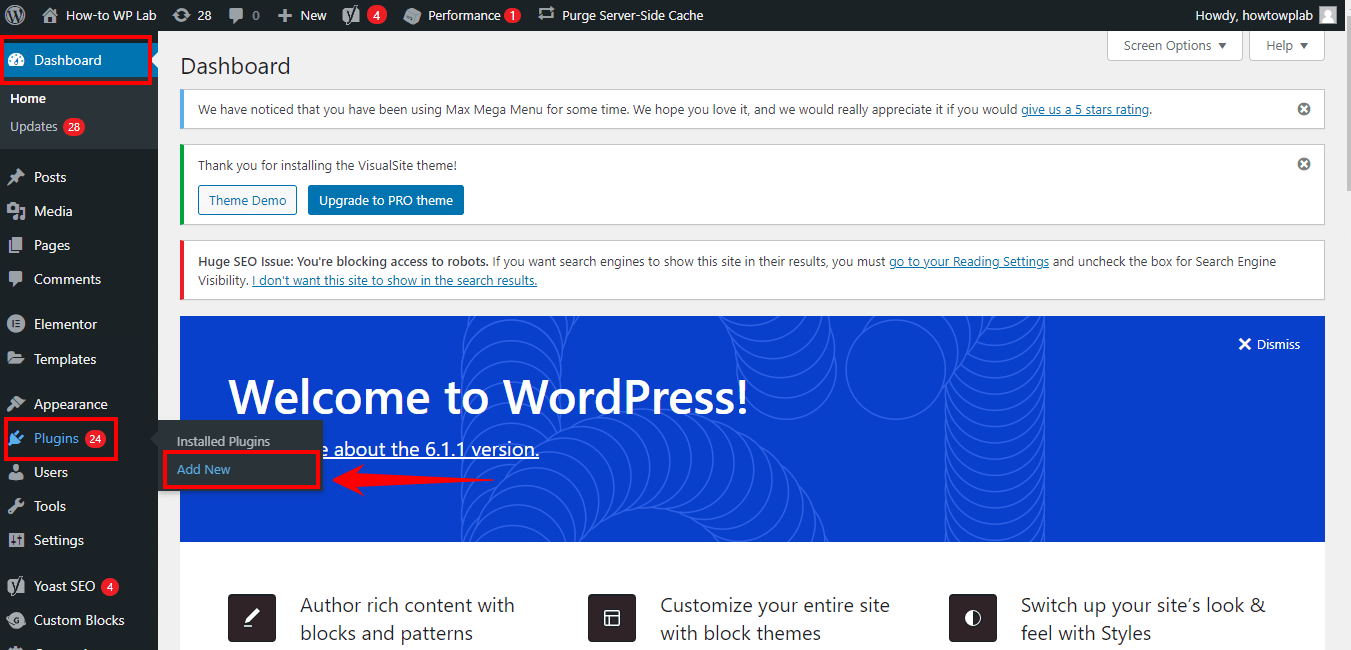
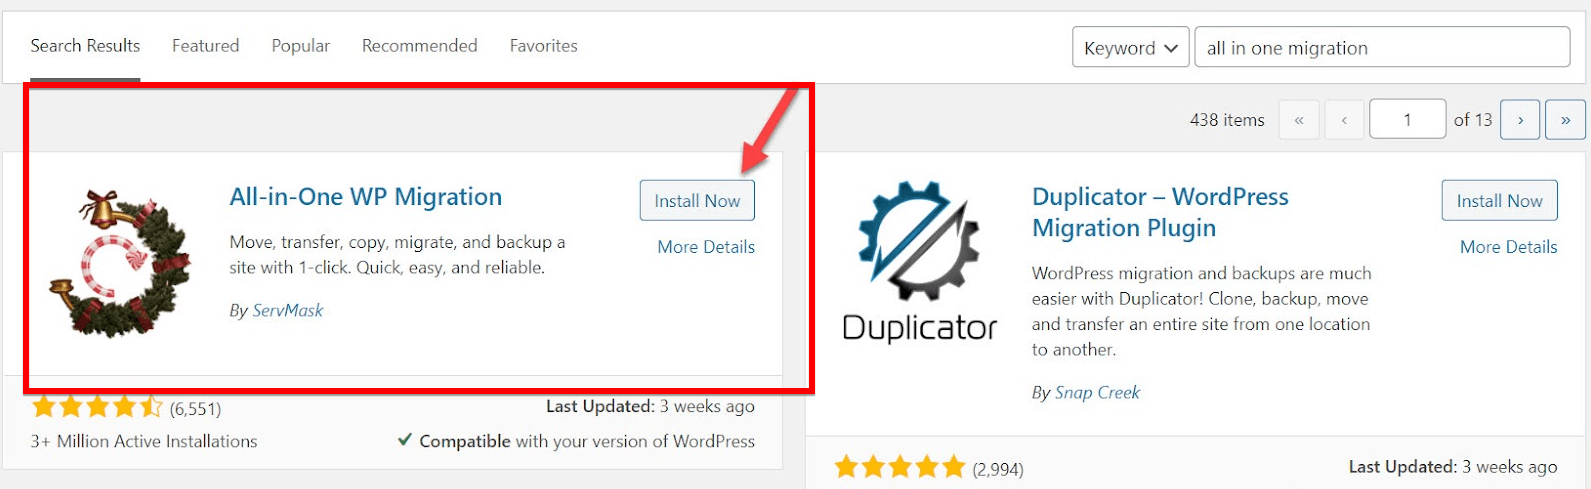
- Step 3: In the search box, type “All-in-One WP Migration,” which is the name of the plugin you need. When the plugin appears in the search results, click on “Install Now.”
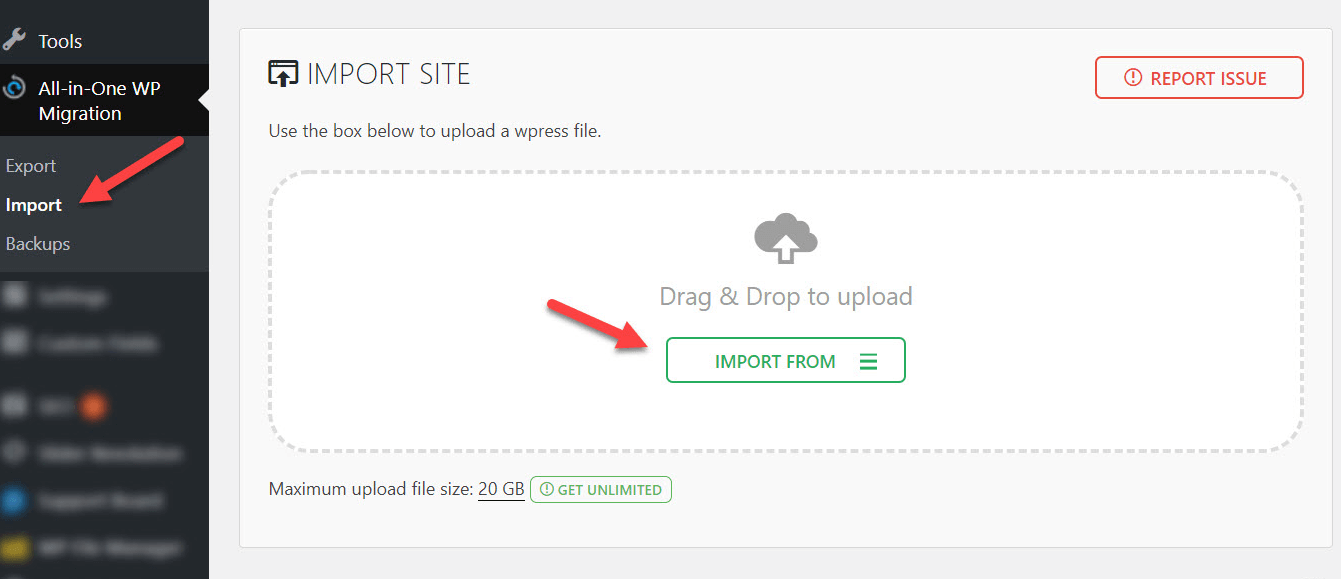
- Step 4: On the left sidebar, click on “All-in-One WP Migration” and then select ‘Import’.
- Step 3: If your backup file’s size exceeds the upload limit, don’t worry. We’ve got a fix.
Pro Tip: To boost the All-in-One Migration Plugin’s upload size limit:
- Install “Increase Maximum Upload File Size” plugin.
- Upon activation, venture to “Settings”. There, adjust the upload size to your needs.
- Step 4: Having sorted the size constraints, go back to “All-in-One WP Migration > Import”. Now, upload your .wpress backup file.
Thinking, “Why seek an alternative when I already have a backup plugin?” Well, each plugin has its specialties. WPVivid is not just about backups; it’s also an adept migration tool. So, if you’re planning on moving your website or looking for more features, here’s how to utilize it:
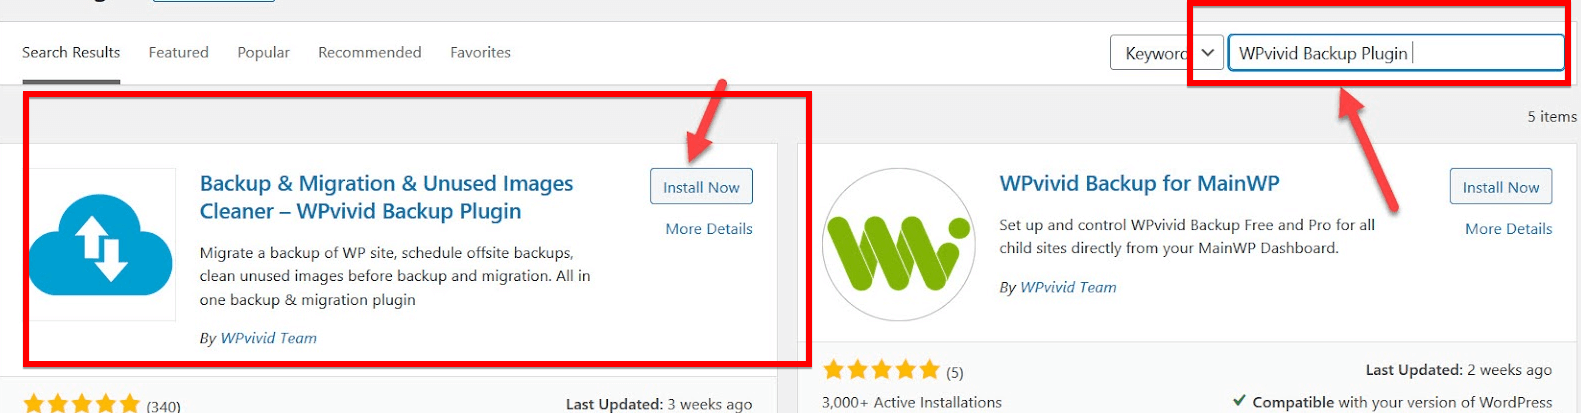
- Step 1: Within the “WordPress dashboard,” navigate to Plugins > Add New’ and search for “WPVivid.” Take the necessary steps to install and activate the “WPVivid Backup Plugin.”
- Step 2: Once activated, the WPVivid option will be prominent on your dashboard. Click on it.

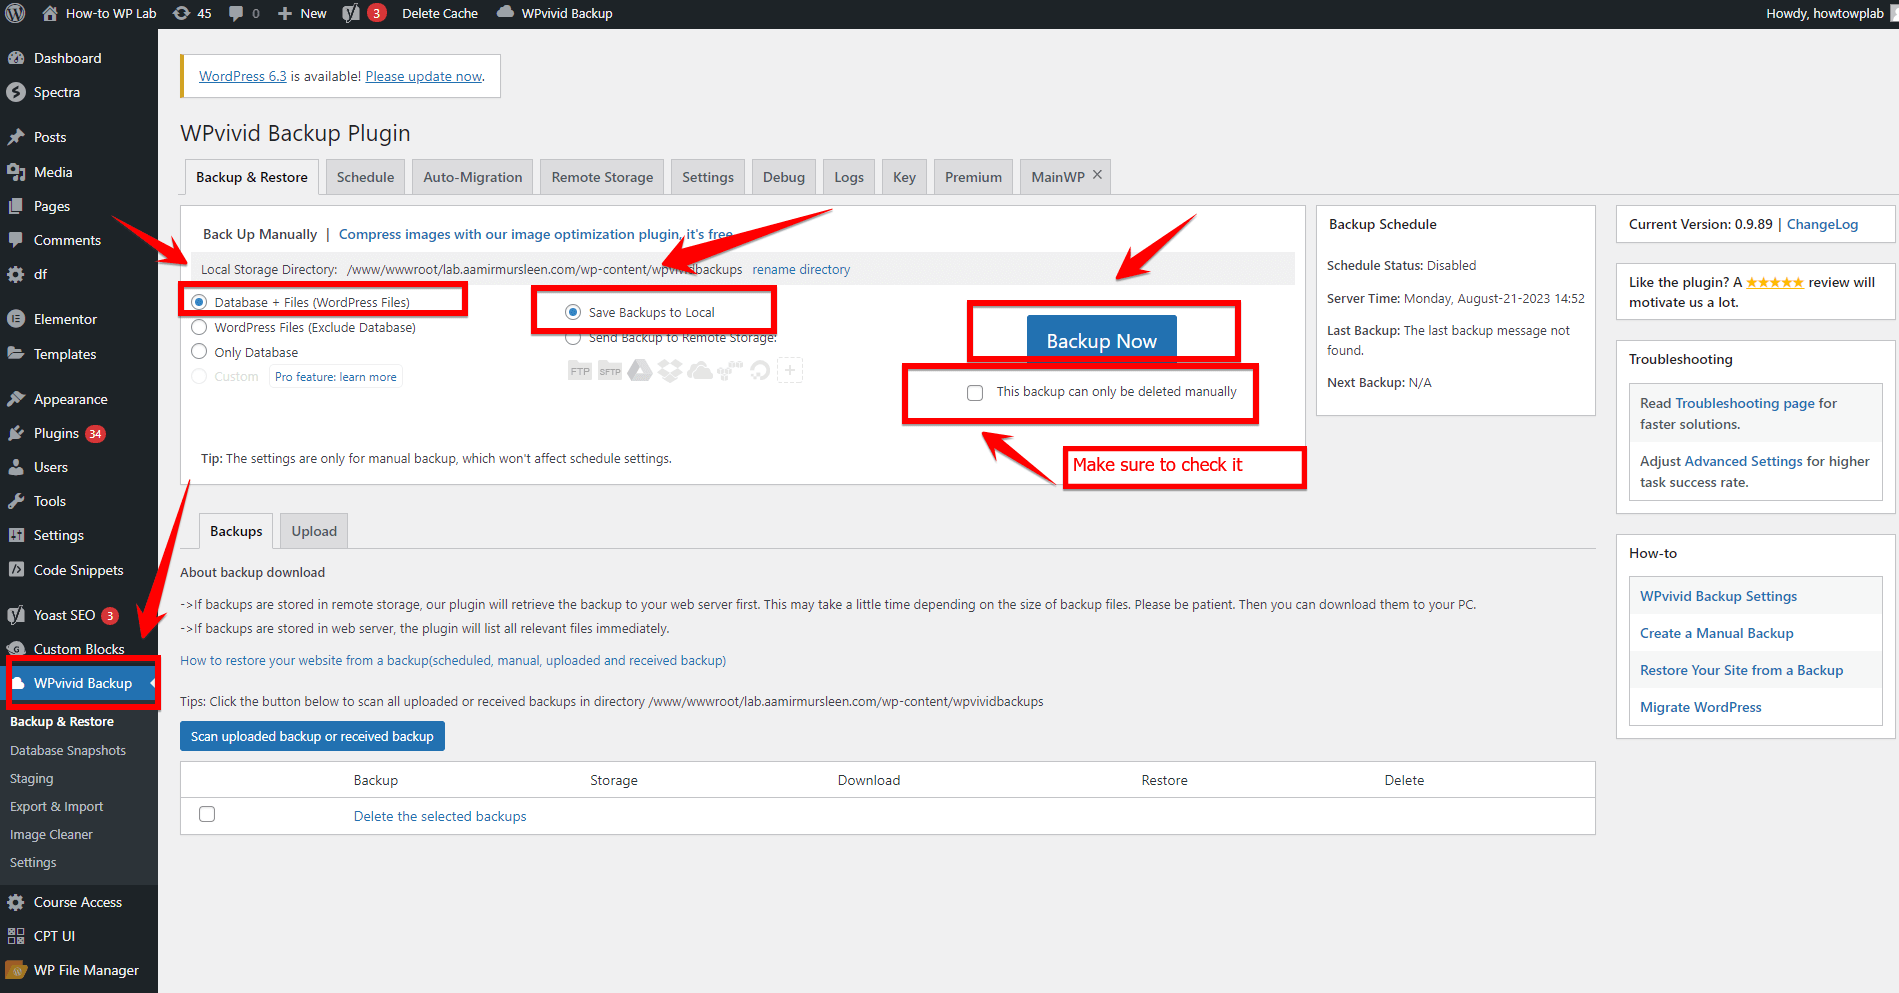
- Step 3: After installing, the system will guide you toward initiating a backup. When prompted, ensure you choose “Database + Files (WordPress Files)” and opt to “Save Backups in Local.” While there’s an option to transfer a backup to external storage solutions such as Dropbox, Google Drive, or OneDrive in the Remote Storage section, you can skip this if unnecessary. Finally, check the option for “This backup can only be deleted manually” and then click “Backup Now.”.
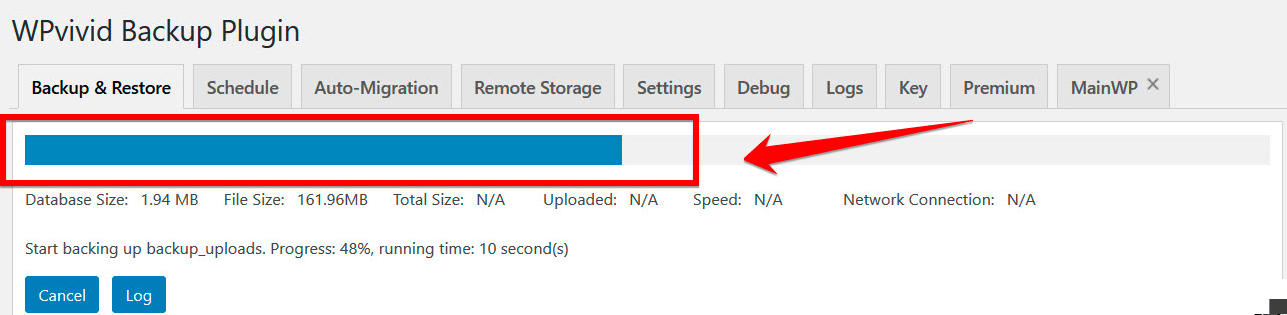
- Step 4: Keep an eye on the progress bar. It’s a neat little feature that’ll keep you updated on how the backup’s coming along.
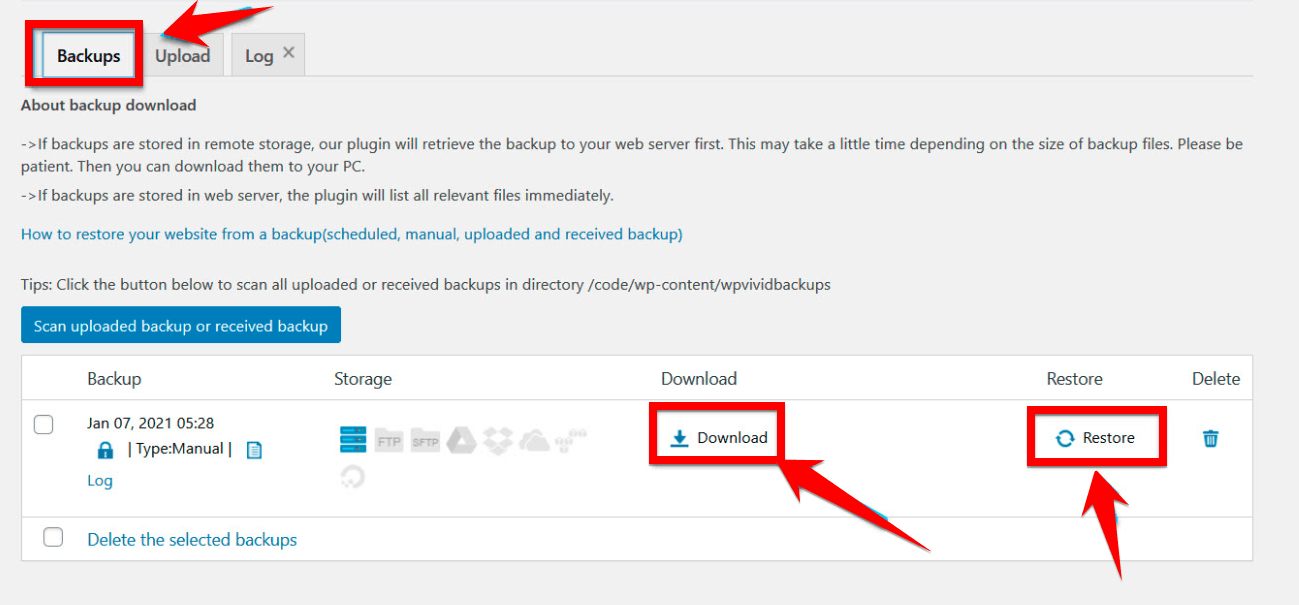
- Step 5: Scroll down a tad, and you’ll spot your brand-new backup file. You have options here: you can either hit “Download” to keep a copy on your device or let it sit there, knowing you can “Restore” from it anytime.
Pro Tip: If you’ve got a ton of website data or if your Wi-Fi is more of a “slow-fi,” think about sending that backup over to a place like Google Drive. You’ll find this handy option in the “Remote Storage” section.

Way 4: Switch to a Default Theme
When WordPress starts acting up, it’s natural to feel a surge of panic. But before you jump to conclusions, remember that oftentimes, the culprit might just be a theme that’s either corrupted or incompatible with a recent update.
Switching to a default WordPress theme might be your simplest solution. Here’s how you can execute this:
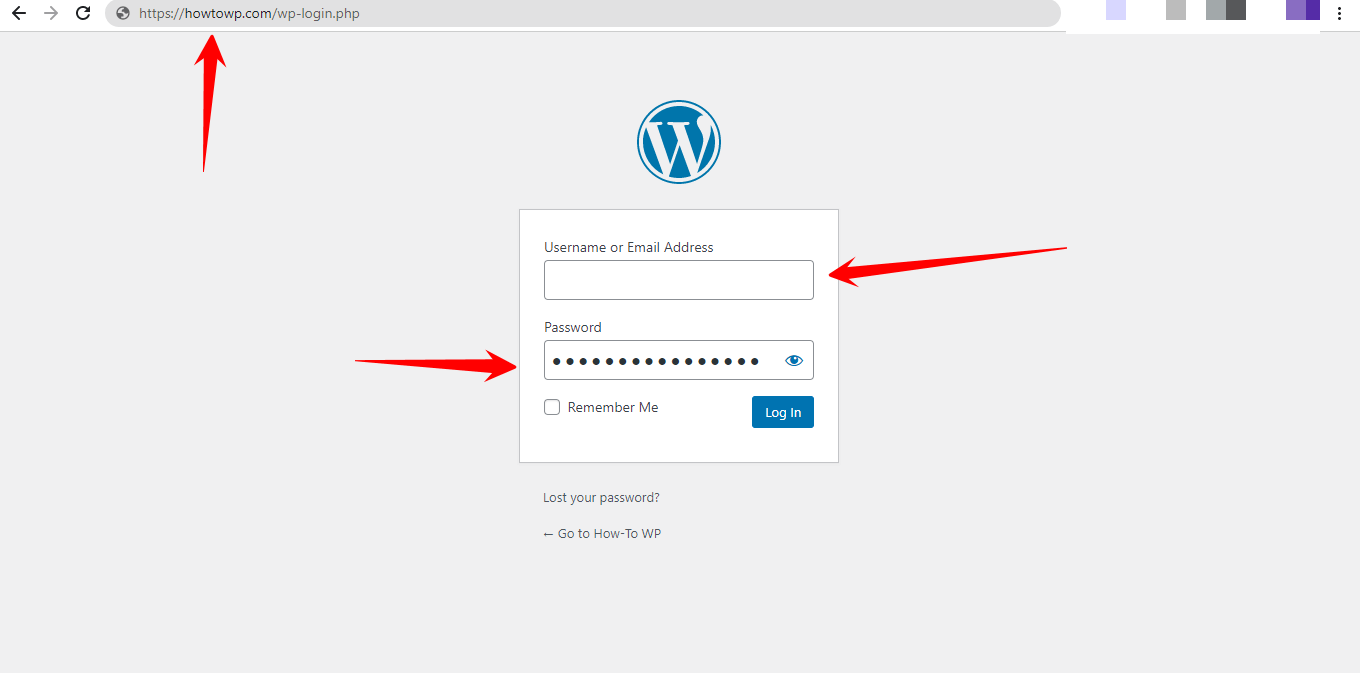
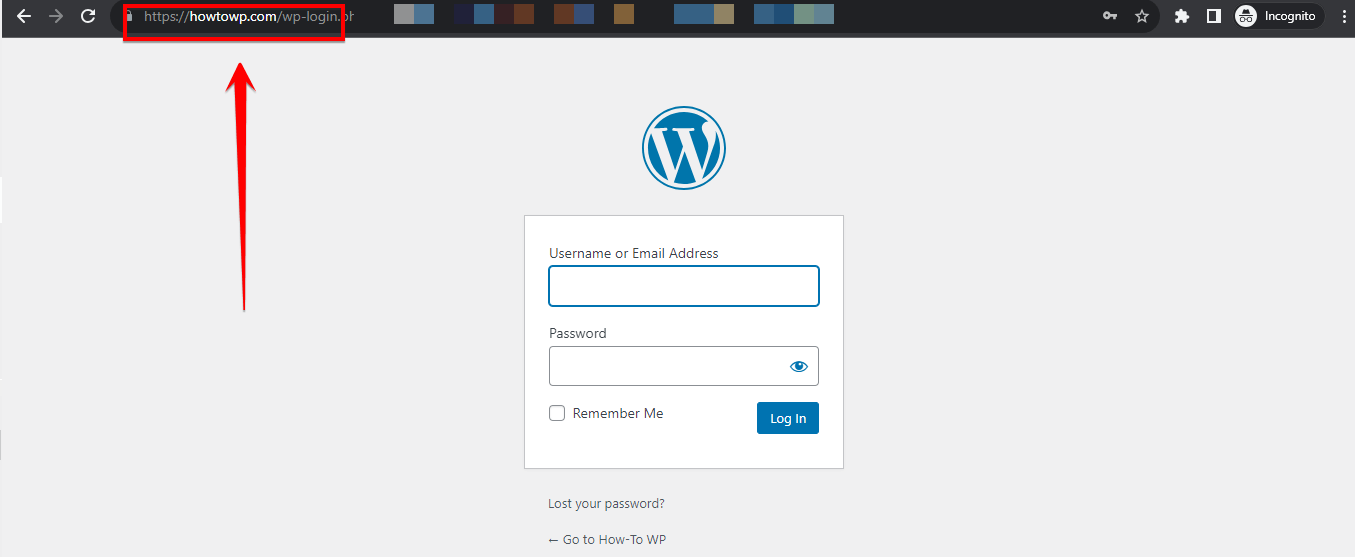
- Step 1: First things first. Fire up your browser, and enter the URL of your “WordPress website.” Attach /wp-admin at the end and press enter. This will usher you to the login page.
- Step 2: Upon logging in, your dashboard becomes accessible. Glance over the left sidebar. There, click “Appearance,” which will unfurl a dropdown. From this dropdown, select “Themes.”
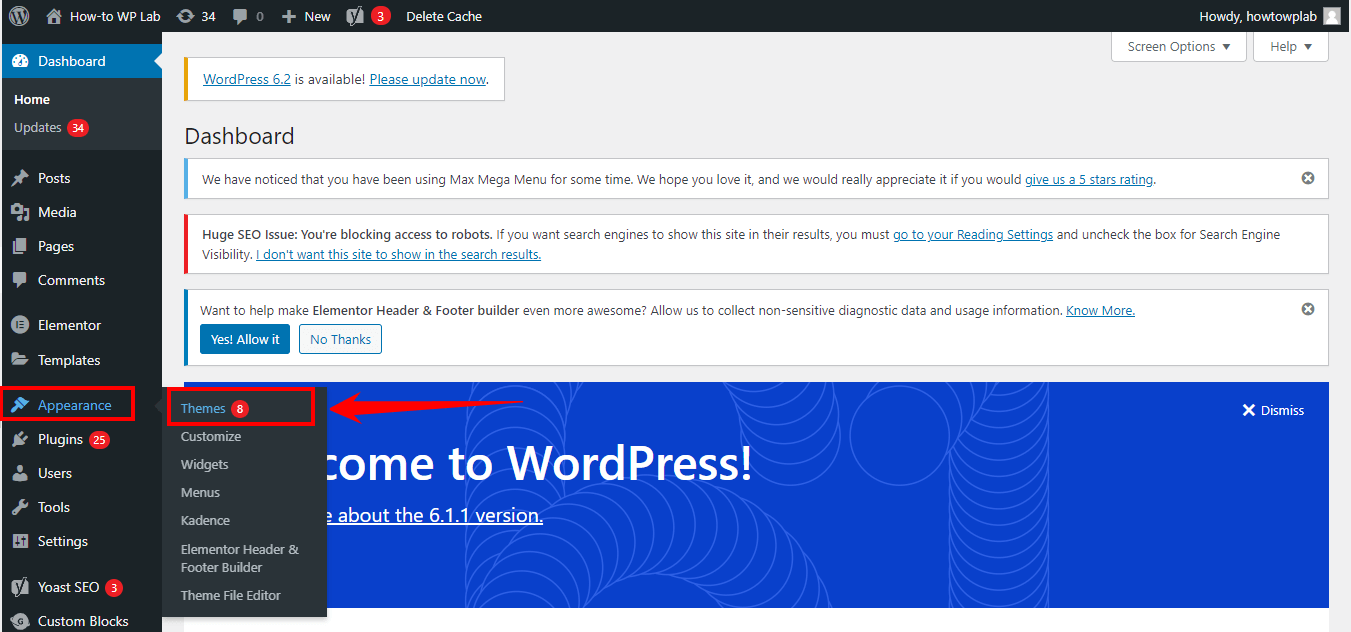
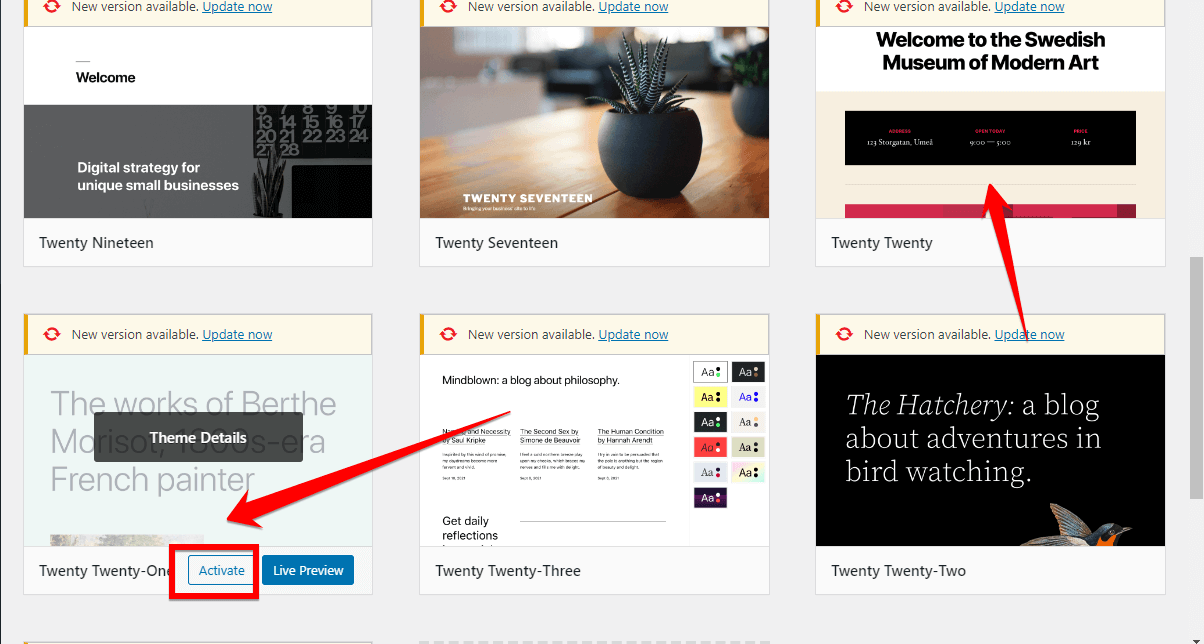
- Step 3: Within the ‘Themes’ section, you’ll spot several themes, provided you’ve installed multiple. Your eyes should search for the default ones—either “Twenty Twenty” or “Twenty Twenty-One.” Hover over your choice, and an “Activate” button will emerge. Click on it, and the transformation will be instantaneous.
Note: These default themes are designed by WordPress themselves, ensuring maximum compatibility and reliability.
For those unfamiliar, FTP is a protocol that allows you to transfer files between your computer and your web server. This comes in handy, especially when the dashboard is inaccessible.
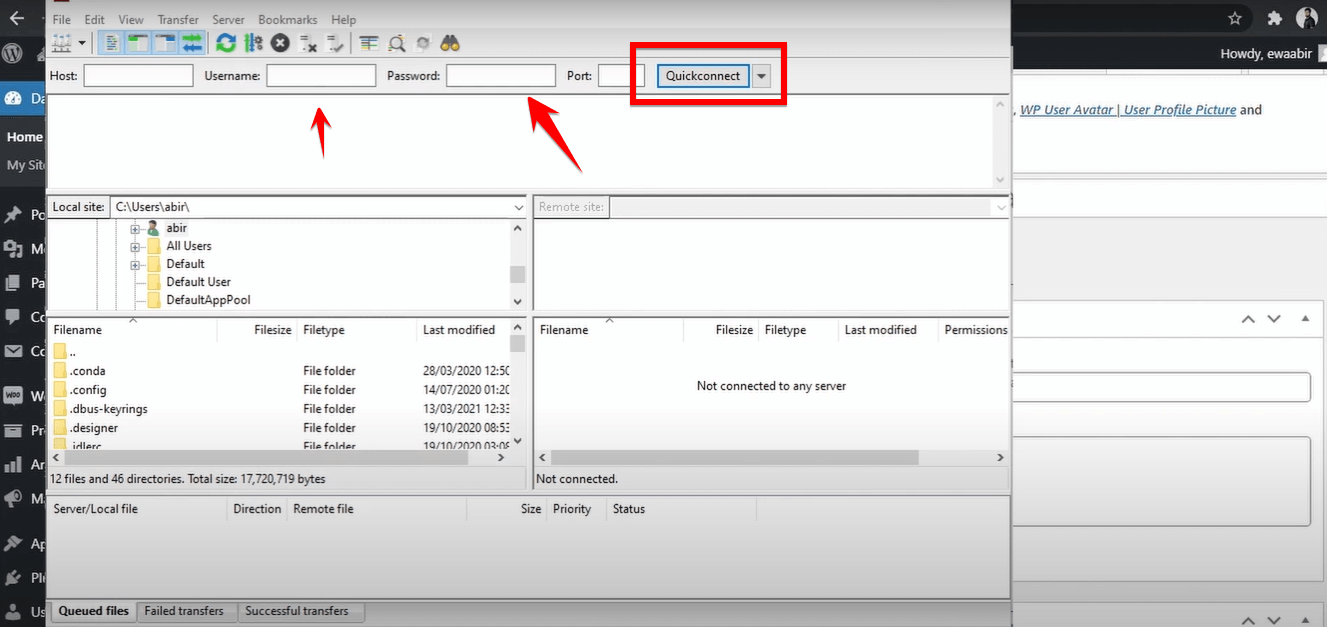
- Step 1: FTP is your gateway to your website’s core files. To access these, you’ll need what’s called an FTP client. Some of the popular choices include FileZilla, Cyberduck, and WinSCP.
- Step 2: After installing your preferred FTP client, launch it. You’d then need to input the FTP credentials (hostname, username, password, and port) – these are typically provided by your hosting provider. Once entered, connect to your server.
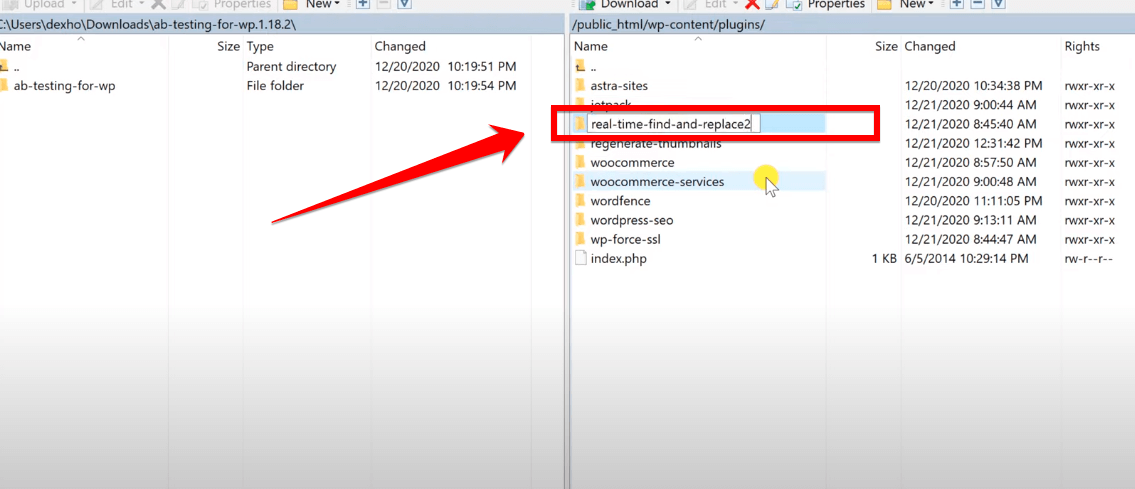
- Step 3: In the list of directories and files, search for wp-content. Dive into it and then further into themes. Here, you’ll find folders for all the themes you’ve ever installed.
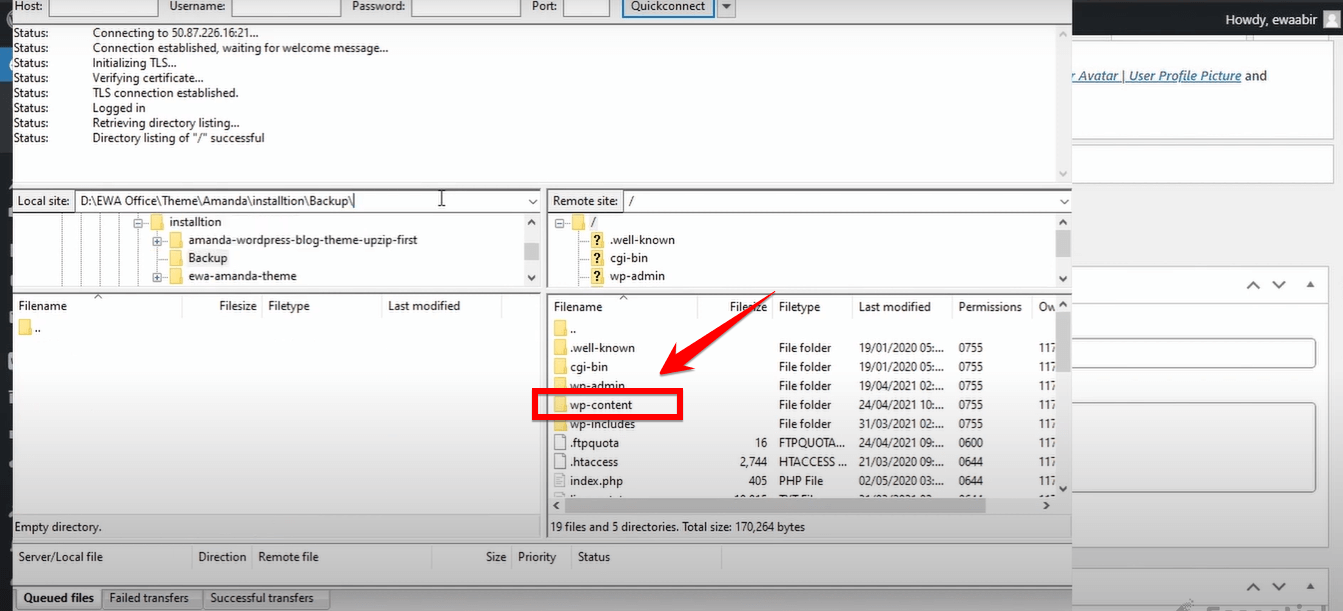
- Step 4: Locate the folder of the theme currently active on your site. Right-click on it and choose ‘Rename.’ By altering its name (for example, appending “_old” at the end), you effectively deactivate it.
Pro Tip: It’s a smart move to have backups before making such changes. Mistakes happen, and it’s always best to be prepared.
Once the active theme is disengaged, WordPress, in its wisdom, automatically switches to a default theme, ensuring your website remains functional.
Way 5: Deactivate All the Plugins
In the ever-evolving ecosystem of WordPress, plugins have stood out as both heroes and occasional villains. These tools, designed to enhance and streamline your website’s functionality, can sometimes be the very source of its ailments.
If you’ve recently encountered an critical error on your WordPress site, those handy plugins might just be the mischief-makers. Let’s delve into the process of deactivating them to diagnose the issue:
- Step 1: Go to your “WordPress Dashboard” and enter your login credentials (username and password).
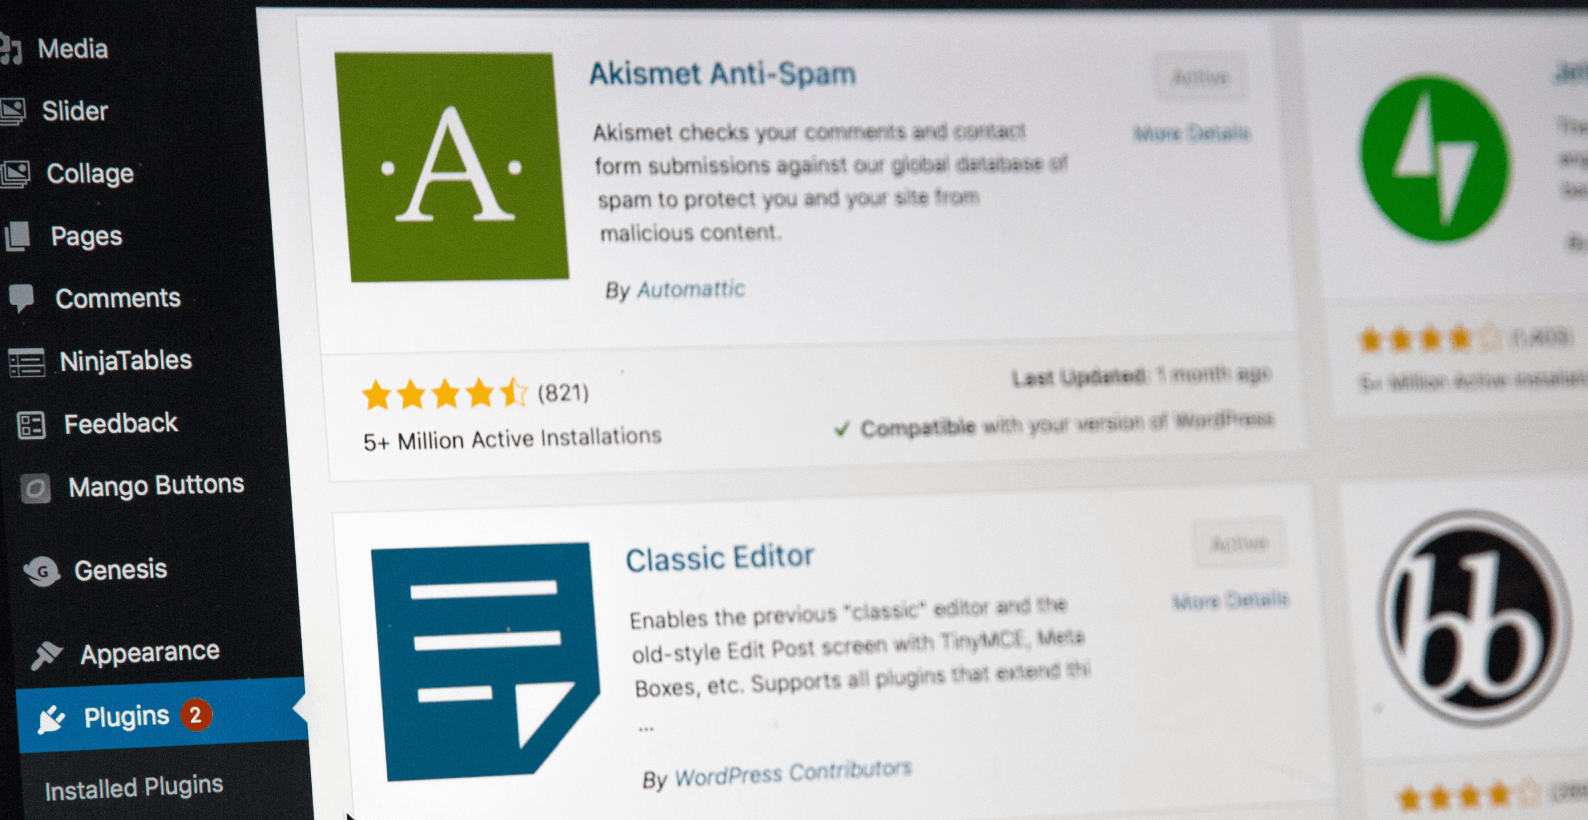
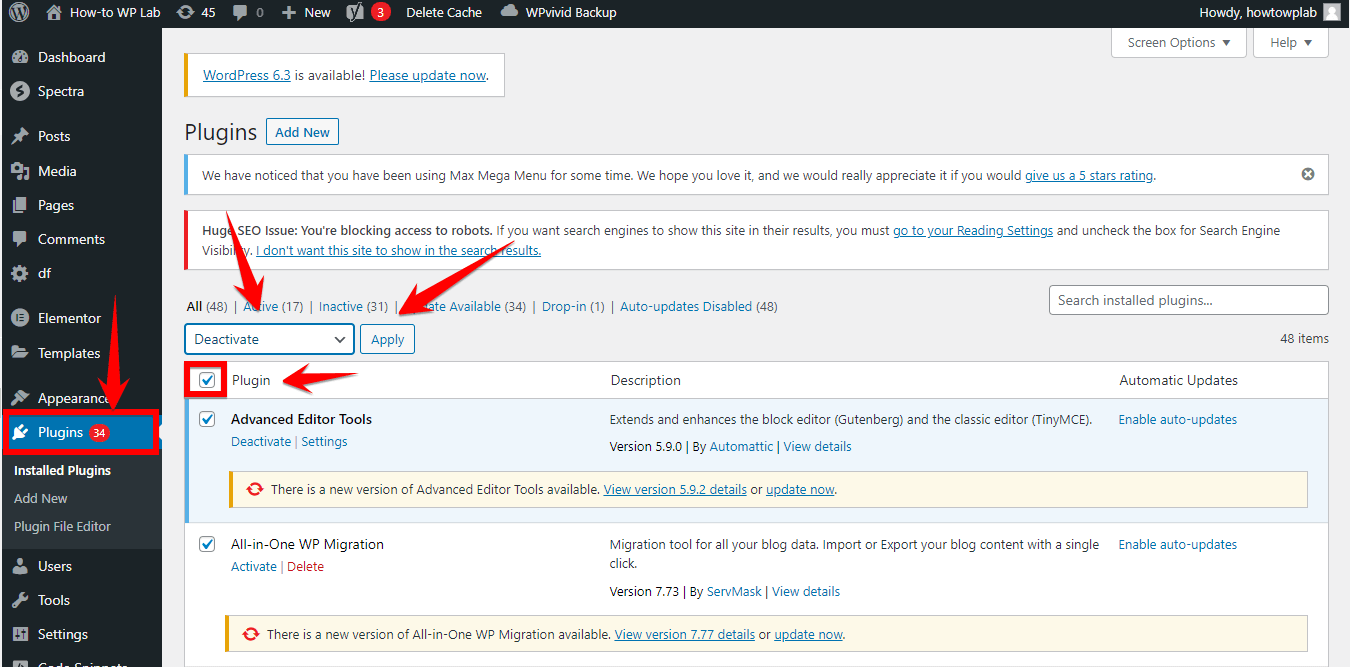
- Step 2: Once you’re on the dashboard, look to the left sidebar and click on “Plugins.” This will show you a list of all your plugins, both active and not.
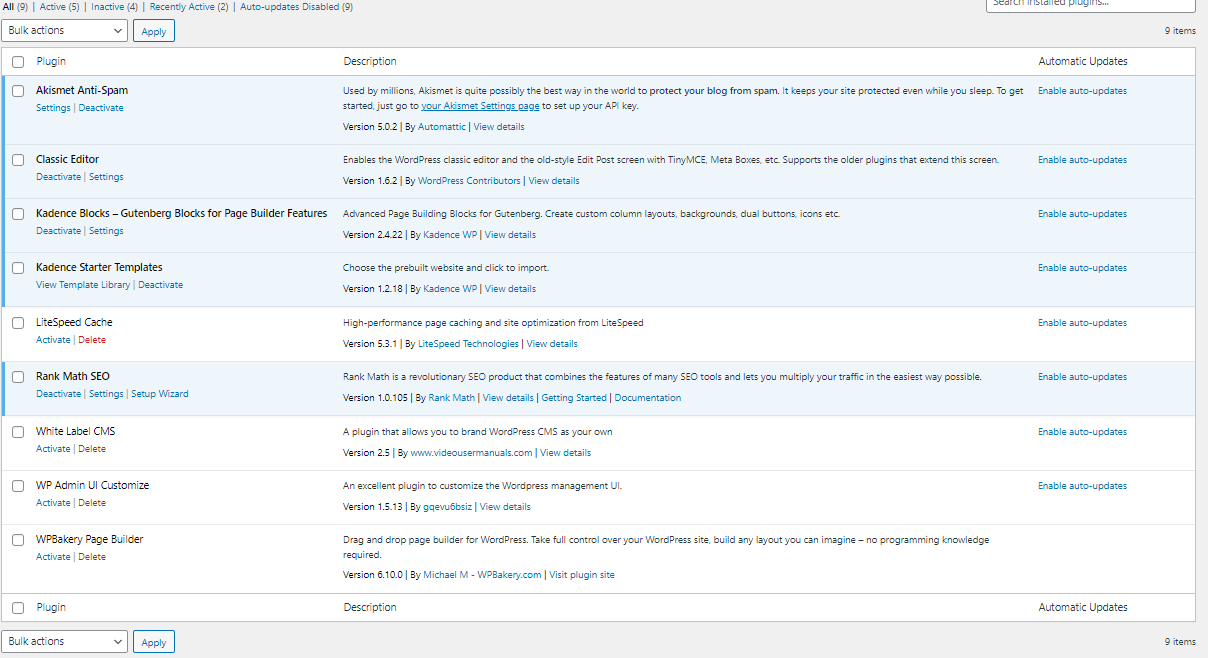
- Step 3: At the top of the plugin list, there’s a checkbox. Click on it to select all plugins. Then, from the “Bulk Actions” dropdown, choose “Deactivate” and click “Apply.” This will deactivate all your plugins.
Note: While it might feel counterintuitive to deactivate all plugins, especially if they’ve been running smoothly for a while, this step aids in quickly identifying any rogue plugins causing upheaval.
In scenarios where the dashboard plays hard to get, FTP emerges as your trusty sidekick.
- Step 1: FTP, in essence, is your bridge to the vast array of files that make up your website. To tread this bridge, you’ll need an FTP client. FileZilla, Cyberduck, or WinSCP rank among the elites in this domain.
- Step 2: Upon your FTP client’s inauguration, you’re to input your FTP credentials—a quartet of hostname, username, password, and port. Your hosting provider usually dispatches these details. Once keyed in, initiate the connection.
- Step 3: Within the maze of directories and files, seek out “wp-content”. Embark further, and plugins will emerge. This is where every plugin you’ve armed your website with resides.
- Step 4: This might sound radical, but renaming the plugins folder (perhaps to plugins_old) will disarm all your plugins in one fell swoop. WordPress, not recognizing the renamed folder, will consider all the plugins deactivated.
Pro Tip: Before delving into any renaming activity, especially when it sounds as consequential as this, always ensure you have a fresh backup at hand. Caution today can prevent a crisis tomorrow.
Way 6: Increasing PHP Memory Limit
Before diving into the intricate steps, let’s briefly understand the importance of the PHP Memory Limit. Every “WordPress website” relies on PHP scripts to function. These scripts, akin to the fuel powering your vehicle, are allotted a specific amount of memory.
Should they exceed this limit, the site may falter, leading to errors. Thankfully, adjusting this limit is within your grasp.
- Step 1: “Connect to your WordPress site” using an FTP client. You might already be familiar with popular ones like FileZilla or Cyberduck.
- Step 2: Once inside, scout for the ‘wp-config.php’ file. This integral file can be visualized as the backbone of your WordPress configuration. Double-click to invoke it within your designated text editor.
- Step 3: Delve into the content, and right before the finale, integrate the following command:
define('WP_MEMORY_LIMIT', '128M');
Note: This code elevates the PHP memory to 128 megabytes. If disruptions linger, bravely tread to ‘256M’. However, transcending this might not always be beneficial unless warranted by a specific plugin’s guidelines.
- Step 4: While it may seem like a walk in the park, some hosting providers maintain a staunch ceiling on the memory limit. If you sense rigidity in extending the PHP memory, there are two broad avenues to tread. Firstly, consider revisiting and possibly decluttering the plugins on your “WordPress website”. Alternatively, it might be an opportune moment to consider aligning with a more malleable hosting provider.
Way 7: Increase the Max Upload File Size and Text Processing Functions
A “Critical Error” message on your WordPress site can sometimes trace back to PHP limits set too low. This especially holds true if you’re handling large file uploads or extensive text processing. By adjusting these limits, you can ensure smoother operations on your site.
Here’s how you can do that:
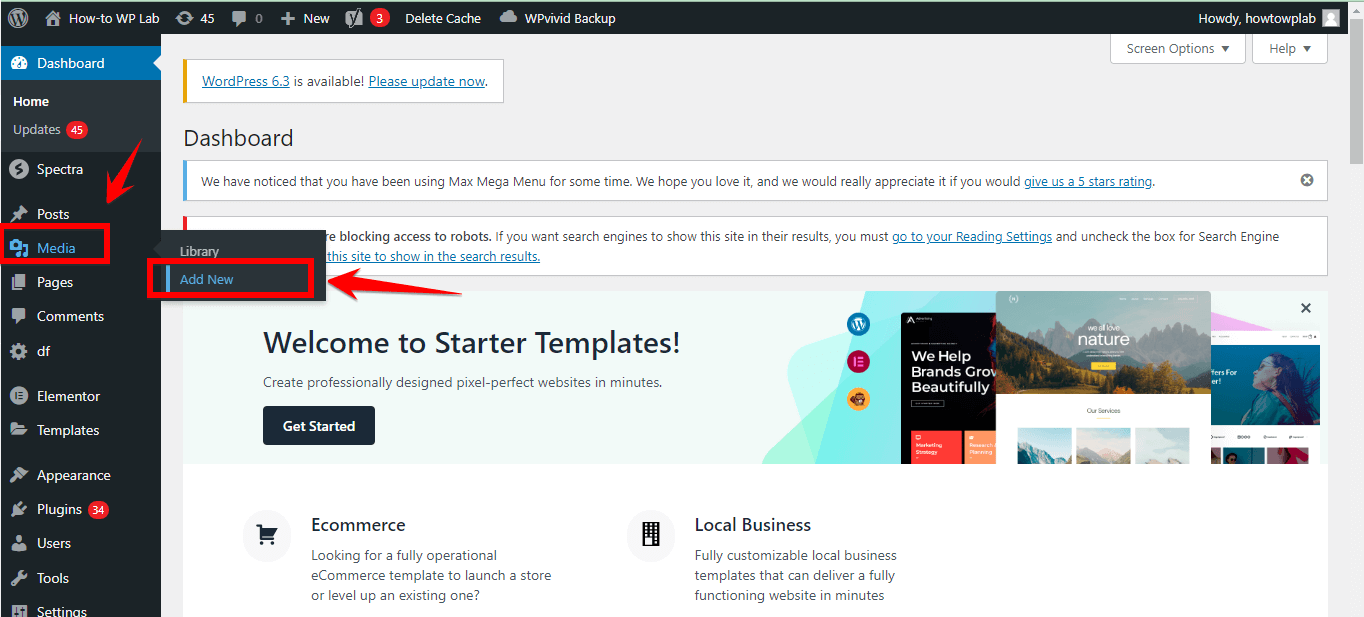
- Step 1: Open your browser and log into your WordPress site to access the dashboard.
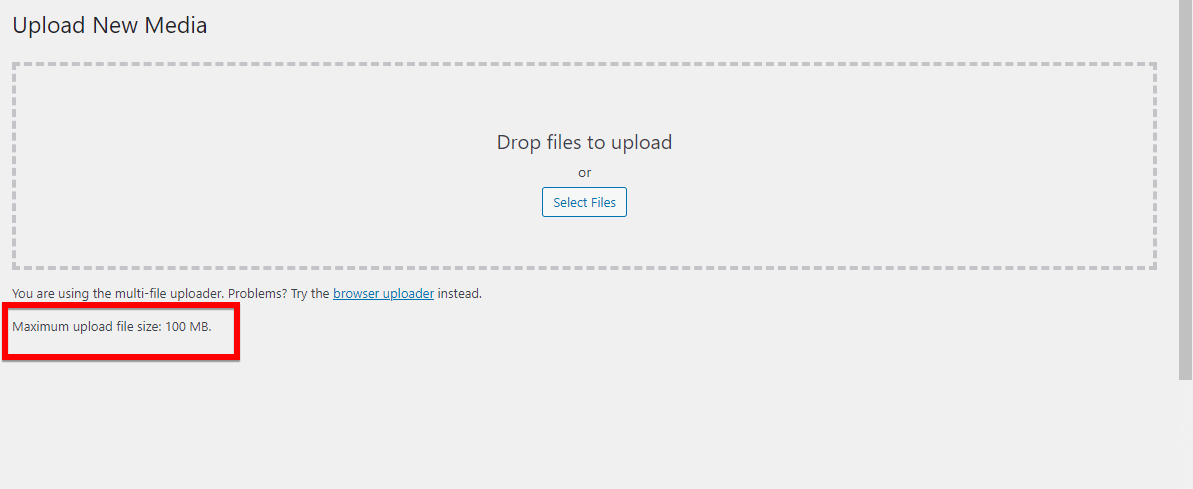
- Step 2: Click on “Media” on the left sidebar, then choose “Add New.”
- Step 3: Before uploading, check the noted maximum file size below the upload area to ensure your file isn’t too large. If it is, consider resizing or compressing your file first.
Sometimes, direct changes within the WordPress dashboard might not be sufficient or possible, especially if the critical error prevents you from accessing certain dashboard features. This is where FTP (File Transfer Protocol) comes into play, allowing direct modifications to your site’s core files.
- Step 1: Employ your chosen FTP client to connect to your website’s primary directory.
- Step 2: Seek out the wp-config.php file and open it for editing.
- Step 3: Before you reach the file’s conclusion, incorporate the following lines to expand the max upload file size:
ini_set('upload_max_size' , '256M' );
ini_set('post_max_size', '256M');
- Step 4: If you’re still experiencing troubles with certain expansive pages or text operations, add these commands:
ini_set('pcre.recursion_limit', '20000000');
ini_set('pcre.backtrack_limit', '10000000');
- Step 5: Post your modifications, save, and then shut the wp-config.php file.
Adjusting these settings allows WordPress to better cope with sizable uploads or intensive text operations. Nonetheless, it’s crucial to confirm you’re not overburdening your server’s capabilities.
Way 8: Clear Your Website’s Cache
When you encounter the message “There Has Been a Critical Error on This Website”, it can be distressing. But worry not! We’ve got a practical solution for you. One of the key methods to troubleshoot this issue is to clear your website’s cache. A loaded cache can obstruct the smooth functioning of your website. Let’s walk through the steps to clear it:
If you’re using a WordPress website, plugins often come to the rescue. They provide a straightforward way to handle backend tasks without much technical know-how.
- Step 1: Access your WordPress site by navigating to your website’s login page. Use your credentials to log into your “Dashboard”.
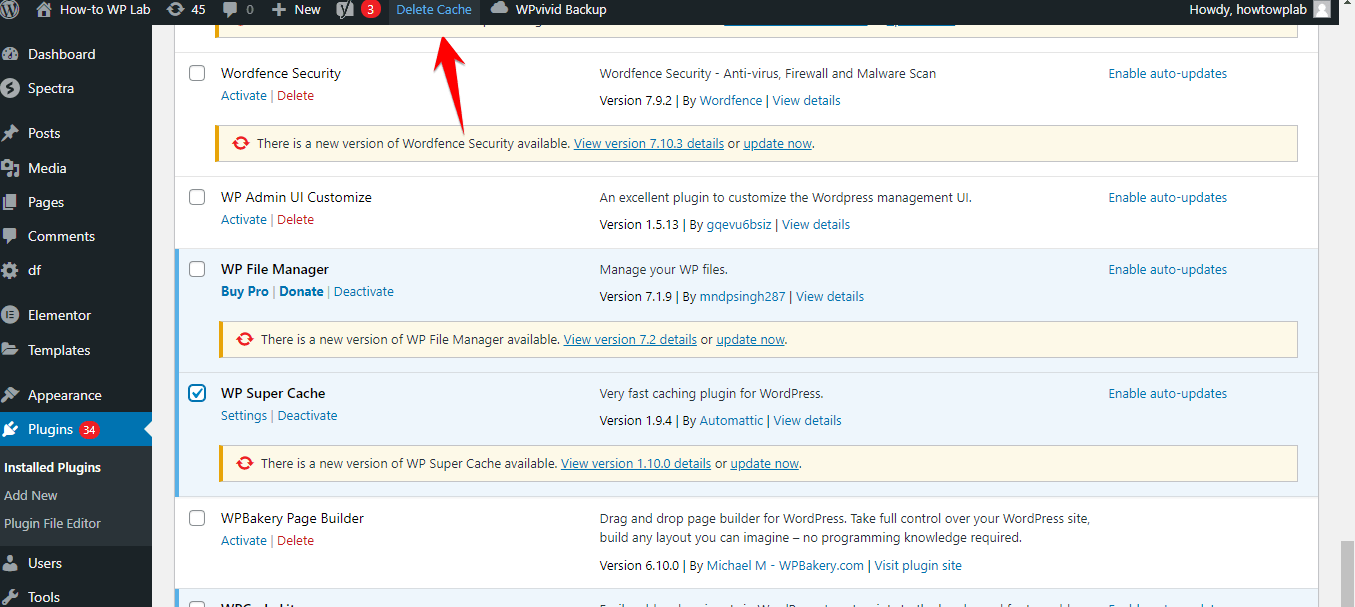
- Step 2: On the left sidebar of the “Dashboard”, click on the “Plugins” section. In the list that appears, find and select the caching plugin you have installed.
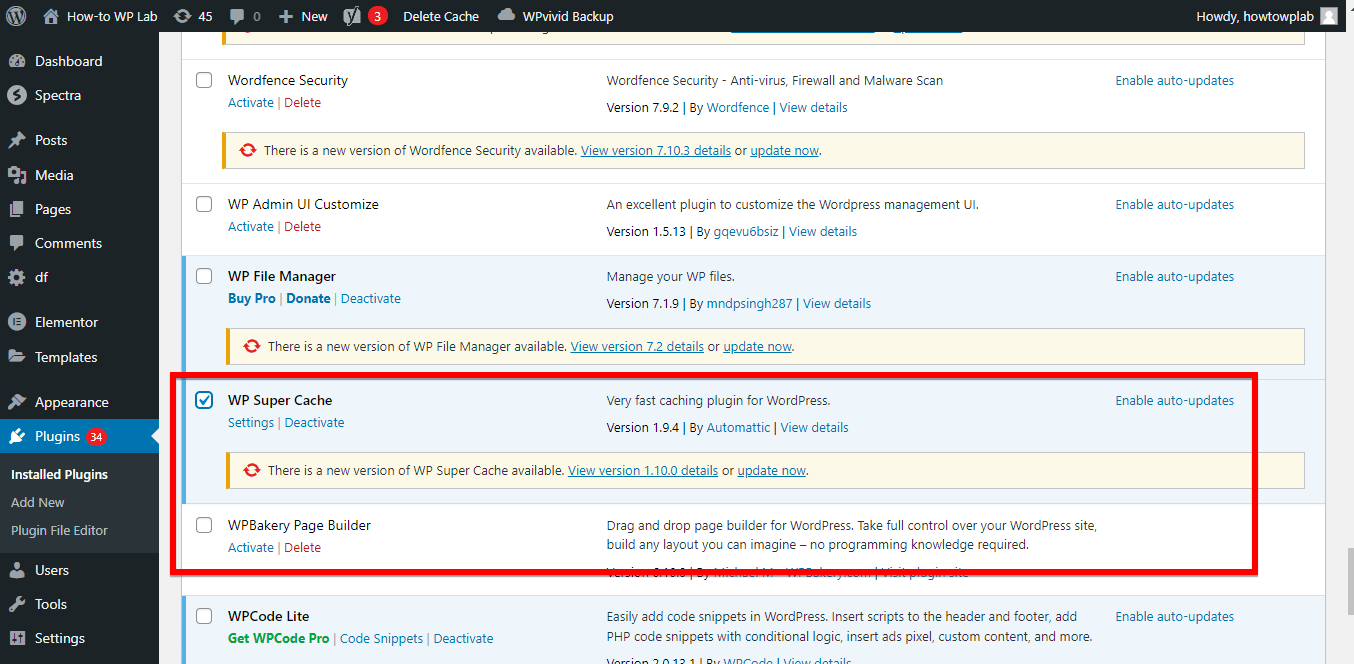
- Step 3: Once you’re within the caching plugin’s interface, look for its “settings” or “configuration” options.
- Step 4: In the plugin’s settings, locate a button or link titled “Clear Cache” or a similar label. Click on this button to clear the cache for your site.
Note: If you do not have access to plugins or prefer not to use them, consider the manual approach below.
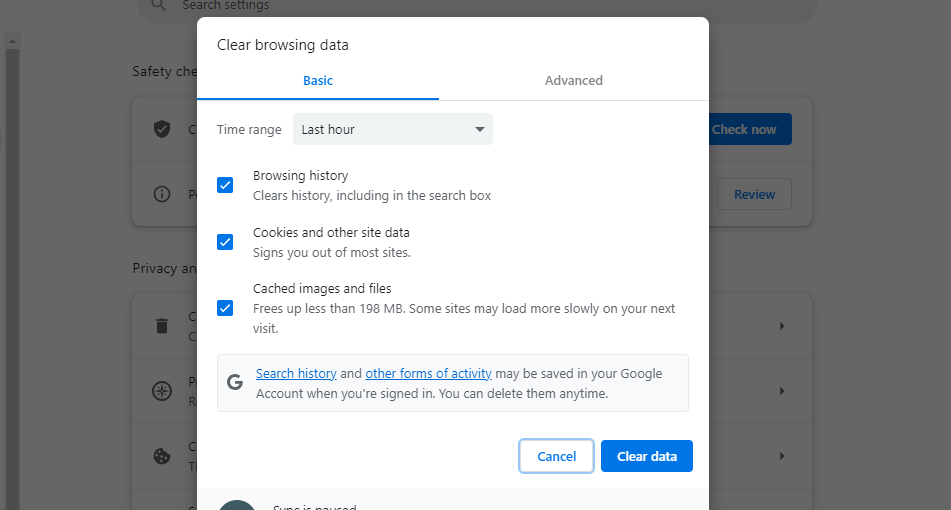
Clearing cache manually pertains to your internet browser, which sometimes stores site data.
- Step 1: Open your preferred internet browser. Dive into the settings or history section (the exact name might vary based on your browser). This area will offer an option to clear your browser cache.
If your website is hosted on Siteground, their hosting dashboard provides an easy cache clearing method.
- Step 1: Begin by accessing your Siteground hosting dashboard.
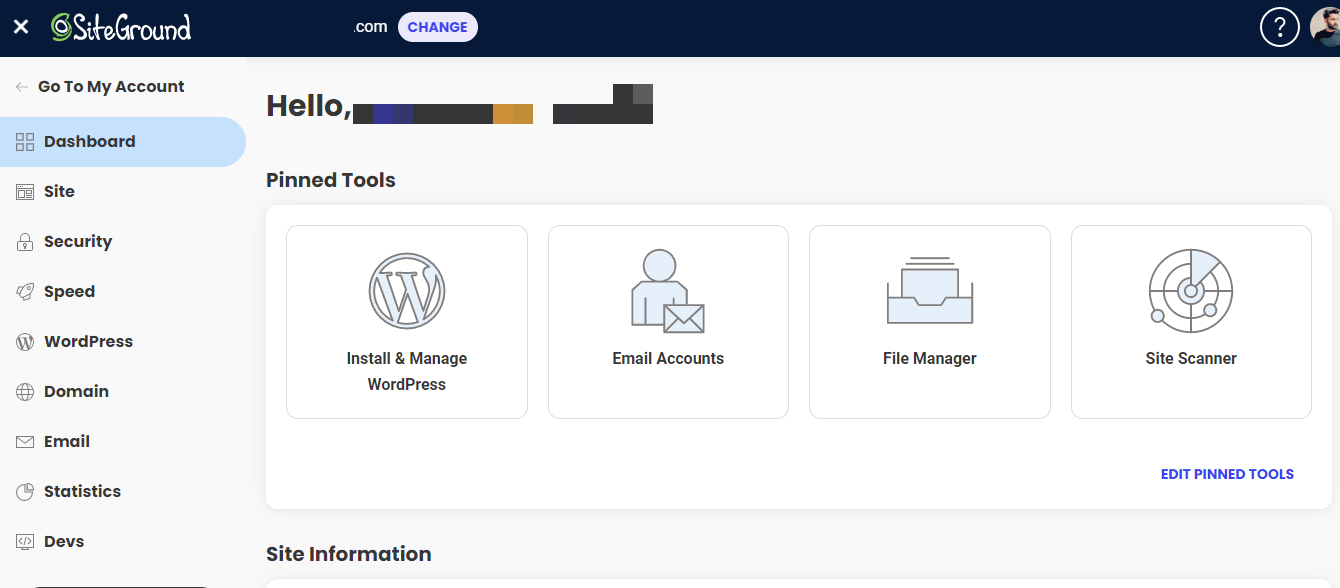
- Step 2: Browse through until you spot caching options. Here, you will find options like ‘Purge’ or ‘Clear Cache.’ Opt for either to clear your website’s cache.
Way 9: Upgrade Your PHP Version
Having an outdated PHP version can be a significant contributor to the message, “There Has Been a Critical Error on This Website.” Not only does an updated PHP version offer enhanced security features, but it also provides performance improvements and compatibility with the latest website scripts.
Therefore, maintaining the most recent version of PHP ensures that your website runs smoothly and is safeguarded against potential vulnerabilities.
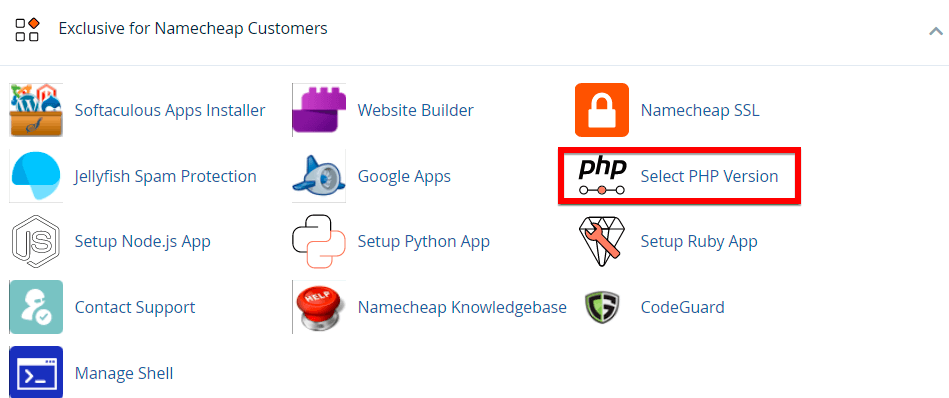
If you’re hosting your website with Namecheap, updating your PHP version is straightforward. Here’s a step-by-step guide to help you through the process:
- Step 1: Begin by logging into your cPanel account associated with Namecheap.

- Step 2: Navigate to the section dedicated to Namecheap customers. If you can’t find it there, the “Select PHP Version” option might also be in the Software section.
- Step 3: Inside the PHP settings, you’ll notice a variety of modules and extensions.
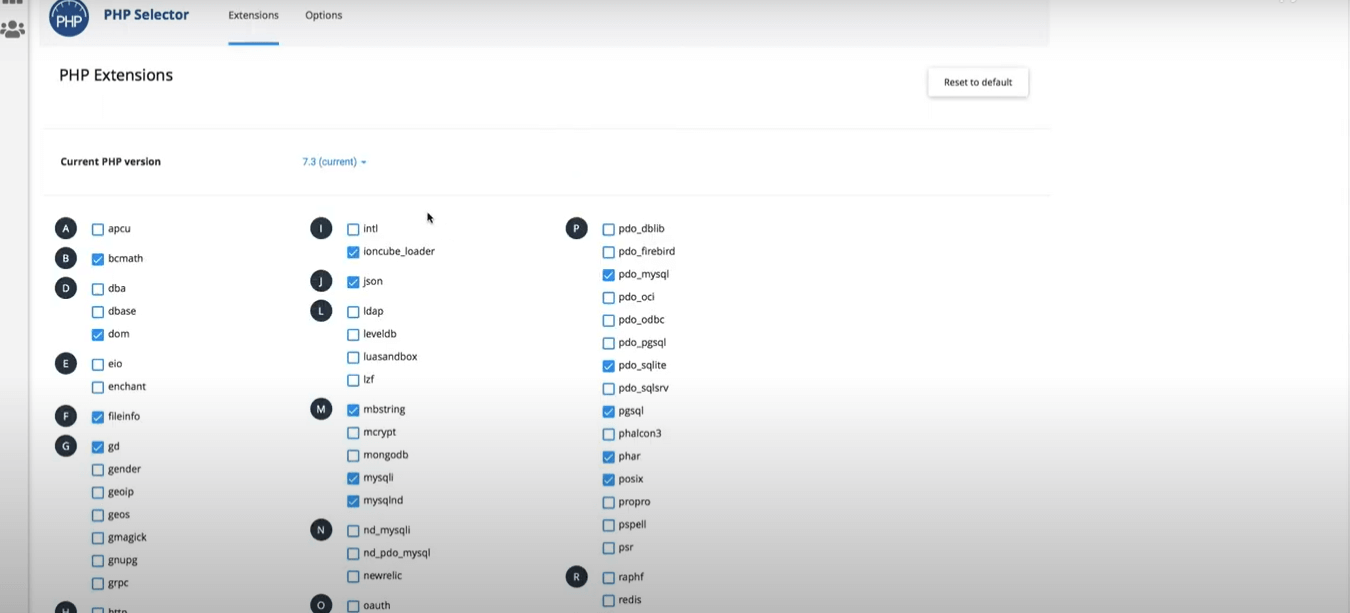
If you wish to activate or deactivate specific PHP extensions, simply tick or untick the respective checkboxes.
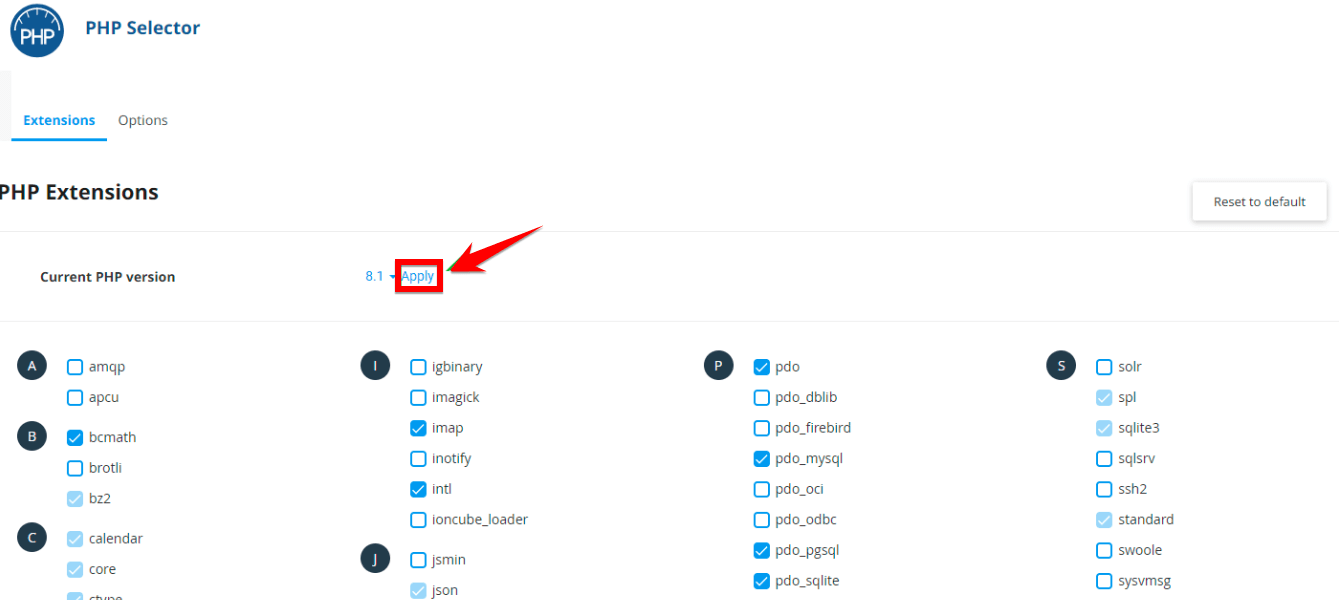
- Step 4: To update your PHP version, tap on the “Current PHP version” drop-down menu, choose your preferred version, and then hit “Apply” to enact the changes.
- Step 5: If you need to make more specific adjustments within the chosen PHP version, head over to the “Options” tab.
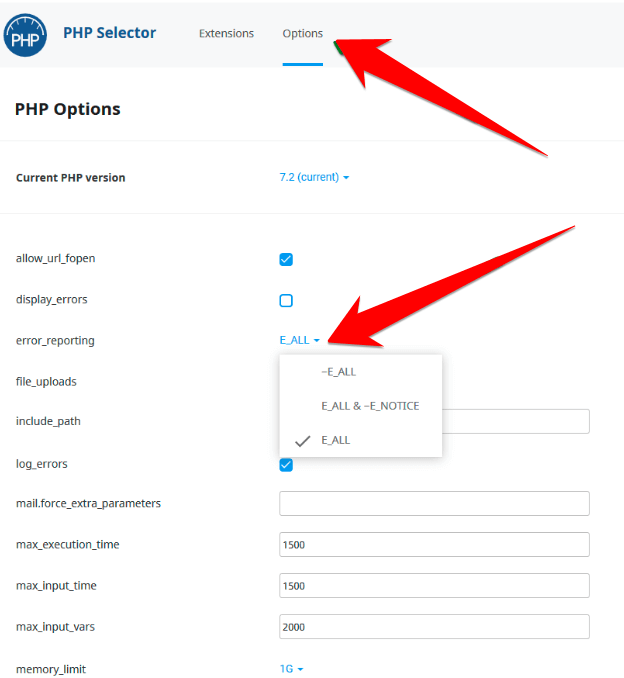
- Step 6: In the options, adjust the desired settings. For instance, if you’re aiming to augment the max upload capacity, ensure to adjust both “post_max_size” and “upload_max_filesize” values.
Note: Should you require a PHP version older than 5.6, it’s advised to reach out to Namecheap’s Support Team for assistance. It’s worth noting that using outdated versions can expose your site to security risks.
Way 10: Check for Malware
One often overlooked reason for the “There Has Been a Critical Error on This Website” message might be the sneaky presence of malware on your WordPress site. Let’s break it down and see how malware might be causing this error and what you can do about it.
Imagine someone secretly changing the settings on your phone without you knowing. That’s sort of what malware does to your website. It sneaks in, makes unauthorized changes, and sometimes, these changes cause big errors like the one you’re facing.
If you’re seeing weird things on your site that you didn’t add, or if parts of your website seem altered, malware might be the troublemaker. These harmful bits of software can secretly add or change the code on your website, leading to unexpected errors.
If you think malware might be causing the problem, don’t panic! It’s essential to handle this calmly:
- Reach Out to Your Web Host: Many web hosting companies have tools and teams ready to help when malware strikes. They might be able to guide you on the next steps or even fix the issue for you.
- Consider Security Plugins: Plugins like Wordfence Security or Sucuri Security are built to scan and protect WordPress sites from malware. Installing one can help you identify and remove any harmful software.
After you’ve tackled the immediate issue, think about how to protect your site in the future. Regularly update your WordPress themes and plugins, and always have reliable security plugins active. This way, you can avoid many troubles, including the dreaded “critical error” message.
What Causes the “There Has Been a Critical Error on Your Website” Error?
As WordPress has advanced, confusing blank screens have given way to specific messages alerting users of problems. One common message is “There Has Been a Critical Error on Your Website.” But what causes it?
Cause 1: PHP Challenges
One of the main culprits behind website errors is related to PHP issues in WordPress.
WordPress sites have a designated memory for optimal performance. Think of this as the workspace your site utilizes. When this space is filled excessively, it’s reminiscent of an overpacked bookshelf, leading to a memory overload.
Another significant concern is coding mistakes. Plugins and themes enhance a website’s functionality. Yet, they come with their unique codes. When these codes are faulty or clash with others, it’s like two misaligned gears causing friction. This can result in the site displaying an error message.
Moreover, the database plays an essential role. It’s the storehouse for content, user details, and site settings. But if there’s any misconfiguration or damage, accessing this data becomes daunting, similar to finding a paper in a chaotic file cabinet.
If you see the message “there has been a critical error on this website. learn more about troubleshooting WordPress,” recognizing these challenges is vital for effective resolution.
Cause 2: Other WordPress Alerts
Beyond PHP, various other aspects of WordPress can trigger alarms:
- Server Lag: The web server is like the engine room of your website. If it’s slowed down by too many tasks or external issues, the whole ship (your site) slows down, resulting in longer load times and potential errors.
- Cache Hiccups: Caching is a clever way sites store frequently used data for quick access. Imagine always having your favorite book on your bedside table rather than in a vast library. However, if this caching system malfunctions or becomes outdated, it could throw up errors.
- Internal Server Issues: These are red flags that the server, which hosts and powers your website, encounters unexpected hitches. It’s like a power outage in a facility, where even if everything else is fine, nothing can run without electricity.
- Database Connectivity: This refers to the bridge between your site and its “database.” If this bridge has issues, like being unstable or broken, data can’t travel back and forth effectively. Think of it as a disrupted phone line.
- 503 Server Overwhelmed: This is the server’s way of saying it’s swamped. Just as a receptionist might struggle with too many calls at once, the server finds it hard to handle excessive simultaneous requests.
- 502 Traffic Jam: This error emerges when there’s a surge in traffic, and the server can’t accommodate everyone. Picture a sudden rush at a ticket counter with not enough attendants.
When confronted with unfamiliar errors or challenges, turning to a trusted WordPress community or forum can provide insights and solutions. Collaborative platforms often have members who’ve faced similar issues and can offer actionable advice.
Tips for Preventing Future “Critical Error WordPress” Issues
Facing the dreaded message, “There has been a critical error on this website. WordPress,” can be a nerve-wracking experience. Although rectifying this issue is vital, understanding the root causes and implementing preventive measures is equally crucial. I will show you in the following sections how you can prevent such scenarios from happening again.
Tip 1: Keep Software Up to Date
One of the leading causes of critical errors in WordPress is outdated software. As vulnerabilities are discovered, WordPress, along with its themes and plugins, releases updates to patch them. Neglecting these updates not only exposes your site to potential risks but also conflicts that can break its functionality.
When developers release new versions of plugins, themes, or even WordPress itself, it’s typically done to improve the platform or fix known issues.
Using outdated software increases the chances of compatibility issues, leading to unforeseen errors. Regularly updating your software ensures a harmonious relationship between all components of your website.
Tip 2: Schedule Regular Backups
Regular backups act as a safety net. While the aim is to prevent the error from occurring in the first place, having updated backups ensure that if something does go wrong, your data isn’t lost forever.
A solid backup strategy involves both automated and manual backups. It’s also important to store these backups in multiple locations—cloud storage, offline hard drives, etc.
You can use a recent backup if you encounter a “Critical Error WordPress” issue (I mentioned this above already). With the backup in hand, you can restore your website to a state before the error occurs, providing a quick solution to get things up and running.
Tip 3: Test Safely in Staging
Jumping straight into live changes can be tempting, especially when those changes seem minor. However, even the smallest modification can trigger a chain reaction, leading to a complete website breakdown. That’s where staging environments come into play.
A staging environment is a clone of your live website, where you can test changes without any risk to your actual site. Whether you’re updating a plugin, tweaking a theme, or making code modifications, doing so in staging first allows you to ensure everything works perfectly before transferring those changes to your live environment.
Tip 4: Monitor Resources Proactively
Unexpected traffic surges, bandwidth constraints, or server limitations can also result in critical errors. Proactive monitoring helps in identifying potential trouble spots before they escalate into larger issues.
Web hosting dashboards often offer insights into resource usage. Regularly checking these can help identify if you’re nearing your server’s limits. Consider using tools and plugins designed specifically for monitoring WordPress performance.
These tools can notify you if there’s an unusual spike in resource consumption, allowing you to take remedial measures before a critical error manifests.
Tip 5: Strengthen Website Security
Last but certainly not least, security plays a pivotal role in maintaining a healthy WordPress website. A majority of critical errors arise due to security breaches, such as hacks, malware, and more. Therefore, strengthening your website’s defenses is paramount.
This can be achieved by implementing strong passwords, using trusted security plugins, limiting login attempts, and regularly scanning for vulnerabilities.
Moreover, choosing a reputable hosting provider that prioritizes security will also help in reducing the chances of facing a “Critical Error WordPress” scenario.
Where to Get WordPress Support If All Else Fails
When the dreaded message “There Has Been a Critical Error on This Website” pops up on your WordPress site, the initial troubleshooting steps are critical. Yet, despite our best efforts, sometimes the conventional fixes don’t quite cut it.
When this happens, you don’t have to feel marooned. The WordPress community is vast, knowledgeable, and quite eager to help. There are multiple avenues you can explore if you’re trying to resolve this error and the previous solutions haven’t worked.
Let’s discuss some of your best bets.
Utilizing the Official WordPress Support Forums
The Official WordPress Support Forums are a treasure trove of information, where thousands of users, from beginners to advanced developers, interact and offer solutions to a myriad of issues, including the critical error in question.
To access the forums, you’ll first need to navigate to the WordPress.org support page. Once there, you can use the search bar to find threads related to your specific problem. Chances are, someone else has faced the same issue, and it’s been addressed within the community.
When posting a new query, remember to provide detailed information. Mention the steps you’ve already taken, the plugins and themes you’re using, and any recent changes to your site. Clear communication is key for a faster resolution.
Experienced WordPress enthusiasts, as well as developers, frequent these forums, offering guidance and solutions. But a word to the wise: always back up your site before applying any suggested solutions.
Reaching Out to Your Hosting Provider for Assistance
Your hosting provider is more than just a platform where your website resides. They are a partner in your digital journey, equipped to handle technical glitches. Often, the “There Has Been a Critical Error on This Website” message may result from server-side issues, which your hosting provider is best positioned to address.
Most hosting providers offer 24/7 customer support, available via chat, email, or phone. When you get in touch, explain the issue in detail, mention any recent changes you’ve made to your site, and ask if there have been any server-level changes or updates on their end.
Moreover, hosting providers usually maintain comprehensive logs. If the error stems from a server-level issue or a conflict with hosting settings, they can quickly pinpoint and rectify the problem. A reputable hosting provider might also have WordPress-specific expertise, given the platform’s popularity, providing a more tailored approach to problem-solving.
Enlisting the Help of a WordPress Expert
Sometimes, it’s best to call in the cavalry. If you’ve tried the forums and spoken to your hosting provider, but the error remains, it might be time to hire a WordPress expert.
Finding a qualified WordPress expert isn’t as daunting as it sounds. Platforms like Upwork, Freelancer, or Codeable specialize in connecting website owners with seasoned WordPress developers. These experts can dive deep into your website’s backend, understand the intricacies, and provide targeted solutions.
When hiring, ensure you provide a comprehensive brief of the issue alongside any relevant access details. Always check the reviews and ratings of a prospective hire, and maybe even ask for references. A seasoned WordPress professional will have a portfolio showcasing their expertise and past problem-solving instances.
Wrapping Up
In wrapping things up, “There Has Been a Critical Error on This Website” is like a red flag on your WordPress site. But don’t fret! I’ve walked you through several methods to tackle this pesky problem. Whether it’s by updating plugins, switching themes, or adjusting some PHP settings, there’s a solution for almost every situation.
Remember, always keep your site’s data backed up and reach out for help if needed. With a bit of patience and following the steps I shared, you’ll have your site up and running smoothly again in no time.
Thanks for sticking with me, and good luck fixing your website!