How to Reinstall WordPress Without Losing Data

There are +455 million websites online that use WordPress as a CMS, and issues can arise with it. Sometimes when you’re reinstalling WordPress, you can lose all of your data. It can be really frustrating and time-consuming to restore everything. That’s why I’m here to guide you on how to reinstall WordPress without losing data.
In this article, you’ll learn:
- Create a Backup
- How to reinstall WordPress without losing data
Let’s start with creating a backup.
Table of Contents
Create a Backup
Before you begin the process of reinstalling WordPress without losing data, you’ll need to create a backup of all the content on your site. It includes all the media, posts, plugins, themes, and the database.
Step 1: Installation
Start off by going to the “Plugins” section and clicking the “Add New” option.
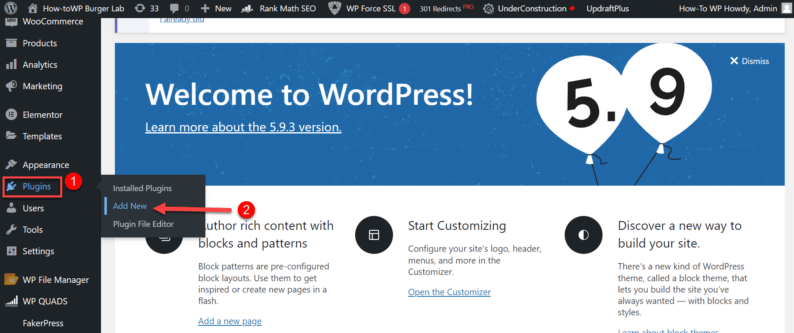
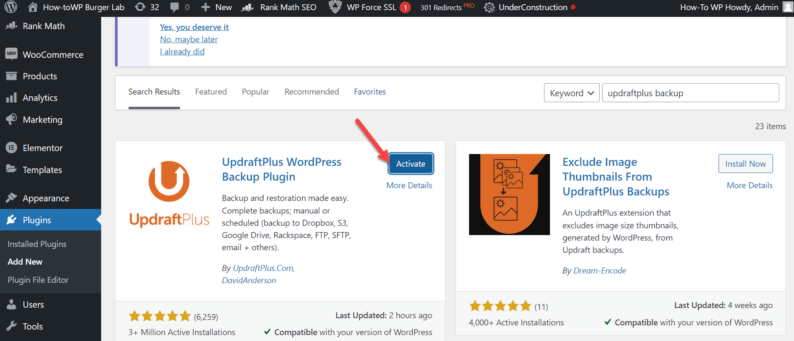
Search and install the “UpdraftPlus WordPress Backup” plugin.
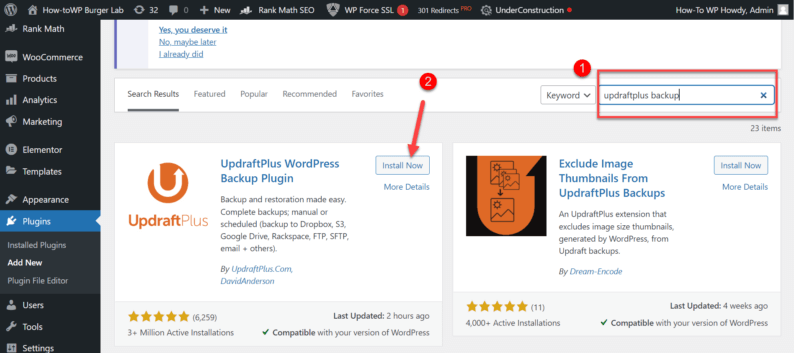
Once the installation has concluded, stay on the page and click the “Activate” button.
Step 2: Creating Backup
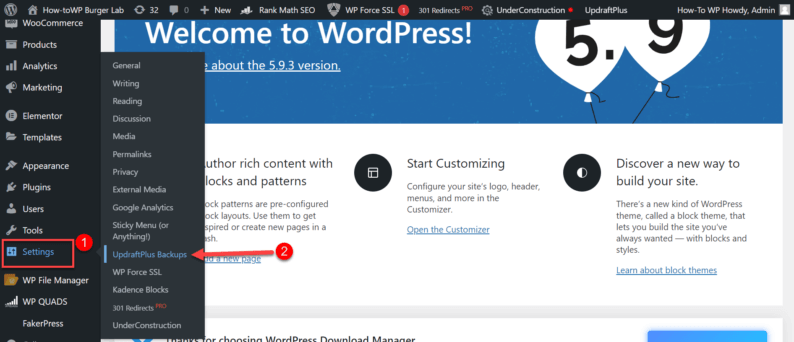
Now go to the “Settings” and click the “UpdraftPlus Backups” option.
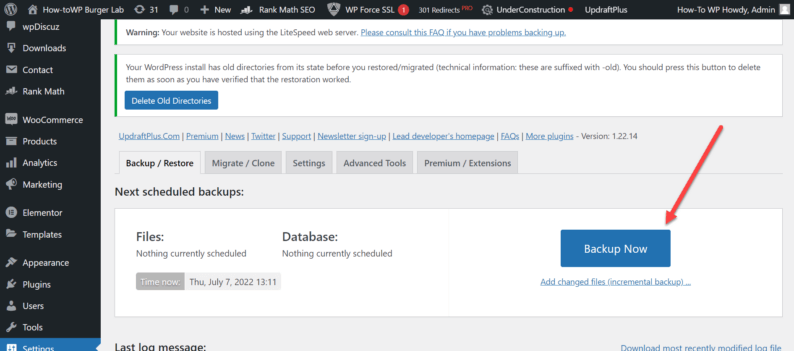
Click the “Backup Now” button to create the backup of the site.
Ensure that you check the boxes regarding the website and click the “Backup Now” button.
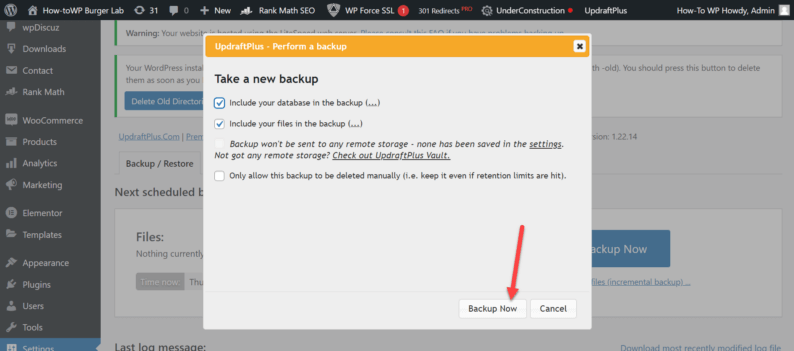
The backup for the website will be ready with all the plugins, themes, uploads, and database.
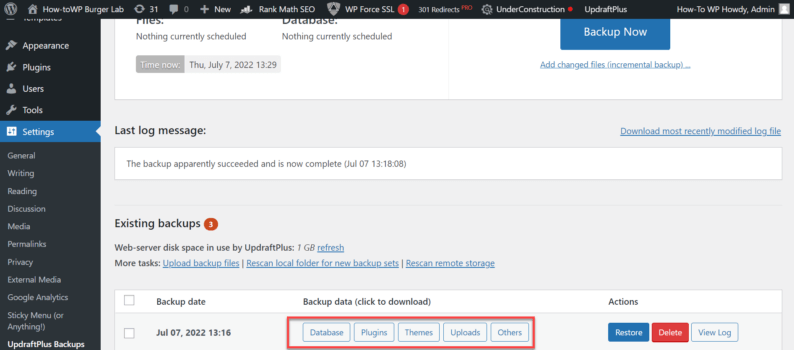
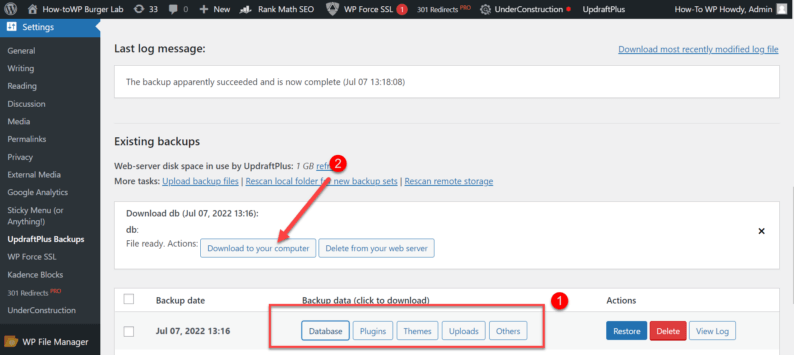
You can download all of them one at a time by clicking the option and clicking the “Download to your computer” button.
How to Reinstall WordPress Without Losing Data
There are several methods you can use to reinstall WordPress without losing data. Some of them are extremely simple, and the others are a bit intricate; however, no need to worry. I’ve got your back and will guide you through all of the processes of reinstallation.
Let’s start with the simplest one, which requires no more than 2 steps.
Method 1: Use the Dashboard
This is the easiest method that you can use for the reinstallation process. It doesn’t require any kind of plugins or extensive web development knowledge.
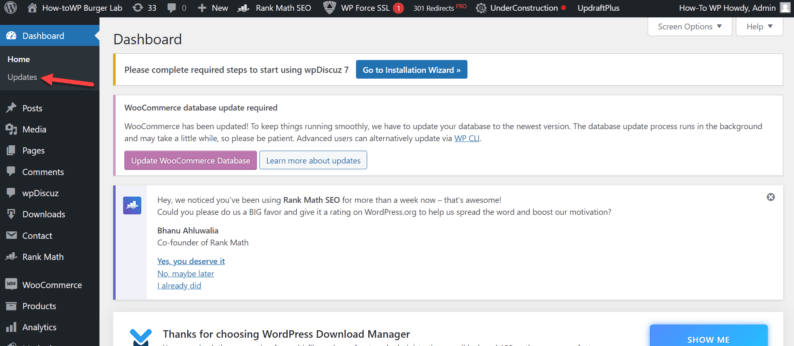
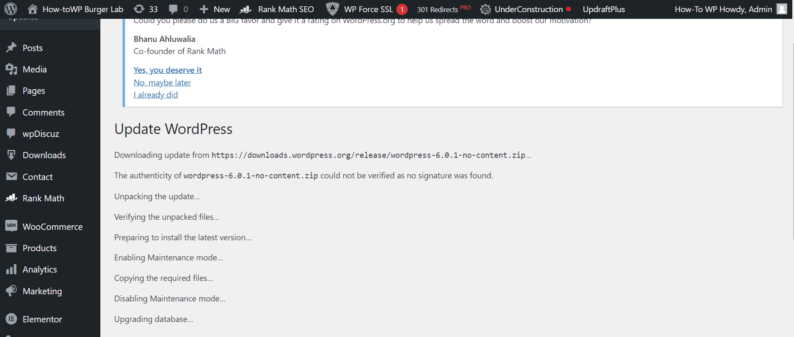
All you need to do is go to “Dashboard” and click the “Updates” option.
After that, you’ll see the “Re-install” button.
Note: The reinstall button will display the latest version of WordPress, so it may differ depending upon when you’re using this guide.
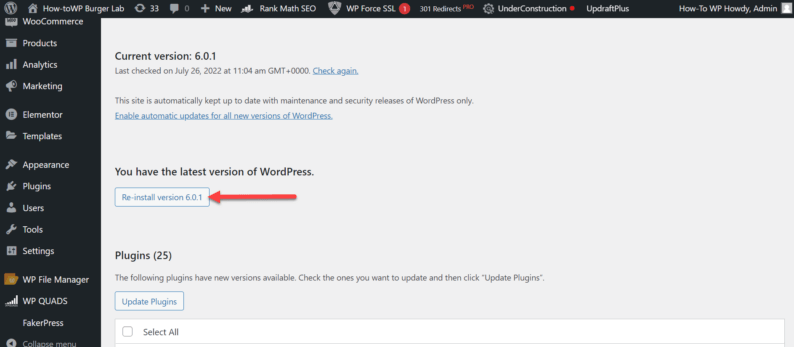
Once you press the button, it’ll reinstall WordPress without losing data or any of your vital information.
To be honest, this is the only method that I prefer, and you should also only use this method. The reason for it is that if you use any other method, then there are bound to be some issues that arise sooner or later.
Method 2: Using the WP Reset Plugin
If for some reason, the above-mentioned method doesn’t work for you, there is another simple method that you can use. You can use the WP Reset plugin to reset your site to its original state.
The main benefit of using this plugin is that you can control what things you want to remove from your site during the reinstallation process. Meaning you can reset and reinstall WordPress without losing data.
Step 1: Installation
It’s a given that before you start the reinstallation process, you’ll need to install the WP Reset plugin.

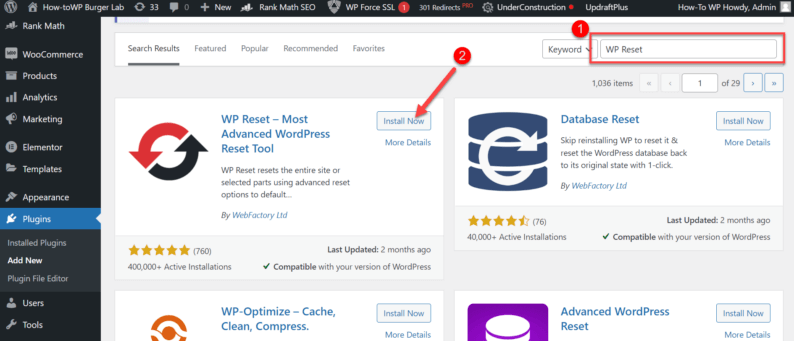
Go to “Plugins” and click the “Add New” option.

Search and install the “WP Reset” plugin.
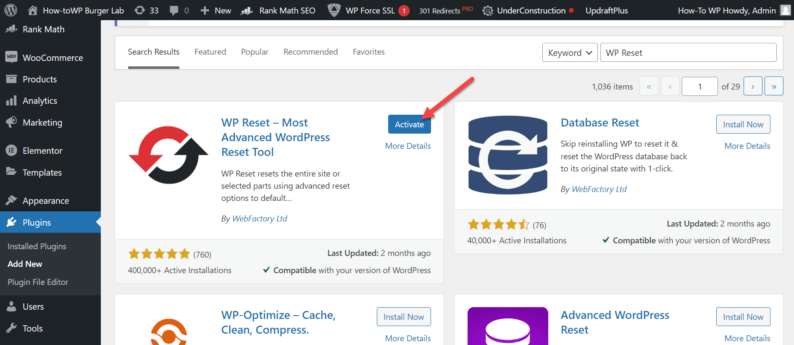
After the installation process, click the “Activate” button.
Now that the installation process for the plugins has concluded, let’s move on to the reinstalling process for WordPress.
Step 2: Reinstalling WordPress
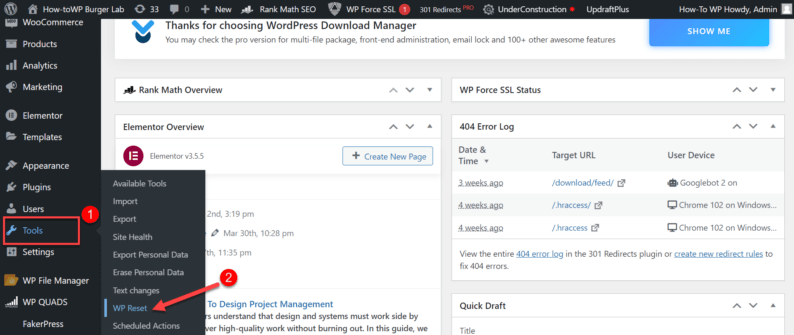
First, go to “Tools” and click the “WP Reset” option.
Go to the “Reset” section.
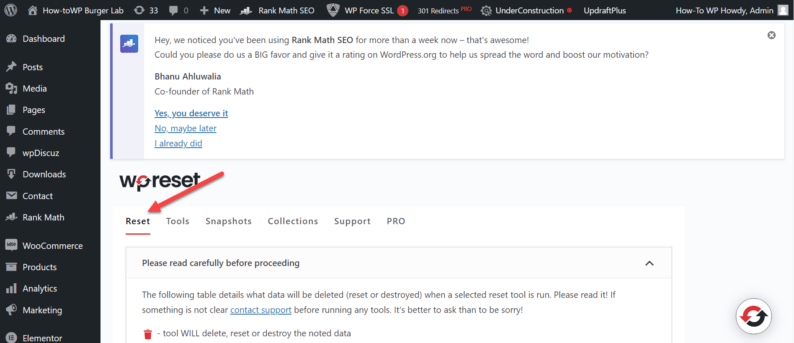
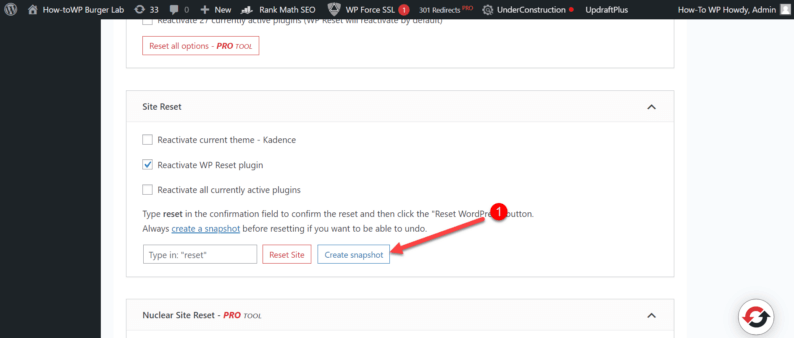
Next, you’ll scroll down and see a section labeled “Site Reset.” Before you reset anything, you’ll need to make sure that you create a snapshot of the current site.
Note: It isn’t necessary if you’ve already created a backup of the site, but it is highly recommended.
Click the “Create snapshot” button.
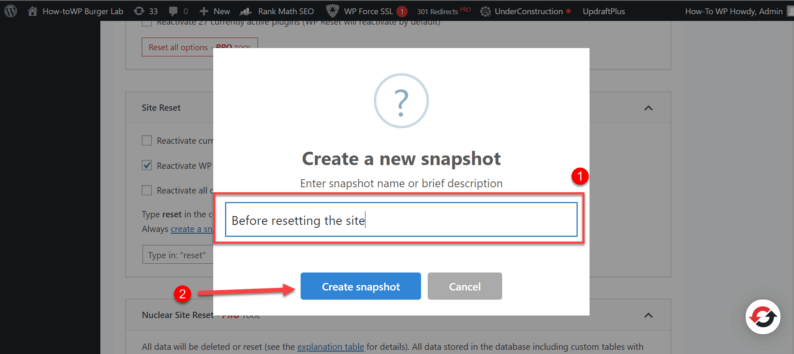
Now, you’ll give a name to the snapshot and click the “Create snapshot” button.
Once you’ve created a snapshot, type in “reset” in the space provided and click the “Reset Site” button.
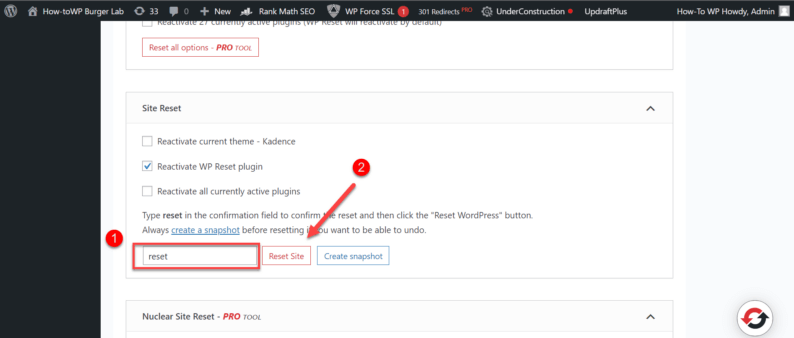
It’ll make sure to reset the website to its original state. You also have the option to select what other aspects of the site you want to reset, such as content, plugins, themes, etc.
The free version of this plugin is somewhat limited, but it gets the job done. If you want to get the full benefit of the plugin’s features, then you’ll need to buy it from their site.
Method 3: Using cPanel
If for some reason, the dashboard method doesn’t work for you and you don’t want to use a plugin for the reinstallation process due to it being used for hacking purposes, then there is another way to reinstall WordPress without losing data.
Keep in mind that this method is quite lengthy and can get complicated at some points. So just follow each of the steps carefully, and hopefully, you shouldn’t face any issues.
Step 1: Export the XML File
For this step, you first need to open the dashboard of your site. After that, go to “Tools” and click the “Export” option.
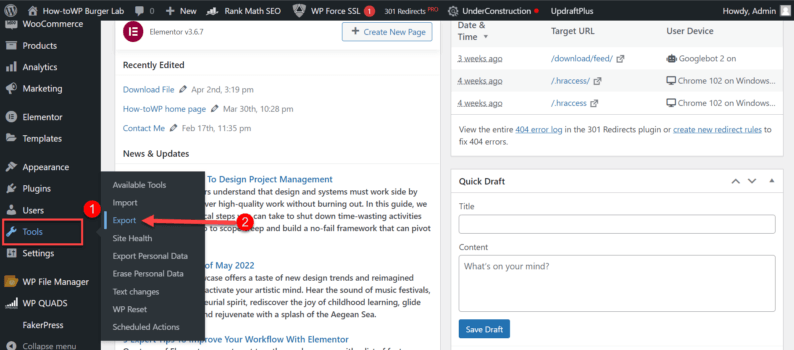
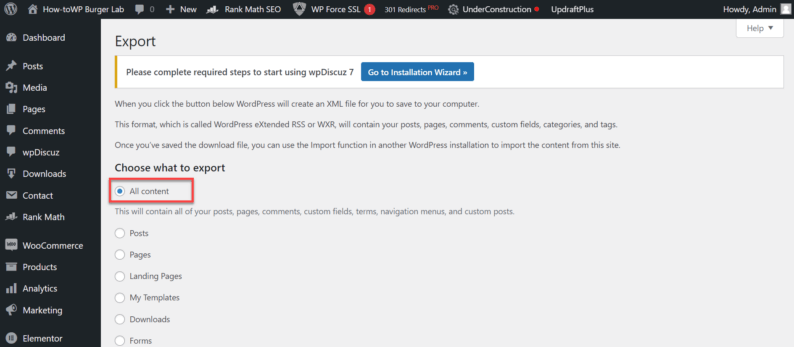
Next, you’ll need to select the “All content” option.
Note: You can also choose specific options if you need to remove some of the unnecessary things.
After that, scroll down and click the “Download Export File” button.
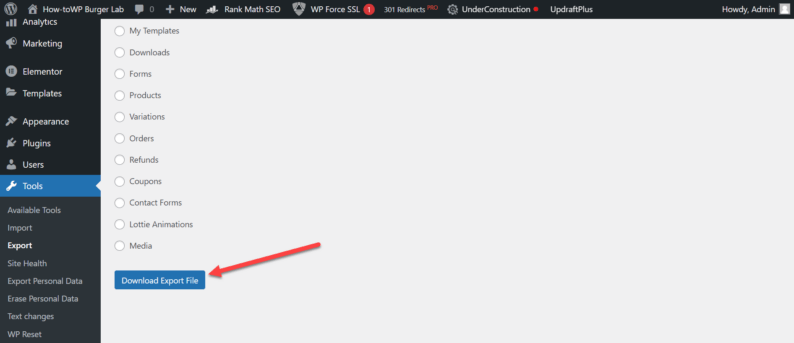
After that, you’ll see that an XML file has been downloaded with the name of the site on it.
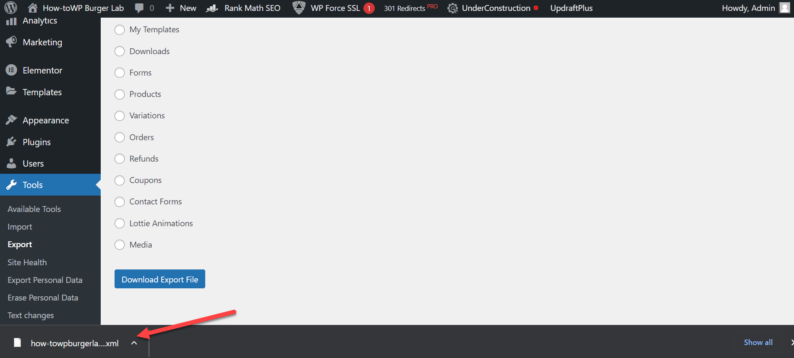
This XML file will keep the necessary information of your site secure. It will be used at the end when you’ve completely reinstalled WordPress.
Step 2: Create a Zip File for the Content
Now you’ll go to the dashboard of cPanel and click on the “File Manager” option.
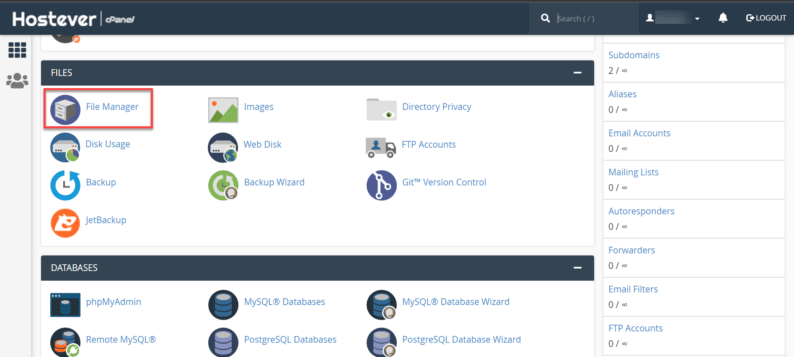
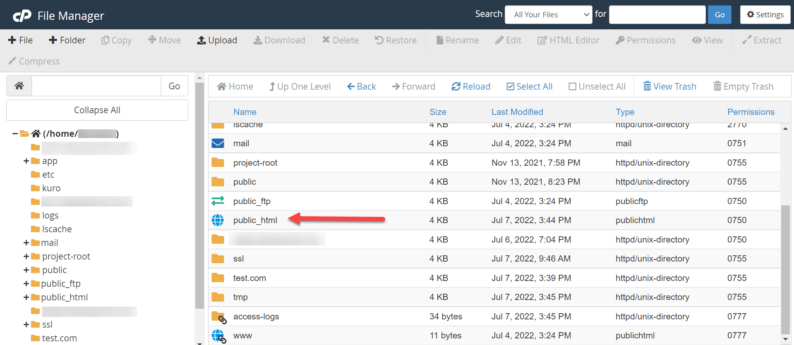
You’ll be able to see a folder by the name of “public_html,” which contains all the necessary files for your website.
Note: If you have more than one site on cPanel, then you’ll first need to identify the folder of the website, and then you’ll be able to see the “public_html” folder.
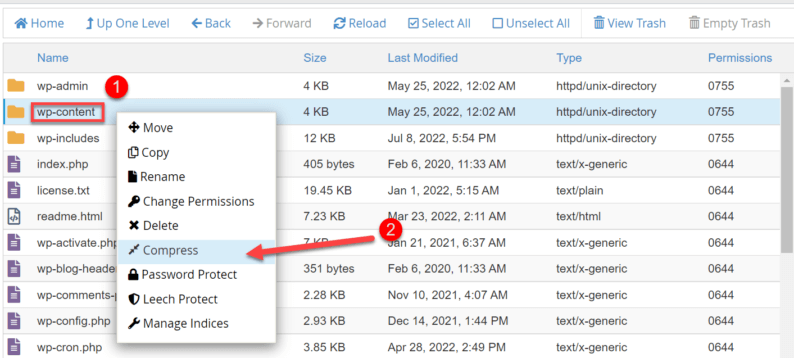
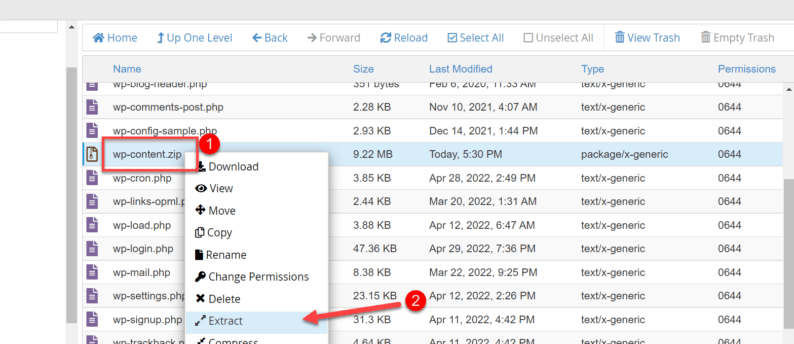
Here you’ll see a collection of files and folders. Locate the “wp-content” folder and right-click on it. A menu will appear from which you’ll click the “Compress” option.
Next, you’ll select the “Zip Archive” option and click on the “Compress Files” button.
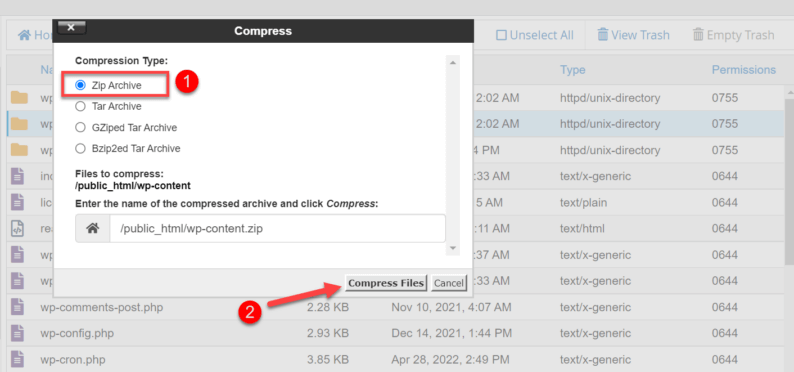
A box will appear, which you close.

After successfully creating the zip file, you’ll need to keep it secure in another folder.
Step 3: Create a Temporary Folder and Move the Zip File
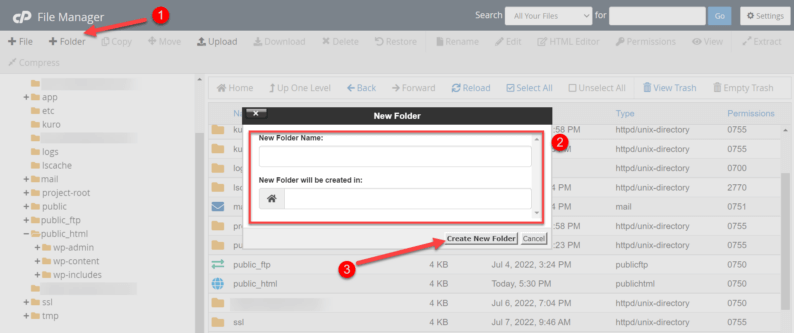
Go out of the “public_html” folder and click on the “Folder” option on top of the screen. You’ll see a box in which you’ll first enter the name of the folder and then click on the “Create New Folder” button.
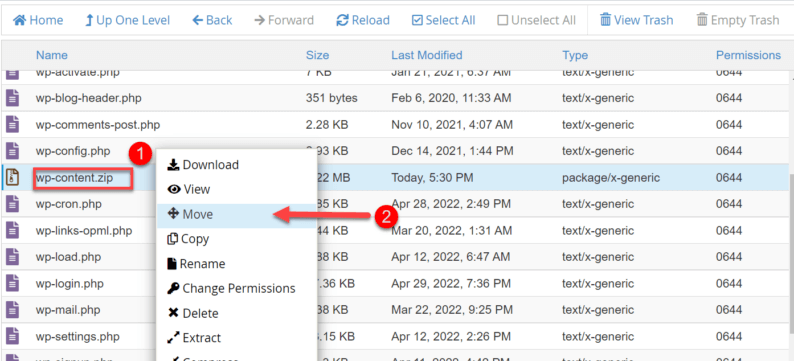
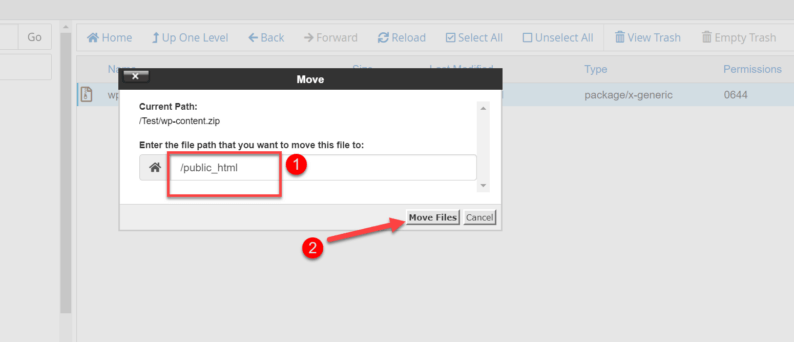
Now go back and right-click on the “wp-content.zip” file. From the menu, click on the “Move” option.
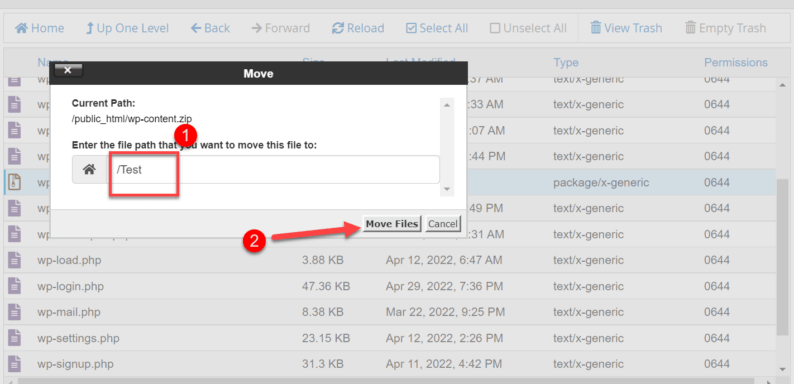
A box will appear where you’ll type in the destination of the zip file. Type in the name of the temporary folder that you created and clicked the “Move Files” button.
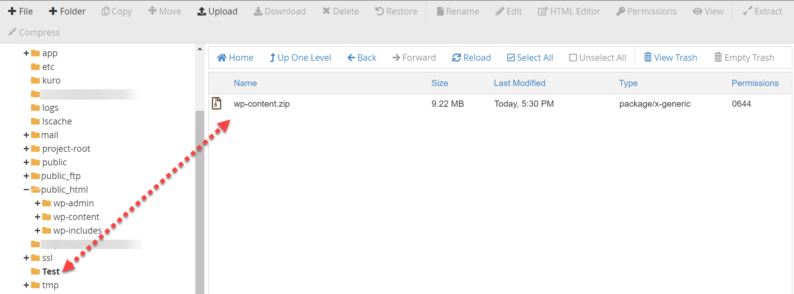
The file will be moved to the temporary folder that you created.
Step 4: Downloading the wp-config.php File
You might be asking yourself, “Why this file?” The reason behind it is that it has all the necessary information regarding your username, password, hosting, database, etc. You’ll need it when you’re about to reinstall WordPress.
Go back to the “public_html” folder and right-click on the “wp-config.php” file. From the menu, click on the “Download” option.
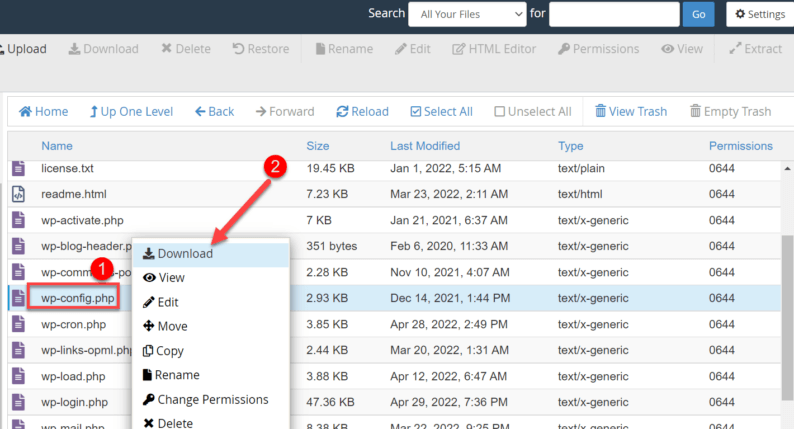
Note: You can also download the file by simply double clicking on it.
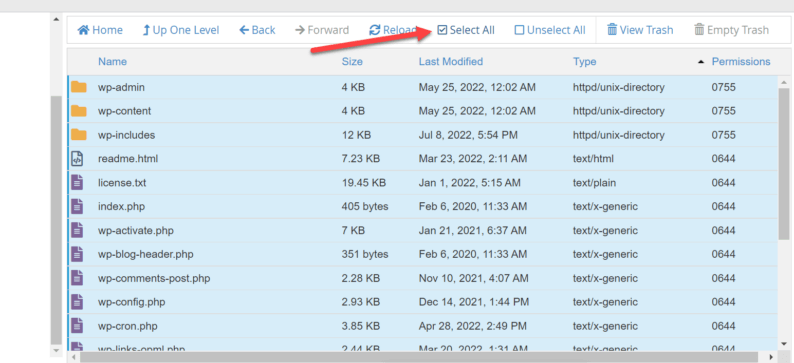
Step 5: Delete All the Files on the Site
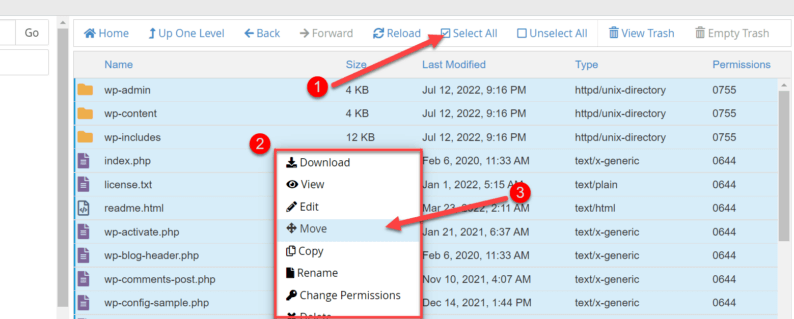
This is one of the terrifying step of the entire process. Go to the “public_html” and select all the files by clicking on the “Select All” checkbox.
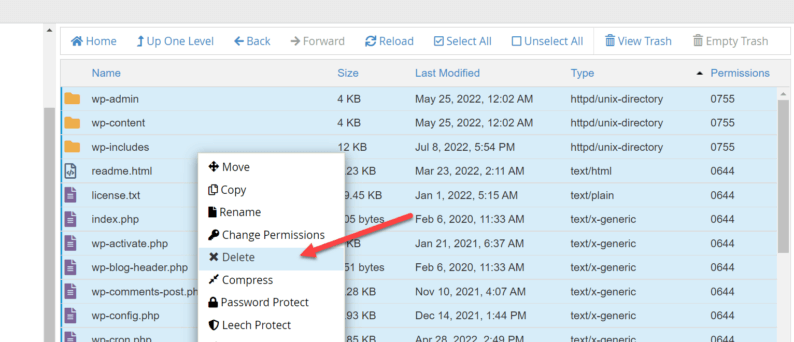
Right-click on the selected files and click on the “Delete” option.
A box will appear on the screen. Click the “Skip the trash and permanently delete the files” and click the “Confirm” button.
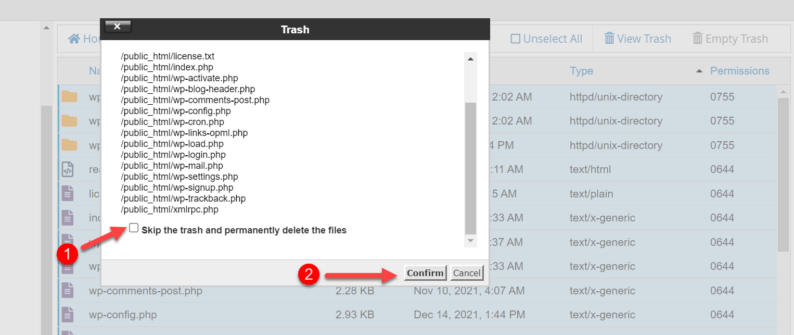
All of the files will be deleted, but don’t worry; we’ve already secured the wp-content.zip file, which means that you can reinstall WordPress without losing data.
Step 6: Uploading and Extracting the Setup File
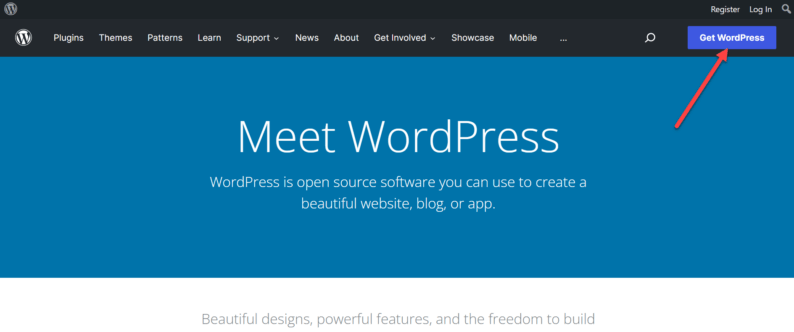
Go to the official WordPress website and click on the “Get WordPress” button on the top right corner of the screen.
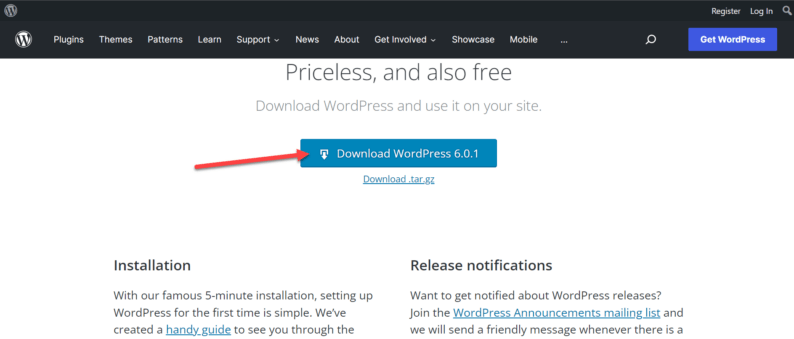
On the next page, click on the “Download WordPress” button.
Note: The button also displays the version of WordPress you are about to download.
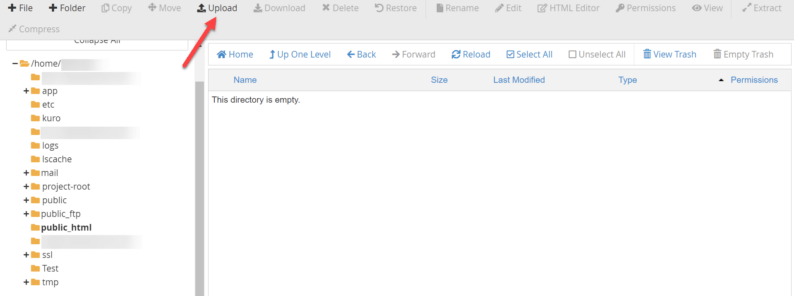
After downloading the latest version of the file, open the cPanel and open the “public_html” folder. Now click on the “Upload” option.
You’ll be redirected to another page where you’ll click on the “Select File” button.
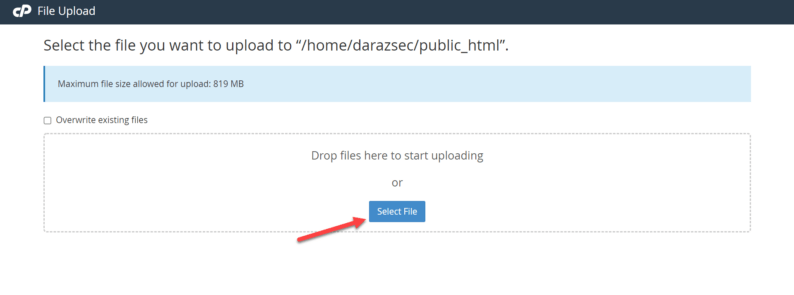
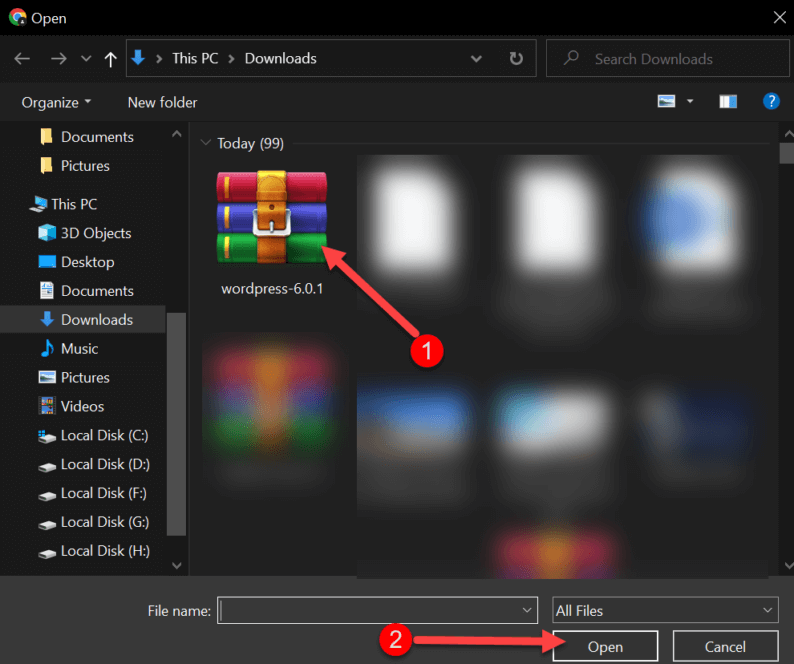
Upload the zip file of the WordPress setup. Select the setup and click on the “Open” button.
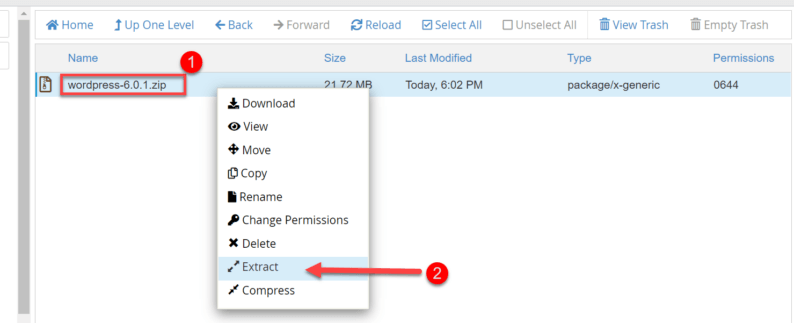
Once the upload has concluded, right-click on the setup and click on the “Extract” option.
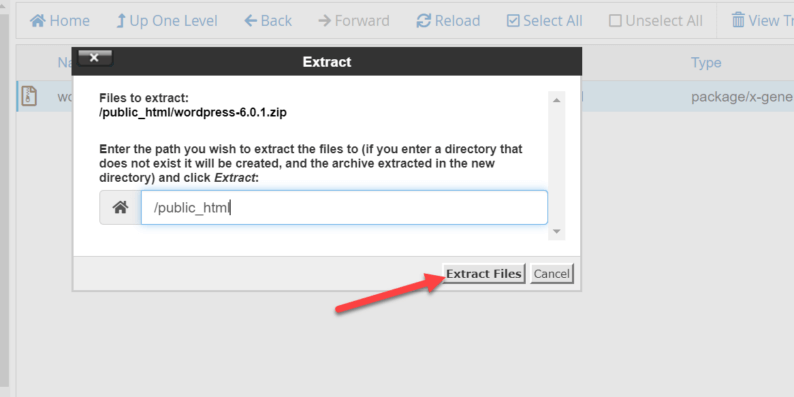
Select the path and click the “Extract Files” button.
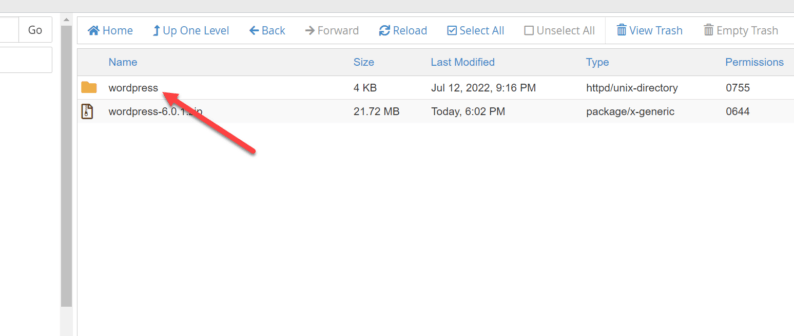
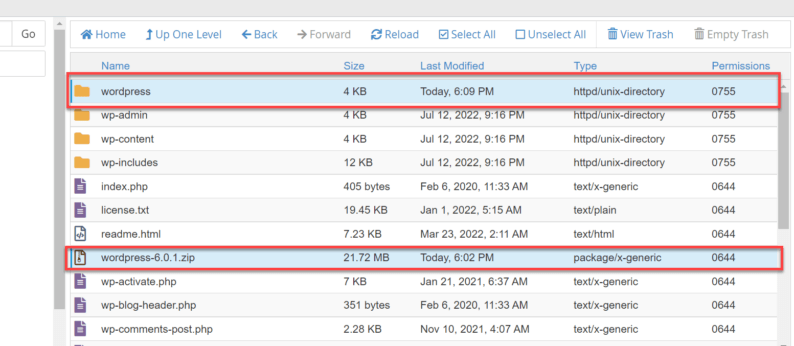
A WordPress folder is now present in the selected folder. Open the folder and select all of the files and folders.
After selecting all of the files and folders, right-click on them and click on the “Move” option.
You’ll see a box with the pathway where you want to move the files. All you have to do is to remove “WordPress” from the pathway and click the “Move Files” button.

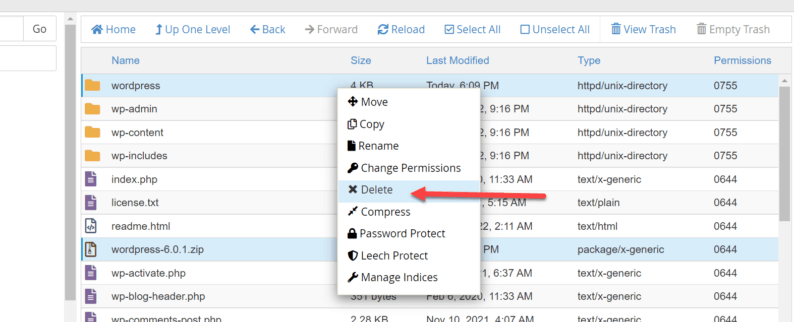
After moving all of the files and, select the “WordPress” folder & the setup zip file.
After selecting both of them, you can delete them.
Step 7: Reinstall WordPress
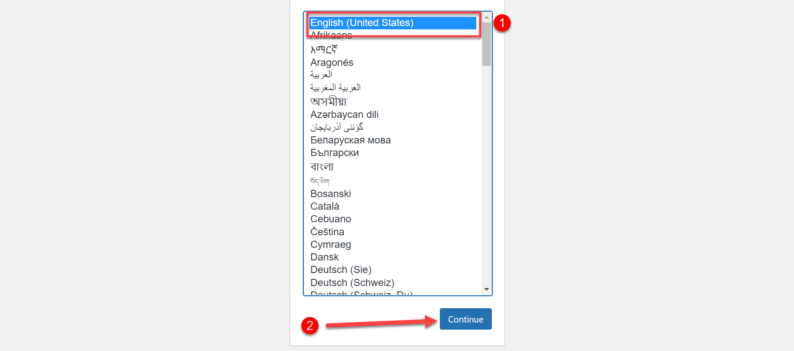
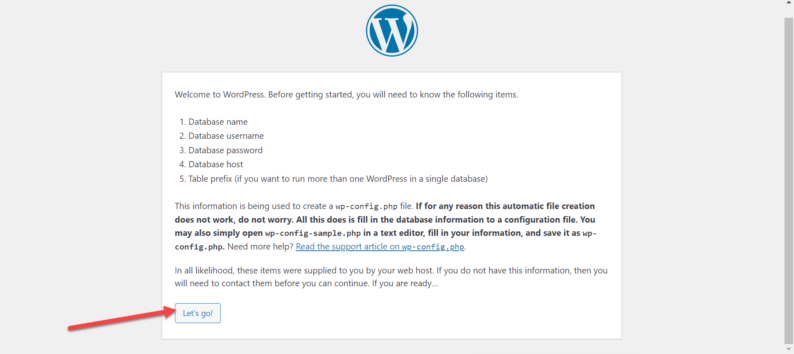
Open the website, and you’ll see the entire installation process of WordPress will start. Here you’ll select the language for the website and click the “Continue” button.
After that, it’ll provide the introductory message, and you’ll click on the “Let’s go!” button.
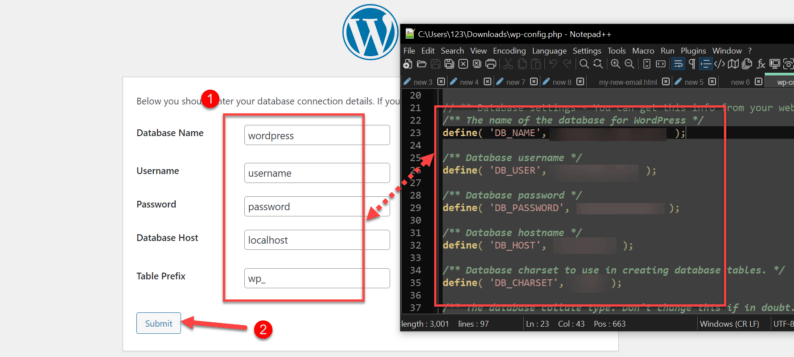
On the next page, it’ll ask you to enter the username, hosting, database, etc. For this, you’ll open the “wp-config.php” file that you previously downloaded and use the credentials provided in that file.
After entering all the details, click the “Submit” button.
After that, you’ll go through the same installation process as always. After that, you’ll need to import the previously exported XML file.
Step 8: Importing the XML File
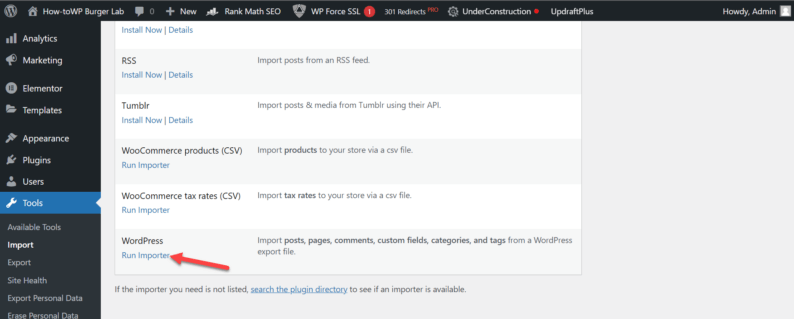
Open the dashboard after the reinstallation process. Go to “Tools” and click on the “Import” option.

Go to the bottom and look for the “WordPress,” and click on the “Run Importer” option.
Click the “Choose File” button.
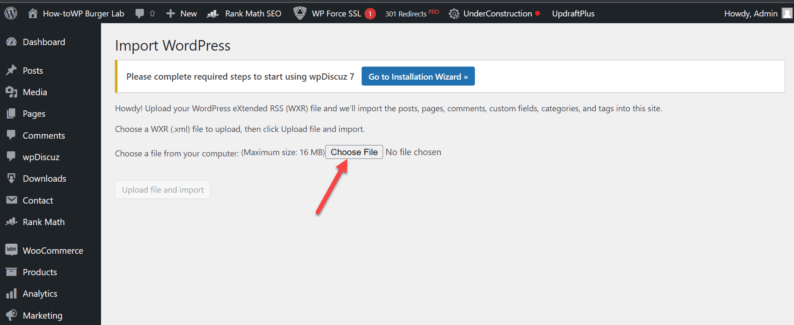
Select the file XML field and click the “Open” button.
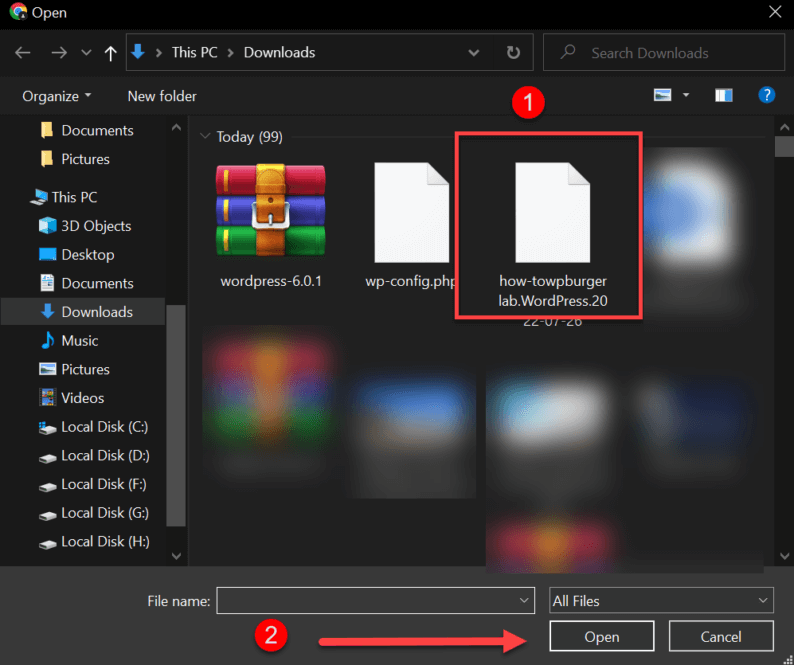
After the XML file is uploaded, click on the “Upload file and import” button.

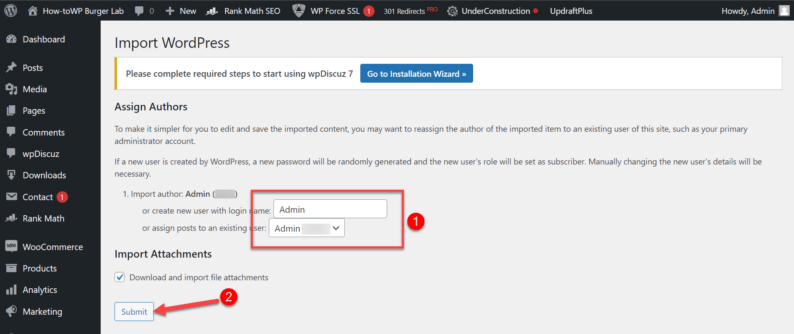
On the next page, select the author you want to import and click the “Submit” button.
Step 9: Moving the Content Back
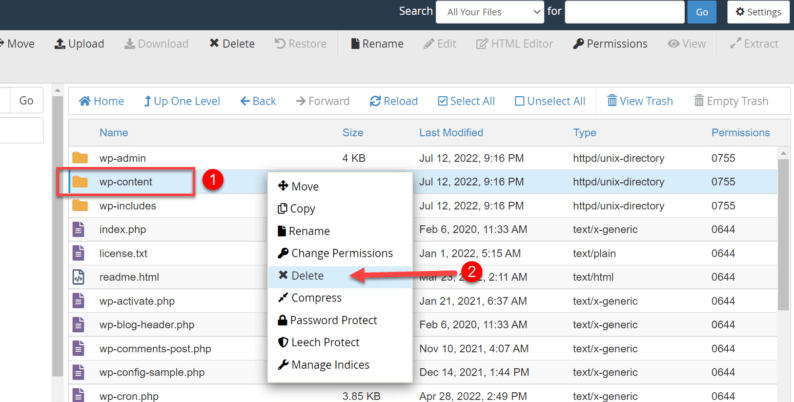
Before you move back the content, you’ll first need to delete the wp-content folder that was created due to the new setup.
Go to the “public_html” folder and then right-click on the “wp-content” folder. After that, click on the “Delete” button.
Now you’ll open the temporary folder where you previously moved the wp-content.zip file. Right-click on the “wp-content.zip” and click on the “Move” option.
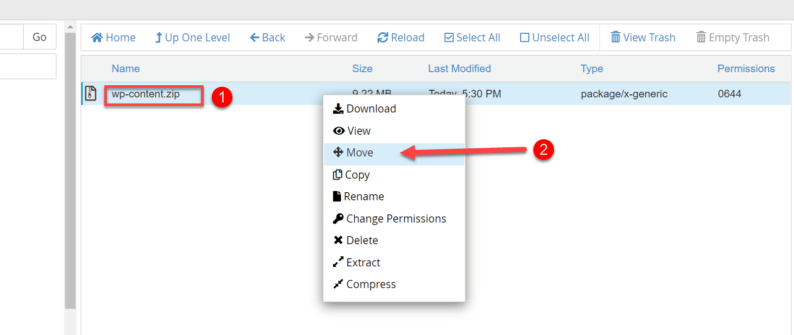
In the box that pops up, enter the directory where you want to move the zip file.
After moving the file, you’ll need to extract it.
Just click the “Extract Files” button, and you’ll be done.

Finally, the entire process of reinstalling WordPress without losing data has concluded. I told you that it does have a lot of steps, and it can be very complicated for an average website owner, but this method is more of a case “if you want to, you can” kind of situation.
Conclusion
You can use any of the above-mentioned methods to reinstall WordPress without losing data. However, the method you want to use depends on your choice.
The first two methods are the simplest ways to reinstall WordPress, and those are my preferred choice. However, if you feel like taking a risk, then you can also use the third method; however, be prepared for a long and complicated ride.
If you know another way to reinstall WordPress without losing data, then tell us in the comment sections down below.