How to Start a Blog Using Namecheap – The Best Cheap Hosting Ever

Important Note: Namecheap has increased its price a little bit since I wrote this tutorial, so the final price will be around $18 excluding domain cost, but I haven’t got time yet to update screenshots in this tutorial which still says $15.
This post only contains a guide/tutorial for setting up a Namecheap hosting account and installing WordPress using Namecheap’s cPanel. For my complete comprehensive guide for starting a blog/website from scratch, please head over to How to Start a WordPress Blog.
Namecheap is primarily known for domain name registrations. But, they also provide cheap web hosting and other services like SSL certificates and private email hosting.
Namecheap is an excellent option for those who want to start a blog, but their budget is low.
Starting a WordPress blog using Namecheap is a lot better than starting a free hosted WordPress blog because you only have to pay around $18 for a year (excluding domain cost).
But, you will have complete access, and control over your blog and the advantages of using self-hosted WordPress are countless.
Before we get started, let’s figure out some Pros and Cons of using Namecheap as your web hosting provider.
Table of Contents
- Pros and Cons of Namecheap Hosting
- Step 1: Choose Your Namecheap Hosting Account Plan
- Step 2: Select Your Domain Name
- Step 3: Verify Your Shopping Cart and Confirm Your Order
- Create An Account
- Add a Payment Method
- Review Your Order and Make Payment
- Namecheap Dashboard
- Install WordPress using cPanel
- Softaculous Apps Installer
- Frequently Asked Questions (FAQs)
Pros and Cons of Namecheap Hosting
Pros of Namecheap
Interface: Easy to use interface.
cPanel: Namecheap uses the most popular control panel for managing your website, called cPanel.
SSL Certificate: Free SSL with their most basic plan.
Storage and Bandwidth: You will get 20GB SSD Storage and Unlimited Bandwidth.
Websites: You can host three websites with their most basic plan.
cPanel Backups: Twice a week.
Cons of Namecheap
Support Speed: Live support speed will depend on what plan type you have.
Support Quality: Their support quality is also not as good as SiteGround’s.
Please Note: The only downside of Namecheap I’ve noticed and experienced is the quality and speed of their live support as compared to SiteGround. So if you’re non-tech-savvy and live support is critical to you, then look no further and choose SiteGround as your web hosting. You’ll thank me for this.
But if you don’t need much live support in the beginning and can figure out things yourself then Namecheap is more than enough for you.
The most important reason to choose Namecheap is their pricing, you only pay $18 for 1-year hosting and the services and support you get for that price is more than good in my opinion.
So, If you’re ready to choose Namecheap then let’s get started.
Step 1: Choose Your Namecheap Hosting Account Plan
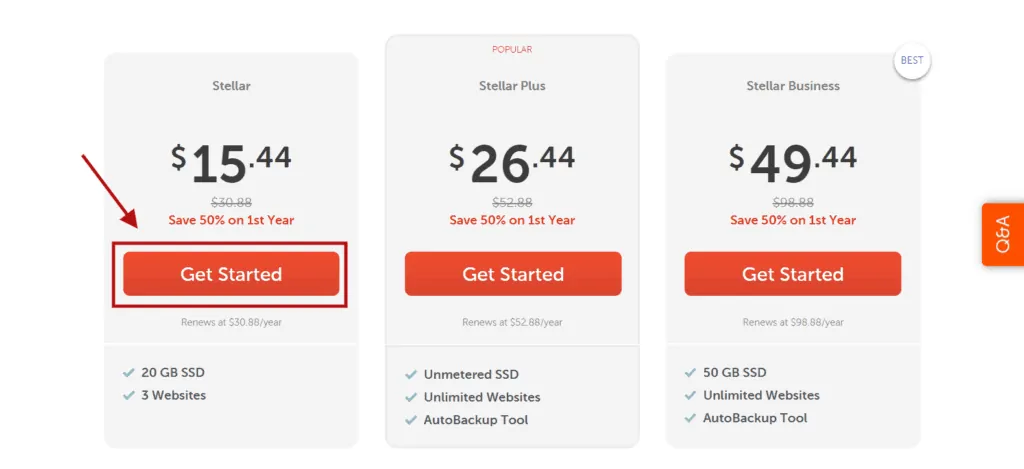
Go to Namecheap and choose “Stellar” as your hosting account plan.
You’ll get (i) 20GB SSD, (ii) 3 Websites, (iii) Unmetered Bandwidth, and (iv) Positive SSL with Namcheaps’s Stellar account which is more than enough for a beginner.
The cost of this is around $17.28 for 1st Year, and renewal cost will be around $33.88.
Step 2: Select Your Domain Name
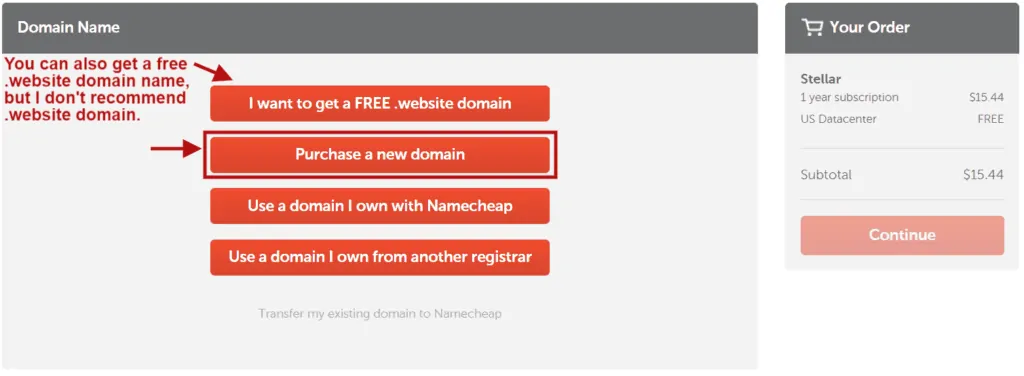
There are four available options to select a domain with Namecheap.
1. I want to get a FREE .website domain – You can register a free .website domain name with Namecheap’s Stellar plan, but I wouldn’t recommend creating your blog on .website domain name.
2. Purchase a new domain – If you don’t have a domain name, then you can select this option, but It will also add domain cost to your cart. I will use this option in the below guide, but you can choose any other option according to your requirements.
3. Use a domain I own with Namecheap – If you select this option, then the next step will be to login to your existing Namecheap account and complete the payment.
4. Use a domain I own from another registrar – If you have already purchased a domain from another domain name registrar like Godaddy, then you can use this option.
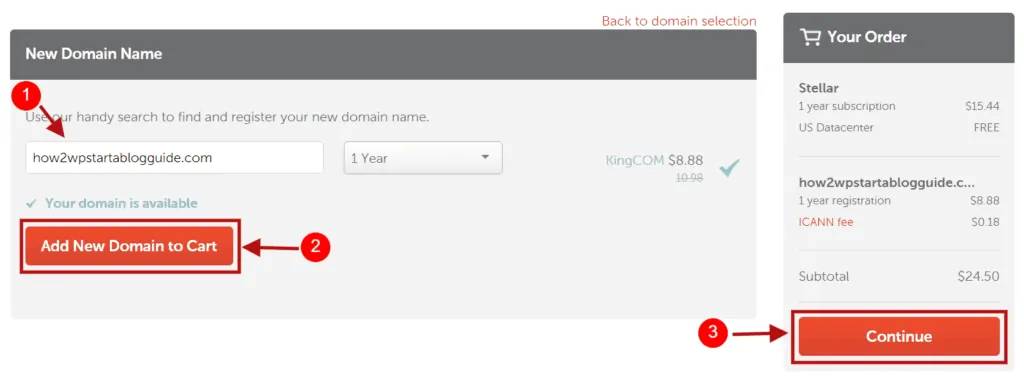
I will use the “Purchase a new domain” option in this guide, which will also add .com domain cost, i.e., $8.88 to the hosting price.
You can use any other option or click on “Purchase a new domain” if you don’t have a domain name.
Enter your desired domain name and click on “Add New Domain to Cart” and then click on the “Continue” button to move to the next step.
Step 3: Verify Your Shopping Cart and Confirm Your Order
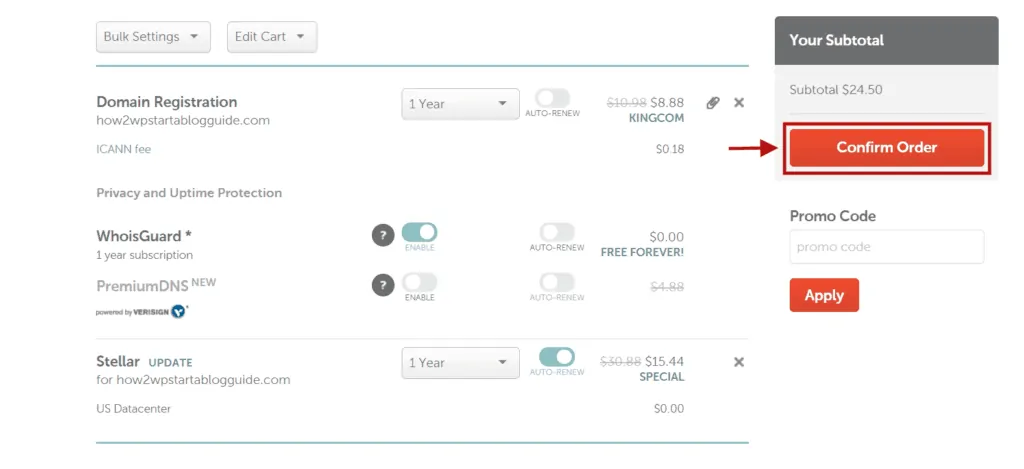
Verify your account details like domain name and hosting account type and click on the “Confirm Order” button. You can also enable or disable a service in this step according to your needs.
Create An Account
The next step is to create an account with Namecheap if you don’t have an account with Namecheap. If you already have an account with Namecheap, then skip this step and move to the next step.
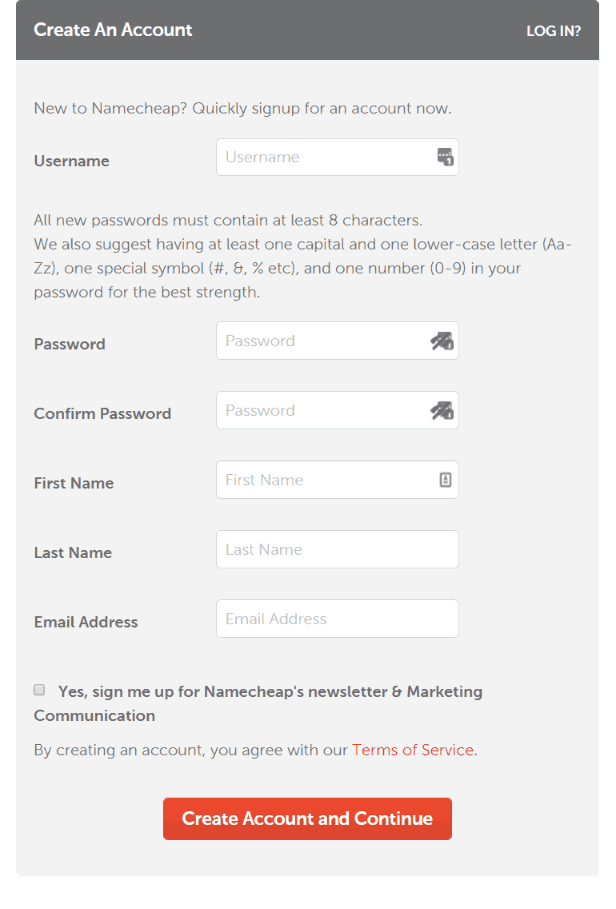
Enter your Username, Password, First Name, Last Name, and Email Address and click on the “Create Account and Continue” button to create your Namecheap account.
I already have an account with Namecheap, so I’ll log in to that and proceed to the next step.
Add a Payment Method
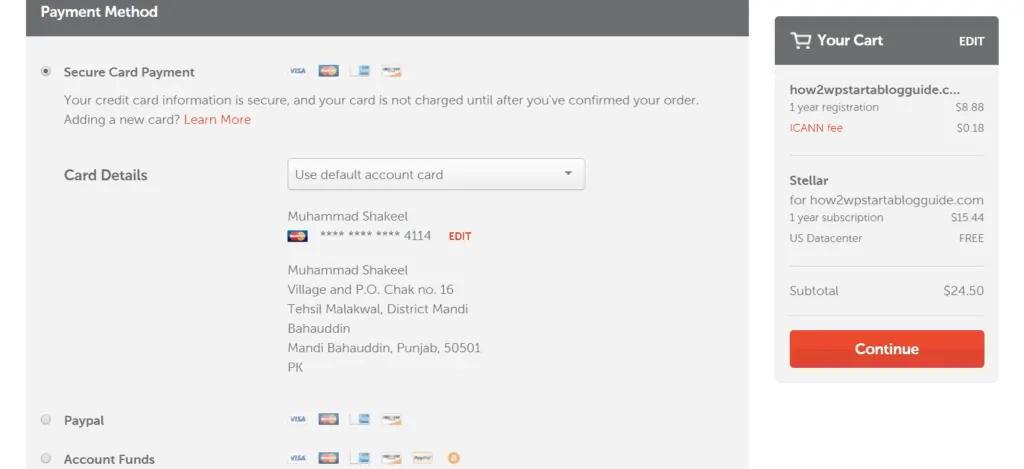
In this step, you need to add a payment method to make the payment. Click on the “Continue” button when you successfully add a payment method.
Review Your Order and Make Payment
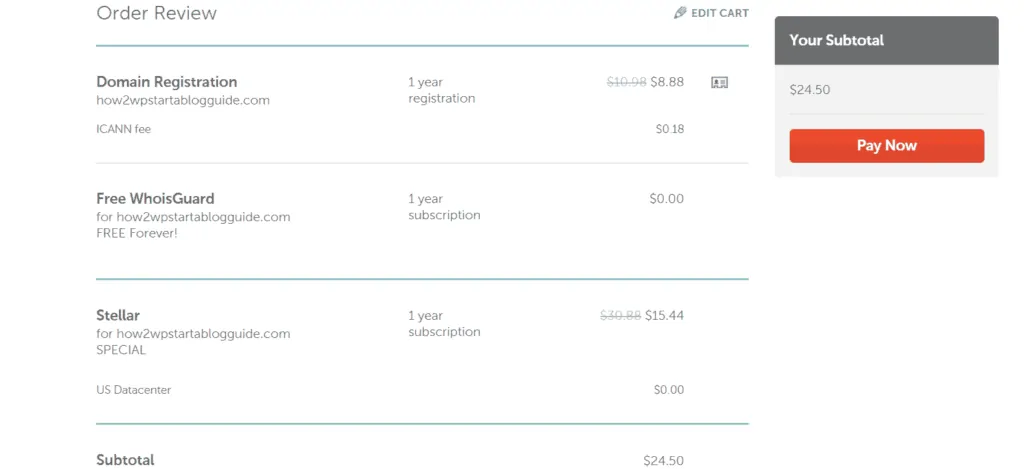
Review your order details and click on the “Pay Now” button.
Your Namecheap hosting account will be created if you’ve successfully made the payment.
Namecheap Dashboard
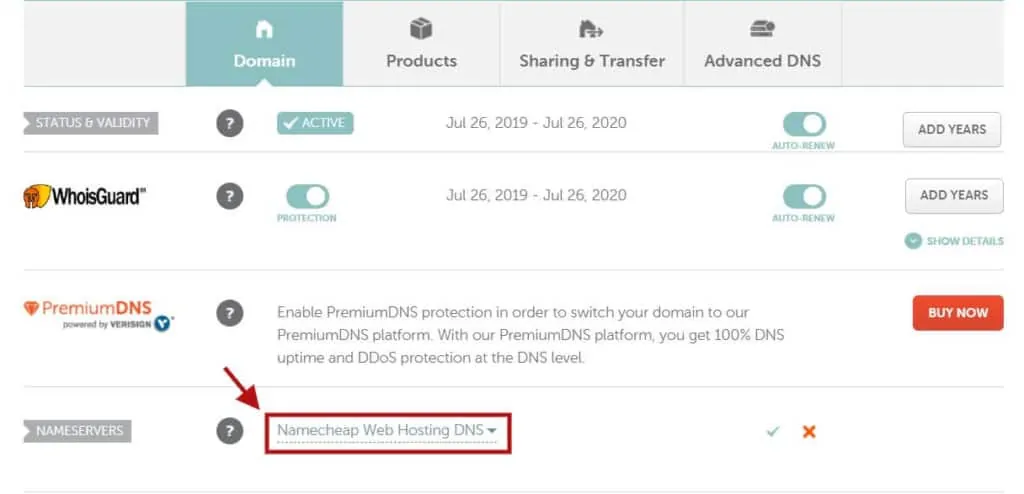
Congrats on creating a Namecheap hosting account, now inside your Namecheap dashboard, click on the Manage button and on the next page scroll down to “Nameservers” section and make sure that your Domain Nameservers are set to “Namecheap Web Hosting DNS”.

Step 1 – Login to cPanel
You can log in to your cPanel by following the login credentials, which Namecheap will email to you when you signup.
Alternatively, you can also log in to your cPanel by hovering over to a little “server icon” against your domain name and then clicking the link, which says, “Go to cPanel.”
Install WordPress using cPanel
cPanel is one of the most popular and widely used Control Panel for creating and managing websites among web hosts. And with the inclusion of Softaculous in cPanel, it just got so simple (even for newbies) to install WordPress using cPanel in less than 5 minutes.
Softaculous Apps Installer
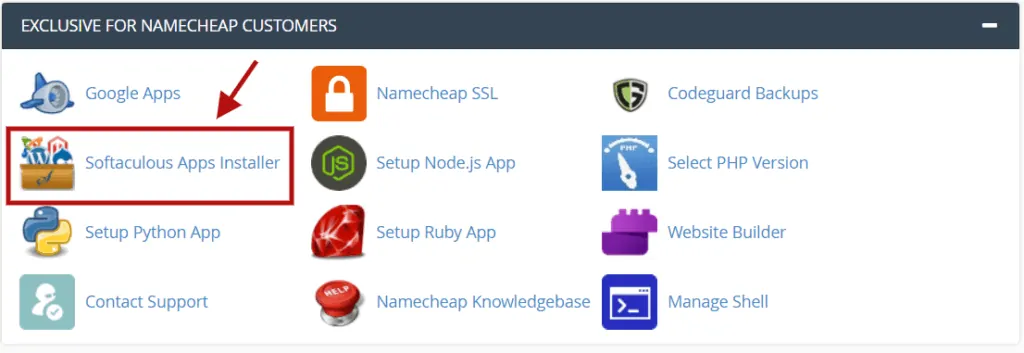
Once you’re in your cPanel, click on the “Softaculous Apps Installer.”
Then on the next page, hover over to the WordPress icon and click on the “Install” button.
Once you click on the “Install” button, it will open up a ‘Setup Wizard’ like below.
Configure the Software Setup and Site Settings.
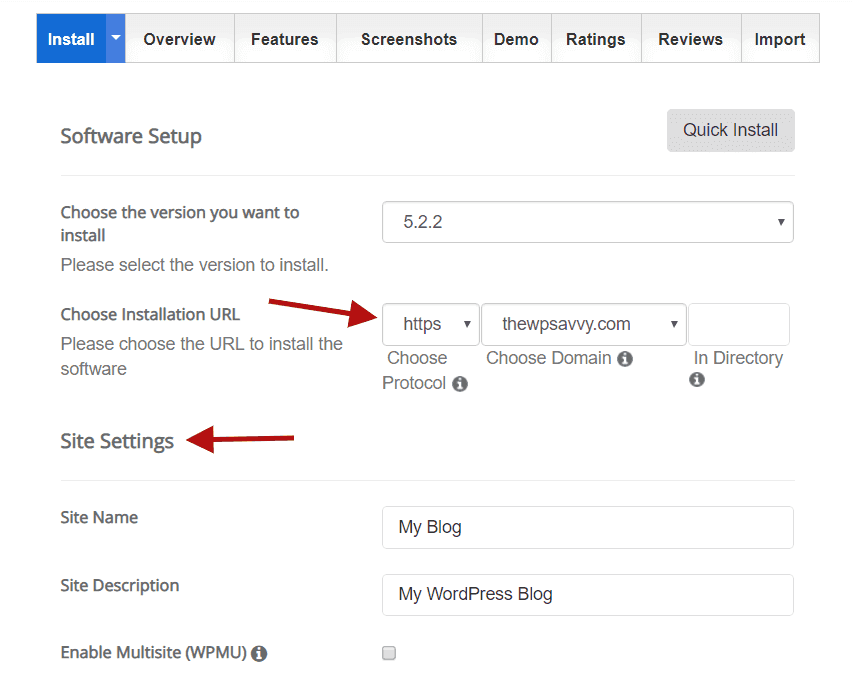
Choose Protocol: Select https because it comes with your SiteGround account.
Choose Domain: Select your domain name where you want to install WordPress.
In Directory: Leave it blank.
Site Name: Enter your Site Name. You can easily change it later.
Site Description: Write some description about your site or blog. You can also easily change this later.
Enable Multisite (WPMU): Keep it un-checked.
Fill out Admin Settings.
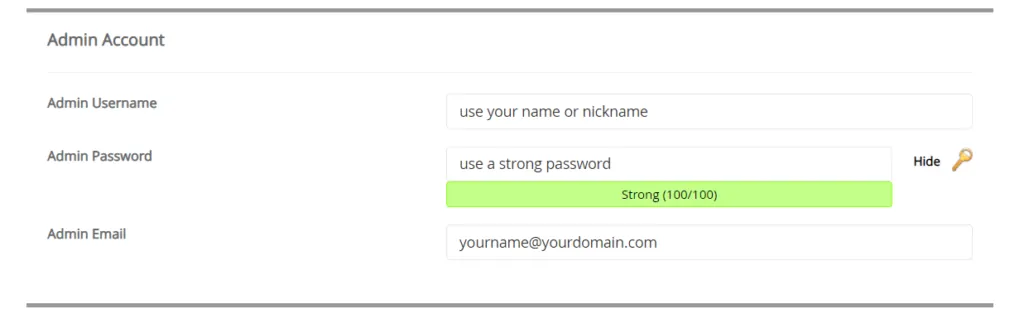
Admin Username: User secure username. Don’t use the default username, which is “Admin.” You can use your nickname as an admin username.
Admin Password: Use a secure password, and write it down somewhere.
Admin Email: Enter your email, which you can use later to change your password or to get critical account-related notifications from WordPress.
Select Plugin(s) and click on the “Install” button at the very bottom.
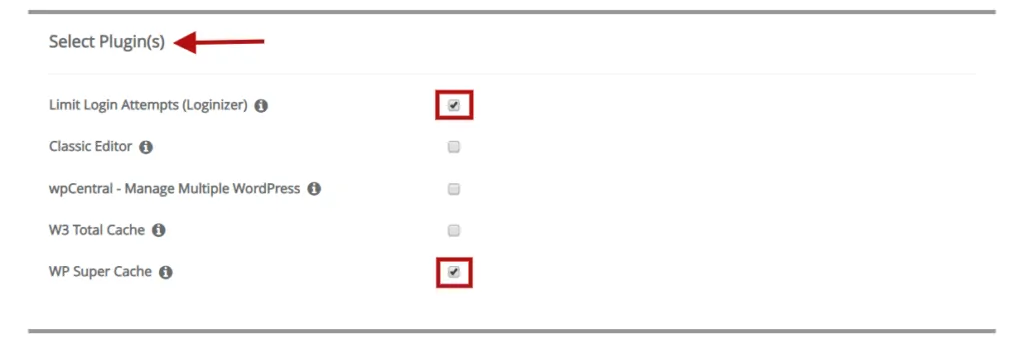
At this stage, I would only recommend choosing the “Limit Login Attempts” plugin (it’s not required), but it will protect your site or blog from Brute Force Attacks.
You can also choose a caching plugin like “WP Super Cache,” which improves your site performance.
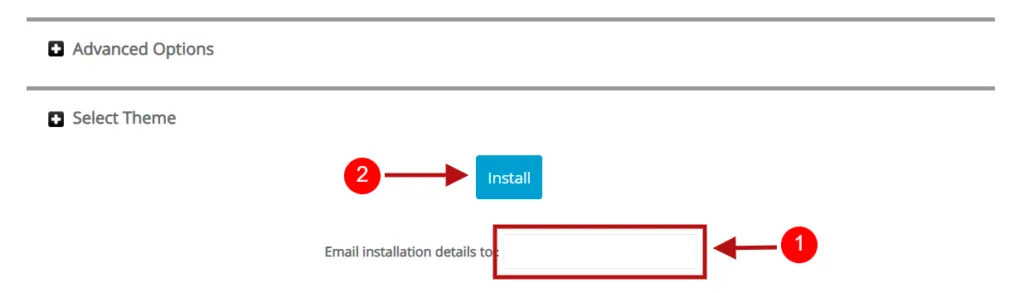
Click the “Install” button.
Now finally re-verify all the information you entered above, enter an email where you want to get installations details and then click on the “Install” button. Boom, you’ve successfully installed WordPress using cPanel with Namecheap.
Once you’ve installed WordPress on your cPanel using the above tutorial and successfully logged-in to your WordPress dashboard, then follow these steps to install a WordPress theme and essential plugins.
I hope this article helped you, but if you face any trouble, you can ask me in the comments section below or contact me directly, and I’d be more than happy to guide you through the process. 🙂
If you liked this article, please share it with your friends and subscribe to the How-To WP Newsletter below to get the latest WordPress tips, tricks, and how-to tutorials directly into your inbox.
Frequently Asked Questions (FAQs)
Is WordPress blog free?
WordPress.com is free and requires no financial investment for you to start your business. WordPress.org, on the other hand, is a self-hosted platform that requires hosting.
How bloggers get paid?
Bloggers get paid by having a revenue-sharing agreement with the website they’re writing for. It’s usually a percentage of the advertising revenue generated by the website especially using Google Adsense. Sometimes they’ll be paid a flat rate for writing a specific number of articles or posts.
How difficult is WordPress?
For years, WordPress has been the go-to blog publishing system. However, many people don’t know that it is also one of the easiest to install, update, and customize. If you’ve been looking for an easy way to start a blog or website and you’re comfortable with the idea of using WordPress, you’re in luck.
What blogs make the most money?
The blogs that make the most money belong to the following niches: finance, online education, insurance, legal, and marketing, and advertising.